Thingiverse
Stereographic Projection plus a few tips by Shmoee
by Thingiverse
Last crawled date: 4 years, 4 months ago
Stereographic Projection based on the excellent work shared here:https://jasmcole.com/2014/11/01/stereographic-lampshades/#more-650
I used Blender's "Solidify" modifier to add various thicknesses to this model for printing. I recommend printing one of the three thicknesses that provided here and oriented upside down for printing.
I printed the middle thickness version (Stereographic_Production_mid.stl) with a wide brim and a 56 degree support overhang which seemed about right to support the arms as they got longer. I lowered the rim into the bed to crop the rim by 0.2mm for better contact with the bed and I also moved one axis by one degree to align the three tips better. The print came out nicely and after carefully removing support for a couple minutes, I used it with my cell phone flashlight and found that it works acceptably but a Maglite 2 AAA LED flashlight with the top off (candle mode) is an amazing light source.
I think this design is OK but could still be improved with some software tweaks as I learn more about how to best generate these files for improved performance.
Note that I had first tried to perform the stereographic projection exclusively in Blender using the python script running in Blender as described here:https://caretdashcaret.com/2014/11/20/3d-printed-stereographic-lampshade/
but that effort was unsuccessful. The script would not run in the current Blender tool. I think there is a version mismatch with newer versions of Blender (or perhaps I just didn't know what I was doing which is also possible)
So I instead focused on the Matlab implementation with the main difference being that I decided to try using Octave (which is free to use) instead of Matlab. This was a challenge and I spent a couple days working on it. I don't recall every challenge I ran into but here are some of the main sticking points I ran into if you are interested:
If you try running the original authors Matlab code (makemesh.m) in Octave, you must first type:
pkg load image
If you don't then a blank Figure 1 pops up and nothing else happens.
You can look at the P image to see if things are making sense using the command:
imshow(P);
I found that changing the line of code from a 5 to a 3 worked better as follows:
newP = filter2(fspecial('average',3),newP);
With Octave, the biggest issue I ran into an qhull crashing after many minutes during the Mesh2D "refine2" function so I ended up reverting to an older Mesh2D codebase which replaces "refine2" function with the older "mesh2d" function. The source code found at the following link was incredibly valuable to use to work around this.https://people.sc.fsu.edu/~jburkardt/classes/dis_2014/mesh2d/mesh2d.html
That resolved the crashing issue and I created the mesh!
Another issue I had was there is no stlwrite function native to Octave to my knowledge so I ended up using this one:https://github.com/alecjacobson/gptoolbox/blob/master/external/stlwrite.m
The 'p' matrix needs to have a third column of zeros appended to get the stl file written with this though.
Some software debug skills are required to go down this path although most of the effort was finding missing pieces of code and not really writing much code from scratch although a little bit of code will need to be modified for Octave.
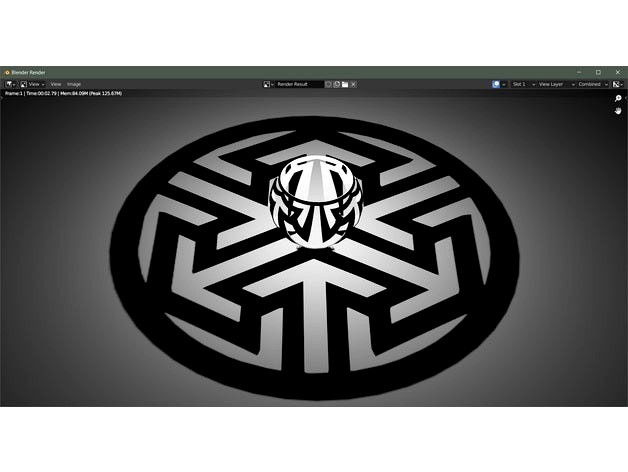
Blender was used in the end to scale up the .stl file and also to give it thickness (via the Solidify modifier) as well as to examine how it performs with a point light source spaced as shown in the pic which seemed to be optimal distance to me.
I wasn't sure running in Octave was possible but now I'm glad to know that it can be done. Thanks to all the folks that have paved the way!
I used Blender's "Solidify" modifier to add various thicknesses to this model for printing. I recommend printing one of the three thicknesses that provided here and oriented upside down for printing.
I printed the middle thickness version (Stereographic_Production_mid.stl) with a wide brim and a 56 degree support overhang which seemed about right to support the arms as they got longer. I lowered the rim into the bed to crop the rim by 0.2mm for better contact with the bed and I also moved one axis by one degree to align the three tips better. The print came out nicely and after carefully removing support for a couple minutes, I used it with my cell phone flashlight and found that it works acceptably but a Maglite 2 AAA LED flashlight with the top off (candle mode) is an amazing light source.
I think this design is OK but could still be improved with some software tweaks as I learn more about how to best generate these files for improved performance.
Note that I had first tried to perform the stereographic projection exclusively in Blender using the python script running in Blender as described here:https://caretdashcaret.com/2014/11/20/3d-printed-stereographic-lampshade/
but that effort was unsuccessful. The script would not run in the current Blender tool. I think there is a version mismatch with newer versions of Blender (or perhaps I just didn't know what I was doing which is also possible)
So I instead focused on the Matlab implementation with the main difference being that I decided to try using Octave (which is free to use) instead of Matlab. This was a challenge and I spent a couple days working on it. I don't recall every challenge I ran into but here are some of the main sticking points I ran into if you are interested:
If you try running the original authors Matlab code (makemesh.m) in Octave, you must first type:
pkg load image
If you don't then a blank Figure 1 pops up and nothing else happens.
You can look at the P image to see if things are making sense using the command:
imshow(P);
I found that changing the line of code from a 5 to a 3 worked better as follows:
newP = filter2(fspecial('average',3),newP);
With Octave, the biggest issue I ran into an qhull crashing after many minutes during the Mesh2D "refine2" function so I ended up reverting to an older Mesh2D codebase which replaces "refine2" function with the older "mesh2d" function. The source code found at the following link was incredibly valuable to use to work around this.https://people.sc.fsu.edu/~jburkardt/classes/dis_2014/mesh2d/mesh2d.html
That resolved the crashing issue and I created the mesh!
Another issue I had was there is no stlwrite function native to Octave to my knowledge so I ended up using this one:https://github.com/alecjacobson/gptoolbox/blob/master/external/stlwrite.m
The 'p' matrix needs to have a third column of zeros appended to get the stl file written with this though.
Some software debug skills are required to go down this path although most of the effort was finding missing pieces of code and not really writing much code from scratch although a little bit of code will need to be modified for Octave.
Blender was used in the end to scale up the .stl file and also to give it thickness (via the Solidify modifier) as well as to examine how it performs with a point light source spaced as shown in the pic which seemed to be optimal distance to me.
I wasn't sure running in Octave was possible but now I'm glad to know that it can be done. Thanks to all the folks that have paved the way!