Thingiverse

Steampunk Oculus Roboticus
by Thingiverse
Last crawled date: 4 years, 2 months ago
A robotic eyeball powered by a Raspberry PI + Camera, 2 servos and OpenCV.
Raspberry Pi
Micro Servos
Pi Camera
Screws
Wire
Follow this guide or similar to get opencv up and running on the Pi, but I might just upload the image somewhere if I get time. You will also need pigpio.
Print lower level
Using the small screws from the micro servo, fit the raspberry pi.
Print the middle level
Cut 4 screws to length and screw the camera in to the middle level
Print the servo bracket
Screw in the servos - see pic
Glue the servo mount to the base of the top level, over the top of the locator marks
Print the two levers and their axle
9 Slide the levers onto the axle and locate the axle into the axle bracket in the top level. Fix it in place with a tiny blob of glue, being careful to not get glue on the levers. They should rotate about the axle.
Print the top level back plate and pipes. You may need to angle the big pipe and print with raft and supports - after some trial and error, I found that the strange angle that I have it at in the stl printed the best.
Glue the big pipe to the back of the back plate and then the small pipe to the big pipe. You might find it useful to attach the top and middle levels at this point to aid with locating. Note that the back plate should just slot snugly into the back of the gimbal housing and shouldn't need gluing.
Print and paint the eyeball and middle ring.
Loosely assemble and paint the top, middle and bottom levels, along with the back plate and pipes.
Disassemble
Clip the eyeball into the middle ring, by applying pressure at the sides. The eyeball should clip into two small holes at the top and bottom of the ring.
Do similar to attach the middle ring to the top level housing, this time by squeezing the top and bottom of the housing to locate the middle ring into the two holes left and right inside. You may need to sand the interior of the gimbal housing slightly to make sure that the eye can move freely in the socket.
Cut a length of wire to make a pull rod to attach from the top link in the back of the eye to the tall lever.
Repeat to create a rod from the right link in the back of the eye to the shorter lever.
Make two more rods to attach to the perpendicular sides of the levers to the servos.
Attach all cables to the Pi.
Tighten screws and power up.
Unzip TheEye.zip onto the Pi and run main.py to start the eye. I have included a startup-cron tab and startup.sh script in the zip if you want the eye to start on boot. Note that CONFIG['showWindow'] must be False if you want to run it in this mode.
Notes:
From layershifter's comments:
I admit that I probably skimped on the front a little and could have hidden the camera a bit more, although it already has quite a narrow field of view. I'd probably use a fisheye lens in retrospect, or multiple cameras. The pipes at the back were actually just an after thought to provide a distraction from the back plate a bit. More pipes would definitely be a great addition. Perhaps for version 2.0!
Similar models
thingiverse
free

Raspberry Pi 4 Mounting Plate for High Quality Camera by DavidDeeds
...y pi and high quality camera together, plenty of cable clearance and easy access to the raspberry pi 4 ports when used on tripod.
thingiverse
free

InMoov Raspberry Pi Camera Support by WayneKennedy
...mera could complement each other. one day i think it would be useful to have an ir sensor in one eye, or the pi low light camera.
thingiverse
free

pi camera servo mount by willclay9520
...pi camera servo mount by willclay9520
thingiverse
mount for raspberry pi camera to attach to servo.
thingiverse
free

Raspberry Pi 3 Pan Tilt Camera holder by helkku
...era. and for the future i wanted servo control. you can read more from https://newbsdiy.com/mini-r2d2-camera-holder-for-learning
thingiverse
free

Raspberry pi Camera - Focus ring by anykey
...ning). you have to make sure that when your press the focus ring on the lens, no glue is being sqeezed out into the lens opening.
thingiverse
free

raspberry pi zero to high quality camera attachment by stinkyskate
...ty camera attachment by stinkyskate
thingiverse
this plate allows the pi zero to be screwed onto the hq camera with 2.5mm screws
thingiverse
free

Raspberry Pi IR Camera Mount by MonkeyBear
...t system
the front and back plate are screwed together with m3 screws.
fusion 360 source file included for remixing or adjusting.
thingiverse
free

Raspberry PI Camera Module Lego NXt/EV3 Axle Connector by Misericordia
...module is a lego mindstorms axle connector.
i used this to put it atop a mindstorms servo motor, allowing it to spin 360 degrees.
thingiverse
free

Raspberry Pi Ethernet Mount by wihami
...port of the pi. the rod used to attach the mounting pieces was 5/16" aluminum rod and the bolt at the top is an m3 x 10 mm.
grabcad
free

Raspberry Pi Camera Module 3 Stand
...odule 3. use m2 8mm self tapping screws for camera case and back. use m4 20mm bolts and m4 nuts to attach stem to top and bottom.
Oculus
3ddd
free

CH468 Oculus
...ch468 oculus
3ddd
oculus
кресло ch468 oculus.
3ddd
$1

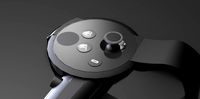
Кресло Oculus
...//www.coalesse.com/products/ch468-oculus-chair/
41 h | 37 d | 37 w
в файле находятся модели кресла в 4-х цветах + obj
turbosquid
$10
Oculus Touch
...squid
royalty free 3d model oculus touch for download as skp on turbosquid: 3d models for games, architecture, videos. (1462433)
3ddd
$1

CH468 Oculus Chair
...ch468 oculus chair
3ddd
oculus
http://www.aram.co.uk/ch468-chair.html
3ddd
free

Oculus Chair Hans J. Wegner
...oculus chair hans j. wegner
3ddd
oculus , hans wegner
стильное кресло из 60-х
3d_export
$39

Oculus Rift S
...21000 triangles. pbr texture pack for vray, redshift, unity standart specular, unreal included textures 8192x8192 fully unwrapped
turbosquid
$15

Oculus chair by Hans J. Wegner
... available on turbo squid, the world's leading provider of digital 3d models for visualization, films, television, and games.
turbosquid
$799

World Trade Center Transportation Hub Oculus
...ld trade center transportation hub oculus for download as skp on turbosquid: 3d models for games, architecture, videos. (1304140)
evermotion
$120

Archinteriors for UE vol. 2
...kitchen home interior engine unreal ue now compatible with oculus rift! evermotion collections for unreal engine gives another dimension...
evermotion
$75

Scene 04 Archinteriors for UE vol. 2
...engine 4.9.0. scene is not optimized or tested for oculus rift. evermotion 3d models...
Steampunk
3ddd
$1
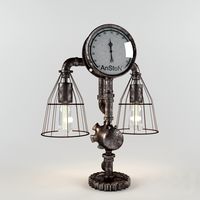
Лампа steampunk
...лампа steampunk
3ddd
steampunk
настольная лампа в стиле steampunk
3ddd
$1
Steampunk ship
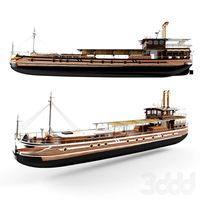
...steampunk ship
3ddd
steampunk , корабль
hd steampunk ship
size 96 mb
3d_export
$30
glass steampunk
...glass steampunk
3dexport
glass steampunk
3d_export
$16

steampunk fish
...steampunk fish
3dexport
steampunk fish for cnc
3d_export
$5
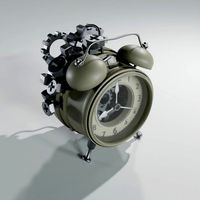
clock steampunk
...clock steampunk
3dexport
a steampunk clock to decorate
3ddd
$1

Rocket steampunk
...rocket steampunk
3ddd
ракета
rocket steampunk
3ddd
$1

Лампа steampunk
...лампа steampunk
3ddd
steampunk
настольная лампа в стиле стимпанк
3ddd
free

Лампа steampunk
...лампа steampunk
3ddd
steampunk
настольная лампа в стиле стимпанк
3d_ocean
$17
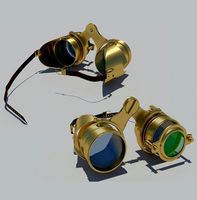
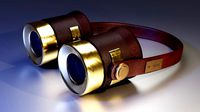
Steampunk Goggles
...bj and max 10,11 and 13 version format. materials are included and it is based on mental ray renderer. also, main file include...
3ddd
free
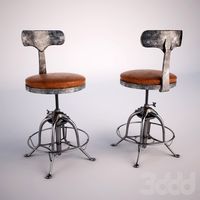
steampunk chair
...steampunk chair
3ddd
барный , steampunk
стул из interval cafe san francisco