Thingiverse

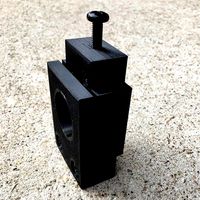
Starlink Pole Insert by Pendle99
by Thingiverse
Last crawled date: 2 years, 11 months ago
The mast I used is made of 45mm diameter, 1.5mm wall thickness, 304 stainless steel tube. Tolerances on the diameter for both the stainless tube and the satellite dish stem can vary so the 3D printed insert may need dimensional refinement to suit. Mast length will vary depending on your installation, sufficient mast length above any obstacle such as the roof line / apex must be allowed for the satellite dish lower radius should the dish move to the vertical position.
The 3D printed insert is prevented from going too far down inside the mast tube by drilling an M6 hole across the tube at 196mm down from the top and an M6 x 60mm bolt is fastened across the mast tube.
A 20mm wide by 70mm long slot is cut down from the top of the mast tube corresponding to the similar slot in the 3D printed insert. This is a clearance slot for the cable outlet from the satellite dish stem. Cable ties secure the cable to the mast.
Once the 3D printed insert and satellite stem are assembled into the mast tube a 50-55mm stainless steel jubilee clip is fastened around the very top of the mast tube just to be sure everything is locked in place.
Sufficient satellite dish stem remains above the mast top by about 120mm to allow the dish to move to its near vertical position without fouling the mast tube.
3 x 45mm exhaust ‘U bolts’ were used to fasten the mast to a wall frame; this type of ‘U bolt’ has a nice saddle to ensure full 360 degree clamping of the mast tube.
Our mast is fastened to a 700mm long x 320mm wide welded wall frame made from 40mm x 40mm x 4mm 304 stainless steel angle, fastened to the wall with 6 off 12mm Fischer sleeve bolts. The frame results in the mast being about 45mm away from the wall, unlike the usual TV aerial mast brackets which protrude quite a distance.
Hope these notes help.
Similar models
thingiverse
free
Steer Tube Cutting Guide by jonseejon
...nsert.
use a flat blade screwdriver to prevent the retainer from rotating.
finish threading the m6 x 35mm bolt into the retainer.
3dwarehouse
free

FRANKE cmpx538-urinal
... #plumbing_suppplies #sanware #stainless_steel #textured #toilet #urinal #washroom_accesories #washroom_systems #water_closet #wc
thingiverse
free

Corner clamp by infoengineer
...pper, pusher and base together by an m6 bolt of 40 mm long (it can be longer) and an m6 nut that i inserted into the knob before.
grabcad
free

TRAILER PARTS
...ks. deck is 10ga 304 stainless steel. tubing will be 1" x 2" 11ga stainless. i will put up more renders as i finish it.
grabcad
free

Coffee Table
...coffee table
grabcad
simple 500mm x 500mm x 400mm stainless steel frame with 40mm thick birch wood top
grabcad
free

stainless steel 304 shell and tube heat exchanger
... stainless steel 304 shell and tube heat exchanger and you can see render and exploded view of this shell and tube heat exchanger
grabcad
free

3D Printer Full X Axis 1 Metre Length
...inium plates
i am new to the cad drawings, please dont hesitate to call me out on thing i have done wrong with the sketches etc.
thingiverse
free

Bicycle top tube cable protector by Tanel_76
...attaches to the steering tube, and you have cables runnin on top of the tube.
printing:
no supports needed.
i printed using petg.
grabcad
free

304 Stainless Steel Enclosures
...ess steel enclosures
grabcad
outdoor wall mounted 201 304 stainless steel electrical control distribution cabinet waterproof ...
grabcad
free

M6 Nuts
...m6 nuts
grabcad
collection of 3 types of m6 nuts
dome nut
lock nut
hex nut
304 stainless steel
Starlink
thingiverse
free

Starlink-Dungeonstick Couplers by Matt73r
... and dungeon stick walls. i mixed the ends of evan carothers dungeon sticks caverns and devon jones dungeon stone starlink walls.
thingiverse
free

Dungeonsticks: Starlink Jail cell
...rlink jail cell
thingiverse
this is a mix of the dungeonsticks starlink templates and the openforge dungeon stone jail cell 2x3.
thingiverse
free

Starlink Router Base by Vmtr
...verse
the router that is included with the starlink antenna (dish) is a little unstable. this base stabilizes it. it snaps on.
thingiverse
free

DungeonSticks: Starlink - Stairs Up
...l stairs, so i remixed this one using meshmixer.
it should be the same length as a the longer wall in the original starlink file.
thingiverse
free

Starlink display by MorganCoLLC
...pilot either inside or outside of their ship. it can print without supports but i would recommend using them for a cleaner print.
thingiverse
free

Starlink Accessories by stageone
...th plugging the hole. i would suggest that weather proof caulk should also be applied at the perimeter to help keep out moisture.
free3d
free

Sci-fi Computer Terminal ( Starlink S101 )
...sci-fi computer terminal ( starlink s101 )
free3d
blender
thingiverse
free

Starlink Dishy Fence Post mount by jacky4566
...ount for starlink dishy. 120mm diameter with 4 screws. accepts 3/8in bolt for security.
i would suggest petg for uv and strength.
thingiverse
free

StarLink EMT Adapter by webguynj
...; from end of conduit, use existing spring connectors or replace with 1/2" x 2" bolt with double nuts to lock in place
thingiverse
free

DungeonSticks(starlink) Tudor-walls and houses by somerandomperson412
...ng the starlink v3 system, except for the expandable walls cuz i hate them, :b
credits to krolbren for modeling thease for me! :d
Pole
turbosquid
$3

Pole Vault - Pole Stand
... available on turbo squid, the world's leading provider of digital 3d models for visualization, films, television, and games.
turbosquid
$1

A Pole
...
turbosquid
royalty free 3d model a pole for download as fbx on turbosquid: 3d models for games, architecture, videos. (1687003)
3ddd
free

Poles salotti
... , капитоне , угловой
диван
poles salotti sofa
turbosquid
$10

pole A
...quid
royalty free 3d model pole a for download as ma and max on turbosquid: 3d models for games, architecture, videos. (1409150)
turbosquid
$14
pole
... available on turbo squid, the world's leading provider of digital 3d models for visualization, films, television, and games.
turbosquid
$4

Pole
... available on turbo squid, the world's leading provider of digital 3d models for visualization, films, television, and games.
turbosquid
free

Pole
... available on turbo squid, the world's leading provider of digital 3d models for visualization, films, television, and games.
3d_ocean
$14
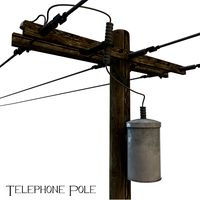
Telephone Pole
...s electricity pole road telephone telephone pole wire
model of a telephone pole made in cinema 4d. files included: .c4d .3ds .obj
3d_export
$5
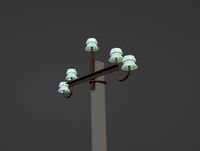
Electric pole
...electric pole
3dexport
electric pole for street, electricity line
3ddd
$1

Roley-Pole Sofa
...roley-pole sofa
3ddd
модульный , roley-pole
roley-pole sofa
Insert
turbosquid
$10
insert a bracelet
... 3d model the link element insert for download as max and max on turbosquid: 3d models for games, architecture, videos. (1609593)
turbosquid
$56

Threaded Inserts
... available on turbo squid, the world's leading provider of digital 3d models for visualization, films, television, and games.
turbosquid
$10

Insert for eggs
... available on turbo squid, the world's leading provider of digital 3d models for visualization, films, television, and games.
3d_export
$14
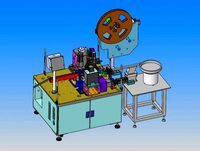
drawing of needle inserting machine
...lectronic manufacturers use pin machines to help customers to insert needles, so as to obtain processing costs and obtain wealth.
turbosquid
$5
IKEA Insert drawers
... available on turbo squid, the world's leading provider of digital 3d models for visualization, films, television, and games.
turbosquid
$5

IKEA insert with door
... available on turbo squid, the world's leading provider of digital 3d models for visualization, films, television, and games.
3d_export
$5
Siemsn EQ 6 Inlet insert
...placed there without any problems. the insert is then straight for normal cups and a square insert can be removed for large cups.
turbosquid
$25
eagle insert on leather or rubber
...eagle insert on leather or rubber for download as obj and stl on turbosquid: 3d models for games, architecture, videos. (1342476)
turbosquid
$14

sofa with pillows and decorative inserts
... available on turbo squid, the world's leading provider of digital 3d models for visualization, films, television, and games.
turbosquid
$5

metal insert for earring rings
...for earring rings for download as 3dm, 3dm, obj, pdf, and stl on turbosquid: 3d models for games, architecture, videos. (1569103)