Thingiverse
Spec-R FPV Racer by Cronos-FDM
by Thingiverse
Last crawled date: 3 years ago
I designed this after being un-satisfied with another model i was using from Thingiverse last year, this is still a major WIP and is currently only suited to the parts i had to hand when building. I will improve the designs compatibility once im happy it performs ok. My current prototypes are being printed in PETG but the final revision i plan to print in Carbonyte.
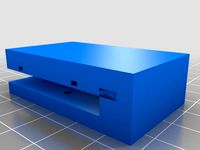
The frame is Approx 258mm Prop to Prop, and was weighing in at 700g with the battery and GoPro fitted when printed in PETG, should be lighter and stronger when in Carbonyte. It is designed to use 5inch Props.
There are currently different versions of the Base to accommodate different FPV camera Angles, i will make this adjustable in the near future.
The current hardware supported is as follows (others will probably fit):
Naze 32 Flight Controller (Illuminati 32 to be exact).https://hobbyking.com/en_us/illuminati-32-flight-controller-with-osd-cleanflight-supported.html
Matek Systems PDB.http://www.hobbyrc.co.uk/matek-xt60-pdb-5v-12v-bec?gclid=CjwKEAjw5_vHBRCBtt2NqqCDjiESJABD5rCJtmWoeoenSmRqo3EAdzJX9XAKFAN6KWUxBjC-O2ztahoCoInw_wcB
FrSky X8R Rx.https://hobbyking.com/en_us/frsky-x8r-8-16ch-s-bus-accst-telemetry-receiver-w-smart-port.html
Eachine ET600 - 600mw Video Tx (or any).
Aomway Clover Leaf Antenna Set.https://hobbyking.com/en_us/aomway-5-8ghz-4-leaf-clover-antenna-set-for-tx-rx-sma-rhcp.html
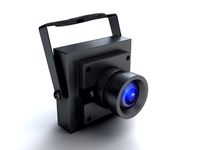
RunCam Owl 700TVLhttps://hobbyking.com/en_us/700tvl-starlight-fpv-camera-true-0-0001lux-fov-150-pal.html
Zippy Compact 3S 2200mah 35C (or upto Similar Size).https://hobbyking.com/en_us/zippy-compact-2200mah-3s-35c-lipo-pack.html
Multistar Elite 2204-2300KV (Or similar with 16 x 19 M3 Mounting Holes).https://hobbyking.com/en_us/multistar-elite-2204-2300kv-multi-rotor-motor-cw-prop-adapter.html
Turnigy Plush 12A ESC (or whatever).
All fixings are M3 x 10mm Low Profile Hex Screws (Head dimensions 5.5mm x 2mm), you can get them and the matching Nyloc Nuts from ACCU Group:
Screws:https://www.accu.co.uk/en/low-head-cap-screws/8723-SSCL-M3-10-A2
Nuts:https://www.accu.co.uk/en/hexagon-nylon-locking-nuts/7944-HNN-M3-A2
The battery, GoPro & rx straps to be used should be 20mm.
You might also need some 2 or 3mm Nylon spacers (or i used Nylon M3 Nuts) to space between the PDB and the Flight Controller.
Assembly is simple, my Motors, ESC's & PDB are soldered connections.
The Rear XT60 should be soldered with the appropriate gauge wire to the PDB just long enough to sit in the correct position at the back. Once it is in position you can fix it using the clamp and M3 Screws.
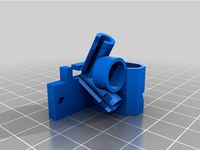
The FPV Camera should be fitted into its slot and then the Clamp Fixed using M3 Screws & Nuts, this can be awkward to do once the motors and props are on. Also fit the M3 Nuts into the rear of the Camera Clamp in order to fix the Front Shroud later.
Fit the Motors, ESC's & PDB to the base, the Motors are fixed using the M3 x 10mm screws, the screws should fit through the feet and into the motors, do not forget the feet otherwise you will screw into the motor winding.
The ESC's are held down with cable ties (2 per ESC), the cable tie routes are radius'd and should be easy to get through.
the Illuminati 32 should be snapped into its case and then screwed down, on top of the PDB, with or without spacers. Make sure it is level.
Prepare the rest of the wiring loom then fit the Battery Deck onto the Base.
Fit the Rx, Vtx & Rx Antennas to the Radio Deck, the X8r antennas slide under the GoPro Vetrical Strap anchors, and then into their positions, this stops the GoPro sitting on top of the wires, the antennas are secured using a cable tie. the Radio Deck has a central channel for the Vtx wires to pass under the Rx. The Vtx is secured using cable ties.
The Straps should be fed through the Anchor Points on each side of the Radio Deck and then either Glued or Stapled to fix them, two straps per side that meet in the middle - for both the GoPro and Rx, if you want to use the GoPro Vertical straps then you need to do the same there as well.
The area behind the shroud is supposed to be used to hold the majority of the wiring and connectors. This entirely depends on how you wire the components.
The shroud is fixed by using the M3 Screws & Nuts.
There are Cable Routes at the Front & Rear for LED strips to be fitted, though i have held off on this for the time being.
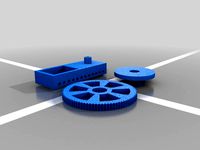
Im sure i have missed something so please ask questions, Check the pics for clues on the awful assembly instructions.
Thanks
Alex
The frame is Approx 258mm Prop to Prop, and was weighing in at 700g with the battery and GoPro fitted when printed in PETG, should be lighter and stronger when in Carbonyte. It is designed to use 5inch Props.
There are currently different versions of the Base to accommodate different FPV camera Angles, i will make this adjustable in the near future.
The current hardware supported is as follows (others will probably fit):
Naze 32 Flight Controller (Illuminati 32 to be exact).https://hobbyking.com/en_us/illuminati-32-flight-controller-with-osd-cleanflight-supported.html
Matek Systems PDB.http://www.hobbyrc.co.uk/matek-xt60-pdb-5v-12v-bec?gclid=CjwKEAjw5_vHBRCBtt2NqqCDjiESJABD5rCJtmWoeoenSmRqo3EAdzJX9XAKFAN6KWUxBjC-O2ztahoCoInw_wcB
FrSky X8R Rx.https://hobbyking.com/en_us/frsky-x8r-8-16ch-s-bus-accst-telemetry-receiver-w-smart-port.html
Eachine ET600 - 600mw Video Tx (or any).
Aomway Clover Leaf Antenna Set.https://hobbyking.com/en_us/aomway-5-8ghz-4-leaf-clover-antenna-set-for-tx-rx-sma-rhcp.html
RunCam Owl 700TVLhttps://hobbyking.com/en_us/700tvl-starlight-fpv-camera-true-0-0001lux-fov-150-pal.html
Zippy Compact 3S 2200mah 35C (or upto Similar Size).https://hobbyking.com/en_us/zippy-compact-2200mah-3s-35c-lipo-pack.html
Multistar Elite 2204-2300KV (Or similar with 16 x 19 M3 Mounting Holes).https://hobbyking.com/en_us/multistar-elite-2204-2300kv-multi-rotor-motor-cw-prop-adapter.html
Turnigy Plush 12A ESC (or whatever).
All fixings are M3 x 10mm Low Profile Hex Screws (Head dimensions 5.5mm x 2mm), you can get them and the matching Nyloc Nuts from ACCU Group:
Screws:https://www.accu.co.uk/en/low-head-cap-screws/8723-SSCL-M3-10-A2
Nuts:https://www.accu.co.uk/en/hexagon-nylon-locking-nuts/7944-HNN-M3-A2
The battery, GoPro & rx straps to be used should be 20mm.
You might also need some 2 or 3mm Nylon spacers (or i used Nylon M3 Nuts) to space between the PDB and the Flight Controller.
Assembly is simple, my Motors, ESC's & PDB are soldered connections.
The Rear XT60 should be soldered with the appropriate gauge wire to the PDB just long enough to sit in the correct position at the back. Once it is in position you can fix it using the clamp and M3 Screws.
The FPV Camera should be fitted into its slot and then the Clamp Fixed using M3 Screws & Nuts, this can be awkward to do once the motors and props are on. Also fit the M3 Nuts into the rear of the Camera Clamp in order to fix the Front Shroud later.
Fit the Motors, ESC's & PDB to the base, the Motors are fixed using the M3 x 10mm screws, the screws should fit through the feet and into the motors, do not forget the feet otherwise you will screw into the motor winding.
The ESC's are held down with cable ties (2 per ESC), the cable tie routes are radius'd and should be easy to get through.
the Illuminati 32 should be snapped into its case and then screwed down, on top of the PDB, with or without spacers. Make sure it is level.
Prepare the rest of the wiring loom then fit the Battery Deck onto the Base.
Fit the Rx, Vtx & Rx Antennas to the Radio Deck, the X8r antennas slide under the GoPro Vetrical Strap anchors, and then into their positions, this stops the GoPro sitting on top of the wires, the antennas are secured using a cable tie. the Radio Deck has a central channel for the Vtx wires to pass under the Rx. The Vtx is secured using cable ties.
The Straps should be fed through the Anchor Points on each side of the Radio Deck and then either Glued or Stapled to fix them, two straps per side that meet in the middle - for both the GoPro and Rx, if you want to use the GoPro Vertical straps then you need to do the same there as well.
The area behind the shroud is supposed to be used to hold the majority of the wiring and connectors. This entirely depends on how you wire the components.
The shroud is fixed by using the M3 Screws & Nuts.
There are Cable Routes at the Front & Rear for LED strips to be fitted, though i have held off on this for the time being.
Im sure i have missed something so please ask questions, Check the pics for clues on the awful assembly instructions.
Thanks
Alex
Similar models
grabcad
free

ESC Motor Cable Manager (Cable Clamp)
...for the 3 wires motor/esc and extra cable, like signal motor cable. makes your wires a bit more tidy.
m3 screw and nut required
thingiverse
free

80 mm Tiny whoop quadcopter drone with FPV camera by Spudwood
...o-fpv-whip-antenna.html
batteryhttps://hobbyking.com/en_us/turnigy-nano-tech-500mah-1s-25-50c-lipo-pack-losi-mini-compatible.html
thingiverse
free

Two piece quad frame by onmeow
...ersion.
after some testing and a number of quite hard caches (on grass) i can confirm that the frame can take some serious abuse!
thingiverse
free

8mm Folding Prop Adapter by Marlin5
... x 10mm machine screws. i used these props: https://hobbyking.com/en_us/multirotor-folding-propeller-9x4-7-blue-cw-ccw-4pcs.html
thingiverse
free

Runcam Split 2 Housing (with GoPro Session Size) by petronioaznar
...rews and either a 2/3 mm spacer (so the electronics on the pdb do not sit too tight against the wall of whatever you mount it in.
thingiverse
free

nano FPV Hexacopter by DonMarle
...w-48ch-ntsc-pal-mini-vtx-600tvl-fpv-camera-micro-fpv-cloverleaf-antenna.html?affiliate_code=mlkijzypkwcrbpx&_asc=3280350457 )
thingiverse
free

Ares Crossfire Frsky X8R antenna holder by triafgg
...on shrinkage/expansion you may need to open up the holes with a 3mm drill. i also replaced two of the m3 screws with longer ones.
thingiverse
free

Ritewing Drak GoPro 3/4 Nose by appelm
...g.
this is the charge cable that i’m using:https://hobbyking.com/en_us/super-slim-gopro-3-a-v-cable-and-power-lead-for-fpv.html
thingiverse
free

GoPro 3 Remote mount by julien9462
... metalic part gopro head with two screws countersunk m3 and two nuts m3 .
hole used to secure the remote by hanging with a cable.
thingiverse
free

Solitaire FPV and Navigation Drone. by StringyMcStringface
...... and yes, it does fly.
update. sorry... use solitaire drone(7) for arm. https://www.youtube.com/watch?v=toqzhf-uxpa&t=246s
Cronos
3ddd
$1

Maxalto Crono
...maxalto crono
3ddd
maxalto , crono
maxalto crono
3ddd
$1

Jorger Cronos
... cronos , смеситель
аксессуары и смеситель jorger cronos
3ddd
free

Аксессуары Jorger Cronos
...ица , дозатор , крючок
аксессуары jorger cronos
3ddd
$1

Burgbad Crono
...
2 декоративная панель burgbad серия crono / productnumber: seal180 / 1794x440 - 640x794 mm
варианты цвета настроены в материале
3ddd
$1

Burgbad - crono
... ванна
ванная burgbad - crono
смеситель thg-bambou
15500 полигонов.
официальный сайт
www.burgbad.com
thg.fr
3ddd
$1

Olympia Crono 0280011 _ toilet sink + bidet
... биде , унитаз
унитаз и биде
olympia crono 0280011
polys: 15000
fbx model included
3ddd
$1

burgbad crono 1.0
...burgbad crono 1.0
3ddd
burgbad
умывальник из минерального литья.
номер продукта: sekc160
turbosquid
$19

Crono b&b sofa
...3d model crono b&b sofa for download as max, obj, and fbx on turbosquid: 3d models for games, architecture, videos. (1230834)
3ddd
$1

Crono Sofa by Maxalto
...dy or bedroom.
overall dimension:
width 2500 mm,
height 880 mm
depth 900 mm
height of armrests 660 mm
height of seat 420 mm
3ddd
free

B&B | Crono Simplice Collection
...p;b | crono simplice collection
3ddd
b&b italia , om
источник: www.bebitalia.com
Racer
3ddd
$1

CILEK (Racer)
...cilek (racer)
3ddd
cilek
набор детской мебели cilek (серия racer)http://www.cilek.com/ru/sl-racer
turbosquid
$36

racer
... available on turbo squid, the world's leading provider of digital 3d models for visualization, films, television, and games.
3ddd
$1

Lego Racers
...lego , racers , конструктор
8667 action wheelie
turbosquid
$80

RACER 9
...turbosquid
royalty free 3d model racer 9 for download as c4d on turbosquid: 3d models for games, architecture, videos. (1417297)
turbosquid
$80

RACER 8
...turbosquid
royalty free 3d model racer 8 for download as c4d on turbosquid: 3d models for games, architecture, videos. (1415462)
turbosquid
$80

RACER 7
...turbosquid
royalty free 3d model racer 7 for download as c4d on turbosquid: 3d models for games, architecture, videos. (1417228)
turbosquid
$8

Spacecraft Racer
...d
royalty free 3d model spacecraft racer for download as fbx on turbosquid: 3d models for games, architecture, videos. (1298320)
turbosquid
$20

Pod Racer
...
royalty free 3d model pod racer for download as jpg and fbx on turbosquid: 3d models for games, architecture, videos. (1156525)
turbosquid
$59

Spaceship Racer
...ty free 3d model space craft racer for download as ma and fbx on turbosquid: 3d models for games, architecture, videos. (1408093)
turbosquid
$80

lego Racer
... available on turbo squid, the world's leading provider of digital 3d models for visualization, films, television, and games.
Fdm
3d_export
$15

old brick wall with corner version
...texture + corner version. miniatures printing - resin & fdm ...
3d_export
$5

shutter shade sunglasses
...shutter shade sunglasses 3dexport this model suitable for fdm printer, the gaps between two dynamic part is 0.4...
3d_export
$5

toggle clamp
...model to your favorite size. this model design for fdm 3d printing plus it design with standard sheet metal...
3d_export
$10

cute kitten v2 stl 3d print model
...kitten v2 stl 3d print model 3dexport solid type (fdm and hollow type (sla & dlp)<br>stl file for 3d...
3d_export
free

Articulated centipede
...actual scale is the smallest scale i've tried for fdm with perfect results. you can scale it up with...
3d_export
$5
groot con grabadora
...is recommended to print these models with a good fdm printer by using some supports enabled, however you can...
3d_export
$5

deer christmas 3
...is recommended to print these models with a good fdm printer by using some supports enabled, however you can...
3d_export
$5

deer christmas 2
...is recommended to print these models with a good fdm printer by using some supports enabled, however you can...
3d_export
$5

deer christmas
...is recommended to print these models with a good fdm printer by using some supports enabled, however you can...
3d_export
$5

deer christmas 5
...is recommended to print these models with a good fdm printer by using some supports enabled, however you can...
Fpv
turbosquid
$1

FPV VTX Antenna
...e 3d model fpv vtx antenna for download as obj, fbx, and stl on turbosquid: 3d models for games, architecture, videos. (1230317)
3d_export
$9

Fpv logo 3D Model
...onogram vehicle part of auto transport 3d model logo emblem detailed high quality badge
fpv logo 3d model rmodeler 59628 3dexport
3d_export
$8
dji fpv battery slot holder
...er for 3 dji fpv batteries. holds perfectly without shaking. need 1 m3 countersunk head bolt. need to print 6 pin, 1 case, 1 cap.
3d_export
$10
fpv camera hd 700tvl
...aterials are logically named<br>the main format is in 3ds max 2009.<br>satisfcation garranteed..<br>thank you !
thingiverse
free
FpV Mount (SOPORTE FPV) by elborjas1987
...fpv mount (soporte fpv) by elborjas1987
thingiverse
this is a fpv mount with the same holes of naza base.
thingiverse
free
fpv by tbutera
...fpv by tbutera
thingiverse
fpv
thingiverse
free
fpv by tbutera
...fpv by tbutera
thingiverse
fpv
thingiverse
free
FPV DRONE ROOSTER DJI FPV PART
...fpv drone rooster dji fpv part
thingiverse
fpv drone rooster dji fpv install part
thingiverse
free
FPV monitor
...tml?rmmds=myorder&cur_warehouse=cn
link for download : https://cults3d.com/fr/mod%c3%a8le-3d/divers/fpv-monitor-ecran-fpv-faf
thingiverse
free
FPV receiver mount for FPV display by petrex
...eceiver mount for fpv display by petrex
thingiverse
aomway receiver mount for field view 777 fpv monitor. with small cable tray.
Spec
3d_ocean
$8

Specs 3d Model
...ocean
eyeglasses eyewear facetion glasses goggle specs sunglasses
realistic specs 3d model stylish 3d specs model with materials.
3d_export
$20

Specs 3D Model
...specs 3d model
3dexport
specs glasses eyeglasses eyewear goggle sunglasses facetion
specs 3d model solide 81034 3dexport
turbosquid
$2

spec-elite
... available on turbo squid, the world's leading provider of digital 3d models for visualization, films, television, and games.
3ddd
$1

fireplaces mod Spec
...fireplaces mod spec
3ddd
камин
fireplaces mod spec 180x90x125h
3d_export
$35

SPEC 3D Model
...spec 3d model
3dexport
spec 3d model 666cepesh666 56432 3dexport
turbosquid
$5

High-spec building
...del high-spec building for download as 3ds, obj, c4d, and fbx on turbosquid: 3d models for games, architecture, videos. (1168635)
turbosquid
$99

Spec Ops Soldier
... available on turbo squid, the world's leading provider of digital 3d models for visualization, films, television, and games.
turbosquid
$19

Falken Circuit Spec
... available on turbo squid, the world's leading provider of digital 3d models for visualization, films, television, and games.
turbosquid
free

Soldier Spec Ops
... available on turbo squid, the world's leading provider of digital 3d models for visualization, films, television, and games.
turbosquid
$11

Spec board
...ty free 3d model specboard2 for download as c4d, fbx, and obj on turbosquid: 3d models for games, architecture, videos. (1657244)
R
3ddd
$1

ORLANDO R
...orlando r
3ddd
новый стиль
новый стиль - orlando r
design_connected
$11

R-Table
...r-table
designconnected
henge r-table computer generated 3d model. designed by castagna, massimo.
design_connected
$7

Cone R
...cone r
designconnected
bonaldo cone r computer generated 3d model. designed by pasini, ennio.
3ddd
$1

R&B
...r&b
3ddd
r&b
спальный гарнитур r&b;
3d_export
$5

nissan gt-r
...nissan gt-r
3dexport
this is nissan gt-r
turbosquid
$10

R for ROBOT
...osquid
royalty free 3d model r for robot for download as max on turbosquid: 3d models for games, architecture, videos. (1694233)
turbosquid
$5

Letter r
...urbosquid
royalty free 3d model letter r for download as max on turbosquid: 3d models for games, architecture, videos. (1408525)
turbosquid
$5

Letter R
...urbosquid
royalty free 3d model letter r for download as max on turbosquid: 3d models for games, architecture, videos. (1408526)
3d_export
$5
react r
...r 9 lamps (6+3) ø 60 × 21 cm 12 lamps (9+3) ø 80 × 21 cm polys: 208 539 verts: 213 675 https://ru.lampachn.com/react-r-p0551.html
turbosquid
$40
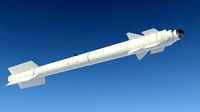
R-73
...uid
royalty free 3d model r-73 for download as blend and fbx on turbosquid: 3d models for games, architecture, videos. (1620664)