Thingiverse
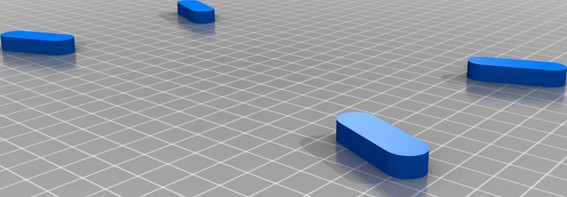
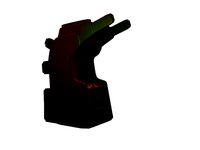
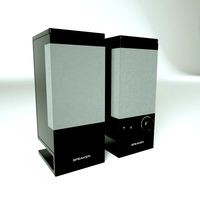
Speaker Cover Grille Mount Holder Bracket for Logitech Z333 for MAME Retro Arcade Cabinet, Etc. by chuckamcknight
by Thingiverse
Last crawled date: 3 years, 3 months ago
This design should still be considered experimental. I'm uploading it because folks have asked, but I have not yet tested it thoroughly.
I designed this to use for the MAME arcade cabinet I'm building. The "base" should screw directly into the face of the speaker box and into the portion of the cabinet that frames the speaker. The "grille" should then (in theory) snap into place on top of the base. While it should hopefully be removable, I can't speak to how frequently it can be placed and removed without damage.
The following instructions are for Cura. I'd imagine you can do something similar in other slicers, but I can't offer precise steps.
The "reinforcement" is a (possibly optional?) bit to strengthen the part of the base that is screwed. To use it, you'll want to center both the base and the reinforcement on the build plate at the same time. From the left sidebar, change the settings specifically for the reinforcement to "Modify settings for overlaps" and "Infill mesh only." Although you should supposedly be able to then change the infill density, I wasn't able to do that for some reason, so I ended up changing the wall line count to 14, which had more-or-less the same effect.
For printing the "grille," note that it is modeled as a solid piece. If you just print it as is, there will be no holes for the sound to pass through. I did this on purpose to both save myself some hassle and allow for greater customization.
Set the top and bottom layers of the "grille" to 0. Then set the infill to any pattern that continues directly through from top to bottom. (I used "Triangles.") Set the density such that the holes are not too small for the sound to easily pass through, but you'll also need to make sure they're not too big that they don't support the snap connectors at the corners. (I set it to 6.35 mm.) I also increased the infill layer thickness to 0.2, and you might want to up the wall count by a bit.
Alternatively, feel free to take the solid grille and use it as a template from which to cut out whatever designed sound holes you would like.
Printing on my Ender 3, I had to rotate these models 90 degrees to get Cura to accept that they would fit (even though in theory they're smaller than the build area in either direction). And turn off any build plate adhesion.
As always, if you enjoy this design, feel free to tip me a coffee!
Similar models
thingiverse
free

Logitech X-140 speaker adapter ring for MAME arcade by cpayne3d
... the diameter of the screws that you will use for mounting the speakers.
enjoy your arcade cabinets with these 3" speakers!
3dwarehouse
free

MAME Cabinet
...e that i am using 3/4' mdf, and i have holes for speakers, and slots for ventilation. #arcade #cabinet #lusid #mame #revision
thingiverse
free

Speaker grill by Bustenchops
...speaker grill by bustenchops
thingiverse
speaker grill for my arcade setup. should scale pretty well but i haven't tried it.
3dwarehouse
free

Tabel Top Arcade Cabinet
...
3dwarehouse
here's my first attempt at a table top arcade cabinet that i am calling the microarcade. #arcade #cabinet #mame
3dwarehouse
free

MAME game cabinet
...is basically a computer in a game cabinet. #arcade #buttons #cabinet #comp #computer #computers #game #joystick #mame #video_game
3dwarehouse
free

Arcade Cabinet
...arcade cabinet
3dwarehouse
based off of plans from project arcade #arcade #cabinet #mame
3dwarehouse
free

MAME Cocktail Arcade Cabinet
...house
based off of plans from: http://arcadecontrols.com/arcade_cabinet_plans.shtml#kyle_pacman #arcade #cabinet #cocktail #mame
3dwarehouse
free

MAME Arcade Cabinet
...ccullar at www.arcadecab.com 3d model by endsville #arcade #cabinet #den #electronics #entertainment #game #mame #playroom #video
3dwarehouse
free

Mini Mame Cabinet
...istmas gift for my nephews, so i made the dimensions smaller to better suit their size. #arcade #cabinet #lusid #mame #video_game
3dwarehouse
free

MAME Arcade cabinet
... other models in mine (why re-invent the wheel) so thanks to all those that i used. #arcade #arcade_cabinet #arcade_machine #mame

Z333
thingiverse
free

Logitech Z333 Wall Mount by gaehl
...gitech z333 wall mount by gaehl
thingiverse
wall mount for logitech z333 can be either mounted with double sided tape or screws.
thingiverse
free

Logitech Z333 Z313 Stand by ioannou0
... by ioannou0
thingiverse
https://www.youtube.com/watch?v=vet7wmo1y8u
this is a stand for logitech z313 stand. no support needed.
thingiverse
free

Logitech Z333 Subwoofer / Speaker Cover by Empiricist1
...at it is fully functional, offers great protection, does not disturb the sound and fits great - straight up from the first print.
thingiverse
free

Logitech Z337 volumeknob wall-mount by FLWE
...for the volume controls for the logitech z337 and z333 speaker sets. improved.stl has better grip, hole for screw...
cg_trader
free

Speaker Logitech
...speaker logitech cg trader model z333 textures are procedural, made in blender speaker audio device...
3dwarehouse
free

z333
...z333
3dwarehouse
sculpturefreefantasy #freebird
3dwarehouse
free

Logiteh Z333
...logiteh z333
3dwarehouse
3dwarehouse
free

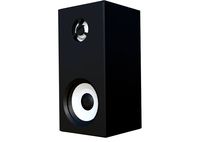
Speakers logitech z333
...ers logitech z333
3dwarehouse
modelled after the logitech z333 speaker set (without bass). complete set available on my account.
3dwarehouse
free

Speaker set logitech z333
...speaker set logitech z333
3dwarehouse
complete speaker set modelled after the logitech z333 speaker system.
Mame
turbosquid
$15

Fogia Mame Armchair
...d model fogia mame armchair for download as max, obj, and fbx on turbosquid: 3d models for games, architecture, videos. (1359733)
thingiverse
free

San Mames Berria by daniarteklab
...san mames berria by daniarteklab
thingiverse
new san mames stadium!!!!!
thingiverse
free

Mame Board Base by pg_helpdesk
...mame board base by pg_helpdesk
thingiverse
the base of a mame board i am making
thingiverse
free

San Mames by daniarteklab
...san mames by daniarteklab
thingiverse
san mamãâ©s stadium!
thingiverse
free

USB cable holder of mame-2 by EIJIRO
...usb cable holder of mame-2 by eijiro
thingiverse
usb cable holder of mame-2
thingiverse
free

USB cable holder (mame series) by EIJIRO
...e".
i'm glad if you like it.
maybe difficult of the overhang if you want 3d print.
let's try and enjoy with my data.
thingiverse
free

Mame bonsai vase by INeDiA
...mame bonsai vase by inedia
thingiverse
just added a 10mm hole and other minor changes for draining
thingiverse
free

Sprinkler dripper suppor for Mame Bonsai by davidwt2
...pper to use with mame bonsai plants. it is adjustable in height and the basement suppot could be used or not dependin of the pot.
thingiverse
free

Mame Bonsai Oval pot with flowerpot dish by davidwt2
...ot dish by davidwt2
thingiverse
this is a bonsai pot i have designed because i have difficulties to find good quality mame pots
thingiverse
free

Oval bonsai pot for mame or shohin by surek
...raining holes and one central, main hole to secure your bonsai with wires.
this is my first design and suggestions are welcome.
Logitech
3ddd
$1

Logitech Z623
...logitech z623
3ddd
logitech , колонки
колонки logitech z623
3ddd
free

Logitech C500
...logitech c500
3ddd
logitech , вебкамера
logitech c500 webcam
3ddd
free

Клавиатура Logitech
...атура logitech
3ddd
logitech , клавиатура
беспроводная клавиатура logitech с подсветкой.
3ddd
$1

logitech revolution
... revolution , мышь
mental ray, logitech revolution
3ddd
$1

Logitech LS21
...logitech ls21
3ddd
logitech , колонки
гламуррррненько =)
3ddd
$1

колонки Logitech z906
...колонки logitech z906
3ddd
logitech
logitech z906
3ddd
$1

Logitech x-530
... акустика , колонки
колонки logitech x-530
текстуры присутствуют
turbosquid
$5

Logitech Speakers
...uid
royalty free 3d model logitech speakers for download as on turbosquid: 3d models for games, architecture, videos. (1712072)
turbosquid
free

Logitech Speaker
...urbosquid
free 3d model logitech speaker for download as fbx on turbosquid: 3d models for games, architecture, videos. (1552574)
3ddd
$1

Трекбол Logitech M570
... logitech
модель популярного трекбола logitech m570. материалы corona, turbosmooth на большинстве элементов не свернут.
Arcade
3ddd
$1
Simas / Arcade
...dd
simas , simas arcade , тумба
simas arcade 46
3d_export
$5

Arcade
...arcade
3dexport
3ddd
free
Turri / Arcade
...turri / arcade
3ddd
turri , журнальный
turri / arcade
turbosquid
$35

arcade
... available on turbo squid, the world's leading provider of digital 3d models for visualization, films, television, and games.
turbosquid
$15
Arcade
... available on turbo squid, the world's leading provider of digital 3d models for visualization, films, television, and games.
turbosquid
free
Arcade
... available on turbo squid, the world's leading provider of digital 3d models for visualization, films, television, and games.
3d_ocean
$16
Arcade Game
...tomate button coin computer console fun game gamer gaming joystick machine play side art video game
detailed arcade game machine.
3d_export
$5

Arcade 3D Model
...arcade 3d model
3dexport
architecture arcade elements decor
arcade 3d model evgenadm 86783 3dexport
3d_export
$10

Arcade 3D Model
...arcade 3d model
3dexport
arcade arch porch portico well round
arcade 3d model loscarpello 54648 3dexport
3d_export
$9
Arcade 3D Model
...arcade 3d model
3dexport
arcade architecture old building classic arch
arcade 3d model lotfy 150 3dexport
Grille
archibase_planet
free

Grill
...grill
archibase planet
grill brazier
grill n010807- 3d model for interior 3d visualization.
archibase_planet
free

Grill
...grill
archibase planet
barbecue grill
gas grill n080908 - 3d model (*.gsm+*.3ds) for interior 3d visualization.
archibase_planet
free

Grill
...grill
archibase planet
grill equipment
kolagrill n211009 - 3d model (*.gsm+*.3ds) for interior 3d visualization.
turbosquid
$10

grill
...rill
turbosquid
royalty free 3d model grill for download as on turbosquid: 3d models for games, architecture, videos. (1448747)
3d_export
$25

Balcony grills and ornamental grills 3D Model
...amental grills 3d model
3dexport
balcony grills ornamental
balcony grills and ornamental grills 3d model rameshknd 72140 3dexport
turbosquid
$12

Grill
...l
turbosquid
royalty free 3d model grill for download as max on turbosquid: 3d models for games, architecture, videos. (1209288)
3d_export
$5

grill
...grill
3dexport
3ddd
free

Grill
...grill
3ddd
гриль
гриль
turbosquid
$25

Grill
...royalty free 3d model grill for download as 3ds, max, and fbx on turbosquid: 3d models for games, architecture, videos. (1288849)
turbosquid
$49

Grill
... available on turbo squid, the world's leading provider of digital 3d models for visualization, films, television, and games.
Speaker
3d_ocean
$12
Speakers
...speakers
3docean
beautiful customizable customizable speakers
speakers 3d model
3d_ocean
$5

Speaker
...speaker
3docean
audio speaker
minimalist audio speaker for your design.
3d_export
$5
speaker
...speaker
3dexport
speaker
archibase_planet
free

Speaker
...er
archibase planet
acoustic system column speaker loud speaker
speaker 3 - 3d model (*.gsm+*.3ds) for interior 3d visualization.
archibase_planet
free

Speaker
...er
archibase planet
column speaker loud speaker acoustic system
speaker 2 - 3d model (*.gsm+*.3ds) for interior 3d visualization.
archibase_planet
free

Speaker
...er
archibase planet
loud speaker column speaker acoustic system
speaker 1 - 3d model (*.gsm+*.3ds) for interior 3d visualization.
archibase_planet
free

Speaker
...speaker
archibase planet
speaker audio
speaker din - 3d model for interior 3d visualization.
archibase_planet
free

Speakers
...speakers
archibase planet
speaker speakers audio
speakers1 - 3d model for interior 3d visualization.
3d_ocean
$6
Speaker
...speaker
3docean
3d model music sound speaker
model,3d,speaker,sound,best,music
3d_ocean
$4
Speaker
...speaker
3docean
audio computer desktop electronic headphone microphone music pc speaker speakers technology
.
Retro
3d_export
$6

billboard-retro
...billboard-retro
3dexport
billboard-retro
3d_export
$5

Retro Bathroom
...retro bathroom
3dexport
retro bathroom
3d_export
$10

billboard retro
...billboard retro
3dexport
billboard retro of the 30s
3d_export
$6

retro tv3ds
...retro tv3ds
3dexport
retro tv.3ds
3d_export
$5

retro lamp
...retro lamp
3dexport
small retro lamp
3ddd
$1

Retro Radio
...retro radio
3ddd
радио
retro radio
3ddd
$1

Retro TV
...retro tv
3ddd
телевизор
retro tv
turbosquid
$5

retro
...ty free 3d model retro for download as max, max, fbx, and obj on turbosquid: 3d models for games, architecture, videos. (1539192)
3d_export
$5

retro sunset
...retro sunset
3dexport
very nice retro sunset selfmade.
3ddd
$1

retro office
...retro office
3ddd
стол
retro office vol.02
Bracket
archibase_planet
free

Bracket
...bracket
archibase planet
bracket corbel holder
bracket 1 - 3d model (*.gsm+*.3ds) for interior 3d visualization.
archibase_planet
free

Bracket
...bracket
archibase planet
bracket corbel console
bracket 5 - 3d model (*.gsm+*.3ds) for interior 3d visualization.
archibase_planet
free

Bracket
...bracket
archibase planet
corbel holder bracket
bracket 6 - 3d model (*.gsm+*.3ds) for interior 3d visualization.
archibase_planet
free

Bracket
...bracket
archibase planet
bracket corbel console
bracket 8 - 3d model (*.gsm+*.3ds) for interior 3d visualization.
archibase_planet
free

Bracket
...bracket
archibase planet
bracket corbel holder
bracket n280911 - 3d model (*.gsm+*.3ds) for interior 3d visualization.
archibase_planet
free

Bracket
...bracket
archibase planet
holder corbel bracket
bracket 9 - 3d model (*.gsm+*.3ds) for interior 3d visualization.
archibase_planet
free

Bracket
...bracket
archibase planet
corbel holder bracket
bracket 10 - 3d model (*.gsm+*.3ds) for interior 3d visualization.
archibase_planet
free

Bracket
...bracket
archibase planet
corbel console bracket
bracket 11 - 3d model (*.gsm+*.3ds) for interior 3d visualization.
archibase_planet
free

Bracket
...bracket
archibase planet
holder console bracket
bracket 12 - 3d model (*.gsm+*.3ds) for interior 3d visualization.
archibase_planet
free

Bracket
...bracket
archibase planet
bracket corbel holder
bracket 13 - 3d model (*.gsm+*.3ds) for interior 3d visualization.
Etc
3ddd
free
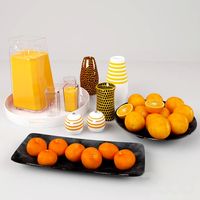
Oranges, mandarins etc.
...син , мандарин , фрукты
oranges, mandarins etc.
3ddd
$1
Bowls, dishes etc.
...bowls, dishes etc.
3ddd
посуда , сервиз
bowls, dishes etc. for contemporary kitchens
turbosquid
$30

theater for( cinema, collage, etc.)
...model theater for( cinema, collage, etc.) for download as fbx on turbosquid: 3d models for games, architecture, videos. (1258736)
3d_export
$40
stage light ETC 3D Model
...am shaper lighting concert music electric studio set movie lens lamp zoom reflector
stage light etc 3d model braz 7043 3dexport
3d_ocean
$8

Realistic TV/Blu-ray/DVD etc. remote
...3docean
blu-ray dvd realistic remote technology television tv
this is a model of a television, dvd, blu-ray, etc. remote control.
3d_ocean
$12

Desk accessories (pen, eraser, etc.)
...ats included: .c4d, .obj – the model contains 58530 polygons – not rigged, scene setup / lighting from the preview, are included.
3d_export
$5

kitchen assets - pots pans etc
...fferent material as they have a separate material id for the ability to personalise or have alternate lid types e.g. foggy glass.
3d_export
$15

bentley continental 2015 with all surroundings complete with lightmaterials etc
...als etc
3dexport
in the car model, each part as a separate object, which allows you to make animation or destruction in the game
3d_export
$12
set of 73 parts bolts nuts washers nails etc
...red with eevee. the wood texture is not included. all the other materials are procedural pbr configured in the native blend file.
3ddd
free

Suitcase
...suitcase 3ddd suitcase plastic suitcase for tools etc ...
Cabinet
3d_ocean
$5
Cabinet
...cabinet
3docean
cabinet furniture
a lowpoly cabinet .
3d_ocean
$5

Cabinet
...cabinet
3docean
cabinet furniture
a lowpoly cabinet.
3d_ocean
$5
Cabinet
...cabinet
3docean
cabinet furniture
a lowpoly cabinet .
3d_ocean
$6
Cabinet
...cabinet
3docean
cabinet furniture
a high quality cabinet .
3d_ocean
$5
Cabinet
...cabinet
3docean
cabinet furniture
a high quality cabinet .
3d_ocean
$5
Cabinet
...cabinet
3docean
cabinet furniture
a high quality cabinet ready to use .
3ddd
free
cabinet
...cabinet
3ddd
cabinet
3d_ocean
$12
Cabinet
...cabinet
3docean
cabinet furniture
a high quality cabinet with high quality textures.
3ddd
$1
cabinet
...cabinet
3ddd
тумба
cabinet
3ddd
$1
The cabinet
...the cabinet
3ddd
тумба
the cabinet
Cover
archibase_planet
free
Cover
...cover
archibase planet
cover place setting
cover n170807 - 3d model for interior 3d visualization.
3ddd
$1
cover
...cover
3ddd
ковер , круглый
cover decor
archibase_planet
free

Cover
...cover
archibase planet
cover place setting setting
servis-cafe1930 - 3d model for interior 3d visualization.
turbosquid
free
Coverings
...rings
turbosquid
free 3d model coverings for download as dwg on turbosquid: 3d models for games, architecture, videos. (1279391)
3d_export
$5
plug cover
...plug cover
3dexport
plug cover
turbosquid
$25
Covers
... available on turbo squid, the world's leading provider of digital 3d models for visualization, films, television, and games.
3d_export
$10
manhole cover
...manhole cover
3dexport
manhole cover gost, stl, step
turbosquid
$5

Street Gas Cover Manhole Cover
... available on turbo squid, the world's leading provider of digital 3d models for visualization, films, television, and games.
3ddd
free
Bed cover
...bed cover
3ddd
постельное белье
very useful bed cover
3d_export
$5
cpu cover
...cpu cover
3dexport
cpu cover, cpu box, sheet metal container
Holder
archibase_planet
free

Holder
...holder
archibase planet
holder toilet paper holder
holder paper n070712 - 3d model (*.gsm+*.3ds) for interior 3d visualization.
archibase_planet
free

Holder
...e planet
holder rack toilet paper holder
holder toilet roll n240715 - 3d model (*.gsm+*.3ds+*.max) for interior 3d visualization.
archibase_planet
free

Holder
...holder
archibase planet
pen holder support prop
pen holder - 3d model for interior 3d visualization.
archibase_planet
free

Holder
...holder
archibase planet
pole post holder
сhurch cross pole holder - 3d model for interior 3d visualization.
archibase_planet
free

Holder
...holder
archibase planet
holder bathroom ware
shower holder - 3d model (*.gsm+*.3ds) for interior 3d visualization.
archibase_planet
free

Holder
...oilet paper holder
holder paper devon&devon; time black n241113 - 3d model (*.gsm+*.3ds+*.max) for interior 3d visualization.
archibase_planet
free

Holder
...holder
archibase planet
holder hanger hanger for towel
holder 7 - 3d model (*.gsm+*.3ds) for interior 3d visualization.
archibase_planet
free

Holder
...holder
archibase planet
holder hanger hanger for towel
holder 3 - 3d model (*.gsm+*.3ds) for interior 3d visualization.
archibase_planet
free

Holder
...holder
archibase planet
holder towel rack towel-horse
holder - 3d model (*.gsm+*.3ds) for interior 3d visualization.
archibase_planet
free

Holder
...lder
archibase planet
holder hanger hanger for towel
holder towel n250912 - 3d model (*.gsm+*.3ds) for interior 3d visualization.
Mount
3d_export
free

mounting bracket
...mounting plate is the portion of a hinge that attaches to the wood. mounting plates can be used indoors, cabinetry and furniture.
turbosquid
$2

MOUNTING
... available on turbo squid, the world's leading provider of digital 3d models for visualization, films, television, and games.
turbosquid
free

Mounts
... available on turbo squid, the world's leading provider of digital 3d models for visualization, films, television, and games.
turbosquid
free

Mount Fuji
...fuji
turbosquid
free 3d model mount fuji for download as obj on turbosquid: 3d models for games, architecture, videos. (1579977)
3d_export
$5

Headphone mount LR
...headphone mount lr
3dexport
headphone mount l+r
turbosquid
$39

Mount rainier
...quid
royalty free 3d model mount rainier for download as fbx on turbosquid: 3d models for games, architecture, videos. (1492586)
turbosquid
$5

pipe mounting
...quid
royalty free 3d model pipe mounting for download as obj on turbosquid: 3d models for games, architecture, videos. (1293744)
turbosquid
$3

Mounting Tires
...uid
royalty free 3d model mounting tires for download as fbx on turbosquid: 3d models for games, architecture, videos. (1708511)
3d_export
$5

Magnetic GoPro Mount
...pro mount
3dexport
cool magnetic mount for gopro. allows you to mount the camera on flat metal surfaces and get exclusive shots.
turbosquid
$5

Stone Mount
...ty free 3d model stone mount for download as ma, obj, and fbx on turbosquid: 3d models for games, architecture, videos. (1370306)