Thingiverse
Sonoff Touch Frame (Customizable) by geit_de
by Thingiverse
Last crawled date: 3 years ago
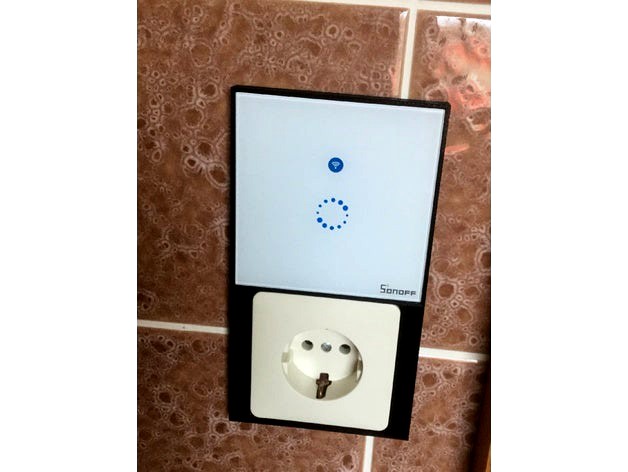
This is my own approach of getting a proper Sonoff Touch frame.
I know there are several very nice frame versions on Thingiverse, but they all are very limited. Basically you get what you see and not what you probably need, when it comes to reusing your switches or power sockets.
However I started making a simple 2mm frame and somehow ended up with a fully featured spreadsheet editable Sonoff Touch Frame construction kit.
By tweaking values in the spreadsheet of the FreeCAD object source file, you can get all the looks included in this archive with any combination of powersocket, switch or connector.
There are some designs available on Thingiverse which style you can reproduce by using this customizable file:
https://www.thingiverse.com/thing:2829881https://www.thingiverse.com/thing:2747188https://www.thingiverse.com/thing:2781919
IMPORTANT: To edit the source file you need FreeCAD V0.17.13509 or later versions or you will break the file when loading/editing.
Also please consider this a work in progress. I am not pleased with several names I gave the values in the spreadsheet and I will probably add more options in the future.
So, if you don´t find the proper frame version included, fire up FreeCAD and edit the file yourself. Don´t panic. It is far less work and less complicated than designing a flexible part likes this in FreeCAD.
First load in the SonoffTouchFrame.fcstd file. Now double click on the spreadsheet shown in the list on the left side. You may need to press the little triangle to see it.
Now you should see a huge sheet. Go to "window" menu and select "arrange windows". You should end up with the part and the spreadsheet side by side.
Now comes the fun part.
Depending on the Sonoff Touch you want to create a frame for, go into the first lines showing "Sonoff T1" "Sonoff Touch EU" and so on. Only the first one having a "1" will be used. So, if you want to create the US version, enter 0 behind the "Touch EU" and 1 behind the "Touch US" to switch the proper sizes. You should see the part changing once you leave the numeric input field.
Next is the framing. Thickness, filet and corner filet can be edited right now. The part in the preview window will update after each change. Make sure not to add a bigger filets than the actually smallest frame size.
Now it is time to define the sizes for the hole, cover and metal plate. Currently three types of cover plates are predefined. Those are probably only useful for the EU region, as I used EU power plates as base.
There is a Square51 (51mm x 51mm), Square70 (70 mm x 70 mm) and Rectangle65 (65mm x 54 mm ) version predefined defined.
The specific values are in the sheet below. If you want to change measurements you should take your devices cover, measure it and enter the values into the active device type group.
I suggest to play with all the values and once you understand how it works, you restart with the original file. Really, it is not that hard and you cannot break anything. If you get errors, which are indicated by vanishing objects and/or a red exclamation mark at the entries in list, you probably created some negative length. Like defining the Secondary Size 70, but the Cover Height as 80.
Another problem is when filet couldn´t done because of the size of the frame.
To create a Sonoff Touch frame without any power socket or switch frame part, simply select SonoffTouchPocket from the list in the main window and hit the space key. Now disable the "Secondary Size" by entering 0 and increase the bottom frame size to match your needs.
To save an object file for 3d printing make sure the last entry in the list is active. The little image must be coloured. Hit the space key to toggle its state. Now mark the last entry in list and select "File->Export" from menu. Now select "alias mesh .obj" as file type below the file list. Type in a proper name and save. Saving the frame only version works in the same way. Just only activate and select SonoffFramePad before exporting using the space key.
Happy Printing.
ADDITIONAL NOTES:
As you may have noticed there are some fields marked as best guess. This is because I don´t have any UK or US switches, so I don´t know if these values are different or not. The Sonoff Touch width and height were taken from the vendor webpage, but there is no information on the depth once mounted. The EU version is here 9 mm.
All numeric values which are centred, are free to edit. Values which are right aligned should not be changed. In many cases you cannot even change them, because there is a formula in the background calculating them.
LEGAL NOTE:
I know this file will be used in the future by some ebay trash to make cheap money using my designs. Please to not support those "services", as they hurt the 3d printing community. Better ask a friend or take the files to a local print store or library to get a print.
This is not a remix, even if the design looks like some other files on Thingiverse. A remix would never come with spreadsheet features and small source files.
Similar models
thingiverse
free

Sonoff Touch meets Merten by doublexminus
...2744)
as you can see in the picture i replaced an existing switch with the sonoff touch eu the replaced frame was a merten (3972)
thingiverse
free

SONOFF Touch EU Frame by ardunoid
...t as soon as this is done, i will post a photo if it fits. edit: first print fits too tight, so a little rework will be needed :)
thingiverse
free

Sonoff Touch by Kaatz
...hingiverse
i purchased sonoff touch - luxury glass panel touch led light switch eu standard
the glass panel touch fell and broke
thingiverse
free

UK to EU wall switch adapter (Sonoff Glass Touch wall switch) by atanasovgoran
...est.
this is not a permanent installation.
use at your own risk.
make sure you know what you are doing.
i take no responsibility.
thingiverse
free
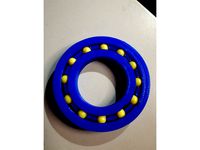
Parametrical Bearing for FreeCAD by StreetPiet
...uot;! the "bb shapes pattern" and "ball array" objects are only for previewing optimizing the bearing values!
thingiverse
free

Sonoff Touch 3 and 2 part Frame by tifrei
...sonoff touch 3 and 2 part frame by tifrei
thingiverse
this is frame for two merten switches and a sonoff touch.
thingiverse
free

Sonoff Touch EU case by Jahislove
...or sonoff touch (eu version)
3 files with hole for cable :
right side
left side
center
print without support
added : upgraded v2
grabcad
free

USB cable protector (CAD files)
..., you can modify the parameters in the spreadsheet.
i added some references values of my cables in case you need.
happy making!
thingiverse
free

Sonoff Touch EU Oberputz / Überputz (Jung) by Stuttgart
...ate v8: i made it taller. now it works perfectly with jung 500 socket
i remodded a little so that the sonoff touch is in a shell.
thingiverse
free

Snail guard by ractivething
...; value. you may also want to adapt the number of occurences in the "polarpattern" to define the shape of the cut outs.
Geit
thingiverse
free

GeitPrinter by geit_de
...(magnetic parking)
2x m3 15mm counter sunk enclosure screws (e3dv6 fan)
8x 4mm cubic neodymium magnets (magnetic parking)
3dwarehouse
free

model houdertje voor in geit
...model houdertje voor in geit
3dwarehouse
model houdertje voor in geit
3dwarehouse
free

Playground skip goat _Wip geit toestel
...playground skip goat _wip geit toestel
3dwarehouse
3dwarehouse
free

Geit Kip en Konijnenhok voor open verblijf
...geit kip en konijnenhok voor open verblijf
3dwarehouse
hok geschikt voor 2-3 dwergeitjes tot 50-60 cm 3-4 konijnen 3-5 kippen
3dwarehouse
free

Goat
...goat 3dwarehouse goat geit 3d geit 3d goat...
3dwarehouse
free
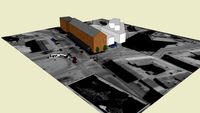
estonian 'my home'
...'my home' 3dwarehouse its my home in estonia autor geit griin #estonia #gonsiori...
3dwarehouse
free

Stal / Barn
...invented it myself. #barn #boerderij #cow #cows #farm #geit #geitn #hok #koe #koeien #schaap #schapen #sheep...
3dwarehouse
free
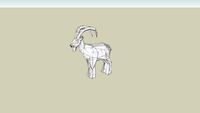
Ibex (adult male)
...steep regions to avoid predators. #animal #beast #beest #dier #geit #goat #ibex #mammal #mountain...
3dwarehouse
free

schaap
...leveren. het is een herkauwer, nauw verwant met de geit de soort behoort tot het geslacht ovis, waar ook...
Sonoff
thingiverse
free

espelho sonoff by TICODRONE
...espelho sonoff by ticodrone
thingiverse
espelho para sonoff
thingiverse
free

sonoff enclosure by dubaimodeler
...sonoff enclosure by dubaimodeler
thingiverse
sonoff enclosure. different look
thingiverse
free

Sonoff button by amonroy_uy
...verse
similar to a shelly button, this sonoff case for a sonoff basic creates a switch for a lamp or whatever.
no screws needed.
thingiverse
free

Sonoff Lid
...sonoff lid
thingiverse
sadsada
thingiverse
free

sonoff boxes by Kaatz
...
sonoff th10/16 box & lid
sonoff basic box only
for the lid https://www.thingiverse.com/thing:2876708 by mark4h
11.5mm hole
thingiverse
free

Sonoff S26 Button
...ingiverse
sonoff s26 button
my sonoff s26 button , easy broken so i decide to make simple button with clear filament
enjoyy !!!
thingiverse
free

Sonoff Box by Decoder112
...sonoff box by decoder112
thingiverse
i´ve created that box for my sonoff wifi switch
thingiverse
free

Sonoff POWR2 Bracket
...owr2 bracket
thingiverse
bracket for sonoff powr2
e.g. for installation on a breadboard or directly at the device to be switched
thingiverse
free

sonoff case by Chadac77
...sonoff case by chadac77
thingiverse
this is just a case for the sonoff that can fit addons like dht22 or a relay or both.
thingiverse
free

Sonoff Mini - foot switch
...sonoff mini - foot switch
thingiverse
sonoff mini foot switch
Customizable
3d_export
$10
customizable sd port
...customizable sd port
3dexport
customizable sd port
turbosquid
$99

Customizable character
...alty free 3d model customizable character for download as max on turbosquid: 3d models for games, architecture, videos. (1152525)
turbosquid
$1

Customizable Mug
... available on turbo squid, the world's leading provider of digital 3d models for visualization, films, television, and games.
turbosquid
$1
Customizable Spider Mech
... free 3d model customizable spider mech for download as blend on turbosquid: 3d models for games, architecture, videos. (1462055)
turbosquid
$20
Customizable Egyptian Pillar
...zable egyptian pillar for download as ma, obj, fbx, and blend on turbosquid: 3d models for games, architecture, videos. (1307376)
turbosquid
$75
Fully Customizable Hospital
... available on turbo squid, the world's leading provider of digital 3d models for visualization, films, television, and games.
turbosquid
$20

Customizable Caste Pieces
... available on turbo squid, the world's leading provider of digital 3d models for visualization, films, television, and games.
turbosquid
$15
Customizable Tea Cup
... available on turbo squid, the world's leading provider of digital 3d models for visualization, films, television, and games.
turbosquid
free
Water Bottle(Customizeable)
... available on turbo squid, the world's leading provider of digital 3d models for visualization, films, television, and games.
3d_export
$49
Book customizable 3D Model
...3dexport
book booshelf novel teach library learn read pages cover fairy tales
book customizable 3d model guitargoa 74240 3dexport
Touch
3ddd
$1

Touch
...touch
3ddd
touch , альфа банк
электронный терминал для очереди
3ddd
$1

GSG / Touch
... ванна
http://www.ceramicagsg.com/sanitaryware-touch/bathtub-touch-free-standing.html
turbosquid
$10

Oculus Touch
...squid
royalty free 3d model oculus touch for download as skp on turbosquid: 3d models for games, architecture, videos. (1462433)
turbosquid
$64

iPod Touch
...ty free 3d model ipod touch for download as 3ds, max, and obj on turbosquid: 3d models for games, architecture, videos. (1299603)
3ddd
$1

iPod Touch 5
...ipod touch 5
3ddd
apple , плеер
модель ipod touch 5
3ddd
$1

Asnaghi "Touch"
...asnaghi "touch"
3ddd
asnaghi , touch
фабрика: asnaghi
модель: touch
3ddd
free
Japanese stone touch
...japanese stone touch
3ddd
фонарь
japanese stone garden touch
японский садовый фонарь
икеокоми-гата
3d_ocean
$15
IPOD TOUCH 5
...apple blender ipad iphone ipod mp3 nano player touch
3d model of ipod touch 5 in 3 colours. available in .3ds, .blend, .obj, .x3d
3d_ocean
$12
iPod touch 5G
...pod jobs nano steve touch
ipod touch 3d model. formats, fbx, obj, max(2010) textures and materials with multiple colors included.
3ddd
$1
HTC Touch HD
...http://www.gsmarena.com/htc_touch_hd-2525.php фото:http://i.smartphone.ua/img/phones/htc-touch-hd/foto_001.jpg
Frame
archibase_planet
free

Frame
...frame
archibase planet
frame photo frame
frame n190813 - 3d model (*.gsm+*.3ds) for interior 3d visualization.
archibase_planet
free

Frame
...frame
archibase planet
frame photo frame
frame n071113 - 3d model (*.gsm+*.3ds) for interior 3d visualization.
3ddd
$1

Frame
...frame
3ddd
frame
3ddd
free

Frame
...frame
3ddd
frame
archibase_planet
free

Frame
...frame
archibase planet
frame mirror frame ornament
frame n260113 - 3d model (*.gsm+*.3ds) for interior 3d visualization.
archibase_planet
free

Frame
...frame
archibase planet
frame photo frame
frame photo n190813 - 3d model (*.gsm+*.3ds) for interior 3d visualization.
archibase_planet
free

Frame
...frame
archibase planet
frame window window frame
frame 1 - 3d model (*.gsm+*.3ds) for interior 3d visualization.
archibase_planet
free

Frame
...frame
archibase planet
frame window frame window
frame 3 - 3d model (*.gsm+*.3ds) for interior 3d visualization.
archibase_planet
free

Frame
...frame
archibase planet
frame wall frame decoration
frame 1 - 3d model (*.gsm+*.3ds) for interior 3d visualization.
archibase_planet
free

Frame
...frame
archibase planet
frame window window frame
frame 2 - 3d model (*.gsm+*.3ds) for interior 3d visualization.