Thingiverse

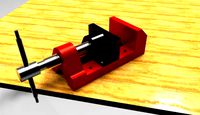
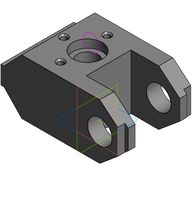
Simple adjustable slider clamp for He3D K200, K280 and similar kossel deltas by Nanocube
by Thingiverse
Last crawled date: 3 years, 1 month ago
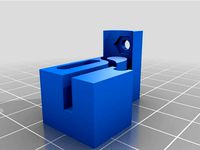
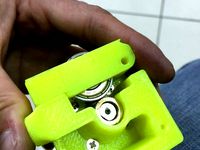
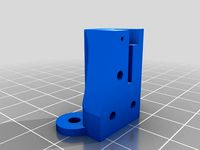
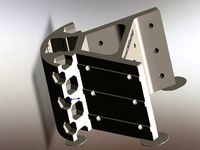
Replaces the stock injection moulded slider clamps of my He3D K280 kossel delta; the stock item is actually fine, but this version has a simple adjuster mechanism, and is sized for a 9mm belt upgrade I made.
Updated with 4 new Models (March 2020) - This is a updated design with thicker pin supports and 4mm more adjustment travel.
Models are provided for 40 and 42mm pins, plus 6 and 9mm belts: A stock K280 has 6mm belts and 40mm pins.
The stock He3D 4 roller carriage backplate design is actually quite good, and I think the 20x20mm spacing for the mount bolts is common to a whole bunch of Kossel designs.
Printing:
Use support for the pin arms and slider bracket. I originally printed these in PLA and they worked fine for a year, But I re-made them in PC-ABS (horrible material to print with, but very strong and stable) when I updated the design.
Fitting;
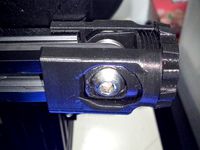
fit both pieces but only fully tighten the upper bolts, leave the lower loose enough so the slider can slide. Then fit the belt, making it tight'ish on the clamp. Finally tension the two pieces with a thumb and finger on the ends to a firm tension on the belt, don't go mad.. but it's OK to squeeze reasonably hard, the belt should thrumm like a double base when plucked.. Finally tighten the lower bolts while maintaining the tension; and after a few hours of printing and settling in it's a good idea to re-tighten and check everything.
Good:
8mm of tensioning adjustment possible via slider, allowing final tension to be set after the belt is fitted.
Standard 4 mounting holes on 20x20 grid, uses original bolts
Arm pin width is 40mm; matching the stock k280 part, this is parameterized in the scadfile and I have also uploaded 42mm wide versions.
Up to 9mm belt, also parameterized, I have uploaded 6mm versions of the model, these are probably lighter; but not printed or tested
Extends to the top of the carriage plate to hit the standard K280 endstop
(is is important that you check this before the first homing move!)
IR blade cutout at the top, I, however, use it to mount a magnet and have magnetic reedswitch endstops.
Simple and strong shell, none of the detail is random; there are elements of the wall layout etc designed to help the resultant print be strong where needed.
I tap the hols for the arm bolts, there is no nut recess, the hex-shaped hole will grip the original bolt very firmly and my experience of using an identical fitting on the effector end of the arms for the last few months has been good.
Arm clearance appears to be as good as, if not better than, the original
Ungood
The lower mount bolts really need a washer to allow you to tighten them enough, make sure it is 1mm or less in thickness or you may foul the belts.
Approx 5g heavier than the original, I think this isn't tooo bad considering this also has adjustment. ymmv.
The slider part will need support to print.I played with a supportless design but it was heavier and fouled the rods more easily.
Finally; The scad file is also there if you want to remix, laugh at my mistakes, etc. OpenScad 2016.11 or later is needed for the clamp to render properly.
Updated with 4 new Models (March 2020) - This is a updated design with thicker pin supports and 4mm more adjustment travel.
Models are provided for 40 and 42mm pins, plus 6 and 9mm belts: A stock K280 has 6mm belts and 40mm pins.
The stock He3D 4 roller carriage backplate design is actually quite good, and I think the 20x20mm spacing for the mount bolts is common to a whole bunch of Kossel designs.
Printing:
Use support for the pin arms and slider bracket. I originally printed these in PLA and they worked fine for a year, But I re-made them in PC-ABS (horrible material to print with, but very strong and stable) when I updated the design.
Fitting;
fit both pieces but only fully tighten the upper bolts, leave the lower loose enough so the slider can slide. Then fit the belt, making it tight'ish on the clamp. Finally tension the two pieces with a thumb and finger on the ends to a firm tension on the belt, don't go mad.. but it's OK to squeeze reasonably hard, the belt should thrumm like a double base when plucked.. Finally tighten the lower bolts while maintaining the tension; and after a few hours of printing and settling in it's a good idea to re-tighten and check everything.
Good:
8mm of tensioning adjustment possible via slider, allowing final tension to be set after the belt is fitted.
Standard 4 mounting holes on 20x20 grid, uses original bolts
Arm pin width is 40mm; matching the stock k280 part, this is parameterized in the scadfile and I have also uploaded 42mm wide versions.
Up to 9mm belt, also parameterized, I have uploaded 6mm versions of the model, these are probably lighter; but not printed or tested
Extends to the top of the carriage plate to hit the standard K280 endstop
(is is important that you check this before the first homing move!)
IR blade cutout at the top, I, however, use it to mount a magnet and have magnetic reedswitch endstops.
Simple and strong shell, none of the detail is random; there are elements of the wall layout etc designed to help the resultant print be strong where needed.
I tap the hols for the arm bolts, there is no nut recess, the hex-shaped hole will grip the original bolt very firmly and my experience of using an identical fitting on the effector end of the arms for the last few months has been good.
Arm clearance appears to be as good as, if not better than, the original
Ungood
The lower mount bolts really need a washer to allow you to tighten them enough, make sure it is 1mm or less in thickness or you may foul the belts.
Approx 5g heavier than the original, I think this isn't tooo bad considering this also has adjustment. ymmv.
The slider part will need support to print.I played with a supportless design but it was heavier and fouled the rods more easily.
Finally; The scad file is also there if you want to remix, laugh at my mistakes, etc. OpenScad 2016.11 or later is needed for the clamp to render properly.
Similar models
thingiverse
free

HE3D K280 Filament Mount
...he3d k280 filament mount
thingiverse
he3d k280 filament mount
thingiverse
free

HE3D K280 - K200 Basic Effector by christtian
...h makes arms perfecly parallel (it is not for the one in the box).
printed in pla or petg to have the good result (no abs at all)
thingiverse
free

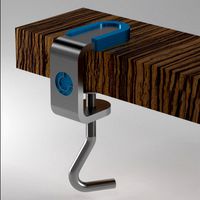
Belt Lock (HE3D K280) by the3der
...giverse
frustrated that my belts would occasionally adjust themselves, i decided to make some locks to keep them in their slots.
thingiverse
free
Ender 3 X axis short belt tensioner (Stock Parts only)
...ioner bolt allows tightening of the bolt onto the bearings with no issue
-stronger bolt
-different bolt and case alignment method
grabcad
free

ShapeOko2 Belt Tensioners
...ension is 4mm hex m5 30mm long
the bolt for the clamp is a 2.5mm hex m3 14mm long
reverse side of clamp 2 locking hex 5mm m3 nuts
thingiverse
free

HE3D K280 PSU MOUNT
...he3d k280 psu mount
thingiverse
he3d k280 psu mount
designed to hold the power supply on the backside or where ever you choose.
thingiverse
free

Belt tensioner / tightener for 2020 delta / Kossel 3D printer
...lide carriage is not ideal. i designed for 6mm gt2 belt, inspired by atziano. belt tension can easily regulated by a knurled nut.
thingiverse
free

Armed Slider for Mini Kossel by bjbsquared
...us long enough for open or closed belts. these have not been used for printing yet but fit and belt alignment appears to be good.
thingiverse
free
X-axis belt clamp'n'tension by carbonoid84
...ting the belt is a bit awkward.
note 2: you may need to turn your x-axis limit switch to stop it catching on the tensioner block.
thingiverse
free

42mm Remix of Anycubic Kossel Linear Plus Carriage Tensioner by pfjason
...tifully to remove the echos i was seeing in the prints due to insufficient belt tension provided by the stock spring tensioners.
Nanocube
thingiverse
free

nanocube rgb hood by ejpsx
...nanocube rgb hood by ejpsx
thingiverse
nanocube rgb ledhood
thingiverse
free

Nanocube light hood by ejpsx
...nanocube light hood by ejpsx
thingiverse
nanocube led light hood
thingiverse
free

NanoCube 6 Aquarium Overflow by jdebriyn
...nanocube 6 aquarium overflow by jdebriyn
thingiverse
simply overflow for small nanocube 6 gal aquarium
thingiverse
free

nanoCUBE by varykap
...tar.
dimensiones 280x280x280
volumen 130x140x140
estructura openbeam
https://www.peakapic.com/
http://varykap.blogspot.com.es/
thingiverse
free

Aquarium Edge Cover (Dennerle Nanocube)
...rle nanocube 60l but should also fit on the other models of dennerle.
also suitable as bear seat :-d
freecad files are included.
thingiverse
free

Simple Key Rack by Nanocube
...imple key rack by nanocube
thingiverse
a simple key rack with 3d lettering.
prints easily with 10% infill and no support needed.
thingiverse
free

NanoCube Flow Diverter by CopabX
...s made for a filter head of .78" diameter and is made at .8" to compensate for the small amount of error during prints.
thingiverse
free

eenvoudig sleutelrek by Nanocube
...telrek
afdrukken met 10% vulling, geen ondersteuning.
de 'dikke' versie was een mk1, ik geef de voorkeur aan de slankere.
thingiverse
free

DC05-nFurminator by Nanocube
...very crudely) replaced the connector with a simple cylinder and tapered cone sized for the nozzle adapter on my dc05. works well.
thingiverse
free

Low Poly Sphere by Nanocube
...aximum rule).
might need a big brim and/or a raft if your bed level or adhesion is poor.
update: improved version with scad file!
K280
thingiverse
free
HE3D K280 Filament Mount
...he3d k280 filament mount
thingiverse
he3d k280 filament mount
thingiverse
free

he3d k280 bed level test
...he3d k280 bed level test
thingiverse
he3d k280 bed level test
thingiverse
free
HE3D K280 PSU MOUNT
...he3d k280 psu mount
thingiverse
he3d k280 psu mount
designed to hold the power supply on the backside or where ever you choose.
thingiverse
free

K280 FAN MOUNT by kissmuch
...k280 fan mount by kissmuch
thingiverse
it's fan-mount for delta 3d printer (k280)
24v dual fan mount
i think not bad
thingiverse
free

HE3D K280 equipment by AbsolutBeginner
...on: case for powersupply with switch, for use with the both holder.
switch-hole 11x30mm (www.kopp.eu ..... switch nr. 1928.1208.7
thingiverse
free

Hemera K280 Delta
...arly most so that i get the attribution of the model i remixed it from. i plan on trying to get it up and running by jan 7, 2020
thingiverse
free

HE3D K280 Bed Bracket by prahjister
...w.cnx-software.com/2017/12/06/he3d-k280-3d-printer-review-part-1-build-tweaks-and-first-prints/
use this article for instructions
thingiverse
free
Belt Lock (HE3D K280) by the3der
...giverse
frustrated that my belts would occasionally adjust themselves, i decided to make some locks to keep them in their slots.
thingiverse
free

he3d k200/k280 delta cooling fan mount by Curado
...ature fault
print on the long flat side with support enabled.
pla might work but abs is best.
see my other k200/k280 accessories!
thingiverse
free

He3D K280 Glass-bed Bracket by the3der
...lass down with masking tape. so i came up with some small brackets that fit every other hole around the bed and hold it in place.
K200
humster3d
$75

3D model of Kenworth K200 Tractor Truck 2010
...odel of kenworth k200 tractor truck 2010 in various file formats. all our 3d models were created maximally close to the original.
thingiverse
free

Keyboard foot for logitech k200 by agarajag
...keyboard foot for logitech k200 by agarajag
thingiverse
a replacement foot for keayboard logitech k200
thingiverse
free

for He3d K200 cool fan by he3d2016
...giverse
for he3d k200 cool fan, according to your own situation, adjust the nozzle height if it have to.
hope you will enjoy it!
thingiverse
free

he3d k200 Z sensor limit switch by Passion
...he3d k200 z sensor limit switch by passion
thingiverse
he3d k200 z sensor limit switch
thingiverse
free

Delta filament holder HE3D K200 by KassyARF
...r he3d k200 by kassyarf
thingiverse
filament holder optimized for the delta he3d k200-280 quick release or quick change printer.
thingiverse
free

HE3D K200 Layer 40mm Fan Duct by tERB0
...he3d k200 layer 40mm fan duct by terb0
thingiverse
this is a remix of e3d v6 layer fan duct to fit he3d k200 delta printer.
thingiverse
free

K200 Fan Duct by DeLan_Design
...chamber.
this modification boost the performance of the overall cooling system.
please rotate on x axis to print on right plane.
thingiverse
free

K200 Keyboard Foot Replacement by jmacdissi
...it works with the keyboard.
there is a possibility this works with more than just the k200 keyboard. i will work to confirm this.
thingiverse
free

Logitech K200 keyboard replacement foot by selectnone
... keyboard.
i designed this when one of mine snapped off.
the rubber pad from the broken part can be reused with this replacement.
thingiverse
free

He3D K200 delta printer cooling for 40 mm cooler by sharanchius
...he3d k200 delta printer cooling for 40 mm cooler by sharanchius
thingiverse
he3d k200 delta printer cooling for 40 mm cooler
He3D
thingiverse
free
HE3D K280 Filament Mount
...he3d k280 filament mount
thingiverse
he3d k280 filament mount
thingiverse
free

HE3D Mods by prahjister
...iverse
https://www.cnx-software.com/2018/02/03/he3d-k280-delta-3d-printer-review-part-2-upgrades-calibration-and-more-3d-prints/
thingiverse
free
he3d k280 bed level test
...he3d k280 bed level test
thingiverse
he3d k280 bed level test
thingiverse
free

Plate for endstop switch (He3D) by Gudini
...plate for endstop switch (he3d) by gudini
thingiverse
plate for endstop switch. for 3d printer he3d
thingiverse
free
HE3D K280 PSU MOUNT
...he3d k280 psu mount
thingiverse
he3d k280 psu mount
designed to hold the power supply on the backside or where ever you choose.
thingiverse
free

cool fan for HE3D EI3 dual by he3d2016
...cool fan for he3d ei3 dual by he3d2016
thingiverse
for he3d printer, cool fan & m12 sensor rack
thingiverse
free

HE3D MKS Faceplate 40mm Fan by ausfranko
...he3d mks faceplate 40mm fan by ausfranko
thingiverse
he3d faceplate for mks base 1.4 with 40mm fan mount
thingiverse
free

HE3D MKS Faceplate 50mm Fan by ausfranko
...he3d mks faceplate 50mm fan by ausfranko
thingiverse
he3d faceplate for mks base 1.4 with 50mm fan mount
thingiverse
free

Y Axis Front plates for HE3D by ausfranko
...y axis front plates for he3d by ausfranko
thingiverse
custom badged front axis plates for he3d 6mm thickness
thingiverse
free
for He3d K200 cool fan by he3d2016
...giverse
for he3d k200 cool fan, according to your own situation, adjust the nozzle height if it have to.
hope you will enjoy it!
Kossel
thingiverse
free
kossel bottom by keisukelin
...kossel bottom by keisukelin
thingiverse
kossel bottom
thingiverse
free
Leg for kossel by exelon
...leg for kossel by exelon
thingiverse
leg for kossel
thingiverse
free
Extruder for kossel by spencer_chen7
...extruder for kossel by spencer_chen7
thingiverse
extruder for kossel
thingiverse
free
Kossel parts by breezer83
...kossel parts by breezer83
thingiverse
kossel parts
thingiverse
free

Anycubic Kossel PID calibration
...ir mount:
kossel raspberry camera ir mount
extruder pid calibration.
simple extruder temperature calibration of your 3d printer.
thingiverse
free

Kossel Medium by flux83
...kossel medium by flux83
thingiverse
vertex for upgraded kossel mini
thingiverse
free
Kossel Mini by salesmendesandre
...kossel mini by salesmendesandre
thingiverse
custom kossel mini
frame 20x20
thingiverse
free
leg for kossel by ionulet
...leg for kossel by ionulet
thingiverse
leg for kossel with channel for end- stop cables
thingiverse
free

Optical Endstops Mounts for Kossel (with Better Kossel carriages) by dellfer
...stops on the anycubic kossel with better kossel carriages by codefreak https://www.thingiverse.com/thing:2501337
more precission
thingiverse
free
kossel??????? by wangrui19890704
...kossel??????? by wangrui19890704
thingiverse
??2020?2060???
Slider
3d_export
$5
slider
...slider
3dexport
slider
3d_export
$5

Camera Slider
...camera slider
3dexport
camera slider toy
turbosquid
$10

SLIDER RAW
... available on turbo squid, the world's leading provider of digital 3d models for visualization, films, television, and games.
turbosquid
free

Slider V1
... available on turbo squid, the world's leading provider of digital 3d models for visualization, films, television, and games.
turbosquid
free

Vitrocsa3001-Slider-Fixed
... available on turbo squid, the world's leading provider of digital 3d models for visualization, films, television, and games.
3ddd
$1

ЭКМИ-МЕБЕЛЬ / Регина-slider
...er
3ddd
угловой , экми-мебель
диван "регина-slider". производитель экми-мебель
3d_ocean
$12
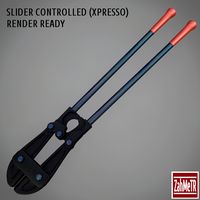
Bolt Cutter (Xpresso Slider Controlled)
...are to use slider controller. you can see how to use slider in preview video. render system and materials are ready. c4d and o...
3ddd
free

Шкатулка-держатель для фотографий Slider
...рмы umbra. вмещает три фотографии размером 8 х 8 см, 10 х 10 см и 10 х 15 см.http://www.umbra.com/usd/slider-photo-dis
3d_ocean
$9
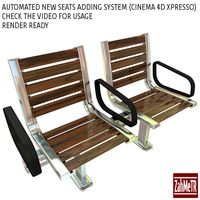
Seats with Automatic Adding Slider (Xpresso)
... / images and read description carefully before you buy. thanks. you need cinema 4d software to use slider controller or just ...
turbosquid
$15

Computer Camera Slider, closes and opens camera view
...der, closes and opens camera view for download as skp and stl on turbosquid: 3d models for games, architecture, videos. (1331206)
Deltas
design_connected
$16
Delta
...delta
designconnected
arflex international spa delta computer generated 3d model. designed by koivisto, eero.
design_connected
$16

Delta
...delta
designconnected
lj lamps delta computer generated 3d model. designed by janowski-lenhart, sasha.
design_connected
$13
Delta
...delta
designconnected
emu group delta armchairs computer generated 3d model. designed by marin chiaramonte .
3ddd
$1

Delta Light
...delta light
3ddd
delta light , you-turn reo 3033
точечний светильник delta light
3ddd
$1
Blanco / delta
...blanco / delta
3ddd
blanco , мойка
мойка blanco delta со смесителем
3ddd
$1
Delta Light Spot
...delta light spot
3ddd
delta light
светильник фирмы delta light
3ddd
free
Bianchi Delta LVMDLT200100
...i delta lvmdlt200100
3ddd
bianchi delta , смеситель
смеситель bianchi delta lvmdlt200100
design_connected
free
Delta 190
...delta 190
designconnected
free 3d model of delta 190 by zanotta designed by progetti, emaf.
design_connected
$27
Delta 211
...delta 211
designconnected
zanotta delta 211 computer generated 3d model. designed by progetti, emaf.
design_connected
$27
Delta 234
...delta 234
designconnected
zanotta delta 234 computer generated 3d model. designed by progetti, emaf.
Clamp
3d_export
$11
clamp
...clamp
3dexport
clamp
3ddd
free

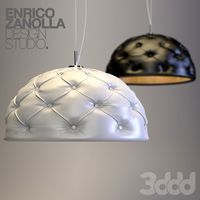
Clamp
... enricо zanolla , капитоне
дизайнерenrico zanollмодель clamp
3ddd
$1

Clamp
...ricо zanolla , капитоне
дизайнеры
enrico zanolla
andrea di filippo
модель clamp
dzstudio
3d_export
free
clamp
...clamp
3dexport
simple clamp model, more free 3d models here:
3d_export
$5
clamping handle
...clamping handle
3dexport
clamping handle
3ddd
$1
Clamp / DZstudio
... dzstudio , капитоне
люстра clamp от dzstudio/enrico zanolla(италия).
3ddd
$1
Светильник Clamp
...светильник clamp
3ddd
clamp
стеганый светильник clamp в двух цветах в черном и белом.
turbosquid
$29
clamp
...ty free 3d model clamp for download as 3ds, obj, c4d, and fbx on turbosquid: 3d models for games, architecture, videos. (1442049)
turbosquid
$29
clamp
...ty free 3d model clamp for download as 3ds, obj, c4d, and fbx on turbosquid: 3d models for games, architecture, videos. (1442041)
3d_export
$5
Clamp-14
...clamp-14
3dexport
3d model of clamp name 14
Similar
3d_export
$20

sports car similar to a chevrolet
...sports car similar to a chevrolet
3dexport
a sports car similar to a chevrolet. high-poly and low-poly models
turbosquid
$10
2 Similar Cutlery Sets
...odel 2 similar cutlery sets for download as c4d, c4d, and fbx on turbosquid: 3d models for games, architecture, videos. (1609168)
turbosquid
$49

Gun similar to Colt Peacemaker
... available on turbo squid, the world's leading provider of digital 3d models for visualization, films, television, and games.
turbosquid
$49

Gun similar to Jericho 941
... available on turbo squid, the world's leading provider of digital 3d models for visualization, films, television, and games.
turbosquid
free

Gun similar to Colt 1911
... available on turbo squid, the world's leading provider of digital 3d models for visualization, films, television, and games.
3d_export
$20

The girl similar to Mandy 3D Model
...autiful sexy
the girl similar to mandy 3d model download .c4d .max .obj .fbx .ma .lwo .3ds .3dm .stl iasha3d39286 103194 3dexport
3d_export
$10
coffee machine similar lavazza tiny
...commended for photorealistic rendering of domestic environments, the model is in real scale and has dimensions of 29.6x11xh 25 cm
turbosquid
$49

Gun similar to Desert Eagle .44 Magnum
... available on turbo squid, the world's leading provider of digital 3d models for visualization, films, television, and games.
3ddd
$1
The girl similar to Mandy
...real-world scale and is centered at 0,0,0.
objects, materials, textures use meaningful names.
mapping is only overlapping in hair
turbosquid
$35
Ground Surveillance Drone (Similar to Tom Clancy's Rainbow Six: Siege drone)
...om clancy's rainbow six: siege drone) for download as c4d on turbosquid: 3d models for games, architecture, videos. (1341540)
Adjustable
3d_ocean
$7
Adjustable Wrench
...adjustable wrench
3docean
adjustable wrench highly detailed wrench
highly detailed adjustable wrench.
3ddd
$1
Adjustable Stool
...adjustable stool
3ddd
табурет
wooden adjustable stool.
3d_ocean
$20

Adjustable Gym Bench
...st adjustable bench black equipement gym gymnastic indoor silver sport workout
3d model of black and silver adjustable gym bench.
3d_ocean
$20
Adjustable Gym Bench
...st adjustable bench black equipement gym gymnastic indoor silver sport workout
3d model of black and silver adjustable gym bench.
3d_ocean
$16

Adjustable Weight Bench
...arbell bench black equipement gym gymnastic indoor sport weight workout
3d model of black adjustable weight bench with a barbell.
turbosquid
$5

Adjustable wrench
...
royalty free 3d model adjustable wrench for download as fbx on turbosquid: 3d models for games, architecture, videos. (1313414)
3d_export
$5

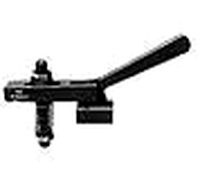
adjustable tension lock
...adjustable tension lock
3dexport
adjustable tension lock
turbosquid
$1
Adjustable Wrench
...free 3d model adjustable wrench for download as obj and blend on turbosquid: 3d models for games, architecture, videos. (1446736)
turbosquid
$1

Adjustable Wrench
...y free 3d model adjustable wrench for download as c4d and fbx on turbosquid: 3d models for games, architecture, videos. (1379022)
3d_export
$5

Adjustable key
...adjustable key
3dexport
Simple
turbosquid
$1

Simple goblet (Taca simples)
... available on turbo squid, the world's leading provider of digital 3d models for visualization, films, television, and games.
3d_export
$5
simple bench
...simple bench
3dexport
the simple bench which can be used in simple projects or video-games.
3d_export
$5
simple knob
...simple knob
3dexport
simple knob
3d_export
$5
simple handle
...simple handle
3dexport
simple handle
3d_export
$5
simple button
...simple button
3dexport
simple button
3d_export
$5

simple spindle
...simple spindle
3dexport
simple spindle
3d_export
$5

simple wheel
...simple wheel
3dexport
simple wheel
3d_export
$5
simple chair
...simple chair
3dexport
simple blue chair
3d_export
free
Simple room
...simple room
3dexport
here is a simple but beautiful room
3ddd
free
SIMPLE | Кресло
...io cianfarra , simple
производитель area declic дизайн giulio cianfarra коллекция simple