Thingiverse

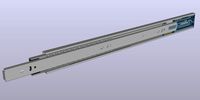
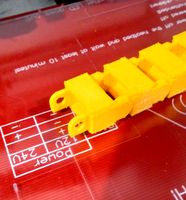
Sidewinder X1 cable guide hotbed by illsen
by Thingiverse
Last crawled date: 3 years, 1 month ago
see below for german version
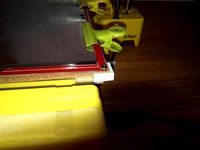
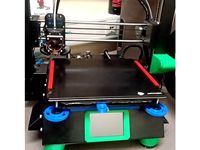
For me the cable management of the Artillery Sidewinder X1 is too unsafe, also I wanted to ground my aluminium based heatbed.
Therefore I created my own strain relief. I bought a textile sleeve with a diameter of 13mm ( https://www.amazon.de/dp/B07FW3GTXB/ ) and a nylon string with a diameter 3mm (e.g. https://www.amazon.de/dp/B074QPS1Y7/ ,but any sort of 3mm Nylon filament will be fine for this purpose). The tension introduced by the nylon inlay will guide the cables to stay rounded.
I used this cable holder https://www.thingiverse.com/thing:4126411 but needed to adjust it as my distance between the edge of the heatbead and the cable was different, 75mm in my case. Also I added a small hole to put the nylon string into it. If you use a different cable holder drilling a small hole might also do the job.
I use this cable gland https://www.thingiverse.com/thing:2937494 mit od=13 and id=10.
Assembly:
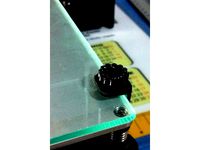
Hotbed: Put the nylon string into the hole. Together with the cables all have to be surrounded by the textile sleeve. Use zip ties to fixate it.
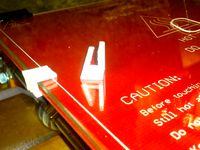
Case: to use the cable gland, all cables need to be disconnected as they have to be guided through the nut. also extended all cables. I am not sure if this is necessary, you have to try out on your own. Before you screw the nut twist the textile sleeve (not the cables!) to increase the overall tension.
GERMAN VERSION
Die von Artillery angedachte Kabelführung für das Hotbed am Sidewinder X1 war mir zu unsicher, ausserdem wollte ich eh eine Erdung für die angebaute Aluplatte einfügen.
Ich habe mir eine Biegeentlastung gebaut. Gekauft habe ich dafür einen selbstschliessenden Kabelschlauch, 13mm Durchmesser ( https://www.amazon.de/dp/B07FW3GTXB/ ) sowie eine 3mm dicke Nylonschnur ( z.B. https://www.amazon.de/dp/B074QPS1Y7/ , irgendein Nylonfilament mit 3mm Durchmesser geht auch) zur rundlaufenden Führung der Kabel.
Als Kabelhalterung habe ich dieses Model als Basis genommen https://www.thingiverse.com/thing:4126411
Das hat bei mir allerdings nicht gepasst, ich habe einen anderen Abstand zwischen Kabel und Aussenkante des Bettes, nämlich von 75mm. Ausserdem habe ich ein Führungsloch für die Nylonschnur mit in das Modell integriert. Bei anderen kann man da sicher ein kleines Loch bohren, um denselben Effekt zu erzielen
Als Kabelverschraubung habe ich dann dieses Modell genommen https://www.thingiverse.com/thing:2937494 und mit den Einstellungen od=13, id=10 erstellt.
Zusammenbau:
Hotbed: Die Kabel werden zusammen mit der Nylonschnur in den Kabelschlauch umhüllt, vorher wird die Nylonschnur in das Führungsloch gepresst. Die Kabel und der Kabelschlauch werden mit zwei Kabelbindern an der Kabelhalterung befestigt.
Gehäuse: An dem Gehäuse habe ich die Kabelverschraubung verwendet. Dafür müssen alle Kabel gelöst werden, um diese durch die Mutter zu führen. Ich habe bei mir die Kabel noch verlängert. Ich weiss nicht, ob das notwendig ist, das muss ausprobiert werden. Vor dem Verschrauben wird der Kabelschlauch noch verdreht (nicht die Kabel!), dadurch wird das Konstrukt steifer.
For me the cable management of the Artillery Sidewinder X1 is too unsafe, also I wanted to ground my aluminium based heatbed.
Therefore I created my own strain relief. I bought a textile sleeve with a diameter of 13mm ( https://www.amazon.de/dp/B07FW3GTXB/ ) and a nylon string with a diameter 3mm (e.g. https://www.amazon.de/dp/B074QPS1Y7/ ,but any sort of 3mm Nylon filament will be fine for this purpose). The tension introduced by the nylon inlay will guide the cables to stay rounded.
I used this cable holder https://www.thingiverse.com/thing:4126411 but needed to adjust it as my distance between the edge of the heatbead and the cable was different, 75mm in my case. Also I added a small hole to put the nylon string into it. If you use a different cable holder drilling a small hole might also do the job.
I use this cable gland https://www.thingiverse.com/thing:2937494 mit od=13 and id=10.
Assembly:
Hotbed: Put the nylon string into the hole. Together with the cables all have to be surrounded by the textile sleeve. Use zip ties to fixate it.
Case: to use the cable gland, all cables need to be disconnected as they have to be guided through the nut. also extended all cables. I am not sure if this is necessary, you have to try out on your own. Before you screw the nut twist the textile sleeve (not the cables!) to increase the overall tension.
GERMAN VERSION
Die von Artillery angedachte Kabelführung für das Hotbed am Sidewinder X1 war mir zu unsicher, ausserdem wollte ich eh eine Erdung für die angebaute Aluplatte einfügen.
Ich habe mir eine Biegeentlastung gebaut. Gekauft habe ich dafür einen selbstschliessenden Kabelschlauch, 13mm Durchmesser ( https://www.amazon.de/dp/B07FW3GTXB/ ) sowie eine 3mm dicke Nylonschnur ( z.B. https://www.amazon.de/dp/B074QPS1Y7/ , irgendein Nylonfilament mit 3mm Durchmesser geht auch) zur rundlaufenden Führung der Kabel.
Als Kabelhalterung habe ich dieses Model als Basis genommen https://www.thingiverse.com/thing:4126411
Das hat bei mir allerdings nicht gepasst, ich habe einen anderen Abstand zwischen Kabel und Aussenkante des Bettes, nämlich von 75mm. Ausserdem habe ich ein Führungsloch für die Nylonschnur mit in das Modell integriert. Bei anderen kann man da sicher ein kleines Loch bohren, um denselben Effekt zu erzielen
Als Kabelverschraubung habe ich dann dieses Modell genommen https://www.thingiverse.com/thing:2937494 und mit den Einstellungen od=13, id=10 erstellt.
Zusammenbau:
Hotbed: Die Kabel werden zusammen mit der Nylonschnur in den Kabelschlauch umhüllt, vorher wird die Nylonschnur in das Führungsloch gepresst. Die Kabel und der Kabelschlauch werden mit zwei Kabelbindern an der Kabelhalterung befestigt.
Gehäuse: An dem Gehäuse habe ich die Kabelverschraubung verwendet. Dafür müssen alle Kabel gelöst werden, um diese durch die Mutter zu führen. Ich habe bei mir die Kabel noch verlängert. Ich weiss nicht, ob das notwendig ist, das muss ausprobiert werden. Vor dem Verschrauben wird der Kabelschlauch noch verdreht (nicht die Kabel!), dadurch wird das Konstrukt steifer.
Similar models
thingiverse
free

CR6SE fan duct by lusbueb
...nal halterung konnte ich nicht montieren, da ich eine kabel-hilfe motiernt habe.
ausserdem ist dieses teil mit streben verstärkt
thingiverse
free

101Hero Antriebsriemenstuetze by PeterLustig
...m5 imbus schraube benutzt.somit schleift der riemen nicht mehr am gehäuse.
das vorhandene loch muss natürlich auf gebohrt werden.
thingiverse
free

Taranis X9d Sperrdisc by Mega7110
...bekam das fast nicht mehr raus:d, deshalb habe ich 2 "ausbauhilfen" mit dran gemacht die das herausnehmen vereinfachen.
thingiverse
free

SodaStream Crystal Halterung by MyProjecrs
...che unter den sodastream greifen vorsichtig entfernt werden.
für eine bessere druckbetthaftung habe ich mit einem brim gedruckt.
thingiverse
free

Abdeckung für das Stream Deck XL by SirThommes
.... sollte aber auch mit anderen filamenten funktionieren.
ich hoffe, der eine oder andere kann das gebrauchen. bedanken wäre nett!
thingiverse
free

Artillery Sidewinder X1 Marlin 2.0.7 SKR 1.4 Turbo TMC2209 by Christophpaesi
...ese auch bei veränderung auf die richtigen pins bei mir nicht erkannt.
auf funktion kann dies mit dem befehl m119 in der konsole.
thingiverse
free

beelogger BME280 BH1750 by hurra
...n löcher habe ich ein m5-gewinde geschnitten. aufgrund der materialstärke an dieser seite kann auf eine mutter verzichtet werden.
thingiverse
free

Aqara Türgriffsensor by myit
... des reedkontakts kann es sein, dass der magnet anders positioniert werden muss. daher habe ich 2 verschiedene einsätze erstellt.
thingiverse
free

LED Ring Ausgleichsbehälter Wasserkühlung 60cm by ColdGamer99
...führen.
den ring habe ich noch schwarz lackiert, da ich kein schwarzen filament hatte. das ist natürlich jedem selbst überlassen.
thingiverse
free

18650-LiIo-Ladegerät by Udo01
...4688
link für die ladeelektronik:https://www.amazon.de/gp/product/b0778z9tfh/ref=ppx_yo_dt_b_asin_title_o01_s00?ie=utf8&psc=1
Hotbed
cg_studio
$22
Greenhouse3d model
...greenhouse3d model cgstudio greenhouse orangery hothouse warm house glasshouse hotbed seedbed glass metal conservatory frame greenery .obj .max .fbx...
cg_studio
$30

Greenhouse3d model
...greenhouse3d model cgstudio greenhouse orangery hothouse warm house glasshouse hotbed seedbed glass metal conservatory frame greenery easter site components...
cg_studio
$22

Greenhouse brick3d model
...brick3d model cgstudio greenhouse orangery hothouse warm house glasshouse hotbed seedbed glass metal conservatory frame greenery .max .fbx .3ds...
3d_export
$37
Green House Low poly 3d model 3D Model
...garden glazing glass architecture architectural summerhouse plants flowering gardening hotbed grow green house low poly 3d model 3d model...
cg_studio
$49

Greenhouse solar3d model
...greenhouse solar3d model cgstudio orangery hothouse warm house glasshouse hotbed seedbed glass metal conservatory frame lamp plant seedlings seed...
3d_ocean
$19

Green House Low poly 3d model
...brick conservatory flowering garden gardening glass glazing greenhouse grow hotbed old plants summerhouse a 3d model of a low...
thingiverse
free
Hotbed clip by El_Ingeniero
...hotbed clip by el_ingeniero
thingiverse
hotbed clip
thingiverse
free
hotbed clip by xfred
...hotbed clip by xfred
thingiverse
hotbed clip
thingiverse
free
hotbed mount by Aganyte
...hotbed mount by aganyte
thingiverse
hotbed mount for "print-rite" 3d printer (and probably others)
thingiverse
free
Anycubic i3 Mega Hotbed Protector
...anycubic i3 mega hotbed protector
thingiverse
protect the glass hotbed and reduce deformation of the hotbed
Sidewinder
turbosquid
$20
Missile sidewinder
...
royalty free 3d model missile sidewinder for download as obj on turbosquid: 3d models for games, architecture, videos. (1407825)
turbosquid
$10

Aim 9 Sidewinder
...del aim 9 sidewinder for download as blend, stl, obj, and fbx on turbosquid: 3d models for games, architecture, videos. (1639038)
turbosquid
$3

AIM_9B Sidewinder Missle
... available on turbo squid, the world's leading provider of digital 3d models for visualization, films, television, and games.
turbosquid
free

Sidewinder Submachine Gun
... available on turbo squid, the world's leading provider of digital 3d models for visualization, films, television, and games.
turbosquid
free
AIM-9 Sidewinder
... available on turbo squid, the world's leading provider of digital 3d models for visualization, films, television, and games.
turbosquid
$3

AIM-9L-M SIDEWINDER
...royalty free 3d model aim-9l-m sidewinder for download as fbx on turbosquid: 3d models for games, architecture, videos. (1638522)
3d_export
$10

sidewinder missile
... height, rough, and metal.<br>https://stgbooks.blogspot.com/<br>please note: this may, or may not 3d print. untested.
humster3d
$75

3D model of Vetex Sidewinder ATX 3000 Forklift 2011
... vetex sidewinder atx 3000 forklift 2011 in various file formats. all our 3d models were created maximally close to the original.
cg_studio
$30
aim-9 missle3d model
...aim-9 missle3d model cgstudio military aim-9 aim sidewinder missle air usaf f-15 f-16 f-14 f-117 amraam bomb...
cg_studio
$29
Matra R550 Magic 23d model
...cgstudio matra r550 r.550 magic 2 ii missile air sidewinder jet military aircraft force navy europe .3ds .lwo .max...
X1
design_connected
$11

X1
...x1
designconnected
dränert x1 chairs computer generated 3d model. designed by oswald mathias ungers.
3ddd
$1

Leica X1
...leica x1
3ddd
leica , фотоаппарат
leica x1 profi
turbosquid
$15
sofa x1
...turbosquid
royalty free 3d model sofa x1 for download as max on turbosquid: 3d models for games, architecture, videos. (1283096)
3ddd
$1

Francis Francis X1
...francis francis x1
3ddd
кофемашина
кофемашина francis francis x1
3d_export
$5

X1 3D Model
...x1 3d model
3dexport
x1
x1 3d model download .c4d .max .obj .fbx .ma .lwo .3ds .3dm .stl gorgsalvatore 106035 3dexport
turbosquid
$55

Nokia X1
... available on turbo squid, the world's leading provider of digital 3d models for visualization, films, television, and games.
turbosquid
$13

Nokia X1
... available on turbo squid, the world's leading provider of digital 3d models for visualization, films, television, and games.
turbosquid
$1

X1 Airplane
... available on turbo squid, the world's leading provider of digital 3d models for visualization, films, television, and games.
3d_export
$55

Nokia X1 3D Model
...nokia x1 3d model
3dexport
nokia x1 phone smartphone mobile
nokia x1 3d model fedia 45159 3dexport
3ddd
$1
Wood x1
...wood x1
3ddd
размер 1024-1024 бесшовная 8-)
Guide
turbosquid
$15
Guide drawer
...squid
royalty free 3d model guide drawer for download as dwg on turbosquid: 3d models for games, architecture, videos. (1261387)
turbosquid
$1
Road Guide
... available on turbo squid, the world's leading provider of digital 3d models for visualization, films, television, and games.
archive3d
free
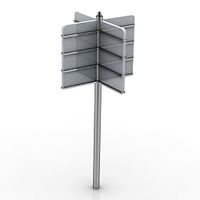
Guide-board 3D Model
...ion sign guide sign
guide-board n170112 - 3d model (*.gsm+*.3ds) for exterior 3d visualization.
turbosquid
$2
soap cutter guide
...
royalty free 3d model soap cutter guide for download as stl on turbosquid: 3d models for games, architecture, videos. (1694030)
turbosquid
$15
Blind Guiding tiles
...free 3d model blind guiding tiles for download as 3dm and dae on turbosquid: 3d models for games, architecture, videos. (1156598)
turbosquid
$69

Japanese Tour Guide
...d model japanese tour guide for download as max, fbx, and obj on turbosquid: 3d models for games, architecture, videos. (1614288)
turbosquid
$10
CNC Linear Guide
... available on turbo squid, the world's leading provider of digital 3d models for visualization, films, television, and games.
turbosquid
$1
Tank Model Guide
... available on turbo squid, the world's leading provider of digital 3d models for visualization, films, television, and games.
turbosquid
$1
Road Guide 2
... available on turbo squid, the world's leading provider of digital 3d models for visualization, films, television, and games.
3d_ocean
$9

Guide Books 3
...sformed separately and each have unique texture map on front and back cover. to make your work easier this model comes in thre...
Cable
3d_export
free

Cables
...cables
3dexport
cables for your purposes
3d_export
free
cable belt for cable organization
...ze your cables in 3d printers. it will bend only to one direction. the area to put the cables per piece is aprox. 1,6cmx2,6cmx1cm
3d_ocean
$16
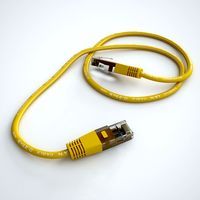
Ethernet Cable
...ethernet cable
3docean
cable computer electronics ethernet internet network connected
ethernet cable 3d model
3d_export
$65

cable
...cable
3dexport
simple rendering of the scene file
turbosquid
$14

Cable
...l cable for download as ma, max, fbx, 3ds, gltf, obj, and stl on turbosquid: 3d models for games, architecture, videos. (1631358)
3ddd
$1
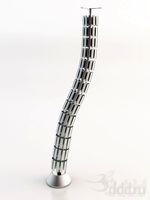
Cable Cover
...cable cover
3ddd
кабель
vertebra passacavo - cable cover
max + vray 2.20.03
3d_export
$15
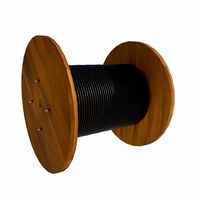
Cable reel
...without cable. textures 4k 4096x4096 targa, png, jpeg.<br>number of polygons without cable: 2896<br>with cable: 35328
3d_export
$7

short cable
...short cable
3dexport
rubber cord. very detailed. cable thickness: 2.55 mm total length: 55mm
3d_export
$5

USB CABLE
...usb cable
3dexport
turbosquid
$30
Cable Reels
...osquid
royalty free 3d model cable reels for download as fbx on turbosquid: 3d models for games, architecture, videos. (1439507)