Thingiverse
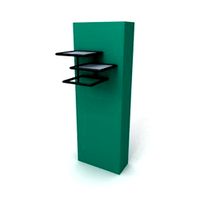
Shelf-mount hanging spool holder by Cova
by Thingiverse
Last crawled date: 3 years ago
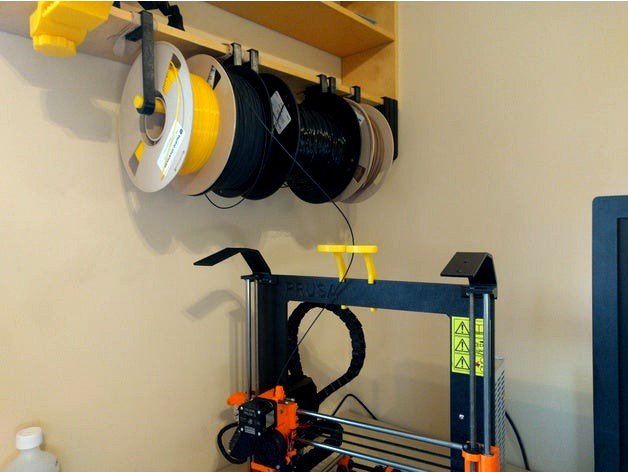
A filament spool hanger designed to mount on the edge of a shelf - it can be used just to store your filament, or if the shelf is close by you can feed your printer directly from the spools where they hang. I wanted to keep it simple, flexible, and 100% printable - no metal parts are required (bearings, rods, etc.). But if you want to combine some metal parts into your implementation these hangers will work with that too. The STLs included here are sized to fit the shelf above my printer, but the design is fully parametric so you can use the Thingiverse Customizer to fit them to whatever size shelf and spools you happen to have, within the limits of your printer of course.
There are 5 separate components all potentially generated from the single design - I recommend letting the customizer generate all of the ones you need together to ensure they are all compatible, and then using your slicing software to separate them for making multiple copies of some, or printing different parts with different settings.
If you would like to see additional mount options for the top part of the hanger, please leave me a comment describing it. I'm currently considering doing options for screwing it to a horizontal or vertial surface, or to clamp around a piece of extrusion.
I've left it tagged as a work in progess for now, although at least for my needs I consider it finished. But I haven't tested every combination of odd parameters that people might want to use and its possible that some combination will cause a bug. Once I've seen a bunch of other customized versions go through and have more confidence I will remove the tag.
List of included parts
The Clamp
The clamp is the main part, designed to slide over the edge of a shelf and hang down with a hook at the bottom - you will need at least two of them (one on each end of a rod). The hook at the bottom is sized to grab a rod of the configured diameter, but in my testing these clamps are strong enough that if you used a longer non-printed rod (say a metal threaded rod) you could easily hang 10+ spools from just a single pair of hangers. Regardless of what kind of rod you plan to use - entering the correct dimension in the customizer will ensure that the hooks get a good grip on it. For my use, I printed the clamps in PETG, at 0.2mm layers, 3 perimiters, and 20% infill - and I can pull with all my strength and cannot break them with pulling force alone.
The Screw
The screw part is designed to thread through the bottom of the clamp, and clamp it against the shelf. Not much else to say about it. I had a few minor issues with snapping them, and so printed them at 90% infill, but otherwize the same settings as the clamps. For a better grip on the shelf, I also printed mine with a filament-change 3 layers before the top, doing the top three layers in a flexible filament to be squeezed against the shelf.
The Rod
The rod again is very simple - just a rod. The default diameter of 16mm matches the size of the studs on the stock Prusa Original i3 MK2 spool holders, and also the size of the cups on my modified MK2 spool holders, so I kept that size here too so that I could re-use my existing rods. I print them at 0.35mm thick layers and with a 10mm brim, keeping the 3 perimiters and 20% infill as the clamp. I recommend making these as tall as your printer is capable of printing. Or as an option use a metal or wood rod to go even longer - just remember to still set the customizer for the correct diameter as it is also used in the hook on the clamp part.
Optional: The Gasket
The gasket is a single-layer-thick (0.2mm) square of material sized to fit inside the clamp - its purpose it to help give the clamp better grip on the shelf. I print these out of flexible material and then superglue it under the top of the clamp, so that the weight presses it down onto the shelf. If you find your clamps slide too easily on your shelves you can use these, or can use any other high-friction material to stuff in there - I've also used paper-towel folded over a few times which is also quite effective.
Optional: The Test
The test object is just a threaded nut, where the threads have exactly the same parameters as the threads in the bottom of the clamp. If you are customizing the screw and want to test if your threads will work without having to print an entire clamp, you can save some time and plastic by printing the test object. It has no other purpose and is not designed to be used in the final assembled clamp. For accurate testing, print it with the same settings you intend to use for your clamp, and leave it oriented as it is. The clamp threads will be printed at that orientation where the overhang/bridging at the top can cause issues with the threads, which is the primary thing that needs to be caught in testing.
Similar models
thingiverse
free

Filament spool hanger by moose4621
...g several spools together.
for best results, use with my threaded filament spool holder: http://www.thingiverse.com/thing:1025147
thingiverse
free

Rod Hanger for Workbench by Dingo_aus
...ow a shelf.
can be used to organise spools or hook up wire for soldering.
would also work well for ribbon, thread spools etc.
thingiverse
free

Filament holder - customizable spool by hackermagnet
...r.stl and 1 for the bearing_holder.stl)
3xm5 threaded rods (about 70mm)
3xm5x30mm hex screws (for the filament_bracket)
9xm5 nuts
thingiverse
free

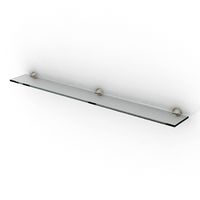
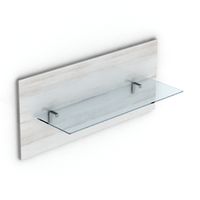
Filament Spool Shelf Hanger
...d: extended the connection to the shelf. can connect to the shelf with a screw, or existing pin hole. stays better on the shelf
thingiverse
free

Sky Hook Hook by kludgineer
...pen coil. this hook allows me to easily hang my sky hook from the same rod that normally holds my filament spools while printing.
thingiverse
free

Shelf spool holder by Jmagon
...f. i'm uploading the solidworks files so you can change the desing if you need to.
use a threaded rod (up to m10) and 4 nuts
thingiverse
free

Cobblebot Little Monster Spool Holder by Phelps3D
... part with the washer and then nut. you can adjust it to the tension you desire so the spool will easily turn on the clamp parts.
thingiverse
free

Filament spool centerer for M8 threaded rods(Anet A8) by ir0nm8n
..., this fixes that.
you need 2 m8 nuts, to thread these properly, the filament then is clamped between these two parts (print two)
thingiverse
free

Twisted S-Hook For Hanging Filament by Bioluminescence
...m your typical wardrobe hanging rod.
or you may use it for something else - perhaps you have some other use for a twisted s-hook.
thingiverse
free

Filament Spool Rack - hangs from a Closet Clothing Rod by Chris918
...brackets (6 pieces total) to hang a 3 foot long 5/16 threaded rod. my setup is easily capable of supporting 8 spools of filament.
Cova
thingiverse
free

Spool Holder for 3030 Extrusion by Cova
... this that should be tall enough to fit the colorfabb xl spools. i don't have such a spool so haven't tested it myself.
3d_sky
$8

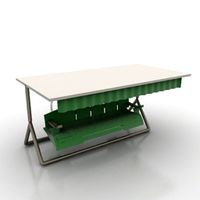
Visor 22
...visor 22 3dsky forging visor cova ...
thingiverse
free

3/8" Marble for the 3D Marble Maze by Cova
...ides down, and a small pin to help align the two halves.
i've also included the openscad file i used to generate both models.
thingiverse
free

Cut off Prusa Original i3 MK2 Extruder Cover by Cova
...39;s possible that other users who are designing alternate part cooling solutions may also want to use it - obviously, feel free.
thingiverse
free

1KG Twist-Lock Masterspool by Cova
...ll get better instructions on how to put them together and take them back apart eventually - but its not that hard to figure out.
thingiverse
free

Yet another Original Prusa i3 MK2 Spool Holder by Cova
...sults in matching grooves in both the rod and top of the arms and with the weight of a spool pressing down it all just stays put.
thingiverse
free

Original Prusa i3 MK2 Alternate Part Cooling Nozzle by Cova
...s titan extruder upgrade kit for the mk2: http://www.thingiverse.com/thing:2065461 - that was the inspiration behind this design.
thingiverse
free

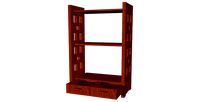
Recycled spools dresser by italymaker
...dresser by italymaker thingiverse this design is from danilo cova from como (italy), one of the great makers of...
thingiverse
free

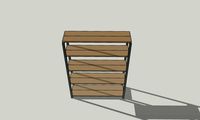
Improved recycled spools dresser, double, containers & drawer with spacers by almaro
...or reduce a section. this design is from danilo cova from como (italy), one of the great makers of...
Spool
3ddd
$1

spool c53301
...spool c53301
3ddd
spool
spool c53301 650х350х145
turbosquid
$3

Cable Spool
...royalty free 3d model cable spool for download as max and fbx on turbosquid: 3d models for games, architecture, videos. (1457009)
turbosquid
free

Pallets and Spool
... available on turbo squid, the world's leading provider of digital 3d models for visualization, films, television, and games.
turbosquid
$10

Spool of String
...ol of string pink for download as c4d, 3ds, fbx, obj, and stl on turbosquid: 3d models for games, architecture, videos. (1647892)
3ddd
$1

Подвесные светильники Spool
...ye/podvesnoy_svetilnik_spool_d320/ http://www.cosmorelax.ru/catalog/podvesnyye/podvesnoy_svetilnik_spool_d420/
3ddd
free

Spool 001 sofa
...spool 001 sofa
3ddd
roda
roda
collection spool
design rodolfo dordoni
dimensions:
lenght 90 cm
depth 94 cm
height 79 cm
turbosquid
$95
wire spools 3ds
... available on turbo squid, the world's leading provider of digital 3d models for visualization, films, television, and games.
turbosquid
$20
spool of TV wire
... available on turbo squid, the world's leading provider of digital 3d models for visualization, films, television, and games.
turbosquid
$3

Simple and Fast Spool Holder
...ree 3d model simple and fast spool holder for download as stl on turbosquid: 3d models for games, architecture, videos. (1548546)
turbosquid
$1

Big Spool for small printer
...free 3d model big spool for small printer for download as stl on turbosquid: 3d models for games, architecture, videos. (1556605)
Hanging
3d_export
$5

hanging lamp
...hanging lamp
3dexport
this is the hanging lamp
3d_export
free

hanging gardens
...hanging gardens
3dexport
hanging gardens
3d_export
$20

hanging chair
...hanging chair
3dexport
hanging chair polycount: 600.000
3ddd
$1

Hanging Chair
...hanging chair
3ddd
подвесное
hanging chair wood , textures included
3d_ocean
$15
Hanging Ceiling
...ling
3docean
attic ceiling cloth garret hanging loft
it’s a hanging ceiling for interiors. i made it from box and use simulation.
3ddd
$1

Hanging Lamp
...hanging lamp
3ddd
подвесной
hallo this is my new 3d model, hanging lamp
3ddd
$1
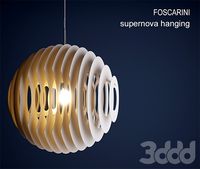
Supernova Hanging
...va hanging
3ddd
supernova hanging , foscarini
спасибо авторам моделей взятых для привью.
3d_export
$12

modern hanging painting
...modern hanging painting
3dexport
modern hanging painting
archive3d
free
Hang 3D Model
...archive3d
hang awning shed
hang n101207 - 3d model (*.gsm+*.3ds) for interior 3d visualization.
3d_export
$10

modern hanging painting
...modern hanging painting
3dexport
modern hanging painting vr4.1
Shelf
3d_ocean
$6

Shelf
...shelf
3docean
furniture shelf
a lowpoly shelf .
turbosquid
$7
Shelf
...helf, bookshelf,cafe shelf,decor, for download as max and ige on turbosquid: 3d models for games, architecture, videos. (1427685)
archibase_planet
free
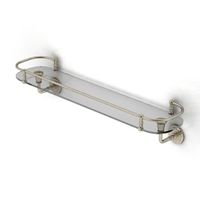
Shelf
...shelf
archibase planet
shelf rack glass shelf
shelf - 3d model (*.gsm+*.3ds) for interior 3d visualization.
archibase_planet
free
Shelf
...shelf
archibase planet
shelf rack glass shelf
shelf - 3d model (*.gsm+*.3ds) for interior 3d visualization.
3d_ocean
$3
Shelf
...shelf
3docean
shelf
a high quality shelf with high resolution texture
3d_export
$5
shelf
...shelf
3dexport
shelf
3d_export
$5

Shelf
...shelf
3dexport
shelf
archibase_planet
free
Shelf
...shelf
archibase planet
shelf shelving glass shelf
shelf 1 - 3d model (*.gsm+*.3ds) for interior 3d visualization.
archibase_planet
free
Shelf
...shelf
archibase planet
shelfs shelving bookshelf
shelf - 3d model for interior 3d visualization.
archibase_planet
free
Shelf
...shelf
archibase planet
shelf shelving bookcase
shelf - 3d model for interior 3d visualization.
Holder
archibase_planet
free

Holder
...holder
archibase planet
holder toilet paper holder
holder paper n070712 - 3d model (*.gsm+*.3ds) for interior 3d visualization.
archibase_planet
free

Holder
...e planet
holder rack toilet paper holder
holder toilet roll n240715 - 3d model (*.gsm+*.3ds+*.max) for interior 3d visualization.
archibase_planet
free

Holder
...holder
archibase planet
pen holder support prop
pen holder - 3d model for interior 3d visualization.
archibase_planet
free

Holder
...holder
archibase planet
pole post holder
сhurch cross pole holder - 3d model for interior 3d visualization.
archibase_planet
free

Holder
...holder
archibase planet
holder bathroom ware
shower holder - 3d model (*.gsm+*.3ds) for interior 3d visualization.
archibase_planet
free

Holder
...oilet paper holder
holder paper devon&devon; time black n241113 - 3d model (*.gsm+*.3ds+*.max) for interior 3d visualization.
archibase_planet
free

Holder
...holder
archibase planet
holder hanger hanger for towel
holder 7 - 3d model (*.gsm+*.3ds) for interior 3d visualization.
archibase_planet
free

Holder
...holder
archibase planet
holder hanger hanger for towel
holder 3 - 3d model (*.gsm+*.3ds) for interior 3d visualization.
archibase_planet
free

Holder
...holder
archibase planet
holder towel rack towel-horse
holder - 3d model (*.gsm+*.3ds) for interior 3d visualization.
archibase_planet
free

Holder
...lder
archibase planet
holder hanger hanger for towel
holder towel n250912 - 3d model (*.gsm+*.3ds) for interior 3d visualization.
Mount
3d_export
free

mounting bracket
...mounting plate is the portion of a hinge that attaches to the wood. mounting plates can be used indoors, cabinetry and furniture.
turbosquid
$2

MOUNTING
... available on turbo squid, the world's leading provider of digital 3d models for visualization, films, television, and games.
turbosquid
free

Mounts
... available on turbo squid, the world's leading provider of digital 3d models for visualization, films, television, and games.
turbosquid
free

Mount Fuji
...fuji
turbosquid
free 3d model mount fuji for download as obj on turbosquid: 3d models for games, architecture, videos. (1579977)
3d_export
$5

Headphone mount LR
...headphone mount lr
3dexport
headphone mount l+r
turbosquid
$39

Mount rainier
...quid
royalty free 3d model mount rainier for download as fbx on turbosquid: 3d models for games, architecture, videos. (1492586)
turbosquid
$5

pipe mounting
...quid
royalty free 3d model pipe mounting for download as obj on turbosquid: 3d models for games, architecture, videos. (1293744)
turbosquid
$3

Mounting Tires
...uid
royalty free 3d model mounting tires for download as fbx on turbosquid: 3d models for games, architecture, videos. (1708511)
3d_export
$5

Magnetic GoPro Mount
...pro mount
3dexport
cool magnetic mount for gopro. allows you to mount the camera on flat metal surfaces and get exclusive shots.
turbosquid
$5

Stone Mount
...ty free 3d model stone mount for download as ma, obj, and fbx on turbosquid: 3d models for games, architecture, videos. (1370306)