Thingiverse
Settlers storage box (laser-cutter & 3d printing) by Dakanzla
by Thingiverse
Last crawled date: 3 years ago
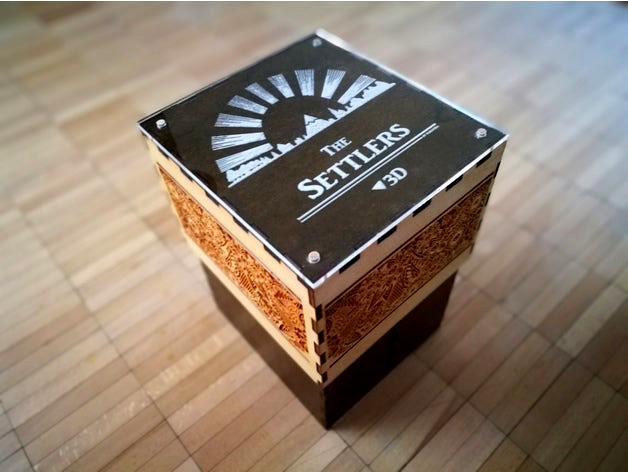
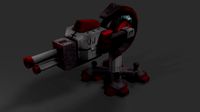
After having made my new settlers version 2.0 (https://www.thingiverse.com/thing:2525047) I wanted to create a storage box for those tiles that would look a little less "industrial" than the fully 3d-printed one I allready made (https://www.thingiverse.com/thing:1482713).
As we do have a great fablab in town (https://www.fablabs.io/labs/map) where you can use a lot of different tools, I decided to create a new box that can be made with a laser cutter and this is the result, with that I'm pretty happy with :-)
IMPORTANT: Before you start this project, make sure that you use materials (wood & acrylic-glass) with a thickness of 5 mm!
I used Inkscape (freeware) to make those models and to convert them to a format for the lasercutter. You can use this program to open the attached .svgz-files.
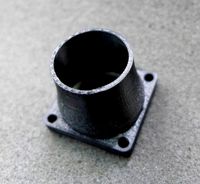
There are as well some 3d-printed parts that come along with the design. These are the parts you need to print:
1 x storage card holder
1 x storage card holder – badge (to be glued together with the storage card holder)
1 x set of storage player parts
1 x storage center part (single- or multicolored)
2 x storage core parts (one piece or two splitted ones)
For the lasercutter you need the following parts to cut / engrave with a material thickness of 5 mm:
1 x top plexiglass: Use acrylic-glass, cut the outer parts and do engrave the writing and the picture
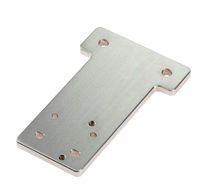
1 x top-part: Cut the outer parts and engrave the flower-ornaments
1 x middle-part: Cut the outer- and inner-parts
2 x bottom-parts: Cut the outer- and inner-parts
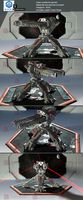
ASSEMBLING :
Here's a short description how I assembled those parts :
Sand all the parts after having them cutted with the laser-cutter
Apply a layer of wood stain to all parts, except the sides with the flower-ornaments and the acrylic-glass of course and let everything dry
Sand all the parts (not with to much pressure, just to make them smooth)
Use glue to put all the parts together by applying the glue on the "outer-spikes" of each part. Make sure you enter the two 3d-printed parts (storage core) inside the wooden bottom-parts before closing them in with the front-pieces!
Apply 3 layers of clear coat to all the wooden parts and let them dry
For the top-part you need some extra 6 mm round wood. Cut 4 parts with a lenght of 1 cm. Then turn around the engraved acrylic-glass and place it on top of the wooden top-part. Then insert the round wood-parts in the four wholes by adding some glue.
Don't hesitate to ask me questions about how to build this box if the description should not be clear enough.
Big THX to Kurt who helped me build this project by teaching me how to use a laser cutter and how to generate the models. Fablab bern roules :-)
As we do have a great fablab in town (https://www.fablabs.io/labs/map) where you can use a lot of different tools, I decided to create a new box that can be made with a laser cutter and this is the result, with that I'm pretty happy with :-)
IMPORTANT: Before you start this project, make sure that you use materials (wood & acrylic-glass) with a thickness of 5 mm!
I used Inkscape (freeware) to make those models and to convert them to a format for the lasercutter. You can use this program to open the attached .svgz-files.
There are as well some 3d-printed parts that come along with the design. These are the parts you need to print:
1 x storage card holder
1 x storage card holder – badge (to be glued together with the storage card holder)
1 x set of storage player parts
1 x storage center part (single- or multicolored)
2 x storage core parts (one piece or two splitted ones)
For the lasercutter you need the following parts to cut / engrave with a material thickness of 5 mm:
1 x top plexiglass: Use acrylic-glass, cut the outer parts and do engrave the writing and the picture
1 x top-part: Cut the outer parts and engrave the flower-ornaments
1 x middle-part: Cut the outer- and inner-parts
2 x bottom-parts: Cut the outer- and inner-parts
ASSEMBLING :
Here's a short description how I assembled those parts :
Sand all the parts after having them cutted with the laser-cutter
Apply a layer of wood stain to all parts, except the sides with the flower-ornaments and the acrylic-glass of course and let everything dry
Sand all the parts (not with to much pressure, just to make them smooth)
Use glue to put all the parts together by applying the glue on the "outer-spikes" of each part. Make sure you enter the two 3d-printed parts (storage core) inside the wooden bottom-parts before closing them in with the front-pieces!
Apply 3 layers of clear coat to all the wooden parts and let them dry
For the top-part you need some extra 6 mm round wood. Cut 4 parts with a lenght of 1 cm. Then turn around the engraved acrylic-glass and place it on top of the wooden top-part. Then insert the round wood-parts in the four wholes by adding some glue.
Don't hesitate to ask me questions about how to build this box if the description should not be clear enough.
Big THX to Kurt who helped me build this project by teaching me how to use a laser cutter and how to generate the models. Fablab bern roules :-)
Similar models
thingiverse
free

Storage cities & knights 2.0 by Dakanzla
...out how to build this box if the description should not be clear enough.
big thx to kurt and our fablab in bern. they roule! :-)
thingiverse
free

Storage seafarers 2.0 by Dakanzla
...bout how to build this box if the description should not be clear enough.
big thx to kurt and our fablab in bern. they roule! :-)
thingiverse
free

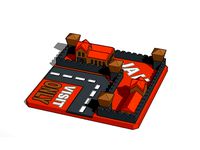
Storage moe's low poly by Dakanzla
... who helped me build this project by teaching me how to use a laser cutter and how to generate the models. fablab bern roules :-)
thingiverse
free

Board moe's low poly by Dakanzla
... who helped me build this project by teaching me how to use a laser cutter and how to generate the models. fablab bern roules :-)
thingiverse
free
Laser Cut 5 SD Cards Storage Case by bratan
...ng, let it dry a little and wipe it off.
repeat until enough paint filled the engraving. wipe again with slightly moistened rug.
thingiverse
free

Strike Box by Sprung
...ose the area. i also have the directions, to be engraved on the inside of the lid.
you will need to wood glue the parts together.
thingiverse
free

Decrotive Dice. Laser cut, wood or acrylic by TexasLaser
...nside. use them for whatever creative idea you come up with.
parts box
flower pot
lamp shade
.svg and .cdr versions uploaded
thingiverse
free

Crystal Dolphin LED Stand by perpdesign
...panel on front of box
-insert acrylic
i used a 100 w laser cutter for this, with a light vector engraving for the wood / acrylic.
thingiverse
free

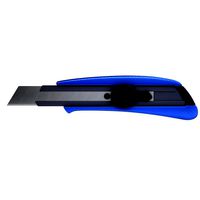
Laser Cut Box cutter blade holder acrylic cutter by phana007
...e this for box cutting and scoring acrylic sheets to break apart. i've added the 123d design file for you to make amendments.
thingiverse
free

Card Holder w/ Laser Cut/Engraved Plate by Madyn3D-CNC_LLC
...
thingiverse
just a basic card holder. if you have a laser cutter you can create custom plates and attach them with m3/m4's.
Dakanzla
thingiverse
free
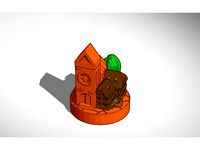
jail by Dakanzla
...verse
overview: https://www.thingiverse.com/thing:2893324
open design in tinkercad: https://www.tinkercad.com/things/5fezh5g6gb0
thingiverse
free

start by Dakanzla
...verse
overview: https://www.thingiverse.com/thing:2893324
open design in tinkercad: https://www.tinkercad.com/things/4xtoe11fm8i
thingiverse
free

gold by Dakanzla
...iew: https://www.thingiverse.com/thing:3072272
print 2 ore
open design in tinkercad: https://www.tinkercad.com/things/3srax43ofkx
thingiverse
free

hotel by Dakanzla
...thingiverse.com/thing:2893324
print 12 hotels for the game
open design in tinkercad: https://www.tinkercad.com/things/jbvibq1evpl
thingiverse
free

house by Dakanzla
...thingiverse.com/thing:2893324
print 32 houses for the game
open design in tinkercad: https://www.tinkercad.com/things/9spnu3bb0m4
thingiverse
free
settlement by Dakanzla
...erse.com/thing:2525047
print 5 settlements for each player
open design in tinkercad: https://www.tinkercad.com/things/anztrd1nr0x
thingiverse
free

crossing by Dakanzla
...verse.com/thing:2525047
print 10 crossings for each player
open design in tinkercad: https://www.tinkercad.com/things/izzkptm0xlw
thingiverse
free

road by Dakanzla
...ingiverse.com/thing:2525047
print 15 roads for each player
open design in tinkercad: https://www.tinkercad.com/things/bzisnjkafex
thingiverse
free

city by Dakanzla
...ingiverse.com/thing:2525047
print 4 cities for each player
open design in tinkercad: https://www.tinkercad.com/things/ectp1wisgli
thingiverse
free

chance by Dakanzla
...iverse.com/thing:2893324
print 3 chance-parts for the game
open design in tinkercad: https://www.tinkercad.com/things/hgyi19uivzr
Settlers
3d_export
$5

cat american shorthair
...from european cats brought to north america by early settlers to protect valuable cargo from mice and rats. according...
3d_export
free

Waste Disposal Landscape OBJ FBX DAE
...and junkers who live in the trash mounds, or settlers foraging in the mountains of trash for anything worth...
3d_export
$15

xemu boots
...the colonization of the planet mars continues. groups of settlers from the earth live in small settlements, especially in...
3d_export
$20

boston cityscape in 3ds and obj format
...founded on the shawmut peninsula in 1630 by puritan settlers from england. it was the scene of several key...
thingiverse
free

Settlers of Catan by lominsky
...settlers of catan by lominsky
thingiverse
a 3d printable settlers of catan board with interlocking pieces.
thingiverse
free

Settlers of Catan - Winterfell by walterromans
...settlers of catan - winterfell by walterromans
thingiverse
so yea the winterfell in settlers of catan.
thingiverse
free

Settlers of Catan Ship by sidhappens
...settlers of catan ship by sidhappens
thingiverse
ship model for settlers of catan expansion pack
thingiverse
free

Pieces for Settlers of Catan
...an
thingiverse
don't be limited by the colors in the box, print your own pieces for settlers of catan in any color you like!
thingiverse
free

Settlers of Catan player pieces holder
...layer pieces holder
thingiverse
these are containers for a players roads, cities, and settlements for the game settlers of catan
thingiverse
free

settlers of catan desert remix (magnetic)
...catan- desert tile 01" and put it on a magnetic base from the magnetic settlers design and added some structure to the sand.
Cutter
archibase_planet
free
Cutter
...cutter
archibase planet
cutter mill milling cutter
cutter 2 n050712 - 3d model (*.gsm+*.3ds) for interior 3d visualization.
3d_export
$10
pipe cutter
...pipe cutter
3dexport
pipe cutter
3d_export
$8
Grass Cutter
...grass cutter
3dexport
grass cutter
turbosquid
$5

Cutter
...alty free 3d model cutter for download as ige, stl, and sldpr on turbosquid: 3d models for games, architecture, videos. (1505202)
turbosquid
$29
Cutter
... available on turbo squid, the world's leading provider of digital 3d models for visualization, films, television, and games.
turbosquid
$15

Cutter
... available on turbo squid, the world's leading provider of digital 3d models for visualization, films, television, and games.
turbosquid
$9
Cutter
... available on turbo squid, the world's leading provider of digital 3d models for visualization, films, television, and games.
turbosquid
$3
cutter
... available on turbo squid, the world's leading provider of digital 3d models for visualization, films, television, and games.
turbosquid
$1
cutter
... available on turbo squid, the world's leading provider of digital 3d models for visualization, films, television, and games.
turbosquid
free

Cutter
... available on turbo squid, the world's leading provider of digital 3d models for visualization, films, television, and games.
Laser
3d_export
$5
laser
...laser
3dexport
a 3d laser
3d_export
free
cnc 3dp laser nozzle for 2w laser opt lasers
...logy that gave birth to cutting and engraving laser heads this laser nozzle was designed for, read the article in the link below:
3d_export
free
cnc laser mount opt lasers
...eive the engraving and cutting laser heads this cnc machine laser mount was designed for, read the article on the following page:
turbosquid
$20
Laser
... available on turbo squid, the world's leading provider of digital 3d models for visualization, films, television, and games.
turbosquid
$15
Laser
... available on turbo squid, the world's leading provider of digital 3d models for visualization, films, television, and games.
turbosquid
$3
Laser
... available on turbo squid, the world's leading provider of digital 3d models for visualization, films, television, and games.
3d_export
$5

laser sword
...laser sword
3dexport
it is a blue laser sword with a metal frame
3d_ocean
$19
Laser Turret
...be used in any sf type of game, especially in tower defense games. - laser turret: 3025 polygons - props: 270 polygons - textu...
3d_export
free
workbee cnc laser mount for opt lasers
...the specifications of engraving and cutting laser heads this mount was designed for, please take a look at the following website:
3d_export
free

shapeoko cnc laser mount for opt lasers
...ind out the opportunities that adding a cutting and engraving laser head to your cnc can bring, take a look at the website below:
Storage
archibase_planet
free

Storage
...storage
archibase planet
shelf locker shelving
overhead storage unit - 3d model for interior 3d visualization.
turbosquid
$3

storage
...id
royalty free 3d model storage for download as stl and ipt on turbosquid: 3d models for games, architecture, videos. (1249483)
3d_export
$5

Oil storage
...oil storage
3dexport
big oil storage or barrel or storage tank 2 formats lwo & obj
turbosquid
$15

storage
... available on turbo squid, the world's leading provider of digital 3d models for visualization, films, television, and games.
turbosquid
$15

storage
... available on turbo squid, the world's leading provider of digital 3d models for visualization, films, television, and games.
turbosquid
$12

storage
... available on turbo squid, the world's leading provider of digital 3d models for visualization, films, television, and games.
3ddd
$1

Storage Baskets
...storage baskets
3ddd
restoration hardware , корзина
restoration hardware storage baskets
3d_export
$5

water tank of storage-tank oiltanker storage
...ater tank of storage-tank | oiltanker storage can be used in ed model environment. this low poly water tank can be used for free.
archive3d
free

Storage 3D Model
...3d model
archive3d
storage shelving furniture
storage - 3d model for interior 3d visualization.
3d_export
$8

chain storage wheel
...chain storage wheel
3dexport
chain storage wheel
Box
archibase_planet
free

Box
...box
archibase planet
box carton cardboard box
box 2 - 3d model (*.3ds) for interior 3d visualization.
archibase_planet
free

Box
...box
archibase planet
carton cardboard box box
box 1 - 3d model (*.3ds) for interior 3d visualization.
3d_export
$6

box
...box
3dexport
box
3d_export
$5

Box
...box
3dexport
box
3d_export
$5

box
...box
3dexport
box
3d_export
$5

box
...box
3dexport
box
archibase_planet
free

Box
...box
archibase planet
box box for paper notebook pencil
box - 3d model (*.gsm+*.3ds) for interior 3d visualization.
archibase_planet
free

Box
...box
archibase planet
box carton cardboard box
box n170111 - 3d model (*.gsm+*.3ds) for interior 3d visualization.
archibase_planet
free

Box
...box
archibase planet
box carton cardboard box
box n050411 - 3d model (*.gsm+*.3ds) for interior 3d visualization.
archibase_planet
free

Boxes
...boxes
archibase planet
boxes box case bin
boxes n281213 - 3d model (*.gsm+*.3ds+*.max) for interior 3d visualization.
Printing
design_connected
$27

...print
designconnected
moroso print computer generated 3d model. designed by wanders, marcel.
3ddd
free

Eichholtz Prints
...- eichholtz print central station i
13 - eichholtz print central station ii
14 - eichholtz print marisa
15 - eichholtz print tish
3ddd
$1

Eichholtz Prints
...print abstract - set of 2
10 - eichholtz print orange abstract
11 - eichholtz print buddha right
12 - eichholtz print buddha left
turbosquid
$1

... available on turbo squid, the world's leading provider of digital 3d models for visualization, films, television, and games.
3ddd
free

Eichholtz Prints
...of 4
2 - print dunbar 2 set of 4
3 - print guadeloupe 1 set of 4
4 - print guadeloupe 2 set of 4
5 - print giles
6 - print trett
3ddd
$1

Eichholtz Prints
...nt tutti frutti
3 - eichholtz prints watson - set of 2
4 - eichholtz prints antique nautilus - set of 2
5 - eichholtz print tiara
3d_export
$5

Monster for printing
...monster for printing
3dexport
monster 3d model printing
3ddd
free

printed rug
...printed rug
3ddd
ковер
very creative printed rug
3ddd
free

Eichholtz Prints
...иал: бумага
габариты (вхш): 72 x 62 см
описание: print sweetmeat - постер в деревянной раме.
3 - prints varsity set of 2
арти
3ddd
free

Art Print Posters
...art print posters
3ddd
прованс
art print posters by patrician prints