Thingiverse
Servo Tester Case by MakerDan55
by Thingiverse
Last crawled date: 3 years ago
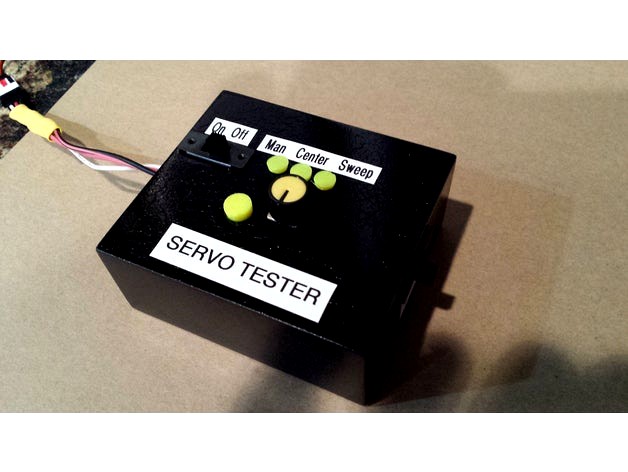
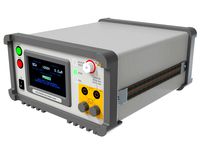
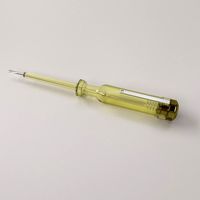
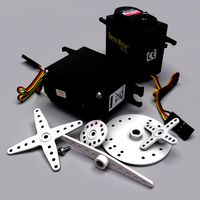
I purchased the servo tester shown in the photo from the internet. It works well but requires a power source to operate which leads to more wires on my workbench that can get in the way. I built a case for this tester that lets you mount a battery pack inside so the unit is mobile.
If you want to build this, do the following:
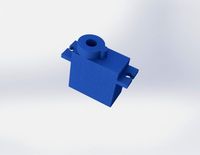
Print out all parts. I printed the button and led covers in a lighter color (I found the leds in this unit to be extremely bright so I wanted to diffuse the light by making covers). I have included the 123D files so you can resize the switch openings to suit the switches you may have lying around.
Take apart the blue plastic case the servo controller came in and pull the circuit board off of the rubberized pad it is attached to.
I only need to test one servo at a time so I used a pair of wire cutters and cut off the top two rows of servo headers from the circuit board as shown in the photos (the top 2 rows also get in the way of the new case).
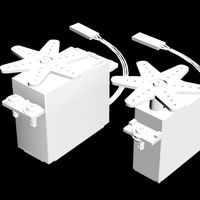
Glue in a battery pack to the bottom of the case and screw the circuit board to the top of the case using 2 small screws (make sure you first push in the "mode" button you printed off earlier).
Wire up the side switch to the battery pack and test it (when you turn on the switch, one of the mode leds should turn on. Test the mode switch to make sure the leds cycle through the modes.
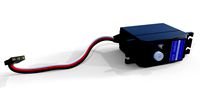
I wanted to have a separate power switch that sends power to the servo only when you are ready to do so (switch on top). Attach a servo extension plug to the new case by feeding the wire through the case and soldering it to the servo header (at the same time, have the power wire for the servo go through the switch on the top).
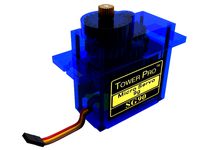
Plug in a servo and test it out!
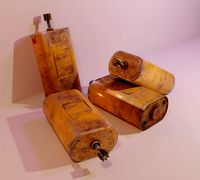
I sanded and spray painted my case to get rid of the rough plastic surface.
If you want to build this, do the following:
Print out all parts. I printed the button and led covers in a lighter color (I found the leds in this unit to be extremely bright so I wanted to diffuse the light by making covers). I have included the 123D files so you can resize the switch openings to suit the switches you may have lying around.
Take apart the blue plastic case the servo controller came in and pull the circuit board off of the rubberized pad it is attached to.
I only need to test one servo at a time so I used a pair of wire cutters and cut off the top two rows of servo headers from the circuit board as shown in the photos (the top 2 rows also get in the way of the new case).
Glue in a battery pack to the bottom of the case and screw the circuit board to the top of the case using 2 small screws (make sure you first push in the "mode" button you printed off earlier).
Wire up the side switch to the battery pack and test it (when you turn on the switch, one of the mode leds should turn on. Test the mode switch to make sure the leds cycle through the modes.
I wanted to have a separate power switch that sends power to the servo only when you are ready to do so (switch on top). Attach a servo extension plug to the new case by feeding the wire through the case and soldering it to the servo header (at the same time, have the power wire for the servo go through the switch on the top).
Plug in a servo and test it out!
I sanded and spray painted my case to get rid of the rough plastic surface.
Similar models
thingiverse
free

pimoroni pirate audio with battery case by n30g30
...er switch, you'll have to get the lid from ywabiko's pimoroni pirate audio case
https://www.thingiverse.com/thing:4087948
thingiverse
free

LED string with timer and printed case by Stemer114
... recycling bin.
the last picture shows a version with 20 leds and 3 aa batteries, where the circuit fits into the battery case.
thingiverse
free

Component Tester LCR-T4 Case with 18650 battery USB charger and boost converter
...
in the design there is no hole because if you have different sizes of switches it's better to do it after the print is done.
thingiverse
free

transistor tester case by cbruner
...t. includes screw posts, just use wood screws to hold circuit board down to screw holes. battery fits underneath circuit board.
thingiverse
free

Circuit Board Casing by seyunbaek07
..., led, ldr and a power switch. the feature of this circuit board is that it is able to turn on the led when the ldr senses light.
thingiverse
free

IR Tester by horendus
...ww.ebay.com.au/itm/spring-loaded-battery-box-case-holder-for-2-x-aaa-battery-/282131721321?hash=item41b05c6c69:g:qf8aaoswyudxgcff
thingiverse
free

Nuke Lamp Stand by krosstoph
...switch on by sticking the led wires in the stand. switch off by sticking the wires in the stand, but the other way around.
enjoy!
cg_trader
$5

Breadboard
...h circuit capacitor led wire power regulator battery compressor bread electronics other circuit board electric board power switch
thingiverse
free

9V Battery Case by jamesdmendez
...fically this was made to power an old star trek ornament. the case has a top that slides off and extra space for interior wiring.
thingiverse
free

EGG night stand light by Ujur35
... inside of the egg to battery and led.
i added letters on the shell, which you can customize to make it a perfect present.
enjoy
Makerdan55
thingiverse
free

Shaver Mount by MakerDan55
...: there is also a version with a wider back in case you want to attach it with double sided tape (i recommend gorilla brand tape)
thingiverse
free

Grove Latching Relay Case by MakerDan55
.../grove_-_2-coil_latching_relay
here is a link for information on more grove modules:http://wiki.seeedstudio.com/wiki/grove_system
thingiverse
free

Marble Machine by MakerDan55
...slot for an on/off switch. i have included both the stl files as well as the sketchup files in case you want to modify anything.
thingiverse
free

1.8" TFT Shield Cover Plate by MakerDan55
...ard slot and reset button. now with integrated reset button.
update: i have added a new stl for the newer version of this shield.
thingiverse
free

PIR Motion Sensor Case by MakerDan55
...mazon.com/bqlzr-12v~24v-automatic-motion-lighting/dp/b00eq20c6k/ref=sr_1_9?ie=utf8&qid=1478288117&sr=8-9&keywords=pir
thingiverse
free

Protein Powder Dispenser by MakerDan55
...s because it was printed with only 20% infill it wasn't strong enough. you could also print this part with a greater infill.
thingiverse
free

R2D2 Dome Mechanism Modifications by MakerDan55
...lectronics boards - 2 versions of this are available. one with 2 maestros (18 and 6 channels) and one with a 24 channel maestro.
Tester
turbosquid
$2

tester
... available on turbo squid, the world's leading provider of digital 3d models for visualization, films, television, and games.
turbosquid
$10

Virus tester
... free 3d model virus tester for download as max, fbx, and obj on turbosquid: 3d models for games, architecture, videos. (1526983)
turbosquid
$24
Hipot Tester
...odel hipot tester for download as skp, 3ds, dae, fbx, and obj on turbosquid: 3d models for games, architecture, videos. (1651595)
turbosquid
$10
Tester Cube
... available on turbo squid, the world's leading provider of digital 3d models for visualization, films, television, and games.
turbosquid
free

BIPED tester
... available on turbo squid, the world's leading provider of digital 3d models for visualization, films, television, and games.
turbosquid
$30
99 Tester SM
...e 3d model 99 tester sm for download as ma, max, obj, and fbx on turbosquid: 3d models for games, architecture, videos. (1258979)
turbosquid
$19

Concrete Compression Tester
... available on turbo squid, the world's leading provider of digital 3d models for visualization, films, television, and games.
turbosquid
$15

AC Electric Tester 2
...ectric tester 2 for download as max, ige, obj, stl, and sldpr on turbosquid: 3d models for games, architecture, videos. (1464810)
turbosquid
$14

Digital Electric Tester Pen
...tric tester pen for download as max, ige, obj, stl, and sldpr on turbosquid: 3d models for games, architecture, videos. (1416100)
3d_export
$15
Probe Screwdriver 3D Model
...screw driver voltage volt electronic equipment tool electric contact tester detector flat head electrician electrical probe screwdriver 3d model...
Servo
turbosquid
$30
Servo
...d model servo for download as obj, blend, dae, stl, and sldpr on turbosquid: 3d models for games, architecture, videos. (1394011)
3d_export
$5

servo motor
...tor
3dexport
it's a simple part of servo motor 0.75kw for used in machines assembly to show specified motor in own project.
turbosquid
$1

Servo Moter
...quid
royalty free 3d model servo moter for download as blend on turbosquid: 3d models for games, architecture, videos. (1650816)
turbosquid
free
Motor/Servo
...osquid
royalty free 3d model motor/servo for download as obj on turbosquid: 3d models for games, architecture, videos. (1522522)
turbosquid
$60

Servo Skull
...
royalty free 3d model servo skull for download as ma and fbx on turbosquid: 3d models for games, architecture, videos. (1318573)
3d_export
$5
Servo 3D Model
...rvo 3d model
3dexport
servo
servo 3d model download .c4d .max .obj .fbx .ma .lwo .3ds .3dm .stl pasqualesiciliano 104590 3dexport
turbosquid
$50
Servo Motor
... available on turbo squid, the world's leading provider of digital 3d models for visualization, films, television, and games.
turbosquid
$49
Servo Motor
...model servo motor for download as 3ds, max, obj, fbx, and stl on turbosquid: 3d models for games, architecture, videos. (1324153)
turbosquid
$29
Servo Set
... available on turbo squid, the world's leading provider of digital 3d models for visualization, films, television, and games.
turbosquid
$10
machine servo
... available on turbo squid, the world's leading provider of digital 3d models for visualization, films, television, and games.
Case
3d_export
$1

case
...case
3dexport
case
archibase_planet
free

Case
...case
archibase planet
showcase show-case glass case
glass-case + cakes - 3d model for interior 3d visualization.
archibase_planet
free

Case
...case
archibase planet
showcase show-case glass case
glass-case for chips - 3d model for interior 3d visualization.
archibase_planet
free

Case
...case
archibase planet
case shelving drawer
case - 3d model for interior 3d visualization.
archibase_planet
free

Case
...case
archibase planet
case rack locker
case - 3d model for interior 3d visualization.
archibase_planet
free

Case
...case
archibase planet
case drawer kitchen furniture
case - 3d model for interior 3d visualization.
archibase_planet
free

Case
...case
archibase planet
case cupboard shelving
glass case - 3d model for interior 3d visualization.
archibase_planet
free

Case
...case
archibase planet
case handbag suitcase
case - 3d model (*.gsm+*.3ds) for interior 3d visualization.
archibase_planet
free

Case
...case
archibase planet
case suitcase
case 5 - 3d model (*.gsm+*.3ds) for interior 3d visualization.
archibase_planet
free

Case
...case
archibase planet
locker case dresser
case - 3d model (*.gsm+*.3ds) for interior 3d visualization.