Thingiverse

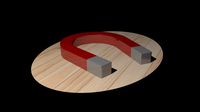
Sectioned Chessboard (magnetic)
by Thingiverse
Last crawled date: 4 years, 3 months ago
Designed for a family member.
(The chess pieces pictured are RoPa's spiral chess set with hollow basehttps://www.thingiverse.com/thing:1264417
modified to have a magnet in the center bottom. This is also a remix of the original by BigBadBison:https://www.thingiverse.com/thing:470700
The hollow version can let you add weights or magnets, the original will just be a straight up print).
I looked at the various chess board ideas there were and thought I should contribute as they didn't quite look the way I wanted. Mainly that the board could be set up quickly and that there weren't too many fiddly parts (like say, assembling the entire thing like a puzzle). I stuck on magnets for my attach methods and then had to design it so it could be two color.
So, there are two quadrants, A and B. You print two of each. Then depending on if you printed the large base in white (or light color) or the tiles, you set the orientation of the board. The tiles should be the opposite color from the base. You'll need 32 tiles, and four (two of each) quadrants. The tiles get superglued to the base quadrant (shown in assembly in the pictures).
Magnets needed:
32 - 5x4mm disc magnets, preferably N50-N52
If you're going to magnetize the pieces and make use of the holes in the tiles:
32pieces+64spaces (96 total) - 6x2mm disc magnets preferably N50-52
To use the magnets, you'll need them all oriented the same. It doesn't matter if you pick North or South, but if you take a stack of magnets, pick one side. Then mark it with a sharpie. Slide it off, drop it, whatever (it'll probably stick to the end of the stick), and mark the next one in line, careful to always mark the same side.
So, when/if you magnetize pieces, you want the pieces and the tiles/spaces to have the same orientation (say, marked side "up" when assembled and in use. That means when you insert it from the bottom, you have to put the up side in first.
When you magnetize the board segments, separate the A and B quadrants. To each of the As, use 8 magnets, all oriented the same way (say, marked side in towards the board). To all the Bs, use 8 magnets all oriented the opposite way of the As (so in this example, all the marked sides away from the board).
To glue them in, I prefer gel superglue. Just add a touch to the magnet, then press in. You can also just add glue to the hole, but it's a bit messier. To help in magnet placement in the deeper board holes, I used punch with a plastic sleeve (mine was from an old yard sign, but you could probably use a coffee stirrer, small straw, etc). In that way (shown in the pic, put the sleeve on the punch, put the magnet on the end of the punch, then add glue to the magnet. In the picture I have marked side facing the camera (I was inserting that end in). The sleeve is to push the magnet into the hole so you can simultaneously remove the punch (otherwise the magnet will probably stick to the punch and change orientation, get removed,or get stuck). Gel superglue will also act as a gap filler and flow around the magnet in the hole. Note, in my pictures, I didn't account for the visibility that resulted from the magnets and glue filling any gaps. You may want to try painting the side of the magnet closest to the surface in a similar color (white in my case) to make it stand out less.
If you oriented the magnets right, you should only be able to attach a quadrant A to the Quadrant Bs, but not to the other A. That makes it much easier to install and setup. I show the assembly of the quadrants in the pictures.
The size should be about 210mm x 210mm which means it should print on an Ender 3/3Pro, Ender 5/5 Pro, Creality CR10/10S/10S4/10S5/10S Pro/CR-X and any "v2" versions coming on the market, and the Prussa i3.
Similar models
thingiverse
free

Fallout Magnetic Tiles (2017 Board Game) by Fantasy Flight Games by villain99
...f any tile.
note: there are 2 pegs on the tile plate that align to 2 guide holes on the tile to ensure a proper fit when gluing.
thingiverse
free

Non-Euclidean Chess Board (Hyperbolic Paraboloid) by DaveMakesStuff
...rd: https://www.thingiverse.com/thing:4655805
and "print in place" chess set: https://www.thingiverse.com/thing:4689389
thingiverse
free

Non-Euclidean Chess Board (Sphere) by DaveMakesStuff
...rd: https://www.thingiverse.com/thing:4655805
and "print in place" chess set: https://www.thingiverse.com/thing:4689389
thingiverse
free

LM2596 Enclosure by Klave
...he board. the lid will fit both ways so make sure you check the pot is visible.
for the side entry the lid will only fit one way
thingiverse
free

Picture Frame by dernst
...ry other hole and it would hold very well. test before glueing together. the magnets should be on the inside of the frame.
enjoy!
thingiverse
free

Wall magnetic chessboard
...e board)
with four tails (single bottom-right cell)
frame includes row/column indices, the text need to printed in another color.
thingiverse
free

Ball magnet socket 3mm by Woodyharoo
...ss pipe and then burn out the hole with my soldering iron.
be careful when gluing so that you don't get glue into the socket.
thingiverse
free

Magnet setting tool
...hich will orient somewhat automatically. i used regular gel type super glue for attaching the magnets, which seems to work well.
thingiverse
free

Universal magnetic tenting legs for split keyboards by lipsticklatitude
...nets, but it's something you can try. if so i recommend using hot glue because heating superglue creates some terrible fumes.
thingiverse
free

Mini Magnetic Chess Set by Opposhaw
...eces. i used super glue.
i did this on an lcd resin printer, but it should be possible on an fdm printer with the right settings.
Chessboard
3d_ocean
$9

Chessboard
...chessboard
3docean
chess chessboard game
a full chessboard model.
turbosquid
free

chessboard
...rd
turbosquid
free 3d model chessboard for download as blend on turbosquid: 3d models for games, architecture, videos. (1505501)
3d_export
free

chessboard
...chessboard
3dexport
chess_board_and_chess_shapes
turbosquid
$13

Chessboard
...bosquid
royalty free 3d model chessboard for download as max on turbosquid: 3d models for games, architecture, videos. (1540260)
turbosquid
$1

Chessboard
...squid
royalty free 3d model chessboard for download as blend on turbosquid: 3d models for games, architecture, videos. (1549650)
turbosquid
free

Chessboard
...squid
free 3d model chessboard for download as blend and fbx on turbosquid: 3d models for games, architecture, videos. (1612338)
turbosquid
$20

ChessBoard
... free 3d model chessboard for download as blend, fbx, and obj on turbosquid: 3d models for games, architecture, videos. (1580196)
turbosquid
$1

Chessboard
...ee 3d model chessboard for download as 3ds, max, obj, and fbx on turbosquid: 3d models for games, architecture, videos. (1193252)
turbosquid
$200

chessboard
... available on turbo squid, the world's leading provider of digital 3d models for visualization, films, television, and games.
turbosquid
$125

Chessboard
... available on turbo squid, the world's leading provider of digital 3d models for visualization, films, television, and games.
Magnetic
3d_ocean
$2

Magnet
...magnet 3docean 3d 3ds max electric magnet magnetic magnetism max model polygon realistic tesla magnet created in...
turbosquid
$6
Magnet
...
turbosquid
royalty free 3d model magnet for download as obj on turbosquid: 3d models for games, architecture, videos. (1548733)
turbosquid
$6

magnet
...uid
royalty free 3d model magnet for download as 3dm and max on turbosquid: 3d models for games, architecture, videos. (1670606)
turbosquid
$1

Magnet
...y free 3d model magnet for download as 3ds, max, obj, and fbx on turbosquid: 3d models for games, architecture, videos. (1215037)
turbosquid
$7

Magnet
...agnet for download as blend, unitypackage, fbx, gltf, and obj on turbosquid: 3d models for games, architecture, videos. (1576588)
3d_export
$5

magnetic knife holder
...magnetic knife holder
3dexport
ordinary magnetic knife holder
archive3d
free

Fridge magnet 3D Model
...3d model archive3d refrigerator magnet fridge magnet magnet toy magnetic s n280712 - 3d model (*.3ds) for interior 3d...
turbosquid
$35

Magnetic butterflies
...alty free 3d model magnetic butterflies for download as blend on turbosquid: 3d models for games, architecture, videos. (1315792)
turbosquid
$2
Magnetic Board
...quid
royalty free 3d model magnetic board for download as ma on turbosquid: 3d models for games, architecture, videos. (1264141)
turbosquid
$977
Magnetic Lego
...oyalty free 3d model magnetic lego for download as ma and obj on turbosquid: 3d models for games, architecture, videos. (1142761)
Sectioned
archibase_planet
free

Section
...section
archibase planet
storefront shelving rack
section 8 - 3d model (*.gsm+*.3ds) for interior 3d visualization.
archibase_planet
free

Section
...section
archibase planet
post storefront stay
section 10 - 3d model (*.gsm+*.3ds) for interior 3d visualization.
archibase_planet
free

Section
...section
archibase planet
sta post desk
section 6 - 3d model (*.gsm+*.3ds) for interior 3d visualization.
archibase_planet
free

Section
...section
archibase planet
settee seat furniture
double section f1278 - 3d model (*.gsm+*.3ds) for interior 3d visualization.
archibase_planet
free

Section
...section
archibase planet
settee seat furniture
double section f1277 - 3d model (*.gsm+*.3ds) for interior 3d visualization.
archibase_planet
free

Section
...section
archibase planet
storefront glass case show-case
section 4 - 3d model (*.gsm+*.3ds) for interior 3d visualization.
archibase_planet
free

Section
...section
archibase planet
showcase show-case glass case
section 3 - 3d model (*.gsm+*.3ds) for interior 3d visualization.
3d_export
$5

sectional column
...sectional column
3dexport
sectional reinforced column 400x400 mm
turbosquid
free

Tree Section
...ction
turbosquid
free 3d model tree section for download as on turbosquid: 3d models for games, architecture, videos. (1263969)
turbosquid
$9

Sectional sofa
...uid
royalty free 3d model sectional sofa for download as max on turbosquid: 3d models for games, architecture, videos. (1638909)