Thingiverse
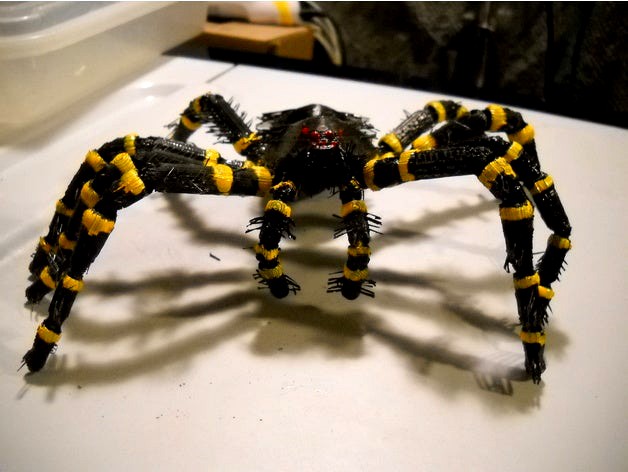
scarry hairyetta tarantula by caj
by Thingiverse
Last crawled date: 3 years ago
update here is the place for the magnets for her legs to put them in use a small brush and put a little acetone in each of the holes on the legs then using a knife place a magnet on the knife and dip it in acetone hold dip and hold till it just melts itself into the hole and slide the knife to detach i have not installed the magnets for her inside as she is already glued together i only put a couple of drops of removable glue between body parts so i could take her apart when i got the magnets so it should not be to hard
magnets for feethttps://www.ebay.com/itm/N50-Mini-Round-Neodymium-Disc-Dot-Magnets-3x1mm-0-12x0-04-100pcs-Ship-from-US/132462261068?ssPageName=STRK%3AMEBIDX%3AIT&_trksid=p2057872.m2749.l2649
magnets for the body in retrospect i should have gotten longer magnets ? these are only 2mm deep but are the correct size
https://www.ebay.com/itm/US-Ship-20pcs-Round-Disc-Rare-Earth-Neodymium-Magnets-9-x-2mm-0-35x0-078-N50/122808039520?ssPageName=STRK%3AMEBIDX%3AIT&_trksid=p2057872.m2749.l2649
hairetta i wanted a female as they are more docile and less psychotic and live a lot loner than a male
went through 2 roles of error prints to make this
i had to repair a lot to make this thing printer friendly
this was a wonderful model but i had nothing but problems printing with warped parts not sticking to the bed and not printing the hairs because it looks like most are not even connected to the support and the legs are too loose to hold her up on her own and tons of errors in the stll files that xyzware could not fix or repair for proper printing
also i have split the files so there are less chances of printer problems and there are also parts that do not have hairs some tarantulas do not have all that hair
and i did not want to have to set exact printing parameters for each part because xyzware does not allow any of the settings mentioned in the description so these are remade for the standard simple settings of xyzware with no supports
to print the hairs print all the parts with the top door open on the xyz printer other printers have no in closer so this is not necessary for other printers
i have added back the round parts of the legs they had ben cut flat on each side to allow for them to be put together so they are extremely tight to fit a lot of light pressure is required to snap them together one not to keep them from splitting when putting together all parts should be just dipped in acetone if using abs and the cups should be lightly filed so that both flat surfaces are flat and even and the round part should take a file and just a light filing to remove the widest part of the round about 3-4 passes no more
there are still loos parts like legs to the body to tighten all the loose fittings put a drop of paint into the joint you might have to do this a few times to take the gap out like on the but joint lots of play lots of paint drops
Similar models
thingiverse
free
DIY 1s Charger / 1s Lader by zaphi
...strk%3amebidx%3ait
power suply:http://www.ebay.de/itm/221961044643?_trksid=p2057872.m2749.l2649&sspagename=strk%3amebidx%3ait
thingiverse
free

360w psu cover by kimmerkesdal
...0w psu - http://www.ebay.com/itm/262626173745?_trksid=p2057872.m2749.l2649&var=561523999305&sspagename=strk%3amebidx%3ait
thingiverse
free

Filter for 3d printer by pochetto
...plice-estremamente-silenzioso/dp/b002ktvftehttps://www.youtube.com/watch?v=cgh0vhmcvlohttps://www.youtube.com/watch?v=ie_0_-arzee
thingiverse
free

Kossel Cooling by SimonFrick
...o09_s01?ie=utf8&psc=1
fan:
http://www.ebay.de/itm/111317241608?_trksid=p2057872.m2749.l2649&sspagename=strk%3amebidx%3ait
thingiverse
free

Radial fan mount + fan duct by meekaah - mod by d1ab0l1k69
...n so as to not have to paste .
http://www.ebay.it/itm/321866382040?_trksid=p2057872.m2749.l2648&sspagename=strk%3amebidx%3ait
thingiverse
free

Electric Screwdriver by Kattstryparen
...ff-on-rocker-switch-momentary-rocker-switch-wl/232537776527?sspagename=strk%3amebidx%3ait&_trksid=p2057872.m2749.l2649 switch
thingiverse
free

Screw driver bit organizer with level eye. by Vandalisimo
... thick.http://www.ebay.co.uk/itm/262409989613?_trksid=p2057872.m2749.l2649&var=561207509370&sspagename=strk%3amebidx%3ait
thingiverse
free

SSR PS_ON COVER by thomasgobert
...mp;var=571595784259&sspagename=strk%3amebidx%3ait
thanks to 3dms : https://www.thingiverse.com/thing:2193481 for the upgrade.
thingiverse
free

Holder for power switch with integrated strain relief by wbggre
...er on / off
i used this switch:http://www.ebay.de/itm/141418060372?_trksid=p2057872.m2749.l2649&sspagename=strk%3amebidx%3ait
thingiverse
free

powerbank by GottderDrachen
.../www.dx.com/de/p/universal-replacement-3-7v-4800mah-li-polymer-battery-for-7-10-tablet-pc-sliver-05-x-80-x-95-321496#.vgldrvkpnt4
Scarry
turbosquid
free

Cartoon Hand Scarry
... available on turbo squid, the world's leading provider of digital 3d models for visualization, films, television, and games.
thingiverse
free

Skully hot-shoe plug by gcardinal
...skully hot-shoe plug by gcardinal thingiverse a scarry hot-shoe plug to pimp your favorite...
thingiverse
free

Goldbug by dutchmogul
...goldbug by dutchmogul thingiverse richard scarry#39;s goldbug! be sure and hide him near something yellow....
thingiverse
free

Nightmare candle holder by qdiiibp
...are breaking apart if you touch making it more scarry.. all versions meshes sliced fine for me with cura....
cg_trader
free

Cartoon Hand Scarry
... cartoon hand cartoon character cartoon hand character anatomy character cartoon character clothing cute character toon character
cg_trader
$10

Scream and Scarry Movie Ghost Face Mask Replica Printable STL | 3D
...l
-printable
-highpoly scream scarrymovie scarry movie mask ghost face ghostface printable cosplay art other face mask ghost face
cg_trader
$23

Scary Terry | 3D
...to present you stylized high poly 3d model of scarry terry based on rick and morty animated...
cg_trader
$29

9 decorative pumpkins for Halloween season 3d model
...model 9 decorative pumpkins for halloween season 3d model scarry decoration pumpkin interior other decoration interior halloween...
cg_trader
$15

Ghostwire Tokyo Ko-Omote Mask Replica STL Printable | 3D
...ghostwire tokyo cosplay ko omote koomote japanese traditional horror scarry printable games toys games toys...
Caj
3dfindit
free

AFT62-CAJ-NA
...aft62-caj-na
3dfind.it
catalog: yiheda
thingiverse
free

MAN Truck by caj
...man truck by caj
thingiverse
included is the designspark mechanical project file
thingiverse
free

magirus transport truck by caj
...magirus transport truck by caj
thingiverse
magirus-transport-pack-
thingiverse
free

The Simpsons 3d Silhouettes by caj
...the simpsons 3d silhouettes by caj
thingiverse
the simpsons 3d silhouettes
thingiverse
free

Aladdin 3D Silhouettes by caj
...aladdin 3d silhouettes by caj
thingiverse
aladdin 3d silhouettes
thingiverse
free

The Croods 3d Silhouettes by caj
...the croods 3d silhouettes by caj
thingiverse
the croods 3d silhouettes
thingiverse
free

Madagascar 3d Silhouettes by caj
...madagascar 3d silhouettes by caj
thingiverse
madagascar 3d silhouettes
thingiverse
free

puppet Gepetto head and hands by caj
...puppet gepetto head and hands by caj
thingiverse
for making a marionette
thingiverse
free

narrower slide quick release by caj
...narrower slide quick release by caj
thingiverse
remixed for this camera gimble
thingiverse
free

Disney 3d Couples silhouettes by caj
...disney 3d couples silhouettes by caj
thingiverse
disney couples silhouettes
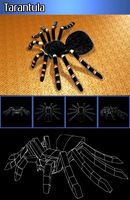
Tarantula
turbosquid
$5

tarantula
...rbosquid
royalty free 3d model tarantula for download as c4d on turbosquid: 3d models for games, architecture, videos. (1690032)
3d_ocean
$8
Tarantula
...rantula 3d model. perfect for animations or still image. textures psd and jpeg files included. modelled using autodesk maya 2011.
turbosquid
$50

tarantula
... available on turbo squid, the world's leading provider of digital 3d models for visualization, films, television, and games.
turbosquid
$45

Tarantula
... available on turbo squid, the world's leading provider of digital 3d models for visualization, films, television, and games.
turbosquid
$12

Spider black widow tarantula tarantula Insects
... black widow tarantula tarantula insects for download as max on turbosquid: 3d models for games, architecture, videos. (1582101)
3ddd
$1
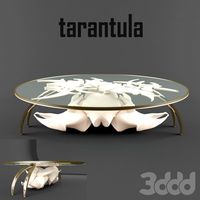
Журнальный столик - tarantula
... бионика , tarantula
журнальный столик tarantula
h=600
d=2000
3d_export
$35

Tarantula
...: zbrush 3ds max ztool obj fbx dae 3ds stl properties : 20*20*8 production time : 23 hours 328 gram models are drawn with zbrush.
3d_ocean
$20

Tarantula spider
...igged, animated, uv textured. particle system for the fur. very easy to animate. a 250 frames animation is available in the pack.
turbosquid
$45

Tarantula Spider
... available on turbo squid, the world's leading provider of digital 3d models for visualization, films, television, and games.
3d_export
$5
spider tarantula
...spider tarantula
3dexport
3d model of a steppe spider for your ideas and projects.