Thingiverse

Sad Robot Radio
by Thingiverse
Last crawled date: 4 years, 2 months ago
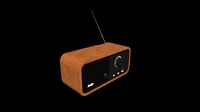
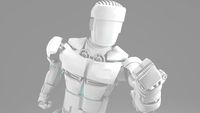
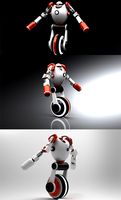
A while ago I bought a Sad Robot 1 kit from https://www.madebya2.com.au/product/sad-robot-1/. It is a cute little robot that holds a Nokia 5110 LCD screen and a Arduino Nano. After building the Art Deco FM Radio (https://www.thingiverse.com/thing:3896141) which also uses a Nokia 5110 LCD screen, I decided to turn my little guy into a FM Radio. The right arm has two buttons to increase or decrease the frequency and the left arm has two buttons to increase or decrease the volume. There is a small speaker in its head.
Video
https://youtu.be/qZzJVGkz1BU
3D Printing
To make the radio, you need to print the following parts and replace the ones in your kit:
Sad - Top.stl
This holds a small speaker and printed circuit board (see below)
Sad - Buttons.stl
These arm covers hold two small 6x6mm switches for increasing and decreasing both frequency and volume
Sad - Arms (111%).stl
These are replacement arms in which the depth of each arm has been increased by 111%. This provides room between the battery and the switches
Schematic and PCB
The PCB holds a Arduino Pro Mini, a MCP4011 digital potentiometer, TEA5767 module, an amplifier based on the TEA2025 chip, and some headers for connections. I made my board using the Toner method. I also used two 100K resistors to join the left and right channels of the TEA5767 FM Radio module on the back of the TEA5767 module. Eagle files are included.
Software
The Arduino sketch and libraries used are included. Install the libraries into your Arduino IDE and compile and upload the sketch to your board.
Similar models
thingiverse
free

Arduino Tea5767 + 4.5 mm Speaker Hole + Nokia 5110 LCD Hole Radio Enclosure by justicemilitia
...cemilitia
thingiverse
arduino tea5767 + 4.5 mm speaker hole + nokia 5110 lcd hole radio enclosure.
rev. added with speaker grill
thingiverse
free

TEA5767 FM Radio Module Arduino Dev Housing by theholotree
...for a tea5767 fm radio module for arduino or similar projects. scale as...
thingiverse
free

Fm Radio Arduino Tea5767
...dio-receiver-543480
16x2 lcd connection diagram:https://create.arduino.cc/projecthub/youssefsabaa/lcd-display-in-real-time-ea0b7b
thingiverse
free

LCD Nokia 5110 housing by Narayan1986
... nokia 5110 housing by narayan1986
thingiverse
this is a little housing for the nokia 5110 lcd module. ideal for arduino project
thingiverse
free

Radio Project by PeriniM
...o;
• tea5767 fm radio module;
• msgeq7 audio equalizer;
• tpa3116 amplifier board;
• 2.2'' tft display;
• rotary encoder.
thingiverse
free

Nokia 5110 Screen mount for 3 Module Din Rail box by strachan
...a 5110 screen mount for 3 module din rail box.
nokia 5110 screen is driven by arduino nano and can be combined with most sensors.
grabcad
free

Nokia 5110 Graphic LCD 84x48
...en for lots of applications. it was originally intended for as a cell phone screen. this one is mounted on an easy to solder pcb.
thingiverse
free

LCD Nokia 5110 stand and PCB. No glue, no wires. by RobotKJR
...lcd nokia 5110 stand and pcb. no glue, no wires. by robotkjr
thingiverse
nokia 5110 lcd stand and pcb. no glue, no wires.
thingiverse
free

NOKIA 5110 LCD based arduino sim racing dashboard by Wotever
...ehind to the connector, pressure is adjustable with the front screws.
part list :
1 arduino nano
2 5110 lcd boards
6 m3*20 screws
thingiverse
free

Nokia 5110 LCD Module by Dampmaskin
...ia 5110 lcd module by dampmaskin
thingiverse
a semi-accurate model of the nokia 5110 lcd module. useful for creating enclosures.
Sad
3d_export
$5

sadness
...sadness
3dexport
sadness 3d model good quality for animation
3d_export
$5

humaniod sad doggo
...humaniod sad doggo
3dexport
perfil of a sad doggo made with a cartoon style.
turbosquid
$10

sad robot
...d model sad robot for download as max, max, max, fbx, and obj on turbosquid: 3d models for games, architecture, videos. (1685083)
turbosquid
$9

Sad sheep
...d model sad sheep for download as lwo, fbx, dae, 3ds, and obj on turbosquid: 3d models for games, architecture, videos. (1690794)
turbosquid
free

Sad Sonic
... available on turbo squid, the world's leading provider of digital 3d models for visualization, films, television, and games.
3d_export
$12

theater sad mask
...theater sad mask
3dexport
turbosquid
$59

Female head sad
...id
royalty free 3d model female head sad for download as fbx on turbosquid: 3d models for games, architecture, videos. (1490248)
turbosquid
$5

Humanoid sad doggo
...
royalty free 3d model humanoid sad doggo for download as obj on turbosquid: 3d models for games, architecture, videos. (1670520)
turbosquid
$8

Facebook Sticker Sad
... model facebook sticker sad for download as max, obj, and fbx on turbosquid: 3d models for games, architecture, videos. (1293032)
turbosquid
$60

Night Sad Town
... available on turbo squid, the world's leading provider of digital 3d models for visualization, films, television, and games.
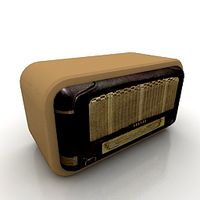
Radio
archibase_planet
free
Radio
...radio
archibase planet
radio
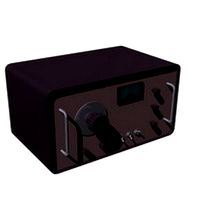
radio - 3d model for interior 3d visualization.
archibase_planet
free
Radio
...radio
archibase planet
radio
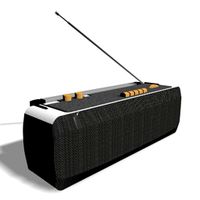
radio - 3d model for interior 3d visualization.
3d_export
$10
radio
...radio
3dexport
radio 3d, ojb
archibase_planet
free
Radio
...radio
archibase planet
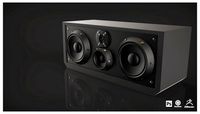
radio set wireless receiver wireless set
radio 2 - 3d model (*.gsm+*.3ds) for interior 3d visualization.
archibase_planet
free
Radio
...radio
archibase planet
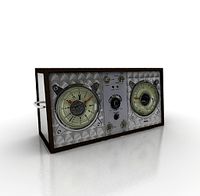
radio set wireless receiver wireless set
radio 7 - 3d model (*.gsm+*.3ds) for interior 3d visualization.
archibase_planet
free
Radio
...radio
archibase planet
radio set wireless receiver wireless set
radio 10 - 3d model (*.gsm+*.3ds) for interior 3d visualization.
3d_ocean
$9
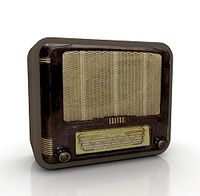
Vintage Radio
...vintage radio
3docean
old radio radio set vintage
this is a vintage radio modeled to help in interior design arrangements.
3d_ocean
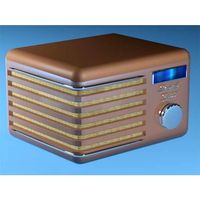
$8
Radio Branu
...radio branu
3docean
detail radio vintage
vintage radio with detail
3d_export
$5
radio
...radio
3dexport
turbosquid
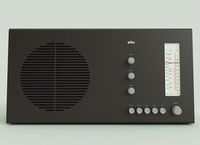
$25

Radio
...o
turbosquid
royalty free 3d model radio for download as max on turbosquid: 3d models for games, architecture, videos. (1203794)
Robot
3d_ocean
$20

Robot
...robot
3docean
character metal robot robot robotic white
robot model for 3dsmax 2009 and greater
3d_ocean
$45
Robot
...robot
3docean
fighing machine robot
a fighting robot from the scrapyard.
3d_ocean
$18
Robot
...robot
3docean
machin robot science fiction
high poly robot.
3d_export
$7

Robot
...robot
3dexport
robot
3d_export
$5
robot
...robot
3dexport
robot
3d_export
free

Robot
...robot
3dexport
robot
turbosquid
$10

Robot/ Alien Robot
...
royalty free 3d model robot/ alien robot for download as max on turbosquid: 3d models for games, architecture, videos. (1442828)
3d_export
$5

robot
...robot
3dexport
robot in blender
3ddd
$1

robot
...robot
3ddd
робот
robot
3ddd
$1

Robot
...robot
3ddd
робот
robot