Thingiverse

Rubbermaid 21 Cup Dry Box
by Thingiverse
Last crawled date: 4 years, 3 months ago
11/30/19 - Updated Spool to use 2mm walls for easier printing and printing instructions for spools.
Humid air is lighter then dry air. Is the dessicant in your dry box at the top?
All filament absorbs water, even PLA.
This information is in a TXT file in the download.
Rubbermaid 21 cup filament dry box by OneEyeDesign
This uses the Rubbermaid 21 cup dry food container
Part# 7M74.
Humid air is lighter than dry air, so it's best to have
the dessicant at the top of a container you want to
keep dry. I designed the dessicant box with a quick release
mount so you can easily change rolls and take it out to dry
in a dehumidifer.
I have included 2 versions of the base, one uses heat set
inserts in the feet. The other has holes in the feet
roughly 6.5mm wide so you can insert the screw head and
use nuts on top. The rest of the parts all use heat set inserts.
The rollers will need to be sanded at the Z seam so the filament
can roll easily without stopping the roller. A large nail
file with a course and fine side works great.
I used 1/4 inch PTFE tubing for filament transfer from the dry
box to the printer because it allows for less restriction. You
can buy it at any Home Improvement store in the plumbing aisle.
I have included a mountable 1/4 inch PTFE through coupler to pass
through a 2x4 or other type of enclosure. You put a piece of PTFE
in between the two mounts.
Roller stand hardware:
(4) 608 skateboard bearings, remove shields and clean out heavy
grease to make them spin easier. Lube with light oil (3 in 1 oil).
(4) M3 heat set inserts OD 5.6mm (initeq heat set inserts short)https://www.amazon.com/gp/product/B077CJV3Z9/ref=ppx_yo_dt_b_search_asin_image?ie=UTF8&psc=1
(4) M3 screws 10mm or longer
PTFE fitting Hardware:
(2) M3 x 12 screws
(2) M3 heat set inserts
Dry box Hardware:
(2) M3 x 16 screws
(3) M3 x 8 screws
(5) M3 heat set inserts
Dry box drill jig:
Line up jig outside box, top of T against lip
and center the bottom with the measurement graduation.
Drill with 7/64 bit
1/4 PTFE drill jig:
Line up jig outside box, top of T against lip
and center the bottom with the measurement graduation.
Drill with 7/64 bit. After installing both sides
drill center with 3/16 bit so holes line up.
1/4 PTFE caps
One is closed and one has a hole for filament so you don't have
to open the dry box to reinsert in printer. I don't recommend
using the cap while printing because it restricts movement.
You may need to use a 5/64 drill bit to open the hole up.
Print settings:
These are the settings I used, change as you see fit.
No brims needed unless you have adhesion
problems. I use buildtak on a whambam bed.
All parts use:
0.40 nozzle
0.50 line width
0.20 layer height
~ denotes a change from the last part
Base
6 top layers
6 bottom layers
3 perimeters
Grid infill 20%
Sides
6 top layers
6 bottom layers
3 perimeters
Grid infill 20%
Min infill length 3mm
Rollers x 1 (1hr 50m)
Slower due to layer time restriction
50mm/s
0.5 line width
0.2 layer height
6 top layers
6 bottom layers
*5 perimeters
Infill doesn't matter
Rollers x 4 (much faster printing, 2hr 12m)
50mm/s
1.0 line width
0.2 layer height
6 top layers
6 bottom layers
*5 perimeters
Infill doesn't matter
PTFE fittings
6 top layers
6 bottom layers
~3 perimeters
Grid infill 20%
Dry box
Clear PetG so you can see dessicant change color
and so it's heat resistant for drying in dehydrator
~10 top layers
~10 bottom layers
~4 perimeters
Grid infill 20%
Supports, build plate only, only needs it at
front of box, see pictures.
Dry box lid - if you make it solid the surface comes out rough
~4 top layers
~3 bottom layers
~2 perimeters
Grid infill 20%
Dry box mount and washer
~6 top layers
~6 bottom layers
~3 perimeters
Grid infill 20%
Helpful Tips:
ALL filament shrinks after cooling.
The amount of shrinkage depends on the type of filament.
PLA shrinks about 0.25%
PetG shrinks around 0.35%
Taulman 910 shrinks 0.31%
That means a PLA part printed at 200mm long will be short by 0.5mm.
I scale all my stuff in the slicer to 100.25% to compensate for most shrinkage.
Measure for yourself if you don't believe me!
Similar models
thingiverse
free

Simple Metal Handle with lead screw hole and filament guide by Rippledabs
... by rippledabs
thingiverse
make it strong. i used 5 perimeters, 5 bottom, 6 top layers. 30% infill using grid (not rectilinear).
thingiverse
free

Ceiling Light Globe
... it's best to have the dessicant at the top of a container you want to keep dry.
check my designs for a dry box you can make.
thingiverse
free

Maker Mining Rig by bytestrome
...: 10
infill: 30%
t-slot nut w/ fan mount:
layer: 0.1 mm
filament: pla
perimeters: 10
top layers: 10
bottom layers: 10
infill: 30%
thingiverse
free

Filament Filter (LACK) by cody3D
...to screw filament filter cover over the filament filter base
use a cotten ball or whatever you want as the filter inside the base
thingiverse
free

DRILL DISK SANDING TOOL by canmyung
...ing paper easily with drill. 7cm diameter with hex or m6 screw. printh with %25 infill, 3 or 4 perimeter 4 top and bottom layers.
thingiverse
free

Crows Game Box Insert by Kyle_Hensley
...f game inserts for many popular games. donations are always welcome, as a lot of this is trial and error as i test these designs.
thingiverse
free

Karuba Game Box Insert by Kyle_Hensley
...f game inserts for many popular games. donations are always welcome, as a lot of this is trial and error as i test these designs.
thingiverse
free

Filament Spool Roller - Snap Fit 6x19x6mm Bearings 626zz by TyCreek
...files, so i drew up a bit different but similar snap together concept for smaller 626zz bearings (19mm od...
thingiverse
free

Chonk side spool by Kol3r
... make it rigid
support was set to toutching build plate.
it's made to use 6 m3x12 screws and 6 m3 t nuts.
hope you like it ;d
thingiverse
free

Silica gel box with clip for spools by Printschnitzel
...ess)
infill->fill pattern: grid
layers and perimeters->bottom solid layers: 0
layers and perimeters->top solid layers: 0
Rubbermaid
thingiverse
free

Rubbermaid Shed Hook by mekpong
...id shed hook by mekpong
thingiverse
just a simple hook for your rubbermaid shed walls.
donations appreciated but not necessary.
thingiverse
free

Rubbermaid shed wall anchor by rshiner
...rubbermaid shed wall anchor by rshiner
thingiverse
wall anchor for rubbermaid shed
thingiverse
free

Rubbermaid Shed Shelf Bracket by mekpong
...rubbermaid shed shelf bracket by mekpong
thingiverse
rubbermaid shed shelf bracket.
enjoy!
thingiverse
free

Hygrometer Holder for Rubbermaid 21 Cups.
...hygrometer holder for rubbermaid 21 cups.
thingiverse
hygrometer holder for rubbermaid 21 cups.
thingiverse
free

Rubbermaid Brilliance Lid holder
...
thingiverse
i made a lid holder for my rubbermaid brilliance 1.3 cup lids. simple design that works horizontally or vertically.
thingiverse
free

Rubbermaid Toolbox Handle by Duke_S
...ke_s
thingiverse
replacement handle for my old rubbermaid toolbox. it fit perfectly and i've used it for a couple years now.
thingiverse
free

Rubbermaid FastTrack Shelf Bracket by pgrandst
...sed space above my top rack. all the rubbermaid clips go below whereas this shelf sits above the track. seems to be working well!
thingiverse
free

Rubbermaid Storage Organization by amnross
...liance 1.5 oz food containers. i got tired of the lids and containers scattering all over the cabinets, so i made this organizer.
thingiverse
free

Rubbermaid Shed Latch by GoJimi
...hed latch that i happened to snap off accidentally. it's designed to snap fit securely into the shed door like the original.
thingiverse
free

Rubbermaid FastTrack Clip by dhulihan
...and add all kinds of accessories: hooks, baskets, etc.
update july 2019: there's now a screw-clamp version of this available.
Dry
3d_export
$5

hair-dry
...hair-dry
3dexport
hair-dry wahl 5439-024 super dry professional 2000 watts styling hair dryer- black
design_connected
$16
Dry-Dock
...dry-dock
designconnected
restoration hardware dry-dock computer generated 3d model.
archive3d
free

Dry 3D Model
...el
archive3d
drying unit radiator towel dry
towel dry - 3d model for interior 3d visualization.
turbosquid
$9
Dry Sprey
...urbosquid
royalty free 3d model dry sprey for download as ma on turbosquid: 3d models for games, architecture, videos. (1661017)
turbosquid
$1

Dry Persimmon
...quid
royalty free 3d model dry persimmon for download as max on turbosquid: 3d models for games, architecture, videos. (1449030)
turbosquid
$1
Dry Persimmon
...quid
royalty free 3d model dry persimmon for download as max on turbosquid: 3d models for games, architecture, videos. (1448712)
turbosquid
free

drying rack
...osquid
royalty free 3d model drying rack for download as max on turbosquid: 3d models for games, architecture, videos. (1614082)
turbosquid
$7

Dry plant
...
royalty free 3d model dry plant for download as max and fbx on turbosquid: 3d models for games, architecture, videos. (1273449)
turbosquid
$37

pineapple dry
... available on turbo squid, the world's leading provider of digital 3d models for visualization, films, television, and games.
turbosquid
$30

Dry Reed_001
... available on turbo squid, the world's leading provider of digital 3d models for visualization, films, television, and games.
21
3ddd
$1

tar 21
...tar 21
3ddd
tar 21
3ddd
$1

Газ 21
...газ 21
3ddd
машина
газ 21
3d_export
$6

rocks 21
...rocks 21
3dexport
rocks 3d model 21
3ddd
$1

Landbond 21
...landbond 21
3ddd
landbond
стенка landbond 21
design_connected
$16

Sweet 21
...sweet 21
designconnected
gervasoni sweet 21 computer generated 3d model. designed by navone, paola.
design_connected
$16

Gray 21
...gray 21
designconnected
gervasoni gray 21 chairs computer generated 3d model. designed by paola navone.
3ddd
$1

Bed 21
...bed 21
3ddd
постельное белье
bed 21.i hope you like it
software : 3dsmax -vray 2.4
3d_export
$6

tap-21
...tap-21
3dexport
3d_export
$17

J-21 jastreb
...j-21 jastreb
3dexport
j-21 jastreb
3d_export
$5

gaz 21 coupe
...gaz 21 coupe
3dexport
gaz 21 coupe
Cup
3d_ocean
$2

Cup
...cup
3docean
bardak cup glass tea cup
low poly cup
archibase_planet
free

Cup
...planet
cup teacup kitchen ware glass cup coffee cup demitasse
cup n110413 - 3d model (*.gsm+*.3ds) for interior 3d visualization.
archibase_planet
free

Cup
...cup
archibase planet
cup teacup coffee-cup
cup - 3d model (*.gsm+*.3ds) for interior 3d visualization.
archibase_planet
free

Cup
...cup
archibase planet
cup teacup coffee-cup
cup - 3d model (*.gsm+*.3ds) for interior 3d visualization.
archibase_planet
free

Cups
...cups
archibase planet
cups cup teacup teacups
cups - 3d model (*.gsm+*.3ds) for interior 3d visualization.
archibase_planet
free

Cups
...cups
archibase planet
cups cup kitchen ware
cups - 3d model (*.gsm+*.3ds) for interior 3d visualization.
3d_export
$7

cup
...cup
3dexport
this is a cup
3d_export
$7

Cup
...cup
3dexport
cup
3d_export
$5

cup
...cup
3dexport
cup
3d_export
$5

Cup
...cup
3dexport
cup
Box
archibase_planet
free
Box
...box
archibase planet
box carton cardboard box
box 2 - 3d model (*.3ds) for interior 3d visualization.
archibase_planet
free
Box
...box
archibase planet
carton cardboard box box
box 1 - 3d model (*.3ds) for interior 3d visualization.
3d_export
$6
box
...box
3dexport
box
3d_export
$5
Box
...box
3dexport
box
3d_export
$5
box
...box
3dexport
box
3d_export
$5
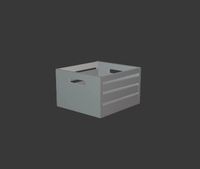
box
...box
3dexport
box
archibase_planet
free
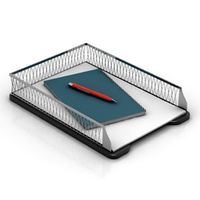
Box
...box
archibase planet
box box for paper notebook pencil
box - 3d model (*.gsm+*.3ds) for interior 3d visualization.
archibase_planet
free
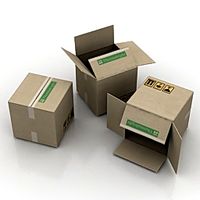
Box
...box
archibase planet
box carton cardboard box
box n170111 - 3d model (*.gsm+*.3ds) for interior 3d visualization.
archibase_planet
free
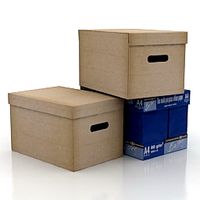
Box
...box
archibase planet
box carton cardboard box
box n050411 - 3d model (*.gsm+*.3ds) for interior 3d visualization.
archibase_planet
free
Boxes
...boxes
archibase planet
boxes box case bin
boxes n281213 - 3d model (*.gsm+*.3ds+*.max) for interior 3d visualization.
