Thingiverse
Rostock Max V3 slim enclosure by Noircogi
by Thingiverse
Last crawled date: 3 years, 1 month ago
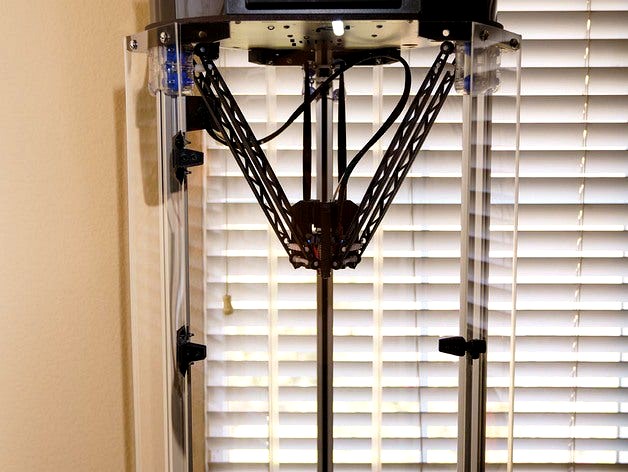
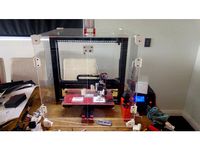
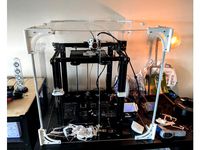
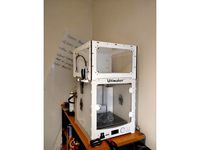
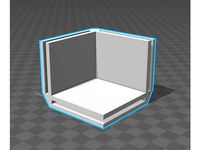
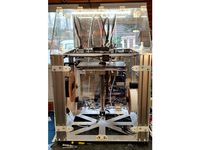
Slim enclosure for Rostock Max V3.
Requires my part fan shroud mod: http://www.thingiverse.com/thing:1792867 which moves the fans up and in to clear the sides of the enclosure.
To complete this you will need:
20 x 1/4-20x3/4" bolts
20 x 1/4-20 Nyloc nuts
12 #8x3/8" sheet metal screws
16 3mm x10mm socket head machine screws
16 3mm nyloc nuts
3 3mm x 36mm machine screws for the hinge pivots
You can use 0.093 (or thicker) sheet acrylic for the sides. I recommend 1/8" or thicker for the door.
I cut my own using a router, but Tap Plastics will cut parts to order for a very reasonable price. If doing it over, I would probably just have had them cut all of the pieces.
The small pieces are 6.5 x 27.5 inches. You need three of them. Each needs 4 holes 5/16" in diameter (slightly over-sized to give some margin). The centers of the holes are 1/2" from the top/bottom and 1 1/4" from the edges.
The larger pieces are 12x27.5 inches. Two of them need 5/16" mounting holes. The centers of the holes are 1/2" from the top/bottom and 1" from the edges. The door doesn't need the 5/16" holes but you will need to have holes to mount the hinges and latch.
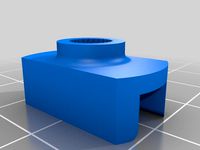
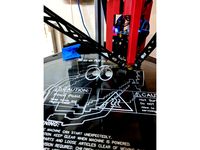
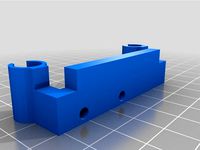
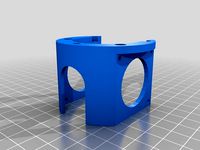
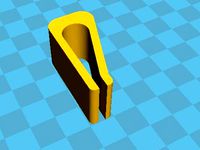
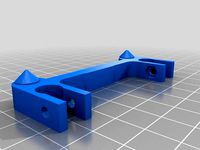
Print 3 top brackets, 3 bottom brackets, 3 hinge sets, one latch front and one latch side.
The brackets are attached to the top and bottom plates using the #8 sheet metal screws. Make sure the ends of the brackets are about 1/8" in from the outer edge of the Max's top/bottom plate when you screw them down. Just enough room so the acrylic will be flush with the outer edge of the base plate on the printer. You will need to drill pilot holes to get the screws started.
The Acrylic is attached to the brackets using the 1/4x20 bolts and nuts.
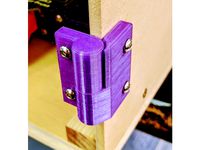
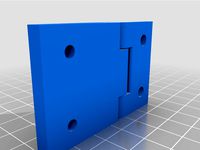
The hinges and latch are attached to the acrylic using the 3mm bolts and locknuts.
If you're not an expert at drilling acrylic, I recommend you use a fine soldering iron tip to make those holes. Tape the door into place, and hold everything snug together when marking the holes for the hinges and latch. Bolt the hinges on one side and snug things up before marking the other holes for the other half of that hinge.
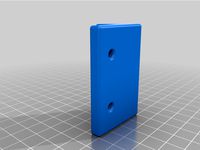
The 30 degree angle on the latch side piece should line up perfectly with the edge of the side plexiglass. The front latch piece should be mounted such that it both holds the door closed, and the side piece snug.
The brackets were re-mixed to move the plexiglass right to the edge of the base-plate on the printer. That required extending the arms. They will still print easily on a max or even (just) on a 6x9" printer. The top bracket is notched to allow the carriages to make it to the home position.
The hinges were made twice as wide, and fixed to have clearance for the pivot.
The latch pieces were derived from the hinge pieces to maintain a common look.
The latch works really well if you have it properly positioned. It will hold the door closed and the right side tight against it, yet it's still easy to open and close.
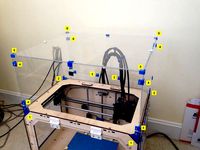
I used gaffer's tape to block all of the openings between the build area and the top and bottom sections of the printer.
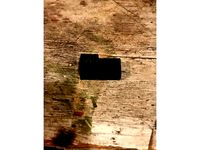
For airflow in the bottom section, I made a hole in the front plate, right in front of where I added an SSR and heatsink to drive the bed heater with my 24V power supply upgrade. It can be seen in the photo if you look closely.
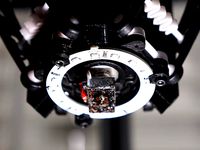
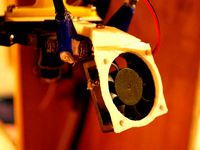
In the top section, I just moved the rambo fan up above the rambo with and made an opening for it to pull in outside air.
After 30 minutes of ABS printing with the bed at 90C, the inside is at around 40C and will go up some from there.
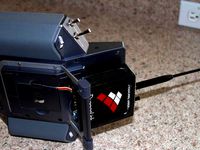
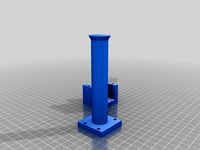
Also included is a mount for this thermometer which I use to monitor the temperature inside the enclosure. https://www.amazon.com/gp/product/B00D79YU9I/ref=oh_aui_detailpage_o00_s00?ie=UTF8&psc=1
Requires my part fan shroud mod: http://www.thingiverse.com/thing:1792867 which moves the fans up and in to clear the sides of the enclosure.
To complete this you will need:
20 x 1/4-20x3/4" bolts
20 x 1/4-20 Nyloc nuts
12 #8x3/8" sheet metal screws
16 3mm x10mm socket head machine screws
16 3mm nyloc nuts
3 3mm x 36mm machine screws for the hinge pivots
You can use 0.093 (or thicker) sheet acrylic for the sides. I recommend 1/8" or thicker for the door.
I cut my own using a router, but Tap Plastics will cut parts to order for a very reasonable price. If doing it over, I would probably just have had them cut all of the pieces.
The small pieces are 6.5 x 27.5 inches. You need three of them. Each needs 4 holes 5/16" in diameter (slightly over-sized to give some margin). The centers of the holes are 1/2" from the top/bottom and 1 1/4" from the edges.
The larger pieces are 12x27.5 inches. Two of them need 5/16" mounting holes. The centers of the holes are 1/2" from the top/bottom and 1" from the edges. The door doesn't need the 5/16" holes but you will need to have holes to mount the hinges and latch.
Print 3 top brackets, 3 bottom brackets, 3 hinge sets, one latch front and one latch side.
The brackets are attached to the top and bottom plates using the #8 sheet metal screws. Make sure the ends of the brackets are about 1/8" in from the outer edge of the Max's top/bottom plate when you screw them down. Just enough room so the acrylic will be flush with the outer edge of the base plate on the printer. You will need to drill pilot holes to get the screws started.
The Acrylic is attached to the brackets using the 1/4x20 bolts and nuts.
The hinges and latch are attached to the acrylic using the 3mm bolts and locknuts.
If you're not an expert at drilling acrylic, I recommend you use a fine soldering iron tip to make those holes. Tape the door into place, and hold everything snug together when marking the holes for the hinges and latch. Bolt the hinges on one side and snug things up before marking the other holes for the other half of that hinge.
The 30 degree angle on the latch side piece should line up perfectly with the edge of the side plexiglass. The front latch piece should be mounted such that it both holds the door closed, and the side piece snug.
The brackets were re-mixed to move the plexiglass right to the edge of the base-plate on the printer. That required extending the arms. They will still print easily on a max or even (just) on a 6x9" printer. The top bracket is notched to allow the carriages to make it to the home position.
The hinges were made twice as wide, and fixed to have clearance for the pivot.
The latch pieces were derived from the hinge pieces to maintain a common look.
The latch works really well if you have it properly positioned. It will hold the door closed and the right side tight against it, yet it's still easy to open and close.
I used gaffer's tape to block all of the openings between the build area and the top and bottom sections of the printer.
For airflow in the bottom section, I made a hole in the front plate, right in front of where I added an SSR and heatsink to drive the bed heater with my 24V power supply upgrade. It can be seen in the photo if you look closely.
In the top section, I just moved the rambo fan up above the rambo with and made an opening for it to pull in outside air.
After 30 minutes of ABS printing with the bed at 90C, the inside is at around 40C and will go up some from there.
Also included is a mount for this thermometer which I use to monitor the temperature inside the enclosure. https://www.amazon.com/gp/product/B00D79YU9I/ref=oh_aui_detailpage_o00_s00?ie=UTF8&psc=1
Similar models
thingiverse
free
Acrylic 3D Printer Enclosure/Case/Cover by gyrex
...nal: 1x cover for cable hole
glue and fit together. print 2 hinges (eg https://www.thingiverse.com/thing:1396038) and attach door
thingiverse
free
3D Printer Enclosure Door Hinge
... there are no plastic zits inside the hole of the bottom half and around the pin on the top one to avoid binding.
happy printing!
thingiverse
free
Enclosure Brackets with Hinge by jrosiene
...for ender 5 but will fit other printers with similar dimensions. you will need 1/8" acrylic sheet or other...
thingiverse
free
Ultimaker 2 Enclosure by TinkerLifeProjects
... included a file for it and there are two holes in the door (dia-3mm spacing-25mm) but you may wish to design this part yourself.
thingiverse
free
One piece hinge - print in place - for Ikea Lack enclosure by mariuschirita
...lic door.
bigger holes take 4mm countersunk wood screws.
you need to print it in one go without using supports. i used white abs.
thingiverse
free
Brackets for assembling top enclosure for FlashForge Creator by speedy777
...he pieces fit in the pictures.
for details about the front door hinge and knob, go here:http://www.thingiverse.com/thing:731461
thingiverse
free
Rack It shelving door hinge (Print enclosure) by NashCreative
...mind...
find more on this part and more at nash creative on instagram @nashcreative_au
https://www.instagram.com/nashcreative_au/
thingiverse
free
Enclosure Corner Bracket for 1/8th" Acrylic by JokerToolWorks
... needed, the part can be scaled up or down for different thicknesses of acrylic.
can be bolted, screwed, or glued to the acrylic.
thingiverse
free
E3d Toolchanger Enclosure ( Hood & Doors ) by iPeel
... rotate smoothly in ( these are the hinge halves that fix against the aluminium profile and half of the hinge halves on the lid )
thingiverse
free
Mirror/Acrylic Bracket by ThothLoki
...osure. so...i made these.
i designed them for 3mm thick material
the hole is 4mm. it fits an imperial 6/32" bolt perfectly
Noircogi
thingiverse
free
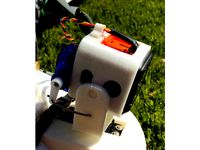
Pan and Tilt for Foxeer Box action cam. by Noircogi
...
thingiverse
simple pan and tilt mechanism for the foxeer box action camera. use a 9 gram servo for tilt and a gws 125 for pan.
thingiverse
free
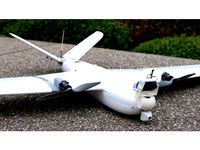
Mods for Believer FPV aircraft by Noircogi
...or the bottom of the believer between the two landing pads. print one normal and one mirrored. makes hand-launching much easier.
thingiverse
free

Thin wing servo cover for Aeroic Schwing Corsa glider by Noircogi
...eat and 110% extrusion multiplier for strength since they're so thin. i printed with support from the build platform as well.
thingiverse
free
Rostock Max V3 LED ring mounts by Noircogi
...y are on either side of one of the mounting screws. be careful not to use too much solder or they could short against the screw.
thingiverse
free
Slim Rostock Max V3 part fan shroud by Noircogi
... 100% in my experience.
you will need to trim the small plastic tabs on the effector plate before installing the shrouds.
print 3
thingiverse
free
Add-ons for XUAV-Clouds FPV aircraft by Noircogi
...d cam. (this one in particular: https://www.banggood.com/fpv-13-sony-ccd-800tvl-fpv-camera-for-qav250-fpv-racer-p-1049331.html )
thingiverse
free
Dragonlink UHF Transmitter mount for Horus radio by Noircogi
... long antenna. attach the switch extension using 2 3mmx10mm machine screws.
5/03/2018 added extended mount for dlv3 slim version.
thingiverse
free
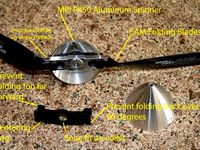
Prop stopper for RC folding props (Parameterized) by Noircogi
...ign and .csvs with the parameters are included. the fusion 360 plug-in "parameterio" can directly read them for import.
thingiverse
free
Slim Rostock Max v3 Fan for 713Maker Mounts by Horvaticus
...original slim fan shroud was too small. i remixed noircogi#39;s design to be both longer so it'll reach the...
Rostock
thingiverse
free
Endstop for Rostock by Raz0neR
...endstop for rostock by raz0ner
thingiverse
endstop for rostock.
thingiverse
free

Rostock Cooling by nobicore
...rostock cooling by nobicore
thingiverse
rostock cooling
thingiverse
free
ROSTOCK PARTS by OC3D
...rostock parts by oc3d
thingiverse
parts for our modified rostock extruder assembly
thingiverse
free
Rostock squirrel fan by MarioPanic
...rostock squirrel fan by mariopanic
thingiverse
rostock squirrel fan
thingiverse
free
FC Hansa Rostock by ron86
...fc hansa rostock by ron86
thingiverse
fc hans rostock logo
thingiverse
free

rostock mini carriage by cjol
...rostock mini carriage by cjol
thingiverse
carriage for my rostock mini project
thingiverse
free

Rostock and Rostock Mini Dual Extruder Mount by westonshakespear
...ht.
sorry about the pictures, my filament jammed for part of the print and i am waiting for a new part to print a better version.
thingiverse
free
Rostock mini clip by Scott_Chen
...rostock mini clip by scott_chen
thingiverse
rostock mini clip for printer base glass
thingiverse
free
Rostock Board holder by drewan
...rostock board holder by drewan
thingiverse
this is a clip for using a rostock board as a print surface.
thingiverse
free
Rostock Fan Bracket by ImprisonedByTime
...rostock fan bracket by imprisonedbytime
thingiverse
this bracket is for a 40mm fan to attach to the rostock 3d printer
Slim
3ddd
$1
Кровать Jupiter slim
...кровать jupiter slim
3ddd
jupiter slim
кровать jupiter slim
design_connected
$10
Slim Chair
...slim chair
designconnected
ligne roset slim chair computer generated 3d model.
3ddd
$1

Minotti Andersen Slim
...minotti , andersen , slim
minotti andersen slim
3ddd
$1

Bottoni Slim
... кресло из коллекции moooi.
oдноместный,плотность пены несколько на фанерной раме, ноги из нержавеющей стали.
размеры: 62x76x86cm
3ddd
$1
Slim Sofa
... slim , arbel
om website: beltafrajumar.com
designer: arbel
formats: 3ds, c4d, fbx, obj
3ddd
free
Складной стол SLIM
...кладной , стол
складной стол для переговоров slim.
размеры соблюдены, текстуры в архиве
3ddd
$1
Slim - Dema
...slim - dema
3ddd
dema
3ddd
free
Luce Verde Slim
... verde , slim
luce verde slim
ø 1300 h 45 mm
lumen led 6500
kg 35
artikel 790.69.01.00
turbosquid
$29
FLOW SLIM
... available on turbo squid, the world's leading provider of digital 3d models for visualization, films, television, and games.
turbosquid
$29
FLOW SLIM
... available on turbo squid, the world's leading provider of digital 3d models for visualization, films, television, and games.
V3
3d_export
$5

Poison-v3
...poison-v3
3dexport
poison-v3
3ddd
$1

Curtain v3
...curtain v3
3ddd
полупрозрачная штора v3
turbosquid
free

v3
... available on turbo squid, the world's leading provider of digital 3d models for visualization, films, television, and games.
3d_export
$5

potato v3
...potato v3
3dexport
turbosquid
$69

Skeletor v3
...royalty free 3d model skeletor v3 for download as ztl and obj on turbosquid: 3d models for games, architecture, videos. (1712713)
turbosquid
$49
Zombie v3
...
royalty free 3d model zombie v3 for download as obj and ztl on turbosquid: 3d models for games, architecture, videos. (1342458)
turbosquid
$2

Bitcoin v3
...
royalty free 3d model bitcoin v3 for download as c4d and prj on turbosquid: 3d models for games, architecture, videos. (1182845)
turbosquid
$29
Turret V3
...alty free 3d model turret v3 for download as ma, obj, and fbx on turbosquid: 3d models for games, architecture, videos. (1217498)
turbosquid
$20
Radiators v3
... free 3d model radiators v3 for download as max, max, and obj on turbosquid: 3d models for games, architecture, videos. (1607437)
turbosquid
$10
Wheel V3S
...e 3d model wheel v3s for download as 3ds, obj, fbx, and blend on turbosquid: 3d models for games, architecture, videos. (1344250)
Enclosure
3d_export
free

electrical enclosure
...l enclosure where electrical devices like (relays, contactors, busbars ) are kept in order to protect from hazardous environment.
turbosquid
$100

GPU Enclosure
...yalty free 3d model gpu enclosure for download as obj and stl on turbosquid: 3d models for games, architecture, videos. (1381061)
3d_export
$5

Electrical Enclosure
...ed. also has tower lights attaced on the top.<br>file format that are available:<br>.step<br>.obj<br>.stl
archive3d
free

Enclosure 3D Model
...closure 3d model
archive3d
shower enclosure-acquarius- 3d model for interior 3d visualization.
archive3d
free

Enclosure 3D Model
...enclosure 3d model
archive3d
shower enclosure-omega- 3d model for interior 3d visualization.
archive3d
free

Enclosure 3D Model
...enclosure 3d model
archive3d
shower enclosure-vega - 3d model for interior 3d visualization.
archive3d
free

Enclosure 3D Model
...enclosure 3d model
archive3d
shower enclosure-zenith - 3d model for interior 3d visualization.
turbosquid
$20

shower enclosure
... available on turbo squid, the world's leading provider of digital 3d models for visualization, films, television, and games.
turbosquid
$14

Dumpster Enclosure
... available on turbo squid, the world's leading provider of digital 3d models for visualization, films, television, and games.
turbosquid
$25

3d printer enclosure
... model 3d printer enclosure for download as ipt, skp, and fbx on turbosquid: 3d models for games, architecture, videos. (1634310)