Thingiverse
Rostock Max Tower Braces by tajd3
by Thingiverse
Last crawled date: 2 years, 11 months ago
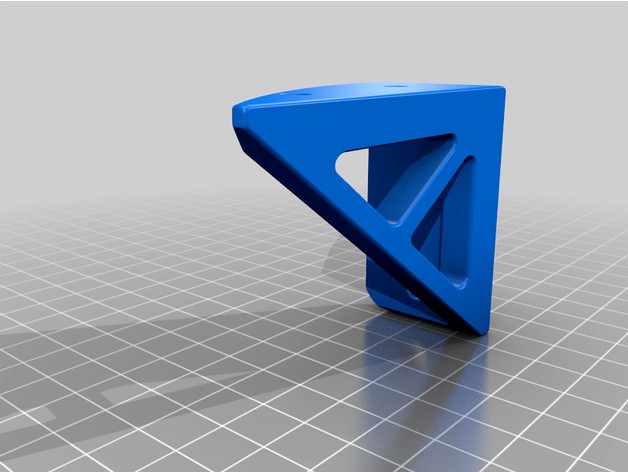
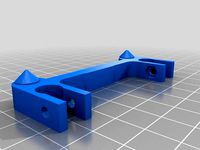
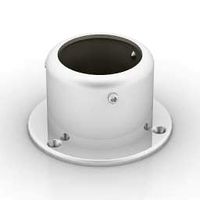
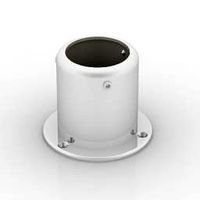
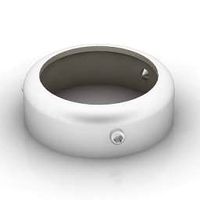
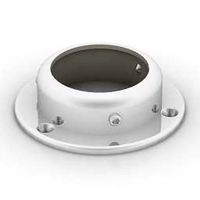
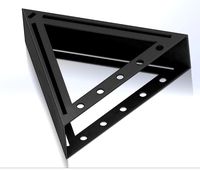
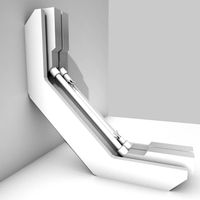
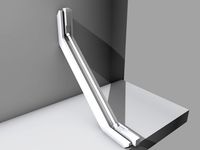
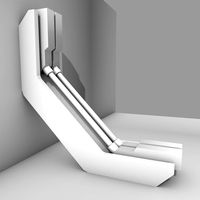
Designed these braces for my SeeMeCNC Rostock Max v2 after the melamine fittings started to get a little loose.
Installation:
Holes have to be drilled in the melamine and the drop-in t-slot nuts can be quite frustrating, especially in the top. I used the largest hex wrench that would fit in the track to lift the t-slot nut into place for the top brackets. If you like to have a beer while you work, wait till you get the top bracket t-nuts in place. You'll need all your dexterity and by the time you finish you'll really need some suds. :lol:
The top bracket has a void for the uppermost 1/4"-20 machine screw so don't remove that one. The lower one will need to be replaced with one 1/4" longer. I used M3 for everything else cuz that's what I already have. If you want a stouter screw you'll have to drill out the screw holes in the braces accordingly. Also, I used fender washers where they would fit. Because the upper brackets require removing existing hardware I only did one bracket at a time to reduce the chance of messing up the frame geometry.
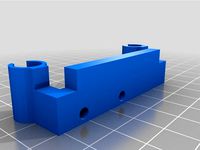
In the pics I posted you can see wires poking out the corner of the lower braces. I had wires for LEDs running up through the extrusion track so I added a hole in the braces for that. Use it if you like or just ignore it.
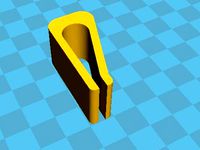
There is just one file for top and one for bottom. Just print 3 as is and three more mirrored. I didn't slice the braces as they drop onto the slicer build surface, I laid them on the triangular side (the side facing toward the center of the bed in the pictures) for best strength.
Installation:
Holes have to be drilled in the melamine and the drop-in t-slot nuts can be quite frustrating, especially in the top. I used the largest hex wrench that would fit in the track to lift the t-slot nut into place for the top brackets. If you like to have a beer while you work, wait till you get the top bracket t-nuts in place. You'll need all your dexterity and by the time you finish you'll really need some suds. :lol:
The top bracket has a void for the uppermost 1/4"-20 machine screw so don't remove that one. The lower one will need to be replaced with one 1/4" longer. I used M3 for everything else cuz that's what I already have. If you want a stouter screw you'll have to drill out the screw holes in the braces accordingly. Also, I used fender washers where they would fit. Because the upper brackets require removing existing hardware I only did one bracket at a time to reduce the chance of messing up the frame geometry.
In the pics I posted you can see wires poking out the corner of the lower braces. I had wires for LEDs running up through the extrusion track so I added a hole in the braces for that. Use it if you like or just ignore it.
There is just one file for top and one for bottom. Just print 3 as is and three more mirrored. I didn't slice the braces as they drop onto the slicer build surface, I laid them on the triangular side (the side facing toward the center of the bed in the pictures) for best strength.
Similar models
thingiverse
free

Easy Universal Z-Braces for CR-10 / S / S4 / S5 | M8 threaded rod remix by Syfeeq
...his is just the basic description of the remix. for the detailed information please read the description of the original project.
thingiverse
free

FLSUN QQ-S PRO Filament Arm Sleeve by Hoisty
..., please share your work here. it'd be awesome to see this in different colors. plus, then i'll know this helped someone.
thingiverse
free

D-Bot Inner Corner Brace by Buket0chicken
...eeded.
if you have a suggestion or request (larger bracket, remove a hole, etc) let me know and i'll whip up a quick version.
thingiverse
free

Cupboard Towel Hook / Holder by lachycharts
...the hole and nut you just put in.
if it doesn't fit snuggly on the door, put a little silicon pad on the inside of the mount.
thingiverse
free

Wanhao DI3 Y Tensioner Idler by ftk1
...knob from the original scraty version. installation instructions are similar to the original, but you only need 6 m3...
thingiverse
free

Tevo Black Widow Base Stabilizers by bdwalker1
...ion with a diamond removed from the center. i believe this version will be just as strong while saving a fair amount of filament.
thingiverse
free

MakerSlide/(T-slot 20mm) Pulley Bracket by jtrantow
...need washers. and if the bracket sides were a little thicker it could have an embedded nut for the bolt going through the pulley.
thingiverse
free

Buffed n Braced Einsy Door remixed for M5 T-nuts and screws
...ffset them by screwing one on all the way and the other just a couple of turns before inserting them into the 3030 aluminum slot.
thingiverse
free

Rostock ProStruder Dual Mount by dbfrompw
...he clamp locks). drilling holes for the tubing was a pain. should have used a step ladder. mine are a little off but should work.
thingiverse
free

Z Rib for CR10 by TarantulaTevo
...ts
4x m10 washers
8 t-nuts
8 screws, that fit your t-nuts.
i used m5 t nuts and 10mm m5 schrews with countersunk head
have fun :)

Rostock
thingiverse
free
Endstop for Rostock by Raz0neR
...endstop for rostock by raz0ner
thingiverse
endstop for rostock.
thingiverse
free

Rostock Cooling by nobicore
...rostock cooling by nobicore
thingiverse
rostock cooling
thingiverse
free
ROSTOCK PARTS by OC3D
...rostock parts by oc3d
thingiverse
parts for our modified rostock extruder assembly
thingiverse
free
Rostock squirrel fan by MarioPanic
...rostock squirrel fan by mariopanic
thingiverse
rostock squirrel fan
thingiverse
free
FC Hansa Rostock by ron86
...fc hansa rostock by ron86
thingiverse
fc hans rostock logo
thingiverse
free

rostock mini carriage by cjol
...rostock mini carriage by cjol
thingiverse
carriage for my rostock mini project
thingiverse
free

Rostock and Rostock Mini Dual Extruder Mount by westonshakespear
...ht.
sorry about the pictures, my filament jammed for part of the print and i am waiting for a new part to print a better version.
thingiverse
free
Rostock mini clip by Scott_Chen
...rostock mini clip by scott_chen
thingiverse
rostock mini clip for printer base glass
thingiverse
free
Rostock Board holder by drewan
...rostock board holder by drewan
thingiverse
this is a clip for using a rostock board as a print surface.
thingiverse
free
Rostock Fan Bracket by ImprisonedByTime
...rostock fan bracket by imprisonedbytime
thingiverse
this bracket is for a 40mm fan to attach to the rostock 3d printer
Braces
archive3d
free
Bracing 3D Model
...
holder bracing strengthening
bracing 4 - 3d model (*.gsm+*.3ds) for interior 3d visualization.
archive3d
free
Bracing 3D Model
...
bracing strengthening holder
bracing 2 - 3d model (*.gsm+*.3ds) for interior 3d visualization.
turbosquid
$5

brace PARIS
...osquid
royalty free 3d model brace paris for download as max on turbosquid: 3d models for games, architecture, videos. (1284415)
archive3d
free
Bracing 3D Model
...older fastening strengthening
bracing 1 - 3d model (*.gsm+*.3ds) for interior 3d visualization.
archive3d
free
Bracing 3D Model
...older fastening strengthening
bracing 3 - 3d model (*.gsm+*.3ds) for interior 3d visualization.
turbosquid
$20
Corner Brace Bracket
...oyalty free 3d model corner brace bracket for download as stl on turbosquid: 3d models for games, architecture, videos. (1322777)
turbosquid
$10

Craftsman Handtools - Brace
... available on turbo squid, the world's leading provider of digital 3d models for visualization, films, television, and games.
turbosquid
$2
Degree Brace 4
...el degree brace 4 for download as 3ds, max, obj, c4d, and fbx on turbosquid: 3d models for games, architecture, videos. (1205705)
turbosquid
$1
Degree Brace 3
...el degree brace 3 for download as 3ds, max, obj, c4d, and fbx on turbosquid: 3d models for games, architecture, videos. (1205719)
turbosquid
$1
Degree Brace 2
...el degree brace 2 for download as 3ds, max, obj, c4d, and fbx on turbosquid: 3d models for games, architecture, videos. (1205714)
Tower
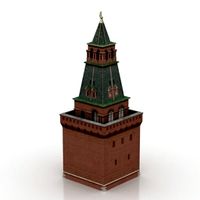
archibase_planet
free
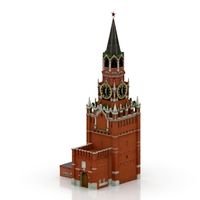
Tower
...kremlin tower spasskaya tower
tower kremlin spasskaya tower n120615 - 3d model (*.gsm+*.3ds+*.max) for exterior 3d visualization.
archibase_planet
free
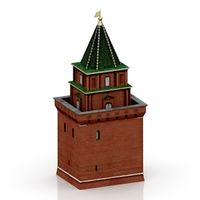
Tower
...r kremlin tower petrovskaya tower
tower petrovskaya kremlin n120615 - 3d model (*.gsm+*.3ds+*.max) for exterior 3d visualization.
archibase_planet
free
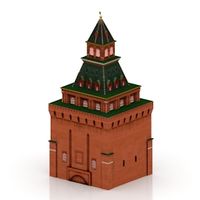
Tower
...ino-eleninskaya tower
tower constantino eleninskaya kremlin n120615 - 3d model (*.gsm+*.3ds+*.max) for exterior 3d visualization.
archibase_planet
free
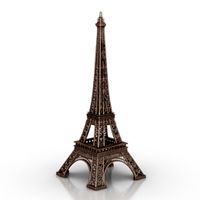
Tower
...tower
archibase planet
tower statuette eiffel tower
tower decor n180914 - 3d model (*.gsm+*.3ds) for interior 3d visualization.
archibase_planet
free
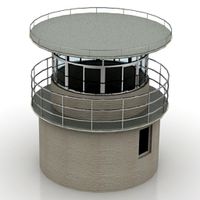
Tower
...lanet
tower construction building
tower polices post street tower n110913 - 3d model (*.gsm+*.3ds) for exterior 3d visualization.
3d_export
$5
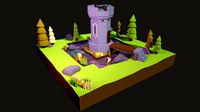
tower
...tower
3dexport
a fortified tower with a moat.
archibase_planet
free
Tower
...tower
archibase planet
building tower construction
tower n300712 - 3d model (*.gsm+*.3ds) for exterior 3d visualization.
archibase_planet
free
Tower
...uilding kremlin construction
tower 2 vtoraya bezymyannaya kremlin n100914 - 3d model (*.gsm+*.3ds) for exterior 3d visualization.
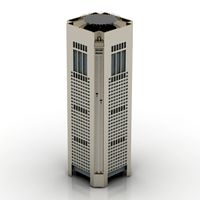
archibase_planet
free
Tower
...tower
archibase planet
forcetower tower
forcetower - 3d model for interior 3d visualization.
archibase_planet
free
Transmission tower
...lectricity pylon lattice tower framework tower
transmission tower n121015 - 3d model (*.gsm+*.3ds) for exterior 3d visualization.