Thingiverse
Rigidbot Big Acrylic Enclosure by noen
by Thingiverse
Last crawled date: 3 years ago
Update: 6.29.2016
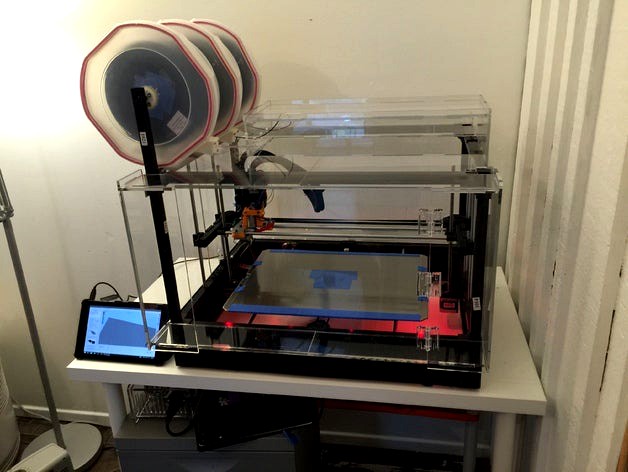
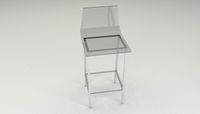
After using this for a while, there's a couple of improvements I would recommend. I inserted a webcam and digital thermometer inside. Routing the cables through the z-stop cutout is possible, but you may want to create a notch/hole elsewhere to route the cables out.
Temperatures for ABS have been fantastic. Throwing a blanket over the entire unit, I sustain a 54C internal temperature for ABS, resulting in zero warping and extremely predictable prints. By just covering the top of the unit, temps of 45C are consistent. Note: for PLA, you'll likely want to remove the entire front door panel to prevent heat buildup.
This is a project for a fully enclosed build chamber for the Rigidbot Big 3D Printer. It is designed to add the absolute minimal amount to the footprint of the printer without compromising the build volume. There is a slight loss in the Z-height at the left edge because of my conservative spacing for material spools. You can regain this by enlarging the relief box, or moving it entirely edge to edge if you don't use the spool rack.
It is optimized to be used with 18x24" 5mm (.220") Acrylic that is available in the USA at Lowe's (http://www.lowes.com/pd_239981-1638-1AG2123A_0__?productId=3502292) and Home Depot (http://www.homedepot.com/p/OPTIX-220-in-x-18-in-x-24-in-Clear-Acrylic-Sheet-1AG2123A/100260547).
You will also need 8 M4 Screws between 12mm and 16mm in length. I used 12mm stainless steel socket cap screws. The M4 screws that come with the printer are not long enough to work.
The dimensions for the cut files have been measured and have enough tolerance to account for slight deviations in your printer, but you may still need to do some light clean up work.
To glue the joints and the door hinges, you will need Acrylic Cement (http://www.tapplastics.com/product/repair_products/plastic_adhesives/tap_acrylic_cement/130) and an Applicator (http://www.tapplastics.com/product/supplies_tools/plastic_tools_supplies/hypo_type_solvent_cement_applicator/409)
I used one self-closing hinge (http://www.tapplastics.com/product/plastics/handles_hinges_latches/acrylic_hinge_self_closing/609) and two clear acrylic hinges (http://www.tapplastics.com/product/plastics/handles_hinges_latches/acryl_hinge_2/122) and an acrylic pull handle (http://www.tapplastics.com/product/plastics/handles_hinges_latches/acryl_pull_acrylic_handles/120) all from TAP Plastics to assemble the front door.
The single springed hinge keeps the door closed, but allows it to stay in a set open position when swung wide open.
A normal Rigidbot will need to have the plans altered quite a bit, but should use significantly less material, because it won't require splitting pieces (the RigidbotBig has pieces that are over 24" in length).
Similar models
thingiverse
free

3D Printer enclosure hinge (for 4mm acrylic)
...or a 3d printer enclosure.
it's made for a 4mm acrylic door
i used wood screws cuted to length to screw the door in the hinge
thingiverse
free

Hinges for Acrylic Doors for Makerbot Replcator 2 / 2X, Flashforge Creator Metal, and similar style 3D printers by DrazzticAction
...ction.com/products-page-2/3dprinters/enclosure-for-makerbot-replicator-2-2x-3d-printers-and-similar-clones/
enjoy better prints
thingiverse
free

Wanhao Duplicator 6 (MMU) Hinge for Front Enclosure Door by Vyperion
...t.
dimensions of pin
12mm x 12mm x 58mm
screws (per hinge)
3x socket cap m3 screws (3x0.5x8mm)
2x flat head m4 screws (4x0.7x8mm)
thingiverse
free

Hinge for the Front Door of the Lulzbot Enclosure by DrazzticAction
... http://www.ebay.com/itm/add-on-enclosure-for-lulzbot-mini-3d-printer-/291446076488?pt=lh_defaultdomain_0&hash=item43db8a3448
thingiverse
free

Small hinge for 4mm acrylic sheet by Beaver_Electronics
...crylic sheet by beaver_electronics
thingiverse
hinge for 4mm acrylic sheet. i'm using it for a door to the printer enclosure
thingiverse
free

Door Latchfor Makerbot Replicator 2 / 2X, Flashe Forge Creator Metal, etc style printer by DrazzticAction
...the these style printers. kit can be ordered at: http://drazzticaction.com/products-page-2/3dprinters/enclosure-for-makerbot-replicator-2-2x-3d-printers-and-similarclones/ ...
thingiverse
free

Door Hinge by Rignam
...door hinge by rignam
thingiverse
50mm x 30mm hinge for a door on my printer, used a 50mm m4 screw as the hinge pin.
thingiverse
free

CT'c Bizer Heat Housing for ABS printing by kabau
... thickness is 4mm.
if you want to order the acrylic sheets cutted to shape, use the stp files to send to your supplier.
have fun!
thingiverse
free

Hinges for door for CTC, Creator, Wanhao Duplicator by Cornflake
...odate the .21" acrylic i used to enclose my printer. the pins are easy enough to pop out in case i need to remove the door.
thingiverse
free
Rack It shelving door hinge (Print enclosure) by NashCreative
...mind...
find more on this part and more at nash creative on instagram @nashcreative_au
https://www.instagram.com/nashcreative_au/
Noen
thingiverse
free

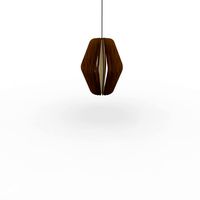
Devil May Cry Noen Sign by Tartor82
...229x190mm
cry 254x228mm
led stinghttps://www.amazon.de/gp/product/b013fzhd7o/ref=ppx_yo_dt_b_asin_title_o06_s00?ie=utf8&psc=1
thingiverse
free

Monoprice Select Mini E3Dv6 Part Cooling Fan Attachment by noen
...ent by noen
thingiverse
simply removed the led holes from uswaterrockets original design to make for a simpler part cooling fan.
thingiverse
free

Intel Edison Smartwatch Case by noen
...and internal details coming soon!
first article on my process here: http://www.thetylergibson.com/intel-edison-smartwatch-case/
thingiverse
free

Ultra-slim nano sim carrier by noen
...t 200 microns or lower. if you find the tolerances too tight, enlarge the model by .5-1%. the sim cards should snap into place.
thingiverse
free

Cork insulation for Monoprice Select Mini 3D Printer by noen
...x11" letter sized sheet of paper and use it to cut out your foam and cork. attach together and insert under the bed, enjoy!
thingiverse
free

Panasonic GH4 Camera Cage by noen
...o use them without brass inserts.
i printed this with 85% infill and 3 perimeters with petg to produce an essentially solid part.
thingiverse
free

Raspberry Pi 2 Simple Enclosure by noen
...t is designed to lose 1-3 layers and still fit well.
providing the original 3dm source file, so feel free to adapt to your needs.
thingiverse
free

MP Select Mini Z-Axis Tapered Coupler by noen
...ied 3/4 nuts here for ease of use.
full guide on properly installing this coupler:https://www.youtube.com/watch?v=5kkyi7q0dso
thingiverse
free

Plywood Nested Bike Rack by noen
....
read more about the design and the reasons i built it here: http://www.thetylergibson.com/building-a-better-portable-bike-rack/
Rigidbot
thingiverse
free

z_bracket rigidbot
...z_bracket rigidbot
thingiverse
z_bracket for 4 screws
thingiverse
free

Rigidbot Side Brackets by MKAY666
...rigidbot side brackets by mkay666
thingiverse
rigidbot side and z brackets
thingiverse
free

RigidBot Caliber Holder by dafes
...rigidbot caliber holder by dafes
thingiverse
caliber holder for the rigidbot frame
thingiverse
free

Rigidbot printerbed by nickbernstein
... printerbed by nickbernstein
thingiverse
build plate for rigidbot 3d printer. intended to be be c&c fabricated from aluminum
thingiverse
free

Filament Guide for Rigidbot by omegdadi
...filament guide that clips onto the frame of a rigidbot 3d printer. inspired by the rigidbot side cutter tool holder by steve0605.
thingiverse
free

Rigidbot End Cap by pdidonna
...rigidbot end cap by pdidonna
thingiverse
end cap to plug up the ends of the rigidbot frame
thingiverse
free

RigidBot monitor by EremaStar
...rigidbot monitor by eremastar
thingiverse
lcd
thingiverse
free

RigidBot Z-Axis Support by dafes
...rigidbot z-axis support by dafes
thingiverse
support structure for the z-axis upgraded rigidbot.
thingiverse
free

RigidBot Bar End Cap by tchotchke
...rigidbot bar end cap by tchotchke
thingiverse
push in end cap for covering the ends of the rigidbot bars.
thingiverse
free

Rigidbot Hex Key Holder by Steve0605
...rigidbot hex key holder by steve0605
thingiverse
a place to keep your hex keys handy for the rigidbot printer.
Acrylic
turbosquid
$15
Acrylic Lectern For The Chruch - Podium Acrylic
...the chruch - podium acrylic for download as skp, obj, and 3ds on turbosquid: 3d models for games, architecture, videos. (1642137)
3ddd
free
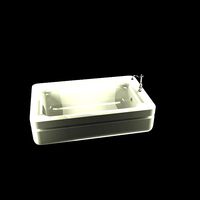
Acrylic bathtub
...acrylic bathtub
3ddd
ванна
acrylic bathtub. size 170x110 cm
turbosquid
$24
Acrylic Stool
...3d model acrylic stool for download as 3ds, max, obj, and fbx on turbosquid: 3d models for games, architecture, videos. (1311388)
turbosquid
$9
Acrylic Tables
... available on turbo squid, the world's leading provider of digital 3d models for visualization, films, television, and games.
turbosquid
$9
Acrylic Chair
... available on turbo squid, the world's leading provider of digital 3d models for visualization, films, television, and games.
turbosquid
$5

Acrylic Chair
... available on turbo squid, the world's leading provider of digital 3d models for visualization, films, television, and games.
turbosquid
$3
Table acrylic
... available on turbo squid, the world's leading provider of digital 3d models for visualization, films, television, and games.
3d_export
$5
Acrylic bath
... empire. originally created in 3ds max 2021 and v-ray next. materials v-ray mtl rubber; chromium; acrylic. modifiers: turbosmooth
3ddd
$1
Acrylic GM
...acrylic gm
3ddd
вентилятор
model is available in retail fanstar
3d_export
$17

Acrylic Chair 3D Model
...acrylic chair 3d model
3dexport
chair furniture acrylic
acrylic chair 3d model shalasaska 7623 3dexport
Enclosure
3d_export
free

electrical enclosure
...l enclosure where electrical devices like (relays, contactors, busbars ) are kept in order to protect from hazardous environment.
turbosquid
$100

GPU Enclosure
...yalty free 3d model gpu enclosure for download as obj and stl on turbosquid: 3d models for games, architecture, videos. (1381061)
3d_export
$5

Electrical Enclosure
...ed. also has tower lights attaced on the top.<br>file format that are available:<br>.step<br>.obj<br>.stl
archive3d
free

Enclosure 3D Model
...closure 3d model
archive3d
shower enclosure-acquarius- 3d model for interior 3d visualization.
archive3d
free

Enclosure 3D Model
...enclosure 3d model
archive3d
shower enclosure-omega- 3d model for interior 3d visualization.
archive3d
free

Enclosure 3D Model
...enclosure 3d model
archive3d
shower enclosure-vega - 3d model for interior 3d visualization.
archive3d
free

Enclosure 3D Model
...enclosure 3d model
archive3d
shower enclosure-zenith - 3d model for interior 3d visualization.
turbosquid
$20

shower enclosure
... available on turbo squid, the world's leading provider of digital 3d models for visualization, films, television, and games.
turbosquid
$14

Dumpster Enclosure
... available on turbo squid, the world's leading provider of digital 3d models for visualization, films, television, and games.
turbosquid
$25

3d printer enclosure
... model 3d printer enclosure for download as ipt, skp, and fbx on turbosquid: 3d models for games, architecture, videos. (1634310)
Big
3ddd
$1
Big Ben
...big ben
3ddd
big ben , часы
часы moooi - big ben
by marcel wanders
3d_export
$5

Sexy big
...sexy big
3dexport
sexy big
3d_export
$5
big sword
...big sword
3dexport
it is a big sword, with a designe
turbosquid
$5
Big
... available on turbo squid, the world's leading provider of digital 3d models for visualization, films, television, and games.
turbosquid
$1
big
... available on turbo squid, the world's leading provider of digital 3d models for visualization, films, television, and games.
3d_export
$5
big monster
...big monster
3dexport
big monster 3d model printing
3ddd
$1
Kioto BIG
...kioto big
3ddd
itre , kioto
kioto big . itre
3d_ocean
$25
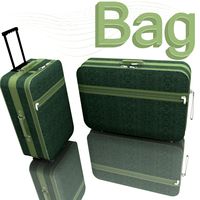
Big Bag
...the files are designed with clean topology, so are easy to edit & customize. there are 4 versions of files that are provid...
3ddd
$1
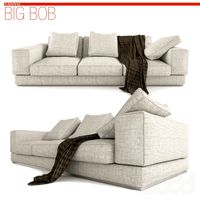
BIG BOB
...
version: 2014
preview: no
units: millimeters
polys: 391984
model parts: 20
render: v-ray
formats: 3ds max 2014, obj
design_connected
$13
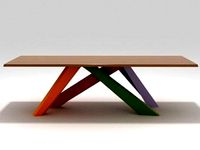
Big Table
...big table
designconnected
bonaldo big table computer generated 3d model. designed by gilles, alain.