Thingiverse
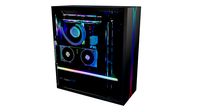
RGB USB Nightlight by Spudd1
by Thingiverse
Last crawled date: 2 years, 10 months ago
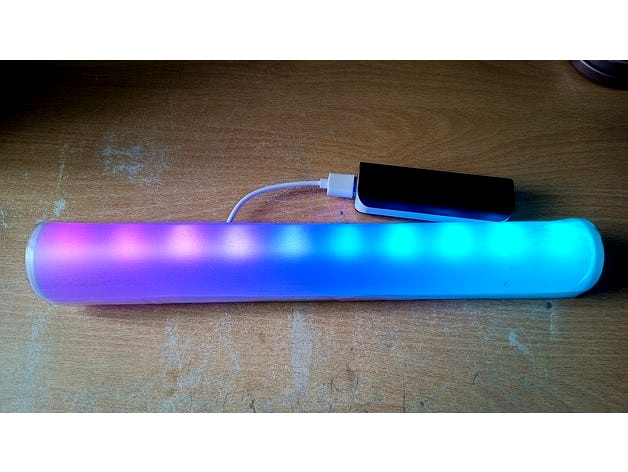
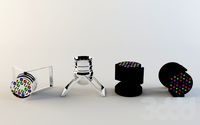
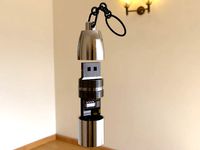
This is a neat project that turned out to be a real nice nightlight! It lasts about 2 days off a 2200mAh USB powerbank.
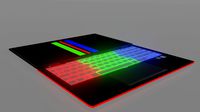
It is based on a Geekcreit® DIY C51 RGB Colorful Crystal LED kit that I got from Banggood (sadly no longer stocked there, but should be available elsewhere). Basically it is a MCU controlled, 10 RGB LED display. It has a number of different "modes" that are selected by briefly interrupting the power, and it has a light sensor (LDR) which will adjust the speed of whatever mode is currently playing (more light on the sensor = faster speed)
Here's a 2min video of the different modes (yes, I know that I messed up the layering of the frosted film, it's on the "To-Do" list) - https://www.youtube.com/watch?v=3wFMxJKNYyA
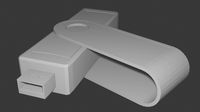
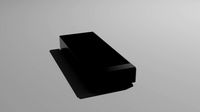
I designed this case in Fusion360 (Fusion file included), it is split into 2 halves as it wouldn't fit on my printer in one piece. There's also a couple of strengthening bars to reinforce the join (only one is in the files, but you need 2 of them for better re-inforcement) I just used hot-melt glue to stick the pieces together, but superglue would also work.
Then to make a front cover for it I used some clear acetate ( Cake collar, Link for the clear acetate :- https://www.amazon.co.uk/gp/product/B07R5P55JF ) and then applied 2 layers of self-adhesive frosting film ( Link for the diffusion film :- https://www.mdpsupplies.co.uk/glass-lightbox-films/etched ( I used Ritrama - Easy Apply Regular Etched ) ).
I have a craft vinyl cutter (Cameo4) and made up a cutting file for the frosted film (Attached SVG file) which has 2 pieces, 1 for the inner face of the acetate (allowing you to cut the clear film oversize, and then stick the "inner" frosted film on and then trim the clear film to the same size as the inner frosted film) and the 2nd larger piece which, because it is bigger than the inner piece, will allow the adhesive to stick the whole frosted diffuser to the 3d printed case.
That sounds way more complicated than it actually is, I made a video about assembling the whole case - https://youtu.be/_0_PeFzIbWM
I also made a video covering the actual building of the kit - https://www.youtube.com/watch?v=nnGKj40KpCE
It is based on a Geekcreit® DIY C51 RGB Colorful Crystal LED kit that I got from Banggood (sadly no longer stocked there, but should be available elsewhere). Basically it is a MCU controlled, 10 RGB LED display. It has a number of different "modes" that are selected by briefly interrupting the power, and it has a light sensor (LDR) which will adjust the speed of whatever mode is currently playing (more light on the sensor = faster speed)
Here's a 2min video of the different modes (yes, I know that I messed up the layering of the frosted film, it's on the "To-Do" list) - https://www.youtube.com/watch?v=3wFMxJKNYyA
I designed this case in Fusion360 (Fusion file included), it is split into 2 halves as it wouldn't fit on my printer in one piece. There's also a couple of strengthening bars to reinforce the join (only one is in the files, but you need 2 of them for better re-inforcement) I just used hot-melt glue to stick the pieces together, but superglue would also work.
Then to make a front cover for it I used some clear acetate ( Cake collar, Link for the clear acetate :- https://www.amazon.co.uk/gp/product/B07R5P55JF ) and then applied 2 layers of self-adhesive frosting film ( Link for the diffusion film :- https://www.mdpsupplies.co.uk/glass-lightbox-films/etched ( I used Ritrama - Easy Apply Regular Etched ) ).
I have a craft vinyl cutter (Cameo4) and made up a cutting file for the frosted film (Attached SVG file) which has 2 pieces, 1 for the inner face of the acetate (allowing you to cut the clear film oversize, and then stick the "inner" frosted film on and then trim the clear film to the same size as the inner frosted film) and the 2nd larger piece which, because it is bigger than the inner piece, will allow the adhesive to stick the whole frosted diffuser to the 3d printed case.
That sounds way more complicated than it actually is, I made a video about assembling the whole case - https://youtu.be/_0_PeFzIbWM
I also made a video covering the actual building of the kit - https://www.youtube.com/watch?v=nnGKj40KpCE
Similar models
thingiverse
free

Baby RGB nightlight - Veilleuse multicolore by Trankilloman
...g
batterie usb
2 pièces plastiques
prochaine étape :
ajout d'un bouton pour passer d'un mode statique à un mode dynamique
grabcad
free

Duracell ® USB Stick
...s://grabcad.com/library/usb-memory-circuit by https://grabcad.com/gonzalo.loredo.neri-1 ;)
i hope you enjoy it !
leave a "♥
thingiverse
free

Generic USB stick case by morecat_lab
....
i used for my usb sensor stick.
update:
improved version : use-case-04.scad
the shape of cogs is changed to avoid snap off.
thingiverse
free

Arduino Case with LAN and 0.96" LCD as RGB Controller by Cybi
....youtube.com/watch?v=afa4tzyteyk
howto:http://smarthomeyourself.de/anleitung-zum-selber-bauen/geraete-vorbereiten/rgb-controller/
thingiverse
free

DIY USB Fan Case by MexiMaker
...ch?v=xgpw7g0jl18&t=7s
video 2:https://www.youtube.com/watch?v=hue098ixunc
video 3:https://www.youtube.com/watch?v=r4uc9i0pflc
thingiverse
free

USB stick casing by AndersV209
... my usb sticks, i had 2 different types of usb sticks. so there is 2 versions.
i printed in different colors to identify them.
thingiverse
free

Hockey stick hanger kit by maburke
...ken hockey stick to a jersey hanger using these pieces.
cut the stick into 3 pieces:
2 pieces at 9.25"
1 piece at 16"
thingiverse
free

Switch Blade (USB stick) by Natange
...e shooting:
-if the usb dose not slide use nail polish remover and oil to clear and bits of leftover glue and lubricate the track
thingiverse
free

2" NPT cap for Maxbotix USB ultrasonic sensor (oil tank level readings) by cmh
...ed to the actual physical float level on the oil tank showing how well it matches up: https://www.youtube.com/watch?v=5ic_27f4kbo
thingiverse
free

Neopixel Tactile Switch Button Case by Firepixie
...n button cover and one with an "om" symbol etched into the top.
video here! https://www.youtube.com/watch?v=7dvy-_mruoo
Spudd1
thingiverse
free

Simple PCB foot for 3.5mm holes by Spudd1
...a soldering iron to heat a steel rule and melt the top of the foot as it comes thru the top of the pcb - sorta like a heat-stake.
thingiverse
free

Macro Ring Light by Spudd1
...brightness controller (pwm speed controller) found here:- https://www.amazon.co.uk/gp/product/b08pj349qf
my blog:- www.pdkh.co.uk
thingiverse
free

TS-100 soldering iron battery adaptor by Spudd1
....
i've also uploaded the fusion file if you want to adapt to your particular battery brand
edit 27/03/2021: added fusion file
thingiverse
free

ATEM Mini Extreme mount by richardhuss
...to attach to a desk/rack shelf/etc. many thanks to spudd1 for the original atem mini design! i have included...
Nightlight
turbosquid
$6

Nightlight
...ee 3d model nightlight for download as 3ds, max, obj, and fbx on turbosquid: 3d models for games, architecture, videos. (1392923)
turbosquid
$15

nightlight
... available on turbo squid, the world's leading provider of digital 3d models for visualization, films, television, and games.
3d_export
$5

Nightlight 3D Model
...export
nightlight light lamp
nightlight 3d model download .c4d .max .obj .fbx .ma .lwo .3ds .3dm .stl denchik1516 103020 3dexport
turbosquid
$25

Nightlight flower
... available on turbo squid, the world's leading provider of digital 3d models for visualization, films, television, and games.
turbosquid
$9

Nightlights for nursery
... available on turbo squid, the world's leading provider of digital 3d models for visualization, films, television, and games.
3d_export
$25

Nightlight flower 3D Model
...light flower 3d model
3dexport
3d model furniture lamp interior table nightlight
nightlight flower 3d model artdyx 87321 3dexport
turbosquid
free

nightlight(01).max
... available on turbo squid, the world's leading provider of digital 3d models for visualization, films, television, and games.
3ddd
free

Nightlight flower
...nightlight flower
3ddd
ночник
делалась модель для уличного декоративного освещения в проект, но решил сделать из него ночник.
turbosquid
$2

Nightlight VINTAGE WOODEN SLEEPING LAMP
... sldpr, lwo, 3dm, ipt, skp, max, blend, fbx, 3ds, obj, and da on turbosquid: 3d models for games, architecture, videos. (1519216)
3d_export
$11
nightlight vintage wooden sleeping lamp
...e designs, some featuring superheros and fantastical designs, while others feature the basic simplicity of a small luminous disc.
Rgb
design_connected
$9
RGB
...rgb
designconnected
zero rgb pendant lights computer generated 3d model. designed by fredrik mattson.
3d_export
free
darts rgb
...darts rgb
3dexport
3d model darts rgb
3ddd
$1
RGB прожектор
...
rgb , прожектор
размеры
чёрный диаметр 25см высота 27см
хромовый диаметр 20см высота 25
turbosquid
$10
RGB Laptop
...squid
royalty free 3d model rgb laptop for download as blend on turbosquid: 3d models for games, architecture, videos. (1686573)
turbosquid
free
RGB Keyboard
...uid
free 3d model rgb keyboard for download as blend and obj on turbosquid: 3d models for games, architecture, videos. (1669677)
3d_export
free
rgb chair
...rgb chair
3dexport
turbosquid
$1

RGB Control
...free 3d model rgb control for download as 3ds, obj, and blend on turbosquid: 3d models for games, architecture, videos. (1257345)
turbosquid
$4
RGB Cabinet
...ee 3d model rgb cabinet for download as ma, fbx, obj, and stl on turbosquid: 3d models for games, architecture, videos. (1662943)
3ddd
$1

Сенсорный пульт RGB
... изменяемой итерацией. текстуры кнопок - одна растровая (сенсорный круг rgb), все остальные сделаны при помощи процедурных карт.
3ddd
free
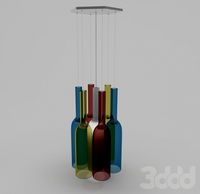
Люстра Jar RGB
...люстра jar rgb
3ddd
jar
люстра jar rgb дизайнер арик леви
h-1500, d-460
Usb
3d_ocean
$3
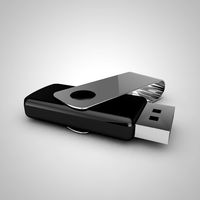
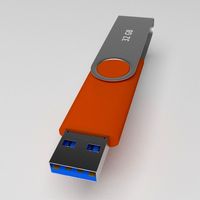
USB Thumbdrive
...usb thumbdrive
3docean
thumbdrive usb usb drive usb stick
this is a swivel type usb thumb drive.
3d_ocean
$5

Usb Stick
...usb stick
3docean
flash stick usb usb memory usb stick
usb stick created using 3ds max 2015 and rendered on mental ray.
3ddd
$1
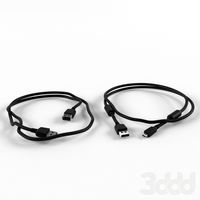
USB cable
... кабель , провод
высокополигональные модели кабелей usb.
3d_ocean
$5
USB Stick
...usb stick
3docean
32gb computer memory plug plugin protection usb usb stick
an usb stick with built-in plug protection
3d_ocean
$6

USB Stick
...tick
3docean
32 gb flash ram gigabyte memory metal nand plug ram stick usb usb 3 usb stick
usb stick with texture and normal map.
turbosquid
$5

USBS
...bs
turbosquid
royalty free 3d model usbs for download as max on turbosquid: 3d models for games, architecture, videos. (1466594)
3d_export
$5
usb flash
...usb flash
3dexport
usb flash
3d_export
free
usb flash
...usb flash
3dexport
usb flash
3d_export
free
usb flash
...usb flash
3dexport
usb flash driver
3ddd
$1

usb
...usb
3ddd
флешка
флешка