GrabCAD

Retro Game Controller
by GrabCAD
Last crawled date: 1 year, 11 months ago
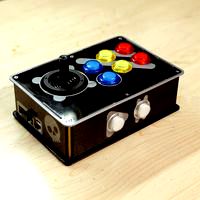
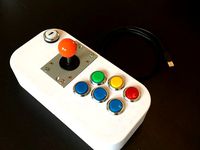
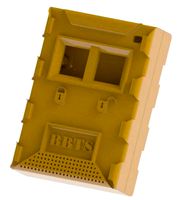
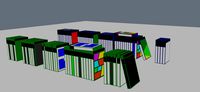
This is a 3D printed Retro Style Game Controller Box for the Raspberry Pi. This was designed for smaller 3D printers (less than 200cm build plate) and to be 3D printed without having to use 'supports'. I also designed it so that there wasn't any external fasteners (like a snap together model) other than screw holes to screw in the Raspberry Pi, speaker and joystick.
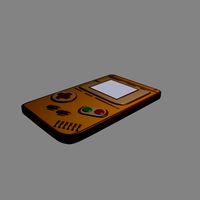
I also designed this for use with the Arcade Bonnet from Adafruit. I did this so I could have sound from the arcade controller and not the display device (T.V., Monitor, LED panels, etc..). Also designed so I could use Arcade style buttons (30mm) and to utilize an actual joystick instead of a small 2 axis thumb type joystick. Some games just need the real thing!
Unfortunately the depth of the joystick and the buttons bumped up against the speaker and Raspberry Pi (with the arcade bonnet) forced me to raise the height of the box, so that's why its so tall. The buttons would short out against the arcade bonnet and kept rebooting.
The speaker's mounts was purposely split across the two main bodies to help keep the two halves of the controller box together.
The design was done in SolidWorks and was fun and challenging! I learned many new tools and tricks available within SolidWorks to help me achieve this design.
Notes and Printer settings:
I did this in PLA so it was designed for very little flexibility. Tolerances are tight ~approx. .5mm. Careful on printing the vertical column locks, if the heatbed is too hot you'll experience "elephant foot" and the locks will be very tight (not necessarily a bad thing but shouldn't be so tight that you need pliers to get apart). I had a tough time with the horizontal locks due to gravity. I incorporated a slight arch in the receptacles. At the time I was using Cura 21.08 and those locks fit tight! I've downloaded Cura 2.26 and that software actually seems to keep to the tolerances slightly better, my horizontal locks were slightly loose when printing with that version. If printing with PLA I recommend setting the build plate temperature to 55C and part removal of 50C. 60C makes it awfully tough to remove the big parts with lots of surface area. I've had excellent results with 55/50.
Similar models
thingiverse
free

Retro Game Controller by JoeBowler
...e speaker's mounts was purposely split across the two main bodies to help keep the two halves of the controller box together.
cults
free
Arcade Bonnet Controller for RetroPie
... also dedicated pins for wiring up an analog joystick and an 8-way switch joystick.
https://www.youtube.com/watch?v=ndnbltzojcg
thingiverse
free

Arcade Bonnet Controller for RetroPie by adafruit
...t wires, so no soldering required. there's also dedicated pins for wiring up an analog joystick and an 8-way switch joystick.
thingiverse
free
Arcade Joystick + Embedded PI by keganholtzhausen
...
7x 28mm arcade buttons + switches
1x joystick like a zippy
1x xin-mo controller + wiring harness
a raspberry pi running retropie
thingiverse
free

ZX Pi Arcade by dubi
...is just to show how it looks, i've included the 123d and step files so all the parts can be exported or altered for printing.
thingiverse
free

Case for Adafruit Joy Bonnet - Raspberry Pi Zero W by adafruit
...e
download design sourcedownload stls on thingiverseadafruit joy bonnetraspberry pi zero w and packsothermill pro milling machine
thingiverse
free

OpenBox - Raspberry Pi B with Camera Mount SVG locked by peteruithoven
...unt where the lid can be locked. i also slightly increased the size of the box, because the raspberry pi didn't fit properly.
3dwarehouse
free

Arcade Test Box
...ull cabinet. i did not design the joystick, arcade buttons or the pcb. i found them in the 3d warehouse. #arcade #arcade_controls
grabcad
free

Arcade Cabinet v.0.1
...arcade cabinet v.0.1
grabcad
my first arcade cabinet based on raspberry pi 3. buttons and joystick connected directly to gpio.
thingiverse
free

box for arcade joystick by gsherper
... by gsherper
thingiverse
box for led arcade joystick designed to fit the winit led illuminated arcade diy joystick and buttons.
Retro
3d_export
$6

billboard-retro
...billboard-retro
3dexport
billboard-retro
3d_export
$5

Retro Bathroom
...retro bathroom
3dexport
retro bathroom
3d_export
$10

billboard retro
...billboard retro
3dexport
billboard retro of the 30s
3d_export
$6

retro tv3ds
...retro tv3ds
3dexport
retro tv.3ds
3d_export
$5

retro lamp
...retro lamp
3dexport
small retro lamp
3ddd
$1

Retro Radio
...retro radio
3ddd
радио
retro radio
3ddd
$1

Retro TV
...retro tv
3ddd
телевизор
retro tv
turbosquid
$5

retro
...ty free 3d model retro for download as max, max, fbx, and obj on turbosquid: 3d models for games, architecture, videos. (1539192)
3d_export
$5

retro sunset
...retro sunset
3dexport
very nice retro sunset selfmade.
3ddd
$1

retro office
...retro office
3ddd
стол
retro office vol.02
Controller
3d_ocean
$4
Controller TQFP32
...qfp32
3docean
chip controller cpu electronic gpu mcu micro controller silicon smd tqfp wafer
a micro controller in tqfp32 package
3d_ocean
$4
Controller TQFP44
...44
3docean
chip controller cpu electronic gpu mcu micro controller package smd tqfp tqfp44
a micro controller in a tqfp44 package
3d_export
$15
control unit
...control unit
3dexport
control unit
3ddd
$1
Yacht control
...yacht control
3ddd
yacht control
3d_export
$5
controle pgdm
...controle pgdm
3dexport
carcaca controle pgdm
turbosquid
free
controler
... available on turbo squid, the world's leading provider of digital 3d models for visualization, films, television, and games.
3ddd
$1
Control
...
http://www.schmitz-leuchten.de/html-ru/einzelleuchten-lampentyp-details.php?lamptype_no=700&group;=917&id;=731
3d_ocean
$4
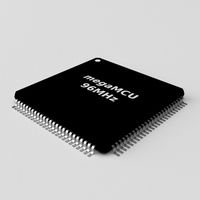
Controller TQFP100
...100
3docean
chip computer cpu electronic gpu mcu micro controller pin platine silicon wafer
a micro controller in tqfp100 package
3d_ocean
$4
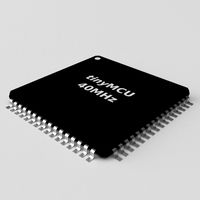
Controller TQFP64
...qfp64
3docean
chip computer cpu gpu mcu micro controller package silicon tqfp tqfp64 wafer
a micro controller in a tqfp64 package
3d_ocean
$7

Remote controller
... control switcher tv remote
remote controller for tv, sound systems etc easy to edit textures photo real rendered with mental ray
Game
3d_ocean
$4
Games
...games
3docean
3d games models real stick
3d, models, sports, games , trail
turbosquid
$5
Games
...s
turbosquid
royalty free 3d model games for download as skp on turbosquid: 3d models for games, architecture, videos. (1612115)
turbosquid
$65

game
... available on turbo squid, the world's leading provider of digital 3d models for visualization, films, television, and games.
turbosquid
$25
Game
... available on turbo squid, the world's leading provider of digital 3d models for visualization, films, television, and games.
turbosquid
$10

Game
... available on turbo squid, the world's leading provider of digital 3d models for visualization, films, television, and games.
turbosquid
$5
Game
...bosquid
royalty free 3d model gameplay for download as blend on turbosquid: 3d models for games, architecture, videos. (1274934)
3d_ocean
$7

game place
...game place
3docean
children game game park game place kids play luna park play
for kids game place
3d_export
$14
game character
...game character
3dexport
game character use for gaming
turbosquid
$20
Game Ready Car For Video Games
...e 3d model game ready car for video games for download as fbx on turbosquid: 3d models for games, architecture, videos. (1499375)
3d_ocean
$5
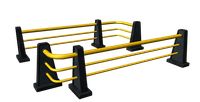
Game fence
...game fence
3docean
fence game
a high quality game ready fence.