Thingiverse
Retro 7 Segment Clock XL by parallyze
by Thingiverse
Last crawled date: 4 years, 7 months ago
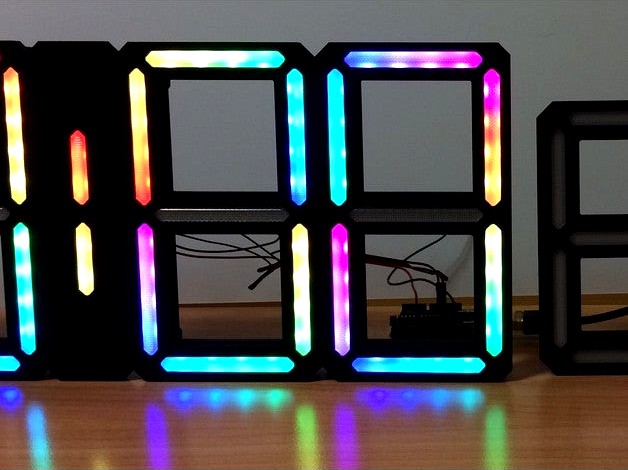
The last of the bunch... XL features 4 leds per segment. It's exactly the same as the standard one just with 4 leds per segment. It's built exactly the same way, so refer to documentation on the original thing/SE edition (video build).
No feet supplied, I suggest using the integrated wall hook. Have not tested mounting feet from the original thing, can't tell for sure if they keep it in balance.
26.04.2020 - Added Model B Diffusers
Added the diffusers from the original clocks modding-remix, sized to fit the XL version
29.09.2019 - Update to v5
v5 is now the same code base for all my 7 segment clocks here. Configuration like 4/6 digits, brightness and so on can all be modified by using the variables on top, there shouldn't be the need to dive down into the code anymore. (Tested and verified on SE, TE, RE, RE/XT and XL/XT). Of course you will still need to download the appropiate sketch because of the predefined led arrays.
Other features:
Removed(!) periodic palette cycling
I don't know if anyone used it at all. But I think this should be tied to a certain time to swap colors each hour or so. I couldn't care less so I removed it. And removing is a great feature, isn't it?
Many, many cleanups
Setup routine and so on have been changed quite a lot. Added some comments here and there.
Brightness is now stored within an array (min/med/max) and eeprom reading/setting has been improved.
Memory usage has been reduced, especially when setting dbg=false.
improved LDR support
There's some new variables on top of the sketch which allow you to adjust your LDR readout more easily. Additionally you can define upper/lower limits to turn it dark/bright exactly when you like.
Greatly improved color handling
Some palettes got some minor changes. All in all they're close to the old ones but I tried to get rid of some color flickering because of non ideal color combinations at start/end of palettes.
Also color flickering/steps on low brightness settings have been greatly improved.
Added some default color corrections/color temperature settings (great improvement on blue tones using ws2812b).
Added some palettes using "HTMLColorCodes", which should make it easy to create own gradients without caring about R/G/B values.
Some kind of debug interface
Using the serial console and having dbg=true; you can use your number pad to send buttons and/or change different variables. This makes creating own palettes and especially testing much more comfortable :D
Power limit is set to 750mA on all of them and one of the first parameters inside the sketch. Adjust this according to the model you're using and how much your wiring/power supply can handle.
Update:
Uploaded a fixed STL of the electronics case. Additionally it's a bit roomier than before.
Important: As can be seen in my instructions for other things I usually connect a regulated 5V power supply to the led strip and then connect an arduino to the led strip using its 5v pin. This is absolutely within specs as stated in the documentation for pro mini/nano.
Power per module is limited to 200mA because some people connect usb to their arduino and then power the leds using the 5v pin. The Arduino will keep resetting if you draw too much current from the 5v pin!
You should raise the limit to at least 500mA per module to get a noticeable difference between the three brightness settings. So make sure you're powering it properly.
Edit:
Added some cable covers. Refer to the picture at the bottom for placement.
Seen from the back:
A - left module
B - right module
C - additional modules in between
So if you're building this with 2 modules, use A + B, 3 modules use A + B + C
Edit:
Re-uploaded the software sketch. Power has been limitied to 200mA per module, more may be too much when connected to usb while uploading the sketch (especially with 3 modules). Depending on your power source you might want to increase this after uploading the sketch.
Added the connectors only (without electronics case) for adding further center/digit modules.A 3rd module can be mounted by using the connectors from the XT remix.
All parts on the back are roughly 1.0mm thicker so I suggest using M3x8-M3x10 as M3x6 might be a bit too short.
Biggest part:
208mm x 185mm x 12,75mm
Comparison:7 Segment Clock XL (2 modules/3 modules)
127/193 leds total (4 per segment, 61 per base frame, 5 per center frame)
7 Segment Clock Standard (2 modules/3 modules)
99/151 leds total (3 per segment, 47 per base frame, 5 per center frame)
7 Segment Clock SE
66 leds total (2 per segment, 33 per base frame)