Thingiverse
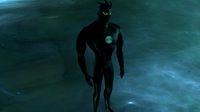
REMIX - Aliens FaceHugger Egg From Babelibue for Agisis' FaceHugger (Near Life Size) by entityunknown
by Thingiverse
Last crawled date: 3 years ago
UPDATE!!!
I've uploaded the No Tendrils egg that includes a base. The base is necessary since it cuts through two layers of the model to create an internal support structure to build the lower bowl of the inside of the egg.
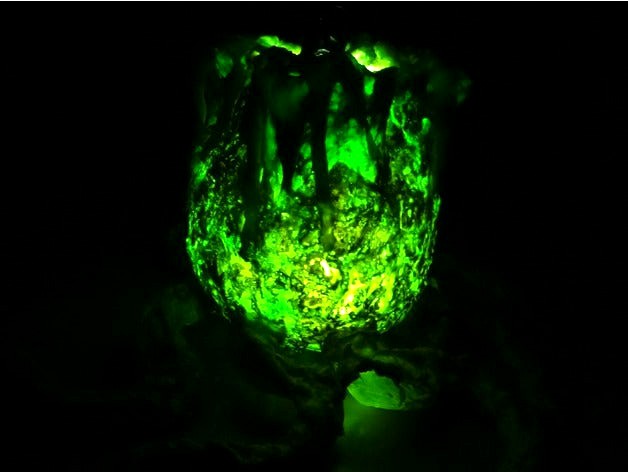
Who cares? WELL if you want a 0% infill egg that you can shine a light through and not see those infill line structures, then this is the way to go! I'm keeping the normal support at the bottom as well for extra support but it's printed without issue on 0% infill.
Printing fast with a low retraction will give strings on the inside which add some support internally too without the human/machine made looking lines.
Sorry for the odd size comparisons but the body of the tape is 2" so it's 7.5" total. I filled and coated the egg in ABS/Acetone so it should eventually (after another coat) be water and generally chemically resistant. The skin is nice and smooth too and it's still transparent with the 1mm shell :D
So next is to continue the fill and coating of ABS/Acetone and then some paint and latex. Then fill the tendrils, connect then, and I'm done!
One note about filling the egg. Drilling the points where the tendrils connect is not a good idea since the 1mm shell makes it too fragile. That didn't work out for the lower right corner in the pic with the green egg since I drilled that one. I did however use a small propane torch and an x-acto knife to cut out and/or move the PLA around for the rest so I had a large enough hole to fill the model with a funnel, without destroying the shell.
The yellow slime part is a really bad ABS brand from Shaxon that seems to be more PVC than ABS but the effect actually worked perfectly so the entire shell and innards is coated in liquid melted plastic :)
##################################################
DO NOT let the CAD view fool you. This thing is HUGE!!! Full disclosure... You saw the movies, those eggs were up nearly up to the hips. This egg fills the capacity of a TAZ 5. If you want true life size, you're gonna have to buy a huge printer OR segment this Egg and weld/glue them together. One day I may segment it for you, but till then this should work for ya :)
Full scale is 474mm X x 474mm Y x 175mm Z
or
18in X x 18in Y x 7in Z
Firstly AGISIS really is owed a lot of credit since he's the inspiration for everyone's design which this is remixed from AND he took some hard hits to make it happen. If you're looking at this you likely love Aliens and the Alien series. If not perhaps you will soon enjoy it too! AGISIS brought to life something that many of us had wished for and for the longest time had to spend 100s to 1000s of dollars to get a subpar model of something that sort of resembles what we saw in the movies. It's the creepiest prop ever! So now it has a home :)
I really liked AGISIS' face hugger and I've been needing an egg for it. Babelique was awesome enough to create one however the bottom just seemed like it needed more.
MustangDave made a great egg but it was closed and the overall model small. It's vector so of course you can scale it.
Either way I took all these ideas and models and meshed them together to build what I'd consider a more appropriate egg which includes the tendrils from MustangDave, the egg from Babelique, and then some sculpting on the lower portions of the egg to give it a more movie-like look.
If you want to make money off this model, WELL GO AHEAD! But do please pay tribute to all the artists involved. Otherwise enjoy and thank you!
What's uploaded here:
I uploaded my final .blend file for anyone to edit themselves.
I included the fullsize Face Hugger Egg I meshed/edited.
I also include the fullsize Face Hugger Egg with the tendrils cut off and then separate files for the tendrils. I named them NE, NW, SE, SW for the directions I saw them in as I cut them out.
As you place the tendrils you'll notice they have a specific orientation relative to Cardinal coordinates. This is how they'll be attached to the base egg. Use whatever methods you feel works to attach them.
How to Make it:
Using a LULZBot TAZ 5, one tendril takes up almost the whole bed. The egg itself without the tendrils does too.... SO that's why I cut it up into the 5 pieces. Have fun and well.... patience is a virtue but not so hard to achieve when something cool is in store for the future :)
If you use this thingi for your Face Hugger, then print with the lightest infill and shell that your printer will let you get away with. I don't like PLA but it sure has it's uses. If you print this whole thing in a translucent PLA, even natural PLA, you can light the inside so if you can make a nice enough paint job while keeping as much transluscency as possible, you'll have a damn near real Face Hugger Egg. Fill the shell with liquid and seal it? :D
How to assemble it:
I recommend drilling one or more large holes in each connection point. From there you can add some epoxy, glue, caulk, or other adhesive that takes up a large volume, and creates a solid bond.
A plastic welder will do wonders for post seam adhesion and cleaning up any gaps. A plastic welder will do well in your 3D printer arsenal if you don't have one yet ;)
SO now I have some wicked props for the house when people walk in my front door :)
Babelique's Face Hugger Egg:http://www.thingiverse.com/thing:2216212
MustangDave's Alien (Face Hugger) Egg:http://www.thingiverse.com/thing:268085
Agisis' Life Size Face Hugger:http://www.thingiverse.com/thing:1116392
I've uploaded the No Tendrils egg that includes a base. The base is necessary since it cuts through two layers of the model to create an internal support structure to build the lower bowl of the inside of the egg.
Who cares? WELL if you want a 0% infill egg that you can shine a light through and not see those infill line structures, then this is the way to go! I'm keeping the normal support at the bottom as well for extra support but it's printed without issue on 0% infill.
Printing fast with a low retraction will give strings on the inside which add some support internally too without the human/machine made looking lines.
Sorry for the odd size comparisons but the body of the tape is 2" so it's 7.5" total. I filled and coated the egg in ABS/Acetone so it should eventually (after another coat) be water and generally chemically resistant. The skin is nice and smooth too and it's still transparent with the 1mm shell :D
So next is to continue the fill and coating of ABS/Acetone and then some paint and latex. Then fill the tendrils, connect then, and I'm done!
One note about filling the egg. Drilling the points where the tendrils connect is not a good idea since the 1mm shell makes it too fragile. That didn't work out for the lower right corner in the pic with the green egg since I drilled that one. I did however use a small propane torch and an x-acto knife to cut out and/or move the PLA around for the rest so I had a large enough hole to fill the model with a funnel, without destroying the shell.
The yellow slime part is a really bad ABS brand from Shaxon that seems to be more PVC than ABS but the effect actually worked perfectly so the entire shell and innards is coated in liquid melted plastic :)
##################################################
DO NOT let the CAD view fool you. This thing is HUGE!!! Full disclosure... You saw the movies, those eggs were up nearly up to the hips. This egg fills the capacity of a TAZ 5. If you want true life size, you're gonna have to buy a huge printer OR segment this Egg and weld/glue them together. One day I may segment it for you, but till then this should work for ya :)
Full scale is 474mm X x 474mm Y x 175mm Z
or
18in X x 18in Y x 7in Z
Firstly AGISIS really is owed a lot of credit since he's the inspiration for everyone's design which this is remixed from AND he took some hard hits to make it happen. If you're looking at this you likely love Aliens and the Alien series. If not perhaps you will soon enjoy it too! AGISIS brought to life something that many of us had wished for and for the longest time had to spend 100s to 1000s of dollars to get a subpar model of something that sort of resembles what we saw in the movies. It's the creepiest prop ever! So now it has a home :)
I really liked AGISIS' face hugger and I've been needing an egg for it. Babelique was awesome enough to create one however the bottom just seemed like it needed more.
MustangDave made a great egg but it was closed and the overall model small. It's vector so of course you can scale it.
Either way I took all these ideas and models and meshed them together to build what I'd consider a more appropriate egg which includes the tendrils from MustangDave, the egg from Babelique, and then some sculpting on the lower portions of the egg to give it a more movie-like look.
If you want to make money off this model, WELL GO AHEAD! But do please pay tribute to all the artists involved. Otherwise enjoy and thank you!
What's uploaded here:
I uploaded my final .blend file for anyone to edit themselves.
I included the fullsize Face Hugger Egg I meshed/edited.
I also include the fullsize Face Hugger Egg with the tendrils cut off and then separate files for the tendrils. I named them NE, NW, SE, SW for the directions I saw them in as I cut them out.
As you place the tendrils you'll notice they have a specific orientation relative to Cardinal coordinates. This is how they'll be attached to the base egg. Use whatever methods you feel works to attach them.
How to Make it:
Using a LULZBot TAZ 5, one tendril takes up almost the whole bed. The egg itself without the tendrils does too.... SO that's why I cut it up into the 5 pieces. Have fun and well.... patience is a virtue but not so hard to achieve when something cool is in store for the future :)
If you use this thingi for your Face Hugger, then print with the lightest infill and shell that your printer will let you get away with. I don't like PLA but it sure has it's uses. If you print this whole thing in a translucent PLA, even natural PLA, you can light the inside so if you can make a nice enough paint job while keeping as much transluscency as possible, you'll have a damn near real Face Hugger Egg. Fill the shell with liquid and seal it? :D
How to assemble it:
I recommend drilling one or more large holes in each connection point. From there you can add some epoxy, glue, caulk, or other adhesive that takes up a large volume, and creates a solid bond.
A plastic welder will do wonders for post seam adhesion and cleaning up any gaps. A plastic welder will do well in your 3D printer arsenal if you don't have one yet ;)
SO now I have some wicked props for the house when people walk in my front door :)
Babelique's Face Hugger Egg:http://www.thingiverse.com/thing:2216212
MustangDave's Alien (Face Hugger) Egg:http://www.thingiverse.com/thing:268085
Agisis' Life Size Face Hugger:http://www.thingiverse.com/thing:1116392
Similar models
thingiverse
free

ALIEN . The face hugger coming out of his egg. by Babelibue
...ibue
thingiverse
the face hugger coming out of his egg
pla 200 / bed 60 / infill 20,30 %.
painting , latex , and painting again.
cg_trader
$9

Alien Face Hugger Xenomorph Fossil | 3D
...sil will fill you with joy! and eggs.... small hole sculpted in back to hang from a screw/nail or print large for a nice bookend.
thingiverse
free

Aliens Face Hugger Bust by Geoffro
...t, so i had to go back and simplify the mesh even more, i figure 25mb odd isn't too bad, i printed mine at 8cm high.
enjoy!
cults
free

Aliens Face Hugger Bust
...ut, so i had to go back and simplify the mesh even more, i figure 25mb odd isn't too bad, i printed mine at 8cm high.
enjoy!
cg_trader
$5

face-hugger-and-xenomorph-eggs | 3D
...hip warhammer miniature facehugger sciencefiction base tabletop fanart prometheus fan art xenomorph sf face hugger art sculptures
3dwarehouse
free

face hugger and egg
...rested in downloading it i recomened downlodading the aline two #alien #attaching #chestburster #facehugger #horror #movie #scifi
cults
free

Gift Egg
...rotate file 90 degrees along x axis so the bottom of the egg is facing down. ) scale up a bit too, the egg in the file is small.
thingiverse
free

Gift Egg by TK3DPrinting
... rotate file 90 degrees along x axis so the bottom of the egg is facing down. ) scale up a bit too, the egg in the file is small.
thingiverse
free

Coat Hanger by Hagen_sr4
... free to
rescale it if you think it's too big.
i made 6 of them and they look pretty nice in the hallway.
knock yourself out!
cg_trader
$19

Alien Eggs 4 Variants plus Nests and Tendrils - 3D Asset Kit PBR
...ests and tendrils that will help you with integration for environment dressing or extentions of any type, ready for vfx or games.
Babelibue
thingiverse
free

Clown by Babelibue
...clown by babelibue
thingiverse
clown for hallowen
thingiverse
free

Thanos by Babelibue
...thanos by babelibue
thingiverse
paint made with brush and airbrush.
thingiverse
free

Apollo ALDRIN by Babelibue
...apollo aldrin by babelibue
thingiverse
buzz aldrin on the moon, apollo.
thingiverse
free

Walking Dead by Babelibue
...walking dead by babelibue
thingiverse
print , paint and latex .
pla 220° bed 60° infil 30%
thingiverse
free

Pioneer message. by Babelibue
...pioneer message. by babelibue
thingiverse
la plaque qui ce trouve sur la sonde pioneer 1 .
thingiverse
free

Iron Man by Babelibue
... the defects of impressions. and finally put in painting with the brush and the airbrush, colorless brilliant plasticizer finish.
thingiverse
free

Hand Spinner Luigi by Babelibue
...r luigi by babelibue
thingiverse
hand spinner luigi
pla 195°
bed 60°
infil 30%
thank you cyril cabannes
for designing it in 3d.
thingiverse
free
ALIEN . The face hugger coming out of his egg. by Babelibue
...ibue
thingiverse
the face hugger coming out of his egg
pla 200 / bed 60 / infill 20,30 %.
painting , latex , and painting again.
Agisis
thingiverse
free

Agisis Facehugger Stand by SuperGario
...39;t one out there. now there is. so print it. paint it. enjoy. i think it looks pretty sweet.
download this.
have fun.
be good.
thingiverse
free

Customizable Agisis Facehugger Stand by Nukular
...th openscad and added some parameters for customization.
it is possible to change the height and the wall thickness of the stand.
thingiverse
free

Agisis Ultimate RoStock Max V2 Toolholder by Agisis
...d to print with supports. i recommend 0.22mm per layer with a 35% infill. it should be strong and sturdy, not necessarily pretty.
thingiverse
free

Rostock Max V2 Spool Spin Smoother by Agisis
...holder is square at the top so each time the extruder pulled in filament, the machine would jerk a bit. this solved that problem.
thingiverse
free

Agisis Face Hugger (simplified) by dazzadazzadazzadazza
...dded the more detailed body complete file as reequested. some of the bottom features are extruded to show of these extra details.
thingiverse
free

Agisis Ultimate Alien Face Hugger (40in x 23in - LIFE SIZE!) by Agisis
...scription), but if you do over-extrude, they will not fit together right no matter how hard you try to snap them together.
enjoy!
thingiverse
free

Alien Face Hugger - Simplified by caross
...very easy to assemble version. the design belongs to agisis i just stuck em together and re-oriented. for me,...
thingiverse
free

Facehugger Mask Cover by Paulcmassey
...for the facehugger. this one i combined the original agisis model, curved it to fit the face better, hollowed...
thingiverse
free

Alien Face Hugger – Free Hugs & Kisses by JeffTregre
...downloaded from thingiverse, titled: ultimate alien face hugger by agisis 11/06/2015. https://www.thingiverse.com/thing:1116392 . total printer build time of the...
Entityunknown
thingiverse
free

The Dirt Spoon by entityunknown
... a link to the place with the dirty stuff i'm talking about and i assure you it is very (dirty)....
https://givemethedirt.com
thingiverse
free

Chain Gun for 1/10 scale RC by entityunknown
...and enjoy a fpv rock crawl with the trx-4, bronco body, and the chain guns :dhttps://www.youtube.com/watch?v=metek6vkyru&t=6s
thingiverse
free

Ford Bronco Angry Eyes - 1987-1991 by entityunknown
... lil gimmic like this won't get so much hate ;)
but if you want a real abs print challenge, print it and good luck ;)
tbd!!!!
thingiverse
free

GoLight RadioRay LED Lens Case by entityunknown
...as is. still, i added the foam since i get enough packaging foam things shipped in so i had something that was perfect already :)
thingiverse
free

Monster Claw - Halloween by entityunknown
... it for each one but hey, it's a start! probably this coming halloween i'll add in those for each one and then re-upload.
thingiverse
free

TRX-4 Rear Bumper by entityunknown
...rawlin!
update: i added the same bumper but with d-links.
bonus points on guessing who those legs belong to in the background :d
thingiverse
free

RC 1/10 Proline 1981 Bronco Light Buckets by entityunknown
...nted side is the side where the light reflects from ;) just flip them 180 on x or y and eventually i might fix that in the model.
thingiverse
free

Mini Lathe DRO No Mod by entityunknown
...im the bottom of the clamps. that will give you a flat setup too vs. the slightly angled one you'd get without shims on this.
thingiverse
free

Mini Lathe Telescoping Lead Screw Cover Install Tool for LittleMachineShop.com by entityunknown
...chris over at the littlemachineshop.com gave me his blessing on this part and provided a link to it as well so we're legit ;)
thingiverse
free

TRX-4 2065 Servo Spring Horn Jig by entityunknown
...x and bandit i believe?
here's the youtube video showing how to use this:https://www.youtube.com/watch?v=rrmnfvb2fkg&t=3s
Facehugger
turbosquid
$50

Facehugger
... available on turbo squid, the world's leading provider of digital 3d models for visualization, films, television, and games.
turbosquid
free

Facehugger
... available on turbo squid, the world's leading provider of digital 3d models for visualization, films, television, and games.
3d_export
$10

Facehugger Rigged 3D Model
...3dexport
alien warrior monster predator avp xenomorph ripley marines facehugger
facehugger rigged 3d model cubanb82 7547 3dexport
3d_export
$100

Alien+Facehugger+BONUS DEMO!! 3D Model
...en warrior monster predator avp xenomorph ripley marines facehugger
alien+facehugger+bonus demo!! 3d model cubanb82 7550 3dexport
turbosquid
free

PROTOTYPE FACEHUGGER (8 of 11)
... available on turbo squid, the world's leading provider of digital 3d models for visualization, films, television, and games.
3d_export
$80

Rigged Alien Xenomorph Facehugger Egg 3D Model
...i science fiction textures materials rigged high
rigged alien xenomorph facehugger egg 3d model video fx universe 33412 3dexport
3d_export
$130

Xenomorph Alien Drone 3D Model
...xenomorph alien drone 3d model 3dexport alien facehugger egg xenomorph drone warrior face hugger character creature fantasy...
3d_export
$130

Xenomorph Alien Warrior 3D Model
...xenomorph alien warrior 3d model 3dexport alien facehugger xenomorph drone warrior face hugger character creature fantasy sci-fi...
3d_export
$190

Rigged Alien Xenomorph Megapack 3D Model
...rigged alien xenomorph megapack 3d model 3dexport alien facehugger egg xenomorph drone warrior face hugger character creature fantasy...
thingiverse
free

Facehugger stencil by Longquang
...facehugger stencil by longquang
thingiverse
facehugger
Egg
3d_ocean
$2

Egg and Egg Cup
...egg and egg cup
3docean
breakfast eating egg egg cup eggcup food
an egg in an egg cup
3d_ocean
$6

Easter Egg Set and Egg Cup
...xtured eggs and one egg cup. striped textures are editable – .pdf files are included in the set. one egg contains 2,368 faces ...
3d_ocean
$6

Eggs Set
...lective scene textures
different types of eggs, including easter egg, golden egg..etc render set-up, materials, texture included.
design_connected
$9

Egg
...egg
designconnected
bonacina pierantonio egg computer generated 3d model. designed by ditzel nanna, joergen.
3d_export
$25

a shatterable egg - broken eggs
...a shatterable egg - broken eggs
3dexport
texture size:512px number of texture:4 texture format: png 1 texture= 1 egg
turbosquid
$40

A pile of eggs - fried egg - yolk - eggshells - broken eggs
...ggshells - broken eggs for download as max, 3ds, fbx, and obj on turbosquid: 3d models for games, architecture, videos. (1677067)
3d_ocean
$2

Easter Egg
...easter egg
3docean
easter egg food holiday
easter egg with texture.
3d_ocean
$1

3D Eggs
...ter eggs eggs
3d eggs ready for decoration! easter is coming! easy editable , uv wrapped ,zip contains : blend,obj,uv layout png.
design_connected
$20

Egg
...ignconnected
photo-realistic 3d models of the egg chair by arne jacobsen for 3d architectural and interior design presentations.
3d_export
$6

fried eggs
...fried eggs
3dexport
fried eggs
Aliens
3d_export
$15

alien
...alien
3dexport
alien
3d_export
free
alien
...alien
3dexport
alien
3d_export
$19

Alien Mountains glacier peaks alien mountains alien landscapes
...untains alien landscapes
3dexport
1.alien mountains glacier peaks alien mountains alien landscapes 2.files include 3dmax fbx obj
3d_ocean
$8

Alien
...ocean
alien character game green lowpoly space ufo weird wild
3d model of alien, optimized for high poly model 1350 total polygon
3d_export
$5
alien
...alien
3dexport
the model of the alien is executed in the program max version 2020. the model has a skeleton.
3d_ocean
$8

3d alien
...3d alien
3docean
3d alien 3d model alien
3d model alien, make by lightwave software
turbosquid
$12

Alien Mountains glacier peaks alien mountains alien landscapes
... peaks alien mountains alien landscapes for download as max on turbosquid: 3d models for games, architecture, videos. (1621520)
turbosquid
$5

Alien
...lien
turbosquid
royalty free 3d model alien for download as on turbosquid: 3d models for games, architecture, videos. (1234719)
turbosquid
$2
Alien
...lien
turbosquid
royalty free 3d model alien for download as on turbosquid: 3d models for games, architecture, videos. (1544698)
3d_export
$14
ben 10 alien force alien-x
...ben 10 alien force alien-x
3dexport
a 3d model of ben 10 alien force alien, alien-x. with turn table animation.
Life
3ddd
$1

Life
...life
3ddd
life
автор модели: aeroslon
3d_ocean
$10

Life
...life
3docean
3ds arman3dg games icon life low max poly set
life icon set. (3ds max file- 2010, 2011, 2012, 2013)
3ddd
$1

Life
... costantini pietro
сидение и спинка обита тканью. спинка украшена каретной стяжкой. концы ножек украшены металлом.
3d_export
$15

life vest life jacket safety jacket
...life vest life jacket safety jacket
3dexport
life vest life jacket safety jacket
3ddd
free

Life
...8
depth cm 80
height cm 93
если вам понравилась моя модель - посмотрите и остальные:http://3ddd.ru/users/stas-t/models
3ddd
free

ROYAL LIFE
...royal life
3ddd
royal life , капитоне
полукресло
3d_export
$5

star of life
...star of life
3dexport
a little model of the symbolf of star of life
3ddd
$1

Royal Life
...royal life
3ddd
royal life
автор модели: aeroslon
3ddd
$1

Royal Life
...royal life
3ddd
royal life
автор модели: aeroslon
3ddd
$1

Life Day
...life day
3ddd
тумба
тумба life day.смоделировано по фотографии
Remix
turbosquid
$5

MODA Collection Remix Chair
... available on turbo squid, the world's leading provider of digital 3d models for visualization, films, television, and games.
3d_export
$12

remix yamaha rm1x
...remix yamaha rm1x
3dexport
geometry triangles 15.2k vertices 7.6k pbr no textures 1 materials 1 uv layers yes
3d_ocean
$5

Vray fabric Kvadrat remix green - tileable
...th vray and 3dsmax. high-resolution texture images (2000×2000 px) file included: shader vray 2.40 texture image 3ds max 2011 file
turbosquid
$20

Gerrit Rietveld 1938 Zig Zag Chair Remix
... available on turbo squid, the world's leading provider of digital 3d models for visualization, films, television, and games.
3d_export
$10

multicolored remix parametric table furniture
... fbx, obj, mtl, archive with textures. the model has no glitches. render and materials - vray . without using plugins. good use!
3ddd
$1

Barovier&Toso / Manhattan Remix 7192
... 004293-142405
в коллекции есть люстры 7, 9, 12 рожковые. диаметр соответственный 1000, 1250, 1500 мм.
3ddd
$1

Muuto fiber chair
...grey/grey, dusty green/dusty green, nature/oak, natural white/oak upholstery options remix 183/black, remix 133/grey, remix 643/dusty red leather options black...
3ddd
$1

Barovier&Toso 7190-7195
...7190-7195 3ddd barovier&toso потолочнай люстра фабрики barovier&toso;, коллекция manhattan remix артикул 7190-7195. размеры в inches: 39"...
3d_export
$5

3D Locking Handle Weatherproof Storage Box Container
...handle weatherproof storage box container 3dexport new, improved and remixd! no screws required. print-in-place. weatherproof. parametric. 2 parts. easy...
cg_studio
$49

HTC One Mini 2 Amber Gold3d model
...cell phone mobile cellular super lcd touchscreen touch screen remix amber gold .max .obj .mb .lwo .fbx .c4d .3ds...
Size
3d_export
$7
shoes size from 5 inch size to 11 inch
...shoes size from 5 inch size to 11 inch
3dexport
shoes design women model sizing from 5 inch to 11 inch
turbosquid
$15

Closet-small size
...
royalty free 3d model closet-small size for download as max on turbosquid: 3d models for games, architecture, videos. (1186088)
turbosquid
$5

Full size Futon
...id
royalty free 3d model full size futon for download as max on turbosquid: 3d models for games, architecture, videos. (1339638)
turbosquid
$4

mid size sword
...d
royalty free 3d model mid size sword for download as blend on turbosquid: 3d models for games, architecture, videos. (1160246)
turbosquid
$3

Mid size hammer
...
royalty free 3d model mid size hammer for download as blend on turbosquid: 3d models for games, architecture, videos. (1160647)
turbosquid
$19
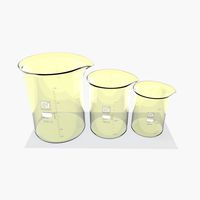
Beaker 3 Sizes
...yalty free 3d model beaker 3 sizes for download as ma and obj on turbosquid: 3d models for games, architecture, videos. (1645955)
turbosquid
$20

Full Sized Bed
...d model full sized bed for download as max, 3ds, fbx, and obj on turbosquid: 3d models for games, architecture, videos. (1547542)
turbosquid
$45
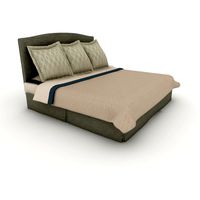
King Size Bed
... available on turbo squid, the world's leading provider of digital 3d models for visualization, films, television, and games.
turbosquid
$15

Queen size bed
... available on turbo squid, the world's leading provider of digital 3d models for visualization, films, television, and games.
turbosquid
$14

Bed - Full Size
... available on turbo squid, the world's leading provider of digital 3d models for visualization, films, television, and games.