Thingiverse

RC Wheel Balancer for 1/10 or 1/16 Vehicles by luisfjdesigner3d
by Thingiverse
Last crawled date: 3 years, 1 month ago
This wheel balancer that I have designed myself and have the two main essential black pieces 3-D printed out at one of my local hobby shops, and for the handle I bought PVC pipe from a hardware store to cut down on costs and I also needed to bearings hex nut
and i need one front axle form a RC vehicle but I purchase the spare parts themselves and used one of them to build this device. If you decide to download this file you will need
You will need 1/2"2 PVC pipe can get them at a hardware store of your choice.
You will also need four screws this rules must be 3x23mm
You will need one front axles from traxxas part no.3637
You will need one hex nut from traxxas part no.3654
You will need two bearings from traxxas part no.5116
You will need one pin part no.2754
So now I will go ahead and explain to you how to assemble it. In one of the photos
you see one of the two 3-D printed parts behind it is the bearings, hex nuts, and the front axle.
So we will go ahead and assembled this part of the wheel balancer.
In the next photo you see the same parts behind it is the dremel power tool infront of it are some bits to be used with the dremel power tool. Why depending upon your 3-D printer you will have to do some dremeling (sanding)to get some of the rough edges out and to remove the excess out of the area where the bearings are going to be fitted in.
After you are done with the dremeling (sanding) you will begin to fit in the bearings as you see in one of the photos where I just dremel out the excess to help fit in the bearings better. And also in one of the photos you will place the bearing on the other side of this part of the wheel balancer as well.
In the next photo you should get and idea how it should look like after you placed in the bearings in this parts
of the wheel balancer.
After you are done you will go ahead and insert one of the axles into the backside of this parts of the wheel balancer. As you see here in the photos on how I did that.
after you are Done with the assembly it should look like this as you see here in one of the photos.
In the next set of photos you will insert a pin on to the hole on the axle as you see here in the photos and you should get the and results in the next photo.
Then the next thing you will do is to insert the hex nut as you see here in one of the photos.
And then after that it should look like this as you see here in one of the photos.
So after you are done with that you are going to take the 3-D printed bigger part of this wheel balancer and use the dremel to sand out some of the excess so you will be able to fit the 3-D printed part on to the PVC pipe.
After you got that done do a test fit to make sure everything fits in correctly. If not
do some more sanding.
After you're done with that as you see here in one of the photos decide how much link that you want for the handle and then cut the PVC pipe to the link that you want.
After getting the PVC pipe cut to size done as you see in one of the photos the parts
now ready to be assembled.
As you see here in one of the photos is the PVC pipe the other 3-D printed parts with the
the 3/4"1/2 PVC Male adapter I am using this part because I wanted to upgrade this
wheel balancer later. But not necessary but would help.
So what I did here in one of the photos I installed the PVC male adapter onto the
PVC pipe itself and then you superglue to glue it in place.
The next thing I did is to get the paint job not necessary but I did it because
I want this to look good.
After getting that done I have to sand some of the excess paint off of the PVC pipe
so I can fit the 3-D printed part in.
After getting that done I you superglue to secure this 3-D printed part on to the PVC pipe
as you see here in one of the photos.
After getting that done you will start inserting the screws in to the first part
of this wheel balancer that involves the bearings and front axle that has been assembled
earlier.
The next thing you will do is to insert the screws through the holes as you see in the photos
on where to put the screws in as you see here in one of the photos.
Then the next thing you will do is just to screw this part onto the handle itself
After that the wheel balancer should be completely assembled as you see here in the photos.
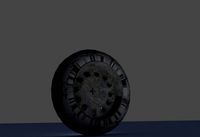
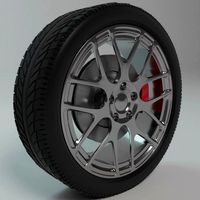
Then the next thing you will do is take one of your wheels and test it out to make sure
that everything works so now you can go and balancer wheels with out blowing a lot of money so enjoy
and i need one front axle form a RC vehicle but I purchase the spare parts themselves and used one of them to build this device. If you decide to download this file you will need
You will need 1/2"2 PVC pipe can get them at a hardware store of your choice.
You will also need four screws this rules must be 3x23mm
You will need one front axles from traxxas part no.3637
You will need one hex nut from traxxas part no.3654
You will need two bearings from traxxas part no.5116
You will need one pin part no.2754
So now I will go ahead and explain to you how to assemble it. In one of the photos
you see one of the two 3-D printed parts behind it is the bearings, hex nuts, and the front axle.
So we will go ahead and assembled this part of the wheel balancer.
In the next photo you see the same parts behind it is the dremel power tool infront of it are some bits to be used with the dremel power tool. Why depending upon your 3-D printer you will have to do some dremeling (sanding)to get some of the rough edges out and to remove the excess out of the area where the bearings are going to be fitted in.
After you are done with the dremeling (sanding) you will begin to fit in the bearings as you see in one of the photos where I just dremel out the excess to help fit in the bearings better. And also in one of the photos you will place the bearing on the other side of this part of the wheel balancer as well.
In the next photo you should get and idea how it should look like after you placed in the bearings in this parts
of the wheel balancer.
After you are done you will go ahead and insert one of the axles into the backside of this parts of the wheel balancer. As you see here in the photos on how I did that.
after you are Done with the assembly it should look like this as you see here in one of the photos.
In the next set of photos you will insert a pin on to the hole on the axle as you see here in the photos and you should get the and results in the next photo.
Then the next thing you will do is to insert the hex nut as you see here in one of the photos.
And then after that it should look like this as you see here in one of the photos.
So after you are done with that you are going to take the 3-D printed bigger part of this wheel balancer and use the dremel to sand out some of the excess so you will be able to fit the 3-D printed part on to the PVC pipe.
After you got that done do a test fit to make sure everything fits in correctly. If not
do some more sanding.
After you're done with that as you see here in one of the photos decide how much link that you want for the handle and then cut the PVC pipe to the link that you want.
After getting the PVC pipe cut to size done as you see in one of the photos the parts
now ready to be assembled.
As you see here in one of the photos is the PVC pipe the other 3-D printed parts with the
the 3/4"1/2 PVC Male adapter I am using this part because I wanted to upgrade this
wheel balancer later. But not necessary but would help.
So what I did here in one of the photos I installed the PVC male adapter onto the
PVC pipe itself and then you superglue to glue it in place.
The next thing I did is to get the paint job not necessary but I did it because
I want this to look good.
After getting that done I have to sand some of the excess paint off of the PVC pipe
so I can fit the 3-D printed part in.
After getting that done I you superglue to secure this 3-D printed part on to the PVC pipe
as you see here in one of the photos.
After getting that done you will start inserting the screws in to the first part
of this wheel balancer that involves the bearings and front axle that has been assembled
earlier.
The next thing you will do is to insert the screws through the holes as you see in the photos
on where to put the screws in as you see here in one of the photos.
Then the next thing you will do is just to screw this part onto the handle itself
After that the wheel balancer should be completely assembled as you see here in the photos.
Then the next thing you will do is take one of your wheels and test it out to make sure
that everything works so now you can go and balancer wheels with out blowing a lot of money so enjoy
Similar models
thingiverse
free

Fake Shock Reservoirs for the Traxxas Ultra Shocks by luisfjdesigner3d
...t get
in the way of the body itself and it does not get in the way on how it performs. so i hope you enjoy this cosmetic upgrade.
thingiverse
free

oscillating sanding tool
...han it was when i used a 608 bearing so i'm good.
also, full speed on the dremel is very exiting, because, not very balanced.
thingiverse
free

Gunner set for stock gun 30mm Portanova m2 by luisfjdesigner3d
...you will need a dremel power tool or something similar to it, some sandpaper, and some super glue to...
thingiverse
free

Disc brake set 2 for Traxxas will 1/16 E Revo by luisfjdesigner3d
...need to do some sanding with a dremel or similar power tool to smooth out all of the rough...
thingiverse
free

Small Stand for Smart Phone by luisfjdesigner3d
...checkout there as i was there i saw a similar device that does the same thing but i could...
thingiverse
free

Shock Spacers for the Traxxas 1/16 E-Revo/summit/slash by luisfjdesigner3d
...ve the shocks and
install the spacers on to the shocks themselves you should get
the idea on how that is done so enjoy this part.
thingiverse
free

Disc brake set 1 for the Traxxas 1/16 E Revo by luisfjdesigner3d
...need to do some sanding with a dremel or similar power tool to smooth out all of the rough...
thingiverse
free

30mm custom back hand set m1 by luisfjdesigner3d
...you will need a dremel power tool or something similar to it, along with the right drill bit, and...
thingiverse
free

Wheel repair 2 by mrbenbritton
...fits around that and holds it together. it worked perfectly in the first print. the photo is the wheel after a few months of use.
thingiverse
free

Dremel Flexi Extension Sanding Table by bernbout
... as shown.
refer to the images for assembly.
if you have one of these clamps then this thingi is designed specifically to fit it.
Luisfjdesigner3D
thingiverse
free

thumb screwdriver by luisfjdesigner3d
...terial so this tool can be
stronger and better. this thumb screwdriver that you see here in the photos
was made with abs plastic.
thingiverse
free

Portable Stand for Android or Apple Device by luisfjdesigner3d
...em
3d printed out at one of my local hobby shops. so there is not much
to this item as you see in the photos. so enjoy this item.
thingiverse
free

Headlights for the Vaterra kalahari/Losi Desert Truck by luisfjdesigner3d
...eadlights
with these that i had designed itself. these headlights
can also be use in the other rc vehicles for cosmetic purposes.
thingiverse
free

Mount for any ESC for Traxxas Slash 4x4 by luisfjdesigner3d
...file you will need to screws they need to be 3x8mm and the photo should give
you and idea how to install it so enjoy this upgrade
thingiverse
free

Battery tray for lipos for the Losi mini 8 by luisfjdesigner3d
...re the battery is laid down. as you see in the photos my
redesign battery tray was used in my vaterra kalahari/losi desert truck.
thingiverse
free

Breastplate m7 for Frame Arms by luisfjdesigner3d
...dpaper, and from there
the photos should show you how to install it and what it should look like
after you're done, so enjoy.
thingiverse
free

Mount for any receiver box for Traxxas Slash 4x4 by luisfjdesigner3d
...t the photos
and it should give you an idea how to install it you will need about 3x8mm
screws, so enjoy it if you need the part.
thingiverse
free

Satellite Antenna for Vaterra kalahari/Losi Desert Truck by luisfjdesigner3d
...as much as possible you can put this 3-d printed
satellite antenna on top of any rc vehicles body best if the
body roof was flat.
thingiverse
free

Battery Spacer for the Traxxas Slash 4x4 by luisfjdesigner3d
...e the photos would give you an idea how to install
it you could use double-sided tape if you wish to do so so enjoy this upgrade.
thingiverse
free

License Plate for the Vaterra kalahari/Losi Desert Truck by luisfjdesigner3d
...ided to
designed license plate and its case to make the rc vehicle looks more like a
streets rc vehicle and still make it unique.
Balancer
3ddd
$1

balance
...balance
3ddd
balance
design_connected
$11

Balance
...balance
designconnected
vibia balance computer generated 3d model. designed by vilardell, jordi.
3ddd
$1

Windfall | Balance
...windfall | balance
3ddd
balance , windfall
люстра windfall balance
3d_export
$5

balance
...balance
3dexport
3ddd
free

Vibia balance
... vibia , balance
vibia balancehttp://www.vibia.com/en
3ddd
$1

Vibia Balance
...vibia balance
3ddd
vibia
vibia balance
turbosquid
$40

balance
... available on turbo squid, the world's leading provider of digital 3d models for visualization, films, television, and games.
turbosquid
$20

Balance
... available on turbo squid, the world's leading provider of digital 3d models for visualization, films, television, and games.
turbosquid
$15

Balance
... available on turbo squid, the world's leading provider of digital 3d models for visualization, films, television, and games.
turbosquid
$8

Balance
... available on turbo squid, the world's leading provider of digital 3d models for visualization, films, television, and games.
Rc
3ddd
$1
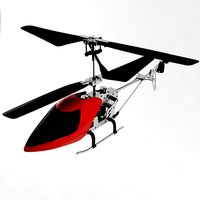
RC Helicopter
...rc helicopter
3ddd
вертолет
mini rc helicopter
93.329 polys
3d_export
$7
rc helicopter model
...rc helicopter model
3dexport
rc helicopter model
3d_ocean
$25
RC F1
...rc f1
3docean
auto car control f1 formula race rc remote speed
remote control f1 car
turbosquid
$10
rc plane
...lane
turbosquid
free 3d model rc plane for download as blend on turbosquid: 3d models for games, architecture, videos. (1295828)
turbosquid
$100
RC Helicopter
...free 3d model rc helicopter for download as 3ds, max, and obj on turbosquid: 3d models for games, architecture, videos. (1298511)
turbosquid
$59
Drone with RC
...3d model drone with rc for download as 3ds, max, obj, and fbx on turbosquid: 3d models for games, architecture, videos. (1363601)
3d_export
$70
rc helicopter 3D Model
...rc helicopter 3d model
3dexport
rc helocopter
rc helicopter 3d model babay 10536 3dexport
turbosquid
$75
RC buggy
... available on turbo squid, the world's leading provider of digital 3d models for visualization, films, television, and games.
turbosquid
$39

RC Plane001
... available on turbo squid, the world's leading provider of digital 3d models for visualization, films, television, and games.
turbosquid
$30
RC Jet
... available on turbo squid, the world's leading provider of digital 3d models for visualization, films, television, and games.
16
3ddd
$1

Bed 16
...bed 16
3ddd
постельное белье
bed 16.hope you like it.thanks you very much
design_connected
$4

Bolla 16
...bolla 16
designconnected
gervasoni bolla 16 coffee tables computer generated 3d model. designed by michael sodeau.
3d_export
$6

tap-16
...tap-16
3dexport
3d_export
$6

set-16
...set-16
3dexport
3ddd
$1

16 Mobilier ALIXE
... уличная , мебель
производитель: 16 mobilier
модель: alixe
3ddd
$1

Curtains 16
...curtains 16
3ddd
ламбрикен
curtains 16
polys: 350077
other models:http://3ddd.ru/users/brast/models
turbosquid
$199

F-16
...16
turbosquid
royalty free 3d model f-16 for download as max on turbosquid: 3d models for games, architecture, videos. (1188169)
turbosquid
$128

DF-16
...6
turbosquid
royalty free 3d model df-16 for download as max on turbosquid: 3d models for games, architecture, videos. (1660349)
turbosquid
$40

cottage 16
...bosquid
royalty free 3d model cottage 16 for download as max on turbosquid: 3d models for games, architecture, videos. (1377002)
turbosquid
$20

Decor 16
...urbosquid
royalty free 3d model decor 16 for download as stl on turbosquid: 3d models for games, architecture, videos. (1676913)
Vehicles
3d_export
$30

Vehicle display
...vehicle display
3dexport
vehicle display consists of podium and vehicle cover no vehicle there is a veiled vehicle silhouette
3d_ocean
$40
Heavy vehicles
...el this model is created with 3ds max 2009 and content .max (3ds max), size: 7,65 mb this model can be used in any scene. enjoy !
turbosquid
$41

vehicle
... available on turbo squid, the world's leading provider of digital 3d models for visualization, films, television, and games.
turbosquid
$10

vehicle
... available on turbo squid, the world's leading provider of digital 3d models for visualization, films, television, and games.
3d_export
$6

Trailer Transporter Consignment Vehicle Turnover Vehicle
...trailer transporter consignment vehicle turnover vehicle
3dexport
trailer transporter consignment vehicle turnover vehicle
archive3d
free

Vehicle 3D Model
... sports and recreational vehicle n250714 - 3d model (*.gsm+*.3ds) for interior 3d visualization.
3d_export
$50
Vehicle 3D Model
...vehicle 3d model
3dexport
vehicle
vehicle 3d model fred-13 21262 3dexport
3d_export
$15
special vehicles
...special vehicles
3dexport
3d_export
$10
utility vehicle
...utility vehicle
3dexport
turbosquid
$9
Vehicles pack
...bosquid
royalty free 3d model vehicles pack for download as on turbosquid: 3d models for games, architecture, videos. (1635451)
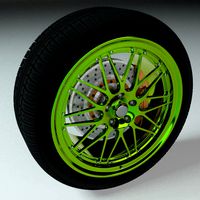
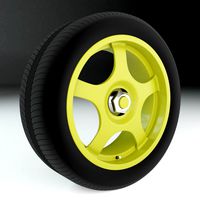
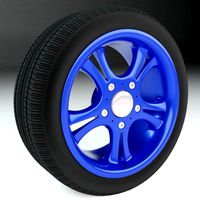
Wheel
archibase_planet
free
Wheel
...l steering control steering wheel
wheel ship steering wheel n060215 - 3d model (*.gsm+*.3ds+*.max) for exterior 3d visualization.
3d_ocean
$14
Wheel
...wheel
3docean
car rim car wheel rim wheel
high poly car wheel design. 16,840 polys
3d_export
free
wheel
...wheel
3dexport
wheel
3d_export
free
wheel
...wheel
3dexport
wheel
3d_export
free
Wheel
...wheel
3dexport
wheel
3d_export
$5

wheel
...wheel
3dexport
wheel for car.
3d_export
$5
wheel
...wheel
3dexport
car wheel
3d_export
$5
wheel
...wheel
3dexport
car wheel
3d_export
$5
wheel
...wheel
3dexport
car wheel
3d_export
$5
wheel
...wheel
3dexport
car wheel
10
turbosquid
$25

10
... available on turbo squid, the world's leading provider of digital 3d models for visualization, films, television, and games.
turbosquid
$10

a-10
... available on turbo squid, the world's leading provider of digital 3d models for visualization, films, television, and games.
3ddd
$1

EX 10
...ex 10
3ddd
samsung , фотоаппарат
ex 10
3ddd
$1

Bed 10
...bed 10
3ddd
постельное белье
bed 10
evermotion
$25

Scene 10 Archinteriors vol. 10
...dering design interior
take a look at textured and shadered visualization scene ready to be rendered.. evermotion 3d models shop.
3ddd
$1

Curtains 10
...curtains 10
3ddd
curtains 10
3ds max 2011,fbx + textures
polys: 100355
3ddd
free

PLANTS 10
...plants 10
3ddd
цветок , горшок
plants 10,, with 3 different color planter boxes
turbosquid
$24

Chandelier MD 89310-10+10 Osgona
... chandelier md 89310-10+10 osgona for download as max and fbx on turbosquid: 3d models for games, architecture, videos. (1218762)
design_connected
$29

Nuvola 10
...nuvola 10
designconnected
gervasoni nuvola 10 computer generated 3d model. designed by navone, paola.
design_connected
$22

Kilt 10
...kilt 10
designconnected
zanotta kilt 10 computer generated 3d model. designed by progetti, emaf.
1
turbosquid
$69

armchairs(1)(1)
... available on turbo squid, the world's leading provider of digital 3d models for visualization, films, television, and games.
turbosquid
$15

ring 1+1
... available on turbo squid, the world's leading provider of digital 3d models for visualization, films, television, and games.
turbosquid
$10

chair(1)(1)
... available on turbo squid, the world's leading provider of digital 3d models for visualization, films, television, and games.
turbosquid
$8

Chair(1)(1)
... available on turbo squid, the world's leading provider of digital 3d models for visualization, films, television, and games.
turbosquid
$2

RING 1(1)
... available on turbo squid, the world's leading provider of digital 3d models for visualization, films, television, and games.
turbosquid
$1

Table 1(1)
... available on turbo squid, the world's leading provider of digital 3d models for visualization, films, television, and games.
turbosquid
$1

house 1(1)
... available on turbo squid, the world's leading provider of digital 3d models for visualization, films, television, and games.
turbosquid
$59

Formula 1(1)
...lty free 3d model formula 1 for download as max, fbx, and obj on turbosquid: 3d models for games, architecture, videos. (1567088)
design_connected
$11

No 1
...no 1
designconnected
sibast no 1 computer generated 3d model. designed by sibast, helge.
turbosquid
$2

desert house(1)(1)
...3d model desert house(1)(1) for download as 3ds, max, and obj on turbosquid: 3d models for games, architecture, videos. (1055095)