Thingiverse

RC Skid loader (1:10 scale)
by Thingiverse
Last crawled date: 4 years, 3 months ago
This 1:10 scale RC skid loader is actually much more than a toy. It will serve as a test bed for automation control software in the company that I work for. I have done the 3D design, the electronics and software for the drive controller and all the printing as part of a "slacktime" project, to give all of us in our department something really cool to program on. That is why the model is big enough to hold a RaspberryPi Zero, which is the actual hardware platform that we will be testing our software on (and the 2800mAh 12V battery will give us enough battery capacity for hours of operation).
With 42 single plastic pieces (32 different pieces, some of them needed multiple times), and over 88 hours of total print time for all parts, I had to do almost all of the work in my spare time at home. I have put a lot of love into the details, that is why all four axis are guided by two ball bearings each, just like the axis for the arm.
Since this kind of skid loader (which tries to be as close as possible in all dimensions to a Caterpillar 226B3) has four wheels rather than tracks, I have used GT2 belts internally to give it all-wheel driving capabilities with only two motors. For driving I use 100rpm 12V DC motors, the arm and the shovel are controlled by RC servos. My homemade drive control software allows for very smooth acceleration from the DC motors, to give it a distinct scale look-and-feel.
Current status is that the model is driving well under it's own power and the arm and the shovel are controlled nicely by the RC servos. The RaspberryPi software is not done yet, so I have to control it with a wire-bound remote control for now. A first driving video is available on YouTube: https://youtu.be/5sA_RCIF0G4
As said, the operation of the arm and the shovel is now working, there is just no video yet of that.
All needed .stl files are uploaded now. I am still working on a photo documentation of the assembly process to make it a bit easier for all of you that want to rebuild this model.
Of course I will disclose also the electronics description (with respective firmware).
By the way, if you like the little street cone in the photo, feel free to print some for yourself: https://www.thingiverse.com/thing:4074005
Hope you will like it and I would be thrilled to see lots of makes here!
Similar models
cg_trader
$5

Radio Control RC Boat Jet Drive DC Motor SG90 Servo | 3D
...radio control rc boat jet drive dc motor sg90 servo | 3d
cg trader
modeled in solidworks 2020
grabcad
free

Servo Motor
...by a few videos from the youtube channel "solidworks tutorial". i have attached the video link of the tutorial as well.
grabcad
free

Z axis servo drive for CNC milling machines
...z axis servo drive for cnc milling machines
grabcad
servo motor change from dc to ac
grabcad
free

DC and servo motors
...e servo motor is of 1kgf-cm but gives very good feedback. the motors can be controlled with help of arduino and l298 motor driver
cg_trader
$69

Skid Loader Shovel Bucket
...skid loader shovel bucket
cg trader
high quality 3d model of skid steer loader with shovel bucket.
grabcad
free

What are 3 types of motor controls?
... output function to match with an application. from left to right, an ac servo motor, a dc brush-less motor, and a stepper motor.
grabcad
free

Hydraulically Operated Arm
...mechanism that i am work on it which works similar to the movements of a human arm, but instead...
grabcad
free

LUNAR TORCH HELIOSTATE
...he shadow covered left sensor motor servo will move right arm,
if the shadow covered right sensor motor servo will move left arm,
grabcad
free

12V DC Motor servo encoder
...12v dc motor servo encoder
grabcad
12v/6.6kg-cm/49rpm 51:1 dc gear motor
grabcad
free

Servo Drive Motor
...shless and dc brush motors. accelnet p/n acj-055-18 from copley controls.
https://www.copleycontrols.com/en/products/acj-055-18/
Skid
turbosquid
$20

Oil SKID
...urbosquid
royalty free 3d model oil skid for download as c4d on turbosquid: 3d models for games, architecture, videos. (1626094)
turbosquid
$20

Skid Loaders
...oyalty free 3d model skid loaders for download as obj and fbx on turbosquid: 3d models for games, architecture, videos. (1202384)
turbosquid
$35

skid steer
... available on turbo squid, the world's leading provider of digital 3d models for visualization, films, television, and games.
turbosquid
$35

skid steer
... available on turbo squid, the world's leading provider of digital 3d models for visualization, films, television, and games.
design_connected
$29

Skid Corner Comp
...skid corner comp
designconnected
bonaldo skid corner comp computer generated 3d model. designed by viganò, giuseppe.
turbosquid
$5

Kamwishi Skid Steer
...royalty free 3d model kamwishi skid steer for download as rfa on turbosquid: 3d models for games, architecture, videos. (1334483)
turbosquid
$3

Plastic Pallet Skid
...yalty free 3d model plastic pallet skid for download as blend on turbosquid: 3d models for games, architecture, videos. (1528558)
turbosquid
$99

Skid Steer Forklift
...d model skid steer forklift for download as max, obj, and fbx on turbosquid: 3d models for games, architecture, videos. (1245984)
turbosquid
$49

Skid Steer Loader
... 3d model skid steer loader for download as max, obj, and fbx on turbosquid: 3d models for games, architecture, videos. (1236113)
turbosquid
$10

Oil Heating and pumping skid
...odel oil heating and pumping skid for download as 3ds and dwg on turbosquid: 3d models for games, architecture, videos. (1248484)
Loader
3d_export
$5

Loader
...loader
3dexport
knuckleboom forest machine loader 3d model
turbosquid
$50

loader
... available on turbo squid, the world's leading provider of digital 3d models for visualization, films, television, and games.
turbosquid
$39

loader
... available on turbo squid, the world's leading provider of digital 3d models for visualization, films, television, and games.
3d_export
$5

Loader 3D
...loader 3d
3dexport
the loader is made in 3d. simple materials are superimposed.
3d_export
$50

wheel loader
...g the job site, digging, carrying heavy loads, or moving materials.<br>modeled in solidworks.<br>rendered in keyshot.
3d_export
$10

Loader 3D Model
...loader 3d model
3dexport
loader vehicle tools yellow
loader 3d model poctob 81233 3dexport
archive3d
free

Loader 3D Model
...model
archive3d
loader boot drive
loader small 200807 - 3d model for interior 3d visualization.
3d_export
$17

wheel loader
...wheel loader
3dexport
3d_export
$15

wheel loader
...wheel loader
3dexport
3d_export
$10

wheel loader
...wheel loader
3dexport
Rc
3ddd
$1

RC Helicopter
...rc helicopter
3ddd
вертолет
mini rc helicopter
93.329 polys
3d_export
$7
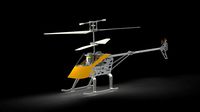
rc helicopter model
...rc helicopter model
3dexport
rc helicopter model
3d_ocean
$25
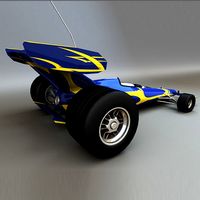
RC F1
...rc f1
3docean
auto car control f1 formula race rc remote speed
remote control f1 car
turbosquid
$10

rc plane
...lane
turbosquid
free 3d model rc plane for download as blend on turbosquid: 3d models for games, architecture, videos. (1295828)
turbosquid
$100

RC Helicopter
...free 3d model rc helicopter for download as 3ds, max, and obj on turbosquid: 3d models for games, architecture, videos. (1298511)
turbosquid
$59

Drone with RC
...3d model drone with rc for download as 3ds, max, obj, and fbx on turbosquid: 3d models for games, architecture, videos. (1363601)
turbosquid
$75
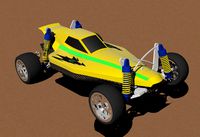
RC buggy
... available on turbo squid, the world's leading provider of digital 3d models for visualization, films, television, and games.
turbosquid
$39

RC Plane001
... available on turbo squid, the world's leading provider of digital 3d models for visualization, films, television, and games.
turbosquid
$30

RC Jet
... available on turbo squid, the world's leading provider of digital 3d models for visualization, films, television, and games.
turbosquid
$30

Rc airplane
... available on turbo squid, the world's leading provider of digital 3d models for visualization, films, television, and games.
10
turbosquid
$25

10
... available on turbo squid, the world's leading provider of digital 3d models for visualization, films, television, and games.
turbosquid
$10

a-10
... available on turbo squid, the world's leading provider of digital 3d models for visualization, films, television, and games.
3ddd
$1

EX 10
...ex 10
3ddd
samsung , фотоаппарат
ex 10
3ddd
$1

Bed 10
...bed 10
3ddd
постельное белье
bed 10
evermotion
$25

Scene 10 Archinteriors vol. 10
...dering design interior
take a look at textured and shadered visualization scene ready to be rendered.. evermotion 3d models shop.
3ddd
$1

Curtains 10
...curtains 10
3ddd
curtains 10
3ds max 2011,fbx + textures
polys: 100355
3ddd
free

PLANTS 10
...plants 10
3ddd
цветок , горшок
plants 10,, with 3 different color planter boxes
turbosquid
$24

Chandelier MD 89310-10+10 Osgona
... chandelier md 89310-10+10 osgona for download as max and fbx on turbosquid: 3d models for games, architecture, videos. (1218762)
design_connected
$29

Nuvola 10
...nuvola 10
designconnected
gervasoni nuvola 10 computer generated 3d model. designed by navone, paola.
design_connected
$22

Kilt 10
...kilt 10
designconnected
zanotta kilt 10 computer generated 3d model. designed by progetti, emaf.
Scale
turbosquid
$20
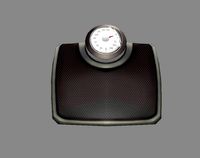
Weight scale or Bathroom Scale
...ght scale or bathroom scale for download as max, fbx, and obj on turbosquid: 3d models for games, architecture, videos. (1664576)
turbosquid
$19

Scale
...e
turbosquid
royalty free 3d model scale for download as fbx on turbosquid: 3d models for games, architecture, videos. (1411722)
turbosquid
$5
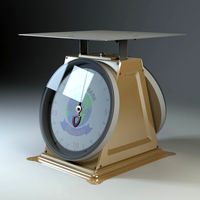
Scales
...s
turbosquid
royalty free 3d model scales for download as ma on turbosquid: 3d models for games, architecture, videos. (1393439)
turbosquid
$40

Scale
... available on turbo squid, the world's leading provider of digital 3d models for visualization, films, television, and games.
turbosquid
$17

Scales
... available on turbo squid, the world's leading provider of digital 3d models for visualization, films, television, and games.
turbosquid
$12

Scale
... available on turbo squid, the world's leading provider of digital 3d models for visualization, films, television, and games.
turbosquid
free

Scale
... available on turbo squid, the world's leading provider of digital 3d models for visualization, films, television, and games.
3d_export
$7

of scales
...s have a flat point of support. the samples are rendered in the standard cinema 4d renderer. enjoy your use and creative success.
3d_export
$5

scale knob
...scale knob
3dexport
scale knob
3d_export
$20

cartoon weight scale or bathroom scale
...cartoon weight scale or bathroom scale
3dexport
texture size:512px number of texture:1 texture format: png
1
turbosquid
$69

armchairs(1)(1)
... available on turbo squid, the world's leading provider of digital 3d models for visualization, films, television, and games.
turbosquid
$15

ring 1+1
... available on turbo squid, the world's leading provider of digital 3d models for visualization, films, television, and games.
turbosquid
$10

chair(1)(1)
... available on turbo squid, the world's leading provider of digital 3d models for visualization, films, television, and games.
turbosquid
$8

Chair(1)(1)
... available on turbo squid, the world's leading provider of digital 3d models for visualization, films, television, and games.
turbosquid
$2

RING 1(1)
... available on turbo squid, the world's leading provider of digital 3d models for visualization, films, television, and games.
turbosquid
$1

house 1(1)
... available on turbo squid, the world's leading provider of digital 3d models for visualization, films, television, and games.
turbosquid
$1

Table 1(1)
... available on turbo squid, the world's leading provider of digital 3d models for visualization, films, television, and games.
turbosquid
$59

Formula 1(1)
...lty free 3d model formula 1 for download as max, fbx, and obj on turbosquid: 3d models for games, architecture, videos. (1567088)
design_connected
$11

No 1
...no 1
designconnected
sibast no 1 computer generated 3d model. designed by sibast, helge.
turbosquid
$2

desert house(1)(1)
...3d model desert house(1)(1) for download as 3ds, max, and obj on turbosquid: 3d models for games, architecture, videos. (1055095)
