Thingiverse

R2D2 Dome Mechanism Modifications by MakerDan55
by Thingiverse
Last crawled date: 3 years, 4 months ago
Here are my modifications to Matt Zwart's Dome Mechanism for R2D2. As I build his system I will upload all of my modifications as I create them. FYI, I am using an FDM printer for the base unit and anything that pops up through the pie panels I am printing in resin.
Here is a video link of my electronics mock-up:https://www.youtube.com/watch?v=h6nXO9jEetk
Base Unit Lower Limit Switch Mount - is for the base unit to mount the lower limit switch more securely.
Dome Mechanism Centering Jig - I made this to center the dome mechanism onto my dome plate. It fits in where the slip ring will go (my center hole is 24 mm in diameter).
Long and Short Pulley Support - These get bolted onto the motors to provide support for the end of the pulley when the belt is attached. The Long one is for the Periscope, Life Form Scanner, and Zapper motors and the Short one is for the Light Saber and Bad Motivator. I used M3 x 30 mm and M3 x 35 mm bolts to attach them.
Periscope Body with Magnet Mounts - 4 magnet mounts that use small round magnets (8 mm by 3 mm). 4 go into the holes and 4 will be epoxied to the bottom of the pie panel.
a back plate that holds 2 leds as well as a single led holder on the back left side. (These will be stand- alone, color-changing, blinking leds).
created 3 large holes in the bottom for an extension on the shafts to glue into and sit flush with the bottom of the periscope body (no screws) as well as an additional hole for the power line to go through into the Large Connector Clip.
Periscope Shafts - all 3 shafts have a hole down the center as well as a lip on top that gets pushed
into the body of the periscope.
Periscope Connector Clips - have a hole through them. The large one will carry power and the small one will have a wire just for show.
Periscope Lower Mount Riser - now has a smaller gear that matches up with a now larger gear for
the servo. This allows the periscope to rotate almost 360 degrees (I'm hoping there will be enough torque in the servo to do that).
Periscope Servo Gear - is now larger to meet up with the Lower Mount Riser gear.
Periscope Lens - I have two versions here, a .5 mm wall as well as a 1 mm wall (your preference based on the type of leds inside. This gets glued in from the inside.
Periscope Top Scanner - a holder for 7- 3mm leds to scan back and forth.
Periscope Electronics Insert - Glue this insert into the periscope body to attach the Neopixels and circuit board to.
Electronics Boards - 2 versions of this are available. One with 2 Maestros (18 and 6 channels) and one with a 24 channel Maestro.
Similar models
thingiverse
free

R2D2 Pie Hinge with Servo Mount by mattrcampbell
...y artoo dome. it has an integrated mount for a small servo. i include an alignment jig for gluing it to the inside of the dome.
thingiverse
free

R2D2 Small Panel Hinge with Servo Mount by mattrcampbell
... see the photo for details on which panels get which mounts! see https://www.thingiverse.com/thing:2746177 for pie panel hinges.
thingiverse
free

R2D2 Periscope by mascal
...d be printed with transparent filament so you can put some light inside the periscope.
take a look at my r2d2 blog for more info.
cg_trader
$4

Periscope
...bmarine since it’s kinda bulky. the crank, knob, upper-shaft, lower-shaft, and center-shaft are all separated for easy animating.
thingiverse
free

Raspberry Pie Base - Breadboard Mount
...adboard mount
thingiverse
this is a base to hold your raspberry pie, as well as attach a breadboard. bottom slotted for magnets.
thingiverse
free

R2D2 Dome Pie Panel Hinge by Martyman
...ionally glue the join.
warning
i am fairly confident that the design is now complete. but it has not undergone extensive testing.
thingiverse
free

Body and Dome Magnet Mount Revised by Mrcosmo
...thingiverse
here is a revision of the bb 8 builders club dome and body magnet mounts. i have increased the magnets from 4 to 7.
thingiverse
free

Mega Riser by ZFreaky
... are mounting holes for accessories such as an extended carrying lever or leds. the mounting holes are optimized for 8-32 screws.
thingiverse
free

AlbaBird FPV Camera Pan mount
... the wood.
link to gears i used:https://www.amazon.com/gp/product/b002q0pa34/ref=ppx_yo_dt_b_asin_title_o06_s00?ie=utf8&psc=1
grabcad
free

37 mm DC Geared Motor Mounting Bracket
...dy with a 37 mm outer diameter.
the m3 mounting hole body center dimension for the 37 mm motor is 31 mm.
https://bit.ly/2gnivgw
Makerdan55
thingiverse
free

Shaver Mount by MakerDan55
...: there is also a version with a wider back in case you want to attach it with double sided tape (i recommend gorilla brand tape)
thingiverse
free

Grove Latching Relay Case by MakerDan55
.../grove_-_2-coil_latching_relay
here is a link for information on more grove modules:http://wiki.seeedstudio.com/wiki/grove_system
thingiverse
free

Marble Machine by MakerDan55
...slot for an on/off switch. i have included both the stl files as well as the sketchup files in case you want to modify anything.
thingiverse
free

1.8" TFT Shield Cover Plate by MakerDan55
...ard slot and reset button. now with integrated reset button.
update: i have added a new stl for the newer version of this shield.
thingiverse
free

PIR Motion Sensor Case by MakerDan55
...mazon.com/bqlzr-12v~24v-automatic-motion-lighting/dp/b00eq20c6k/ref=sr_1_9?ie=utf8&qid=1478288117&sr=8-9&keywords=pir
thingiverse
free

Protein Powder Dispenser by MakerDan55
...s because it was printed with only 20% infill it wasn't strong enough. you could also print this part with a greater infill.
thingiverse
free
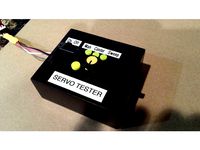
Servo Tester Case by MakerDan55
...switch on the top).
plug in a servo and test it out!
i sanded and spray painted my case to get rid of the rough plastic surface.
R2D2
3d_export
$99

R2D2 3D Model
...r2d2 3d model
3dexport
r2d2 robot astro droid star wars
r2d2 3d model ribnadzor 60387 3dexport
3d_export
$50

R2D2 3D Model
...r2d2 3d model
3dexport
star wars r2d2 robot sci_fi character
r2d2 3d model jjdempsey3 64365 3dexport
3d_export
$6

r2d2 succulent planter
...r2d2 succulent planter
3dexport
r2d2 succulent planter 3d model stl file
turbosquid
$77

Star Wars R2D2
...quid
royalty free 3d model star wars r2d2 for download as ma on turbosquid: 3d models for games, architecture, videos. (1495807)
cg_studio
$129

R2D2 Droid Star Wars3d model
...d
.max .fbx .c4d .3ds .obj .lwo - r2d2 droid star wars 3d model, royalty free license available, instant download after purchase.
3d_ocean
$12

Star Wars R2D2
...mes fully textured with rigged legs and feet ready for animation. the colours can be changed to suit your needs. i’ve used blu...
3d_export
$99

R2D2 Star Wars Droid Robot 3D Model
...racter movie star wars sci-fi scifi rigged riged r2d2 robot droid 3dsmax
r2d2 star wars droid robot 3d model squir 73437 3dexport
turbosquid
$15

Angry Birds Star Wars R2D2
... available on turbo squid, the world's leading provider of digital 3d models for visualization, films, television, and games.
3d_export
$23

Toaster Star Wars R2D2 by Williams Sonoma
...x<br>site - https://www.williams-sonoma.com/products/star-wars-r2d2-toaster/<br>pol 94562, tr. 98047<br>thanks!
cg_studio
$99

R2D2 Star Wars Droid Robot3d model
... .c4d .fbx .lwo .max .obj - r2d2 star wars droid robot 3d model, royalty free license available, instant download after purchase.
Dome
archibase_planet
free

Dome
...dome
archibase planet
dome
dome n261107 - 3d model (*.gsm+*.3ds) for interior 3d visualization.
3d_ocean
$4

geodesic dome
...geodesic dome
3docean
dome geodesic
geodesic dome with 3 holes
3d_ocean
$5

event dome
...event dome
3docean
dome event spotlight truss
event dome complete with truss and spotlights.
turbosquid
$60

dome
...squid
royalty free 3d model dome for download as obj and fbx on turbosquid: 3d models for games, architecture, videos. (1670366)
3ddd
$1

moooi / domes
...moooi / domes
3ddd
domes , moooi
светильники moooi_domes
turbosquid
$99

dome
... available on turbo squid, the world's leading provider of digital 3d models for visualization, films, television, and games.
archive3d
free

Dome 3D Model
...e onion-shaped dome
dome church n311012 - 3d model (*.gsm+*.3ds) for exterior 3d visualization.
archive3d
free

Dome 3D Model
...dome 3d model
archive3d
dome arbor
archive3d
free

Dome 3D Model
...me 3d model
archive3d
dome
dome n261107 - 3d model (*.gsm+*.3ds) for interior 3d visualization.
design_connected
$18

Dome Light
...dome light
designconnected
moooi dome light pendant lights computer generated 3d model. designed by jameelah el-gahsjgari.
Modifications
turbosquid
$12

AKMS (AK47 modification)
... available on turbo squid, the world's leading provider of digital 3d models for visualization, films, television, and games.
turbosquid
$79

BusTransForm - Modif Bus Thailand
...d model bustransform - modif bus thailand for download as obj on turbosquid: 3d models for games, architecture, videos. (1383303)
3d_export
$25

mitsubishi evo 9 modification
...mitsubishi evo 9 modification
3dexport
evo 9 has been modified with a nice and elegant look.
3d_ocean
$25

Dart Vader (modificated helm)
...niforms, as well as anatomical model of the character itself. the model is divided into groups for further editing. primarily ...
turbosquid
$15

FN SCAR-H modification low-poly game ready
...fication low-poly game ready for download as ma, obj, and fbx on turbosquid: 3d models for games, architecture, videos. (1386384)
3d_export
$5

sphere light
...sphere light
3dexport
the socket and light are modifables
3d_export
$5
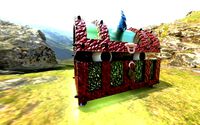
Fabulous chest
...fabulous chest
3dexport
fabulous chest for your game or further modification
3d_export
free
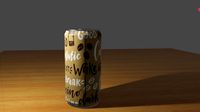
cold coffee
...cold coffee 3dexport cold coffee can. any required modifications will be done at...
3d_ocean
$12

Cartoon Dump or Sand Truck
... wheels and piston already rig low poly modifier still in stack for modification unwrap uvw for material and colour modification
3d_ocean
$12

Cartoon Cement Mixer Truck
...r truck the wheels already rig low poly modifier still in stack for modification unwrap uvw for material and colour modification
Mechanism
3d_export
$50

Mechanism
...mechanism
3dexport
mechanism -------- animation is present only in the blender file.
3d_export
$5

mechanics
...mechanics
3dexport
turbosquid
$50
mechanic
... available on turbo squid, the world's leading provider of digital 3d models for visualization, films, television, and games.
3ddd
$1
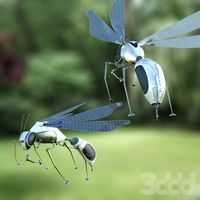
Mechanical Wasp
...mechanical wasp
3ddd
робот
mechanical wasp
3d_export
$20
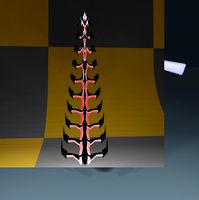
Mechanical tail
...mechanical tail
3dexport
mechanical tail<br>four-part movement
3d_export
$5

mechanical ballista
...mechanical ballista
3dexport
a mechanical ballista useful for medieval or fantasy games does not contain animations
turbosquid
$59

Mechanical Part
...id
royalty free 3d model mechanical part for download as c4d on turbosquid: 3d models for games, architecture, videos. (1410833)
turbosquid
$50
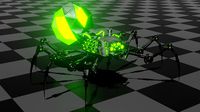
Mechanical Spider
...royalty free 3d model mechanical spider for download as blend on turbosquid: 3d models for games, architecture, videos. (1599864)
turbosquid
$45

Mechanical Pencil
...royalty free 3d model mechanical pencil for download as blend on turbosquid: 3d models for games, architecture, videos. (1503379)
turbosquid
$35

Mechanical fish
...id
royalty free 3d model mechanical fish for download as max on turbosquid: 3d models for games, architecture, videos. (1152530)
