Thingiverse

PrusaSlicer profile for Easythreed X1 + extensive explanation of each setting by JacekJagosz
by Thingiverse
Last crawled date: 3 years, 3 months ago
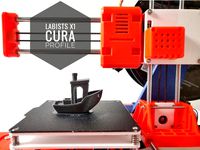
This is a profile for Easythreed X1 and its derivatives for awesome Prusa Slicer. I hope it will serve you well.
But I'm so mad that there are so many great profiles on the internet that to me are a witchcraft, because most don't explain what they do and how can they print so well.
So I did my best to explain every single thing I did, so you can learn how to improve your prints. Here is the link to its Github page where you can easily see how it will evolve.. The description below is taken from there.
My Easythreed X1 config for Prusa Slicer
Although created for Easythreed X1, it should also work well on Easythreed X2, Labists X1, SONDORY PICO
Installation
Download EasythreedX1.ini from Thingiverse or Github.
Go to PrusaSlicer, select File -> Import -> Import Config and find the EasythreedX1.ini file you just downloaded.
My setup
I have an early Easythreed X1 without part cooling fan, and instead I used a PC 120MM fan standing next to the printer or 4010 centrifugal fun with simple duck, both connected to fan header in the electronics box. They unfortunately provide better cooling from one side (visible in extreme situations), and need improvement.
I print in higher quality PET-G, which requires less cooling than PLA, but needs better tuning to avoid stringing. I also bought PLA just to test this profile with most people print with, and it works really well, but PET-G is better suited for this printer.
My printer seems to suffer from less backlash than some others, so it seems frame of my frame is more rigid and I can get away with higher acceleration jerk settings.
I also oiled the rails and I printed spool holder for Prusa Mini to prevent any problems that could be caused by high friction.
What I changed and why
orange padlock tells you I have changed something from PrusaSlicer's defaults, while orange back button tells you have changed something in the current profile and haven't saved it. By clicking one or the other you can see PS's defaults or what is in the profile respectively.
Z belt slack compensation none -> 0.4mm - Gets rid of first layers getting squished caused by slack in the belt raising the head, which causes it to not move up while printing first few layers. Your printer will have less or more of it, so especially if your prints not stick lower it, or raise if you still see squishing. Filament Settings -> Custom G-code -> Start G-code
Layer height 0.3mm -> 0.2mm- I lowered it to get more detail, as speed benefit from taller layer isn't that noticeable with such a small printer.
Skirt 1 -> 4, 6mm -> 2mm- increased number of loops so the filament will start extruding correctly before it goes to the print, and increased distance from object so it doesn't cause big prints to not fit on the bed.
Support - XY separation between between an object and its support 50% -> 150%- I had massive problems removing supports from the print, and this should make it easier to detach.
Max print speed 80mm -> 30mm- Decreased it to 30mm/s for improving print quality. For now this is a quick fix, in the long run I should lower each speed value by hand.
Extruder temperature 200C -> 180C- Set it to 180 and 190 for first layer, which gives me good bed adhesion and very little stringing. You filament might need different temperatures.
Slow down if layer print time is below 5s -> 10s- Increased it so hopefully sharp tips will have more time to cool down and will look nicer. Shouldn't affect print time too much.
Retract on layer change no -> yes- Should reduce filament buildup where layer change happens, so seam should be less visible.
Increase Y max Jerk 0.4 -> 2 (M205 Y2)- By default X1 has Y jerk set extremely low. Bringing it up to the same value as X jerk makes printing quality of curves better and speeds up the printing.
Raise the nozzle before the printing Z5 -> Z40 (G1 Z40 F5000)- By default it stayed very close to the bed making oozing filament stick to the nozzle and risking damaging the bed.
Retraction 2mm -> 6mm- Decreases stringing, which occur with PLA but are especially visible when printing PET-G.
And more minor changes
What you should tweak
To see all settings mentioned below you will need to switch from "Simple" to "Expert"
Also remember when you hover over a checkbox it should show a tool-tip explaining what that option does.
Extruder temperature is extremely important for your filament type and brand. Each roll has recommended temperatures written on it, in my experience X1 prints the best at lowest recommended one, even slightly below it. helps: stringing and other artifacts
Extruder: Initial layer setting is helpful when your prints have problem sticking to the bed. Increasing it compared to other layers is helpful, but don't do it too much or it will stick to the bed. helps: printbed adhesion
Layer height is the easiest thing to tweak and also one of the most influential. If need very fine detail you can lower layer height from 0.2mm to 0.15 or 0.1. This will increase printing time. helps: fine detail
Brim is printed around the object and is easily removable. Easiest way to make problematic prints stick. helps: bed adhesion
Supports are necessary when parts of the objects would have to be printed in mid-air. helps: complicated objects, not designed for 3D printing
Raft layers (2-4) can not only help with bed adhesion but also can help with technical prints where even first few layers need to be accurate. When you add a raft all the first layer problems (like elephant foot) will only affect the raft and not the print. This wastes filament, makes bottom of the print rougher and can be hard to remove. helps: bed adhesion and first layer consistency
Infill density influences print's strength, but by not that much as you might think, as perimeters bring most rigidity. Still increase this if you want more strength or if your top layers don't get enough support. *helps: filament used and print strength
Advanced tweaks
Retraction length prevents stringing and zits by pulling filament back before travel move. This is quite dependent on your filament, so I recommend tweaking it yourself. In extreme cases Z-Hop can also help. It's a pity Prusa Slicer doesn't support coasting as it would make tweaking it a lot easier. If you see excessive stringing (like when printing PET-G) turn it up, but if you have extruder jams turn it down. helps: stringing, blobs, zits
Avoid crossing perimeters can help a lot with visible stringing. I won't actually prevent it, but it will try moving the head inside the print instead of outside, so the stringing will be hidden inside the print. Much easier than fine-tuning retraction and very helpful when printing flexible filaments. helps: stringing
Infill pattern effects print strength and printing time. Different ones are slower or faster, and have different strengths in different axis (XYZ). So choosing the best one for specific print needs more research. X1 doesn't print gyroid too well and does best when it is just straight lines. I'm considering switching the default to cubic. helps: printing time and strength
Elephant foot compensation helps get rid of too large first layers. To make the print stick, you place the nozzle too close to the bed to push the filament into the bed. This has an adverse effect of filament squishing out the sides of print's first layers causing "elephant foot". If you have that problem you can increase the value from default 0.2, but first check "Getting rid of Z belt slack" as that could actually fix the root of your problem instead of this which is more of a band-aid. helps: too large first layers
TO DO
Start G-code tweaks
; character serves as a comment, whatever is in that line after this character is a comment and will be skipped by the printer
Printer Settings -> Custom G-code -> Start G-code
Increasing XY jerk If you find corners not sharp enough, and want to get rid of bulging where the nozzle makes sharp turns consider adding
M205 X10 Y10
This increases max jerk from 2 to 10, meaning the printer doesn't stop on sharp corners.
When the head slows down to turn the extruder doesn't, and keeps spitting out filament at the same pace. This causes excessive filament on sharp turns.
You could make extruder "smarter" using linear advance, but that needs firmware changes. Instead this makes head stop less, so the problem is less visible.this could lead to worse prints if your frame isn't rigid enough, but causes no problems on mine helps: corner bulging
Filament start G-code tweaks
Filament Settings -> Custom G-code -> Start G-code
They are executed later, after the nozzle is fully heated up and just before start of the print.
Purge line stabilizes the filament flow at the start of the print, but it will interfere if you use clips to hold the bed. I found added skirt lines make it not necessary. If you want it remove ";"s. Taken from u/Alyex227's profile. helps: filament buildup on the nozzle after heating up, and no extrusion on start of the print
G1 Z0.2 X5 ; position for purge line
G1 F500 X30 E7 ; purge line start
G1 F350 X70 E11 ; purge line finish
G1 E10.8 ; retract a small amount
G1 F1500 ; set feedrate for move to print starting point
G92 E0 ; reset extruder
Getting rid of Z belt slack - If you suffer from heavy elephant foot and first layers that are squished too much, you can add this before or after purge line:
G1 Z0
G1 Z0.2
G92 Z0
This is helpful if your printer has loose Z axis belt and on first few layers the head wouldn't really move up because those moves would only take out slack from the belt. This command should stretch it and take slack out before the print. Start with Z0.2, but increase it until you get good results, u/calex2 needed Z1.0 to get good results. Tip taken from Nerys' video on Youtube helps: many first layers squishing
PS
I'm open for suggestions, please comment what you think, what I could improve and how well did it work for you. Open issues if you have any ideas.
Happy printing!
Version history
V3.1 Making it reliable
Reduced retraction length to get rid of occasional extruder jams.
Changed infill from Stars to Cubic because it should make prints a bit stronger without any downsides compared to Stars.
Added filament density, so now you can see how much filament a given print will use.
v3.0 Z belt slack begone!
I think enough things changed from 2.0 to grant a 3.0. In this release I changed:
First I decided to enable Z belt slack compensation, if it causes the prints not to stick reduce the amount and report to me please, so I set an even more conservative value!
I disabled purge line after all, because it interferes if you use clips to hold the bed, which is a must for big prints. More skirt lines do what purge line is supposed to do anyways.
v2.2 Purge line for the win!
It is a small thing, but a big quality of life improvement, taken from u/Alyex227's config
v2.1 Stringing is no more!
I decided to increase retraction from 2 to 10mm. This should decrease stringing and blobbing almost completely, even on harder filaments like PET-G. But that is an overkill for many, so you can consider turning it back down.
Still I think this is a good default because better safe than sorry. And excessive retraction shouldn't cause any problems apart from slightly higher printing time.
v2.0 Initial release
I think this is good enough for people to use.
Even though this is first release I call it v2, because it is my second major iteration.
Similar models
thingiverse
free

Purge Strip Generator by EnergyStrike
...ast g1 line. now paste those lines of g code into your slicers start g code. this purge strip can replace a skirt a lot of times.
thingiverse
free

Bed Level Ender 3 / Ender 3 Pro by maxwellhau5caffy
...move to side a little
g1 x0.4 y20 z0.3 f1500.0 e30 ; draw the second line
;end purge line
.
..
...
..
.
g1 x0 y235 ;present print
thingiverse
free

Purge Pan by bsbmx
...nce inside the 'bowl', but its purpose is just to collect purged and wasted plastic, so it doesn't need to be pretty.
thingiverse
free
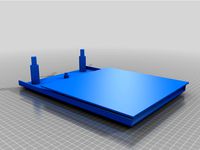
Labists X1 / Easythreed X1 Cura Profile by fabiofilippini
... stl file to level the bed.
as the bed is not heated (and there's a little of backslash in the z axis) i usually use the raft
thingiverse
free

Scraper for skirts and purge lines
...ed you can heat up the bed to >80c and press the flat edge against it and it'll straighten itself out, ready to be reused.
thingiverse
free

Flexible Vibration absorbing feet for Easythreed X1
...imes of course.
fun fact: this was printed on the easythreed x1. didnt expect this machine to be able to print flexible filament.
thingiverse
free

CR-6 SE Bed Level Test For ABL points by dr_dunno
... the first line
g1 x40.4 y200.0 z0.28 f5000.0 ;move to side a little
g1 x40.4 y20 z0.28 f1500.0 e30 ;draw the second line
thingiverse
free

Advanced Bed level by Nagasuye
... small line that connects to the line most slicers lay down (from [10, 20] to [10, 200]) so both can be removed at the same time.
thingiverse
free

Easythreed X1 Large Spool Mount by Elproducts
...edition of filament friday: https://youtu.be/l_av6ffmf98
unfortunately, you need a larger printer such as an ender 3 to print it.
thingiverse
free

EasyThreed X1, X2 Filament Guide by Maxx3D
...nt slip off and get tangled up.
works great so far! :)
easy to print, no supports needed. print with a skirt and some glue stick.
Easythreed
thingiverse
free

Calicat EasyThreed by AGarcia_88
...calicat easythreed by agarcia_88
thingiverse
calibration model that came with the easythreed x1.
thingiverse
free

EasyThreed nano spare part
...eed nano spare part
thingiverse
easythreed nano spare part and better quality.
material:pla,
layer 0,26
infill:20%
support: yes
thingiverse
free

EasyThreed Nano Model
...model function.
it's not perfect though, but i am working on it. :)
update 1: changed bed shape and size to be more accurate.
thingiverse
free

Easythreed X1 parts cooler
...is with the easythreed x1 that has the firmware bug that mirrors the prints, remember to mirror the design in cura before slicing
thingiverse
free

EasyThreed X1 bed leveling knob by Motsh
...easythreed x1 bed leveling knob by motsh
thingiverse
easythreed x1 bed leveling knob
thingiverse
free

Nano EasyThreed Support by carolm3zs
...nano easythreed support by carolm3zs
thingiverse
filament support for nano printer.
thingiverse
free
Flexible Vibration absorbing feet for Easythreed X1
...imes of course.
fun fact: this was printed on the easythreed x1. didnt expect this machine to be able to print flexible filament.
thingiverse
free

Easythreed X1 X2 3d printer Spool holder
...easythreed x1 x2 3d printer spool holder
thingiverse
easythreed x1 x2 1k spool holder
thingiverse
free

supplementary prints for mini 3D(EasyThreeD or Pico) by dukuby
...ico) by dukuby
thingiverse
prints supplement the printer called pico in korea looks the same with easythreed sold in aliexpress.
thingiverse
free

supplementary prints for mini 3D(EasyThreeD or Pico) by dukuby
...ico) by dukuby
thingiverse
prints supplement the printer called pico in korea looks the same with easythreed sold in aliexpress.
Prusaslicer
thingiverse
free

PrusaSlicer config Settings
...usa_i3_hephestos
software prusaslicerhttps://www.prusa3d.com/prusaslicer/
firmware marlin 1.1.9http://marlinfw.org/meta/download/
thingiverse
free

Artillery Genius model for Prusaslicer by alpo16000
...artillery genius model for prusaslicer by alpo16000
thingiverse
artillery genius custom bed model for prusaslicer
thingiverse
free

PrusaSlicer - Sapphire Pro - Profile
..... working with my win10 ;-(
and i decided to use prusaslicer instead ;-)https://youtu.be/e3tpketyrxc
here is my profile....enjoy
thingiverse
free

Ender 3 Model for PrusaSlicer by FeedBackM
...er 3 model for prusaslicer by feedbackm
thingiverse
i've re-centered the ender 3 model so it fit perfectly with prusaslicer.
thingiverse
free

PrusaSlicer Infill Patterns Display by asimomagic
...fference between adaptive cubic and support cubic is not clear in this sample.
[note]
the version of prusaslicer i used is 2.3.0.
thingiverse
free

Wiper Cutter Renovator repaired for PrusaSlicer by A-make-designs
...ce properly with prusaslicer.
the top picture is the auto-repaired from prusaslicer, the bottom picture is this repaired version.
thingiverse
free

Bed PrusaSlicer Slic3r by PatBef
...sult on the bed
when loading for the first time, prusaslicer takes a little while to load
and then it's up to you to work ;-)
thingiverse
free

Customizable bed shape (for PrusaSlicer & other) by kanocz
...z
thingiverse
small openscad script to generate bed shape for prusaslicer (and probably other slicers)... just to get it nice :)
thingiverse
free
Sapphire Pro bed texture for Prusaslicer by zajacmannheim
...cer by zajacmannheim
thingiverse
twotrees sapphire pro druckbett modell und eine grafik für den prusaslicer.
viel spaß damit ;-)
thingiverse
free

PrusaSlicer Build plate for Creality CR-10S by Gregbloor
...e 'load...' button
load the file 'cr-10s_buildplate_prusa.svg' from wherever you saved it.
restart prusaslicer
Explanation
3d_export
$5

1 liter bottle
...contact me and ask for modification, information our even explanation ...
3d_ocean
$15

Light bulb (light up animation)
...up animation (1s, 30fps). see document notes for additional explanation (in c4d : ctrl+d -> info...
3d_export
$5

3D Multi -Storey Parking - Floor Parking 2 VR - AR - low-poly
...parking 2 vr - ar - low-poly 3dexport english explanation floor parking 3d model all are designed and modeled...
3d_export
$5

Koi Fishes Set
...in preview images<br>you can download preview video file with explanation editing animations...
3d_export
$8

lilium
...breaking the bowls that people rely on. an alternative explanation is that parents convince children into not taking the...
3d_export
$69

korean mask machine kf94 plane one drag two willow leaf mask machine
...kf94 plane one drag two willow leaf mask machine,simple explanation of willow leaf (fish kf94) one drag two mask...
thingiverse
free

Baby_Grooda
...baby_grooda thingiverse no explanation ...
3d_sky
free

English fireplace
...english fireplace 3dsky explanation of...
3d_sky
free

Bretz 165 A Rocky
...bretz 165 a rocky 3dsky explanation of...
thingiverse
free

Stove control by film4rk
...stove control by film4rk thingiverse no need explanation ...
X1
design_connected
$11

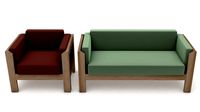
X1
...x1
designconnected
dränert x1 chairs computer generated 3d model. designed by oswald mathias ungers.
3ddd
$1
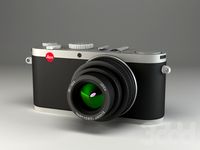
Leica X1
...leica x1
3ddd
leica , фотоаппарат
leica x1 profi
turbosquid
$15
sofa x1
...turbosquid
royalty free 3d model sofa x1 for download as max on turbosquid: 3d models for games, architecture, videos. (1283096)
3ddd
$1

Francis Francis X1
...francis francis x1
3ddd
кофемашина
кофемашина francis francis x1
3d_export
$5
X1 3D Model
...x1 3d model
3dexport
x1
x1 3d model download .c4d .max .obj .fbx .ma .lwo .3ds .3dm .stl gorgsalvatore 106035 3dexport
turbosquid
$55

Nokia X1
... available on turbo squid, the world's leading provider of digital 3d models for visualization, films, television, and games.
turbosquid
$13

Nokia X1
... available on turbo squid, the world's leading provider of digital 3d models for visualization, films, television, and games.
turbosquid
$1
X1 Airplane
... available on turbo squid, the world's leading provider of digital 3d models for visualization, films, television, and games.
3d_export
$55

Nokia X1 3D Model
...nokia x1 3d model
3dexport
nokia x1 phone smartphone mobile
nokia x1 3d model fedia 45159 3dexport
3ddd
$1
Wood x1
...wood x1
3ddd
размер 1024-1024 бесшовная 8-)
Extensive
3d_export
$5
extension plug - extension socket
...model. low poly and game ready. with blender files and texture (.png).<br>verts: 424<br>faces: 364<br>tris: 808
3ddd
$1

Moooi, Extension Chair
... стул , вешалка
стулья фирмы moooi, коллекция extension
turbosquid
$300

Bedroom Extension
...
royalty free 3d model bedroom extension for download as skp on turbosquid: 3d models for games, architecture, videos. (1682078)
3d_export
$5
palo extensible
...palo extensible
3dexport
turbosquid
$39
Leg Extension
...ee 3d model leg extension for download as obj, fbx, and blend on turbosquid: 3d models for games, architecture, videos. (1276776)
3d_export
$5

lampe extensible architecte
...lampe extensible architecte
3dexport
lampe extensible architecte maisons du monde
turbosquid
$20

Leg Extension
... available on turbo squid, the world's leading provider of digital 3d models for visualization, films, television, and games.
turbosquid
$2

Garage Extension
... available on turbo squid, the world's leading provider of digital 3d models for visualization, films, television, and games.
turbosquid
free

Extension cable
... available on turbo squid, the world's leading provider of digital 3d models for visualization, films, television, and games.
3ddd
$1

Moooi Extension Chair
...moooi extension chair
3ddd
moooi
http://www.moooi.com/products/extension-chair
Profile
3ddd
$1

Profile
... лофт , профиль , свип
описание ниже
3d_export
$5
profile anchor
...profile anchor
3dexport
profile anchor
3d_export
$5
profile fastener
...profile fastener
3dexport
profile fastener
3ddd
$1

Profil Doors
...
3ddd
profil doors , дверь
двери и наличник profil doors модели 7х и 15х, цвет капучино.
3ddd
$1
Profile chair
...rofile
http://www.casefurniture.co.uk/contemporary-furniture-products/contemporary-chairs-benches-stools/profile-chair/
3ddd
$1
Profil Doors
...dd
двери , profildoors
дверь profil doors
серия - vg
модель - 4vg
цвет - чёрный матовый
3d_export
$5
profile hand wheel
...profile hand wheel
3dexport
profile hand wheel
3d_export
$5
profile rotation handle
...profile rotation handle
3dexport
profile rotation handle
3d_ocean
$6
Low Profile Radiator
...low profile radiator
3docean
heat heater hot pipe radiator temperature thermostat warm
a low profile version of the radiator
3d_export
$10
Aluminum profile 3D Model
...aluminum profile 3d model
3dexport
aluminum profile window sample corner
aluminum profile 3d model 3dstocker 27361 3dexport
Each
3d_export
$19

Each Side Emerald Stone Diamond Ring 3D Model
...channel
each side emerald stone diamond ring 3d model download .c4d .max .obj .fbx .ma .lwo .3ds .3dm .stl 3dm168 104704 3dexport
3d_ocean
$7

Assorted Lego Bricks
...toys this is a collection of assorted lego bricks. each lego brick is to scale of each other. if...
vizpark
$15

Cherries
...models include four detailed variations of cherries with stalk, each with its own textures for diffuse, bump and reflection....
3d_export
$8

cherry
...models include four detailed variations of cherries with stalk, each with its own textures for diffuse, bump and reflection....
3d_export
$8

cherry
...models include four detailed variations of cherries with stalk, each with its own textures for diffuse, bump and reflection....
3d_export
$5

building
...building 3dexport 4-storey building on each floor there are 2 apartments, each apartment has 2...
3d_export
$40

level design sci-fi
...level design sci-fi 3dexport it has 2 files each rar:<br>- 7 individual modules<br>each part perfectly merge with each...
vizpark
$10

Water Melons
...water melons set includes four very detailed 3d models, each with its own textures. two different full melon, and...
vizpark
$10

Peaches
...ump, reflection maps are not needed in this case). each model is available as lowres poly mesh with turbosmooth modifier applied.
3d_ocean
$4
The Engineer
...the engineer 3docean great 2d concept art with each of the following views aligned and ready to model:...
Setting
archibase_planet
free
Setting
...setting
archibase planet
setting cover place setting
setting - 3d model (*.gsm+*.3ds) for interior 3d visualization.
archibase_planet
free
Setting
...setting
archibase planet
setting place setting cover
setting - 3d model (*.gsm+*.3ds) for interior 3d visualization.
archibase_planet
free

Setting
...setting
archibase planet
setting place setting cover
setting - 3d model (*.gsm+*.3ds) for interior 3d visualization.
3d_export
$8

decorative set mens set
...decorative set mens set
3dexport
decorative set men's set
archibase_planet
free
Set
...anet
set kitchen ware kitchen set kitchen tools
set kitchen tools n281114 - 3d model (*.gsm+*.3ds) for interior 3d visualization.
archibase_planet
free
Set
...set
archibase planet
beer set bar equipment
beer set - 3d model for interior 3d visualization.
archibase_planet
free
Set
...set archibase planet cover place setting set - 3d model (*.gsm+*.3ds) for interior 3d...
archibase_planet
free
Set
...set
archibase planet
kitchen set kitchen ware
set - 3d model (*.gsm+*.3ds) for interior 3d visualization.
archibase_planet
free
Set
...set
archibase planet
set cup glass kitchen ware
set - 3d model (*.gsm+*.3ds) for interior 3d visualization.
archibase_planet
free
Set
...set archibase planet flatware cover place setting set n311210 - 3d model (*.gsm+*.3ds) for interior 3d...