Thingiverse

Prusa MK3 laser engraver / cutter mod by jltx
by Thingiverse
Last crawled date: 3 years ago
Your mother warned you: if you play with your laser, you will go blind! Please google laser safety before even considering using one. They cause permanent damage beyond just blindness. The high energy can react with some materials to create toxic compounds like hydrofluoric acid (see Wikipedia for deadly consequences). Don’t do it!
If you are still reading, this is an example solution for use with Prusa Original i3 MK3. It may not work for other printers. But I will share my learning, as there is a crap ton of misinformation on the web. First, the pwm is driven through a mosfet, not straight off the micro controller. This leads to a logical inversion and drive incompatibility. The TTL input stage on the laser driver I received (and I suspect all others) is a resistor tree feeding an op-amp off 12V, which leads to more problems. And the schematics for my printer controller has errors. And the other header choice uses timer1 which has been repurposed by Marlin so can no longer do pwm. And on and on it went.
I wanted a solution that is mostly plug-n-play and allows easy switching between 3d printing and laser engraving/cutting and is completely reversible if desired. Here is what I came up with. When you are done, all parts stay in place except the laser and driver which are easy to install / remove for simple conversion. Feel free to mod away, but please share so we all benefit. There are a lot of words here, but it is surprisingly simple. Just need to take time to understand things and do it correctly the first time. If you don’t understand these instructions, you really should not attempt this.
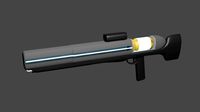
In addition to the laser diode/heatsink and laser driver (and SAFETY GOGGLES!), you will also need:
DC-DC buck to convert from 24V (MK3 PSU) to 12V (laser driver)
An optocoupler to handle translation from fan pwm to pseudo-TTL on the laser driver
Rocker switch for power kill. I used Philmore 16605 SPST with press fit.
Oh, and a pull-up resistor, and wires and connectors.
I also cut out a new magnetic bed cover from sheet steel.
But these are all very inexpensive. You will have to do some light soldering.
PDF shows simple hook up. Hopefully that is clear. IMPORTANT: Marlin fires up fan on reboot, which means laser would fire for a few seconds. You really need to use a power switch as shown, so you can leave disabled right up until you hit print. Plus it is there for emergency kill if something goes wrong. You will be wearing your safety goggles though, right?
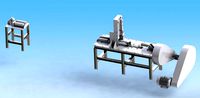
So what are all these parts? There are two sets. One is a handy circuit box to hold the buck and coupler and can mount to the Z frame (and really to have a sturdy and easily accessible place to have the kill switch). The others are the mount to hold the laser and driver on the extruder, along with safety shield of sorts. See photos. They can all be printed in PLA without supports at 0.2mm layer.
The circuit box is tight quarters, by design. The power rocker snap fits into hole on side. Note that this size clears the X motor while printing, so measure that if you go with a different model. The buck goes down on the left with the optocoupler above it on the right. You need to tuck wires around and push through bottom hole. Lid has pins to hold boards in place. Two screw holes are for 2 M3x10 to mount to Z frame above Rambo box. You can screw it down first, before assembly, but I managed to do it after the fact. I recommend flat blade fork terminals so slide under the existing flanged terminals from the psu. Use the middle bed power input as shown.
You will be sending 4 new wires from the controller to the extruder. I added these into my umbilical loom with pin connectors on each end. The outputs from the circuit box (+12V and TTL control) will connect to the wires in the umbilical. Double check your wiring using a multi-meter. Without laser attached, check the you get 12v and 5v. You will probably need to adjust the buck since it supports a wide range of conversion. Turn the tiny screw pot until you get 12V. Use and cheap LED to check the fan pwm input to the optocoupler and the output both respond to M106 S0 and S255 (need USB connected to Pronterface or similar).
Inside the Rambo, you get power off the spare header (which can stay connected even in printing mode) and connect to input to circuit box. For the fan PWM, you have two choices. You can disconnect the fan every time you convert and connect to pin 1 (which may get tiring if you do it a lot). Or you can create a short extender, plug the fan into that and tap off pin 1 wire. This way you will not ever have to open the Rambo box again. The specific locking connectors are hard to find, but Ultimachine sells them.
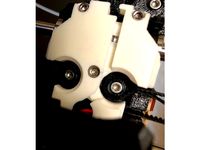
The mount comes in several parts to facilitate printing. You will need a new extruder cover to get the mounting holes for the bracket. Bonus is you get support for garter screw which is probably my best idea ever (but need my cooling with view solution). Also note you could have trouble removing old e cover, but not too bad; see notes in my cooling project. Key fits into bracket to form one piece and screws on side of new extruder cover. This stays permanently and does not interfere with printing. The laser screws to the mount using 3 M3x8 using spacers. The hanger clips on the the top of the mount and mates to the base for the laser driver board. The shield tube press-fits on the focus ring of the laser. This doubles has a grip for tuning the laser focus without burning yourself.
Hey! Your done! Let’s get to burning stuff.
When you attach the laser to the extruder, watch the pinda cable closely as it needs to tuck between the mount and x carriage. The top tab slips over filament entry tube. Connect the laser driver to the other end of the umbilical wires. Make sure you get this correct, or even better, use a single 4 pin keyed solution. I used two 3 pin connectors I had lying around which you can see in the photo.
Make sure kill switch is off before you power on printer!
[This could really use a video, wink, wink, nudge, nudge] You need to do a focus calibration the first time. Make sure you have your cheap sheet metal bed cover in place and put on your safety goggles.. Turn on printer and go into settings and turn off “fan detect”. Since the fan isn’t running the printer would abort your print. Auto home and watch carefully that nothing catches. Hit reset before shield hits bed This will give you a good baseline Z. It doesn’t have to be perfect. Raise the Z a little to slip in a target, like piece or corrugated cardboard. Leave a small gap between shield and target. Turn on laser power switch on circuit box. In settings, turn on fan to a low value, like 20. You should see a spot of light. You want this to be as small as possible. Being very careful, turn the shield tube until you get a tiny spot. Mark tube with sharpie to you know for future. Turn off kill switch and return fan to zero.
Use your favorite image-to-gcode workflow, typically Inkscape with plug-ins (google is your friend here, M106 for on and M107 for off), load up your SD card. When you go to print, firmware may complain the gcode is incomplete, but will give option to continue. At this point I turn on laser power and hit yes.
You will have to experiment a lot. Different speeds and strengths depending on your laser power and the target material. Good luck.
Things to note:
Laser engraving / cutting is done at one height, so there is no Z movement. This is assumed in the design such that you cannot run Calibrate Z with laser attached as there is no clearance to top frame.
Also, each laser is different and you will find an optimal height for best focus. If you want to adjust the length of the shield tube, you can scale in slic3r in the Z direction.
You lose some range on X and a bit on Y, so keep your working dimensions in Inkscape to 200x200mm.
If you are still reading, this is an example solution for use with Prusa Original i3 MK3. It may not work for other printers. But I will share my learning, as there is a crap ton of misinformation on the web. First, the pwm is driven through a mosfet, not straight off the micro controller. This leads to a logical inversion and drive incompatibility. The TTL input stage on the laser driver I received (and I suspect all others) is a resistor tree feeding an op-amp off 12V, which leads to more problems. And the schematics for my printer controller has errors. And the other header choice uses timer1 which has been repurposed by Marlin so can no longer do pwm. And on and on it went.
I wanted a solution that is mostly plug-n-play and allows easy switching between 3d printing and laser engraving/cutting and is completely reversible if desired. Here is what I came up with. When you are done, all parts stay in place except the laser and driver which are easy to install / remove for simple conversion. Feel free to mod away, but please share so we all benefit. There are a lot of words here, but it is surprisingly simple. Just need to take time to understand things and do it correctly the first time. If you don’t understand these instructions, you really should not attempt this.
In addition to the laser diode/heatsink and laser driver (and SAFETY GOGGLES!), you will also need:
DC-DC buck to convert from 24V (MK3 PSU) to 12V (laser driver)
An optocoupler to handle translation from fan pwm to pseudo-TTL on the laser driver
Rocker switch for power kill. I used Philmore 16605 SPST with press fit.
Oh, and a pull-up resistor, and wires and connectors.
I also cut out a new magnetic bed cover from sheet steel.
But these are all very inexpensive. You will have to do some light soldering.
PDF shows simple hook up. Hopefully that is clear. IMPORTANT: Marlin fires up fan on reboot, which means laser would fire for a few seconds. You really need to use a power switch as shown, so you can leave disabled right up until you hit print. Plus it is there for emergency kill if something goes wrong. You will be wearing your safety goggles though, right?
So what are all these parts? There are two sets. One is a handy circuit box to hold the buck and coupler and can mount to the Z frame (and really to have a sturdy and easily accessible place to have the kill switch). The others are the mount to hold the laser and driver on the extruder, along with safety shield of sorts. See photos. They can all be printed in PLA without supports at 0.2mm layer.
The circuit box is tight quarters, by design. The power rocker snap fits into hole on side. Note that this size clears the X motor while printing, so measure that if you go with a different model. The buck goes down on the left with the optocoupler above it on the right. You need to tuck wires around and push through bottom hole. Lid has pins to hold boards in place. Two screw holes are for 2 M3x10 to mount to Z frame above Rambo box. You can screw it down first, before assembly, but I managed to do it after the fact. I recommend flat blade fork terminals so slide under the existing flanged terminals from the psu. Use the middle bed power input as shown.
You will be sending 4 new wires from the controller to the extruder. I added these into my umbilical loom with pin connectors on each end. The outputs from the circuit box (+12V and TTL control) will connect to the wires in the umbilical. Double check your wiring using a multi-meter. Without laser attached, check the you get 12v and 5v. You will probably need to adjust the buck since it supports a wide range of conversion. Turn the tiny screw pot until you get 12V. Use and cheap LED to check the fan pwm input to the optocoupler and the output both respond to M106 S0 and S255 (need USB connected to Pronterface or similar).
Inside the Rambo, you get power off the spare header (which can stay connected even in printing mode) and connect to input to circuit box. For the fan PWM, you have two choices. You can disconnect the fan every time you convert and connect to pin 1 (which may get tiring if you do it a lot). Or you can create a short extender, plug the fan into that and tap off pin 1 wire. This way you will not ever have to open the Rambo box again. The specific locking connectors are hard to find, but Ultimachine sells them.
The mount comes in several parts to facilitate printing. You will need a new extruder cover to get the mounting holes for the bracket. Bonus is you get support for garter screw which is probably my best idea ever (but need my cooling with view solution). Also note you could have trouble removing old e cover, but not too bad; see notes in my cooling project. Key fits into bracket to form one piece and screws on side of new extruder cover. This stays permanently and does not interfere with printing. The laser screws to the mount using 3 M3x8 using spacers. The hanger clips on the the top of the mount and mates to the base for the laser driver board. The shield tube press-fits on the focus ring of the laser. This doubles has a grip for tuning the laser focus without burning yourself.
Hey! Your done! Let’s get to burning stuff.
When you attach the laser to the extruder, watch the pinda cable closely as it needs to tuck between the mount and x carriage. The top tab slips over filament entry tube. Connect the laser driver to the other end of the umbilical wires. Make sure you get this correct, or even better, use a single 4 pin keyed solution. I used two 3 pin connectors I had lying around which you can see in the photo.
Make sure kill switch is off before you power on printer!
[This could really use a video, wink, wink, nudge, nudge] You need to do a focus calibration the first time. Make sure you have your cheap sheet metal bed cover in place and put on your safety goggles.. Turn on printer and go into settings and turn off “fan detect”. Since the fan isn’t running the printer would abort your print. Auto home and watch carefully that nothing catches. Hit reset before shield hits bed This will give you a good baseline Z. It doesn’t have to be perfect. Raise the Z a little to slip in a target, like piece or corrugated cardboard. Leave a small gap between shield and target. Turn on laser power switch on circuit box. In settings, turn on fan to a low value, like 20. You should see a spot of light. You want this to be as small as possible. Being very careful, turn the shield tube until you get a tiny spot. Mark tube with sharpie to you know for future. Turn off kill switch and return fan to zero.
Use your favorite image-to-gcode workflow, typically Inkscape with plug-ins (google is your friend here, M106 for on and M107 for off), load up your SD card. When you go to print, firmware may complain the gcode is incomplete, but will give option to continue. At this point I turn on laser power and hit yes.
You will have to experiment a lot. Different speeds and strengths depending on your laser power and the target material. Good luck.
Things to note:
Laser engraving / cutting is done at one height, so there is no Z movement. This is assumed in the design such that you cannot run Calibrate Z with laser attached as there is no clearance to top frame.
Also, each laser is different and you will find an optimal height for best focus. If you want to adjust the length of the shield tube, you can scale in slic3r in the Z direction.
You lose some range on X and a bit on Y, so keep your working dimensions in Inkscape to 200x200mm.
Similar models
thingiverse
free

Anycubic i3 Mega Laser holder
... easy switch between 3d printer and laser.
https://www.youtube.com/watch?v=sf8lb535dv4https://www.youtube.com/watch?v=u7lcmb8jtmk
thingiverse
free

Laser and ABL Connection Board for CR-10 and other 3D Printer by digitaljunk
...rds the pcb.
to mount the laser module to the cr-10 or ender2 use this https://www.thingiverse.com/thing:2757972
order @ oshpark:
thingiverse
free

Switch mount for MendelMax by LulzBot
...you can find the switch we use on mouser here: ca.mouser.com/productdetail/e-switch/re111c1121/?qs=s%2fcbhqs5rcobvmsgnwxbha%3d%3d
thingiverse
free

EleksMaker EleksLaser air assist 80mm fan mount
...'servo' connector you get 12v supply that switches on/off with the button on the controller. see the photos for guidance.
thingiverse
free

PowerSpec Ultra PWM Fan Switch/Speed Controller by fiercedeitylink
... bottom alongside the other components with a simple bracket (that also holds an upgraded trigorilla mosfet based on this thing).
thingiverse
free

Switch mount for Prusa Mendel by LulzBot
... find the switch we use on mouser here: http://ca.mouser.com/productdetail/e-switch/re111c1121/?qs=s%2fcbhqs5rcobvmsgnwxbha%3d%3d
thingiverse
free

Laser Mount for Geeetech A10 - "Hot" swap by Urinator
...ing-tube is a 2a step down for the native 24v to 12v.
the internal 12v regulator in the gt2560 is not able to deliver > 500ma!
thingiverse
free

Kniwwelino Desktop Fan by lazyzero
...opening it in the online programming platform https://code.kniwwelino.lu
materials:
kniwwelino
arctic cooling f14 pwm pst
step-up
thingiverse
free

Switch mount for laser / fan flip-switch ender 3 pro by R2J3D
... it, it wil switch the fan on instead of the laser.
the mount is made for a basic flip switch 5-6mm. i used a 6 pin on/on switch.
thingiverse
free

Laser upgrade by Alcra
... s0= turn offhttps://youtu.be/q1ktgc1dbz0
laser used: https://goo.gl/upg5gq
1 toggle switch 3 positions
2 magnets neodimio 10 x 3
Jltx
thingiverse
free

TOSLink Adpater by jltx
... into a traditional plug, this is for you. plug this adapter in first the insert cable end. holds snug and sounds flawless. :-)
thingiverse
free
Freedom Wrench by jltx
...ose with strong hands
full-throated freedom, william wallace edition
leave a comment to let me know how it works for you. enjoy.
thingiverse
free

Sony Alpha accessory mount dust cap by jltx
...39;d like a dust cap for my accessory mount. so i made one. thought i'd share. designed to print vertically so add a brim.
thingiverse
free

72mm lens cap clip for neck strap by jltx
...f the three tabs. you'll have to work it a bit and pull from other side as it is designed to be snug. repeat for other two.
thingiverse
free

GT2 Idler Pulley for F693ZZ Bearing by Flex35
...by flex35 thingiverse i remixed the great design by jltx to fit in f693zz...
thingiverse
free

Prusa MK3 - toolbox by KurzyKocour
...prusa i3 mk3 reuses the t nuts designed by jltx works fine for storing your 3d printer...
thingiverse
free
Prusa MK3 hard feet (with spikes) by vaxxi
...hard feet (with spikes) by vaxxi thingiverse remix of jltx#39;s printer feet with two rows of 4 spikes (each...
thingiverse
free
Prusa i3 MK3 X carriage back plate with belt access by jltx
...
2/12/18 update prusa released r2 versions and i updated the back cover to give belt access. need to flip over before slicing.
thingiverse
free

Prusa MK3 Indirect filament sensor mod for stock extruder by jltx
...c with any improvements i make going forward. so i made this interposer to translate the mount to mine. see instructions below.
thingiverse
free

Taurus PSU relo frame brace for Prusa MK3 and MK3s by jltx
...cally for strength. do not reorient. add brim if needed.
i printed mine in thingiverse blue. j/k, it’s atomic pearl blue petg.
Mk3
turbosquid
$50

cention mk3
...ty free 3d model cention mk3 for download as ma, obj, and fbx on turbosquid: 3d models for games, architecture, videos. (1454148)
turbosquid
$129

MK3 Tank
... available on turbo squid, the world's leading provider of digital 3d models for visualization, films, television, and games.
turbosquid
$100

Toyota Supra MK3
... available on turbo squid, the world's leading provider of digital 3d models for visualization, films, television, and games.
turbosquid
$44

cention mk3 low poly
...d model cention mk3 low poly for download as ma, obj, and fbx on turbosquid: 3d models for games, architecture, videos. (1454666)
turbosquid
$30

Challenger I Mk3 Falcon
... available on turbo squid, the world's leading provider of digital 3d models for visualization, films, television, and games.
turbosquid
$10

American Frag hand grenade MK3
...free 3d model american frag hand grenade mk3 for download as on turbosquid: 3d models for games, architecture, videos. (1393624)
turbosquid
$20

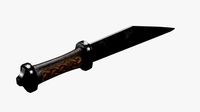
Mk3 US Navy Combat Knife
...ty free 3d model mk3 us navy combat knife for download as fbx on turbosquid: 3d models for games, architecture, videos. (1172791)
3d_export
$29

Ford Fiesta MK3 Modified 3D Model
...7 tumerfx mtumer mehmet t?mer 1993 1995 1996 wrc special modifed modifiye
ford fiesta mk3 modified 3d model mtumer 30698 3dexport
3d_export
$99

Toyota Supra Mk3 19861993 3D Model
...ort fast coupe japan 1986 1987 1988 1989 1990 1991 1992 1993 tuning turbo
toyota supra mk3 19861993 3d model squir 62530 3dexport
turbosquid
$5

Timothy Oulton Mars Chair MK3
...on mars chair mk3 for download as 3ds, max, obj, fbx, and dae on turbosquid: 3d models for games, architecture, videos. (1209782)
Engraver
turbosquid
$8
Engraved Sword
...alty free 3d model engraved sword for download as max and fbx on turbosquid: 3d models for games, architecture, videos. (1168563)
turbosquid
$10
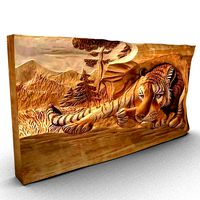
Engraved tiger
...ree 3d model engraved tiger for download as max, obj, and fbx on turbosquid: 3d models for games, architecture, videos. (1298214)
turbosquid
$1

Engraver(General)
... available on turbo squid, the world's leading provider of digital 3d models for visualization, films, television, and games.
turbosquid
$19
Seax Knife Engraved
...model seax knife engraved for download as blend, fbx, and obj on turbosquid: 3d models for games, architecture, videos. (1497294)
3d_export
$5
scary monster engraving
...nal engraving for 3d printing will give your environment an exotic look! it will look great if you paint it in the color of stone
turbosquid
$59

Emerald Engraving Ring
... available on turbo squid, the world's leading provider of digital 3d models for visualization, films, television, and games.
turbosquid
$23

Runes Engraving Set
... available on turbo squid, the world's leading provider of digital 3d models for visualization, films, television, and games.
turbosquid
$15

Decoration Engraved table
... available on turbo squid, the world's leading provider of digital 3d models for visualization, films, television, and games.
turbosquid
$8
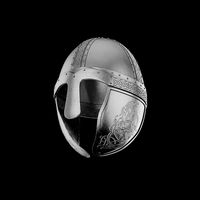
Viking helmet with engraved
...met with engraved for download as c4d, 3ds, dxf, fbx, and obj on turbosquid: 3d models for games, architecture, videos. (1618783)
turbosquid
$5

Engraved coffee cup
...ved coffee cup for download as blend, dae, fbx, obj, and gltf on turbosquid: 3d models for games, architecture, videos. (1713648)
Cutter
archibase_planet
free
Cutter
...cutter
archibase planet
cutter mill milling cutter
cutter 2 n050712 - 3d model (*.gsm+*.3ds) for interior 3d visualization.
3d_export
$10
pipe cutter
...pipe cutter
3dexport
pipe cutter
3d_export
$8

Grass Cutter
...grass cutter
3dexport
grass cutter
turbosquid
$5

Cutter
...alty free 3d model cutter for download as ige, stl, and sldpr on turbosquid: 3d models for games, architecture, videos. (1505202)
turbosquid
$29
Cutter
... available on turbo squid, the world's leading provider of digital 3d models for visualization, films, television, and games.
turbosquid
$15

Cutter
... available on turbo squid, the world's leading provider of digital 3d models for visualization, films, television, and games.
turbosquid
$9

Cutter
... available on turbo squid, the world's leading provider of digital 3d models for visualization, films, television, and games.
turbosquid
$3
cutter
... available on turbo squid, the world's leading provider of digital 3d models for visualization, films, television, and games.
turbosquid
$1

cutter
... available on turbo squid, the world's leading provider of digital 3d models for visualization, films, television, and games.
turbosquid
free

Cutter
... available on turbo squid, the world's leading provider of digital 3d models for visualization, films, television, and games.
Prusa
turbosquid
$2

Frame Filament Guide Clip-On for Prusa Mk3
...rame filament guide clip-on for prusa mk3 for download as stl on turbosquid: 3d models for games, architecture, videos. (1634730)
3d_export
free

prusa i3 mk3s laser mount for opt lasers
...to learn more about the blue laser technology that conceived the cutting and engraving laser heads from opt lasers, please visit:
turbosquid
free

Prusa small printer adapter holder
...er for download as ipt, skp, dwg, dxf, fbx, ige, obj, and stl on turbosquid: 3d models for games, architecture, videos. (1642936)
3d_export
$30

geisha by jonathan adler
...** i did a 3d printing test in the prusa software, you can find it among the attached images.<br>exchange:<br>.blend...
thingiverse
free

Prusa without Prusa (rc2) by madless
...prusa without prusa (rc2) by madless
thingiverse
just the main part of prusa rc2 faceshield, without writing.
enjoy :)
thingiverse
free

Prusa by acejbc
...prusa by acejbc
thingiverse
prusa knob info
m3 8mm screw
thingiverse
free

Prusa house
...prusa house
thingiverse
how prusa house could look like...
thingiverse
free

Prusa Mk2 "Fake Prusa" LCD cover by anraf1001
...r by anraf1001
thingiverse
version of prusa's lcd cover with "fake prusa" instead of "original prusa"
thingiverse
free

Prusa stabilizator by gutiueugen
...prusa stabilizator by gutiueugen
thingiverse
prusa stabilizator
thingiverse
free

Keychain Prusa by rbarbalho
...keychain prusa by rbarbalho
thingiverse
keychain with text prusa.
Mod
design_connected
$13

MOD. 4233 - MOD. 4234 Table Lamp
...mod. 4233 - mod. 4234 table lamp
designconnected
arcahorn mod. 4233 - mod. 4234 table lamp computer generated 3d model.
design_connected
$11

MOD.1095
...mod.1095
designconnected
mod.1095 computer generated 3d model. designed by sarfatti, gino.
3ddd
$1

fireplaces mod Spec
...fireplaces mod spec
3ddd
камин
fireplaces mod spec 180x90x125h
3ddd
free

Flos Mod. 2129
... mod
фабрика: flos
модель: mod. 2129
описание: подвесной светильник, металл, белый, черный.
сайт: www.flos.com
turbosquid
$34
Mod Lamp.c4d
... available on turbo squid, the world's leading provider of digital 3d models for visualization, films, television, and games.
turbosquid
$32

MOD A 001
... available on turbo squid, the world's leading provider of digital 3d models for visualization, films, television, and games.
turbosquid
$29

Maars Mod
... available on turbo squid, the world's leading provider of digital 3d models for visualization, films, television, and games.
turbosquid
$15

Mod 70..
... available on turbo squid, the world's leading provider of digital 3d models for visualization, films, television, and games.
turbosquid
$10

MOD Sofa
... available on turbo squid, the world's leading provider of digital 3d models for visualization, films, television, and games.
turbosquid
$1

Mod-Lite
... available on turbo squid, the world's leading provider of digital 3d models for visualization, films, television, and games.
Laser
3d_export
$5
laser
...laser
3dexport
a 3d laser
3d_export
free
cnc 3dp laser nozzle for 2w laser opt lasers
...logy that gave birth to cutting and engraving laser heads this laser nozzle was designed for, read the article in the link below:
3d_export
free
cnc laser mount opt lasers
...eive the engraving and cutting laser heads this cnc machine laser mount was designed for, read the article on the following page:
turbosquid
$20

Laser
... available on turbo squid, the world's leading provider of digital 3d models for visualization, films, television, and games.
turbosquid
$15
Laser
... available on turbo squid, the world's leading provider of digital 3d models for visualization, films, television, and games.
turbosquid
$3
Laser
... available on turbo squid, the world's leading provider of digital 3d models for visualization, films, television, and games.
3d_export
$5

laser sword
...laser sword
3dexport
it is a blue laser sword with a metal frame
3d_ocean
$19
Laser Turret
...be used in any sf type of game, especially in tower defense games. - laser turret: 3025 polygons - props: 270 polygons - textu...
3d_export
free
workbee cnc laser mount for opt lasers
...the specifications of engraving and cutting laser heads this mount was designed for, please take a look at the following website:
3d_export
free

shapeoko cnc laser mount for opt lasers
...ind out the opportunities that adding a cutting and engraving laser head to your cnc can bring, take a look at the website below: