Thingiverse
Prusa i3 MK2 Extruder for Wanhao Dupilactor i3/Monoprice MakerSelect by dirtsky
by Thingiverse
Last crawled date: 3 years ago
UPDATE 5: I've updated the link to the lastest stable version of Marlin. As always do a PID tune and make sure your thermosistors are set accordingly. I also have enabled mesh bed leveling. You can find the option under Prepare > Level Bed. Just follow the onscreen directions.
UPDATE 4: I've updated the link to the firmware I'm running on my Ramps 1.4 to Marlin 1.1.0 RC8 Bugfix. As always do a PID tune and adjust your E-Steps accordingly. I've also enabled mesh bed leveling which works very well.
UPDATE 3: I've uploaded my endstop mount for my particular endstop (not stock) and one for the stock di3 endstop which I pulled from my previous bowden setup I was running which is my friends upload where you can find it here.
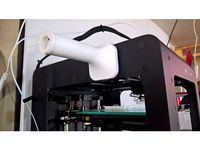
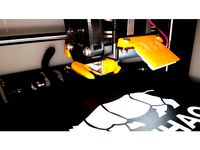
UPDATE 2: I've installed the new carriage and it works perfectly. Check out the pics for the new setup.
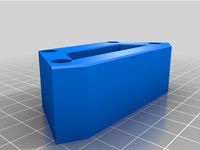
UPDATE: I've uploaded a version of the X-carriage with the double holes like the cable-chain uses. I'm also going to see if I can edit it where I have my end stop at and make it so it is adjustable. I'm going to print the modified carriage today and install it tomorrow hopefully if everything goes how I want.
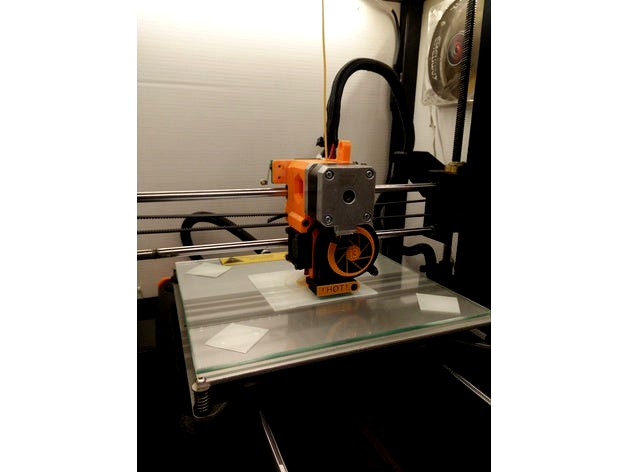
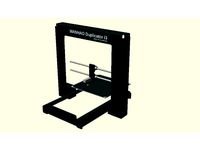
On my search to get better prints out of my MakerSelect, I upgraded my printer a few months after having it and converted to a Bowden style E3D v6 hot-end. Used it for quite a few months and was happy with print quality. But there was one thing I wasn't happy with. Not being able to print flexible materials. So I searched for some extruder designs here on thingiverse and wasn't satisfied with any of them until I came across one for another i3 style printer. Then I did a little research on the MK2. The Prusa MK2 is one of the best printers on the market in its price range. So I decided why not use that setup.
There is no modifications you need to do to the printer itself besides needing to tidy up your wiring. The X-Carriage is a direct fit for the X-Axis rails. Only things you need is the hardware to put the extruder body together, a 50mm radial fan, 30mm fan and a E3D v6 hotend (a clone will work just fine as that is what I'm using).
All the files (besides the modified x-carriage) I'm posting can be found on the Prusa website free to download but, I decided to post them here for ease of download.
I've modified the X-Carriage to allow you to use your drag chain so it not drooping down. On the original Prusa MK2 to compensate for this they use a 3mm nylon filament piece that is about 50cm in length that runs along the wire all the way to the control box. I attempted this with our 1.75 filament but, it did not work so well.
UPDATE 4: I've updated the link to the firmware I'm running on my Ramps 1.4 to Marlin 1.1.0 RC8 Bugfix. As always do a PID tune and adjust your E-Steps accordingly. I've also enabled mesh bed leveling which works very well.
UPDATE 3: I've uploaded my endstop mount for my particular endstop (not stock) and one for the stock di3 endstop which I pulled from my previous bowden setup I was running which is my friends upload where you can find it here.
UPDATE 2: I've installed the new carriage and it works perfectly. Check out the pics for the new setup.
UPDATE: I've uploaded a version of the X-carriage with the double holes like the cable-chain uses. I'm also going to see if I can edit it where I have my end stop at and make it so it is adjustable. I'm going to print the modified carriage today and install it tomorrow hopefully if everything goes how I want.
On my search to get better prints out of my MakerSelect, I upgraded my printer a few months after having it and converted to a Bowden style E3D v6 hot-end. Used it for quite a few months and was happy with print quality. But there was one thing I wasn't happy with. Not being able to print flexible materials. So I searched for some extruder designs here on thingiverse and wasn't satisfied with any of them until I came across one for another i3 style printer. Then I did a little research on the MK2. The Prusa MK2 is one of the best printers on the market in its price range. So I decided why not use that setup.
There is no modifications you need to do to the printer itself besides needing to tidy up your wiring. The X-Carriage is a direct fit for the X-Axis rails. Only things you need is the hardware to put the extruder body together, a 50mm radial fan, 30mm fan and a E3D v6 hotend (a clone will work just fine as that is what I'm using).
All the files (besides the modified x-carriage) I'm posting can be found on the Prusa website free to download but, I decided to post them here for ease of download.
I've modified the X-Carriage to allow you to use your drag chain so it not drooping down. On the original Prusa MK2 to compensate for this they use a 3mm nylon filament piece that is about 50cm in length that runs along the wire all the way to the control box. I attempted this with our 1.75 filament but, it did not work so well.
Similar models
thingiverse
free

Prusa i3 MK2 & MK2S Bowden Mod - E3Dv6 X Carriage Mount by theFPVgeek
... extruder body file to make this bowden x carriage mount.
e3d titan mount located here: http://www.thingiverse.com/thing:2236020
thingiverse
free

Original Prusa MK2.3 extruder (MK2/MK3 hybrid extruder for Prusa MK2/MK2s) by Tijnv
...l 18 2018
added a new "v2" version of the extruder body and cover
included prusa's new 45 angle nozzle and support
thingiverse
free

bowden single extruder for Prusa i3 by misio_pl
...n single extruder for prusa i3 by misio_pl
thingiverse
i've made this one for my printer, it works fine, rigid construction,
thingiverse
free

Prusa i3 Rework MK8 Extruder mount by barracuda01
...y own. it seems to fit the extruder and x-carriage well. but i haven't tested it on a working printer. (a build in progress).
thingiverse
free

E3D Titan Mount for Prusa i3 Mk2-style X Carriage by josefcub
...ile this a bit to let the gear turn freely.
caveat emptor, as i don't actually own an original prusa i3 mk2 to test this on.
thingiverse
free

Prusa i3 MK2 Extruder With MK8 Drive for Wanhao i3/MakerSelect by 3DPropWorx
...d you're done.
i should add, the only original part of my wanhao i3 is the frame and power supply. it runs on a mks base 1.4.
thingiverse
free

Prusa MK2 Extruder For BQ Prusa I3 by Tuga_75
...o post x-carriage sorry.
extruder upgrade to use e3d v6 on a bq prusa i3http://manual.prusa3d.com/guide/5.+extruder+assembly/114
thingiverse
free

Prusa i3 MK2 Bowden Mod - PSU Titan Extruder Mount by theFPVgeek
...gned to attach to the prusa mk2 power supply.
mk2(s) bowden x carriage adapter here: http://www.thingiverse.com/thing:2233222
thingiverse
free

X endstop mount for Prusa i3 by QuadBert
...rint area even with it pushed up against the side piece of the x assembly, so i'll eventually tweak it about to address that.
thingiverse
free

Flsun i3 re-work X Carriage for BoyDrone's re-design by netsplit
...ws so it accepts all the extruders designed for the prusa i3 rework
also requires four lm8uu linear bearings for extra stability
Makerselect
thingiverse
free

Bed Leveling for Monoprice makerselect by ThreeDeePrint
...noprice maker select 3d printer. start the print and adjust the bed height as it goes around the perimeter for perfect leveling.
thingiverse
free

MakerSelect / Wanhao i3 - V2.1 - Sweep Fan (40mm Extruder Fan) by BrewHouse
...ppreciate your feedback :)
please feel free to remix my design. if you are interested in the fusion 360 file, please let me know.
thingiverse
free

MakerSelect V2 X-Axis Belt Tensioner by IND3D
...t uses 4 6mm od bearings with a 3.5mm id along with a m3*20 screw
im testing this piece as i type this i have not tested it yet!!
thingiverse
free

Monoprice MakerSelect V2 Filament Guide by thingiturtle
...ery basic design that should be quick to print. it's split so that you can still change filaments without removing the guide.
thingiverse
free

LM8UU mount replacement for Monoprice MakerSelect v2.1 by xenz
...ount in my photos.
note
please pay attention to the y axis plate i have, if yours different then the screw holes may not line up.
thingiverse
free

Makerselect/Duplicator i3 Damper Feet by wellkevi01
...ip to the bottom of the printer's frame, so they're super simple to install and you can postion them where you want them.
thingiverse
free

Wanhao Di3 / Cocoon Create Touch / Monoprice Makerselect flexible feet by TeachingTech
...inted in tpu and solve these two problems.
print settings and design process covered in detail here: https://youtu.be/hwyde5sj1hy
thingiverse
free
Prusa i3 MK2 Extruder With MK8 Drive for Wanhao i3/MakerSelect by 3DPropWorx
...d you're done.
i should add, the only original part of my wanhao i3 is the frame and power supply. it runs on a mks base 1.4.
thingiverse
free

Wanhao D6 / Makerselect Ultimate Ribbon Cable Retainer Clip by ficklecycler
...ed to.
print it in whatever material you want but abs worked best for me since it has some spring to it. let me know how it goes!
thingiverse
free

dial indicator mount for stock Monoporice Makerselect plus, wanhao duplicator i3 by djtobia
...from bottom of dial to tip of stem of about 60 mm.
it isn't an incredibly snug fit on the extruder, but it gets the job done.
Dirtsky
thingiverse
free

The Game by dirtsky
...the game by dirtsky
thingiverse
do you want to fool your friends in the game? well here is your chance
thingiverse
free

WRX Logo by dirtsky
...wrx logo by dirtsky
thingiverse
made a wrx logo for a keychain for my nieces boyfriend. didn't see any on here.
thingiverse
free

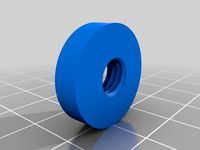
Wire Clamp by dirtsky
...rtsky
thingiverse
i was using a different clamp but, it wasn't that great so i designed my own to help with wire management.
thingiverse
free

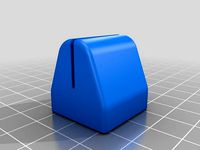
Keyboard Hanger by dirtsky
...hingiverse
well i got tired of sitting my wireless keyboard on the floor at night while watching a movie in bed so, i made this.
thingiverse
free

Up & Down Indicator by dirtsky
...up & down indicator by dirtsky
thingiverse
got tired of forgetting what way was which while adjusting bed height.
thingiverse
free

Wire Hanger by dirtsky
...ded a wire hanger to hold my keyboard and mouse cable underneath my desk. so i came up with this design in 123d design in 5 mins.
thingiverse
free

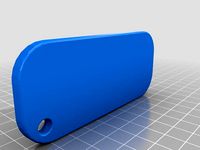
Turbo Keychain by dirtsky
... asked if i could) design a key chain similar to a picture he found. so determined i went through and designed it in 123d design.
thingiverse
free

GE Washer Knob by dirtsky
...ge washer knob by dirtsky
thingiverse
my father-in-law broke his dryer's knob so i redesigned one for him in 123d design
thingiverse
free

120mm Sliding Fan Door by dirtsky
...m sliding fan door by dirtsky
thingiverse
needed a way to control the air flow of my enclosure, so i designed this sliding door.
thingiverse
free

Custom OUYA case by dirtsky
...y designed a lego case but i didn't like how loose the motherboard was so i designed this case. i modeled this in 123d design
Monoprice
thingiverse
free

Display frame for Monoprice MP10
...display frame for monoprice mp10
thingiverse
display frame for monoprice mp10
thingiverse
free

Bridge covers Monoprice MP10
...bridge covers monoprice mp10
thingiverse
bridge covers monoprice mp10
thingiverse
free
Monoprice Coin by Peyton_Guyot
...monoprice coin by peyton_guyot
thingiverse
print this!
thingiverse
free
Voxel Monoprice spool holder by avalero
...voxel monoprice spool holder by avalero
thingiverse
voxel monoprice spool holder
thingiverse
free
Monoprice select mini knob by BramRausch
...monoprice select mini knob by bramrausch
thingiverse
this is a replacement knob for the monoprice select mini.
thingiverse
free

Monoprice 3d printer hook by dmitriyf
...monoprice 3d printer hook by dmitriyf
thingiverse
this is an attachment to monoprice select 3d printer v2
thingiverse
free
monoprice ultimate spool mount by death4u
...older by danmannert to monoprice ultimate 3d printer. it clips into the slot on the top of the printer for the optional enclosue.
thingiverse
free
Monoprice Mini Delta Foot
...a foot for a monoprice mini delta. it helps to increase airflow under the printer. it also helps to reduce the volume of the fan.
thingiverse
free
Monoprice Select Mini Fan Guard
...y fan protection. this is an essential upgrade.
used it on the monoprice select mini pro (from www.3dprinthings.be).
perfect fit!
thingiverse
free

Monoprice Cable Tie Mount
... but had to cut down the straps a bit to make them work. designed a quick mount that fits the full strap, item 6457 on monoprice.
Wanhao
thingiverse
free

Wanhao Logo Plate / Wanhao Logo Schild by JMDesigns
...wanhao logo plate / wanhao logo schild by jmdesigns
thingiverse
wanhao logo plate / wanhao logo schild
thingiverse
free
Wanhao logo by nebtio
...wanhao logo by nebtio
thingiverse
wanhao logo
thingiverse
free
Wanhao keychain by Rein3003
...wanhao keychain by rein3003
thingiverse
a keychain with the logo of wanhao
thingiverse
free
Wanhao Di3 v2 Light / Wanhao Di3 v2 Beleuchtung by JMDesigns
...wanhao di3 v2 light / wanhao di3 v2 beleuchtung by jmdesigns
thingiverse
wanhao di3 v2 light / wanhao di3 v2 beleuchtung
thingiverse
free
TUSH For Wanhao by wtmi1992
...tush for wanhao by wtmi1992
thingiverse
the ultimate spool holder, modified for the top of the wanhao control box. fits snug.
thingiverse
free
fanduct wanhao d12 by theopoilmek
...fanduct wanhao d12 by theopoilmek
thingiverse
fanduct pour wanhao d12
thingiverse
free
Wanhao i3 Marlin by johan21
...wanhao i3 marlin by johan21
thingiverse
marlin for wanhao i3 rampsboard 1.4.
thingiverse
free
Wanhao Duplicator i3 by imagineering4
...wanhao duplicator i3 by imagineering4
thingiverse
these are the stl files for the improvements to the wanhao duplicator i3, v2
thingiverse
free

Wanhao D6 filament guard
...wanhao d6 filament guard
thingiverse
this is a filament guard for wanhao d6 machine to avoid the filament unrolling
thingiverse
free
Wanhao Duplicator i3 Model by Hilde3D
...wanhao duplicator i3 model by hilde3d
thingiverse
wanhao duplicator i3 model
Mk2
turbosquid
$4

Mk2
...
royalty free 3d model mk2 for download as max, obj, and fbx on turbosquid: 3d models for games, architecture, videos. (1305687)
turbosquid
$9
Mk2 Grenade
...osquid
royalty free 3d model mk2 grenade for download as fbx on turbosquid: 3d models for games, architecture, videos. (1175401)
turbosquid
$4

Mk2 Grenade
...quid
royalty free 3d model mk2 grenade for download as blend on turbosquid: 3d models for games, architecture, videos. (1228888)
turbosquid
$2

mk2 Grenade
...osquid
royalty free 3d model mk2 grenade for download as fbx on turbosquid: 3d models for games, architecture, videos. (1329079)
turbosquid
$2

GRENADE MK2
...osquid
royalty free 3d model grenade mk2 for download as fbx on turbosquid: 3d models for games, architecture, videos. (1202615)
turbosquid
$2

Grenade Mk2
...osquid
royalty free 3d model grenade mk2 for download as max on turbosquid: 3d models for games, architecture, videos. (1658201)
turbosquid
$75

Lanchester Mk2
...alty free 3d model lanchester mk2 for download as 3ds and max on turbosquid: 3d models for games, architecture, videos. (1497085)
turbosquid
$10

MK2 helmet
...
royalty free 3d model mk2 helmet for download as max and obj on turbosquid: 3d models for games, architecture, videos. (1371428)
turbosquid
$10

Grenade MK2
...royalty free 3d model grenade mk2 for download as max and fbx on turbosquid: 3d models for games, architecture, videos. (1146970)
turbosquid
free

MK2 Grenade
...
free 3d model mk2 grenade for download as png, obj, and fbx on turbosquid: 3d models for games, architecture, videos. (1225336)
I3
3d_export
$10

suv i3
...suv i3
3dexport
suv i3 2013 series
3d_ocean
$89

BMW i3 2012
...y, in real units of measurement, qualitatively and maximally close to the original. model formats: - *.max (3ds max 2008 scanl...
cg_studio
$99

BMW i3 20143d model
...
cgstudio
.3ds .c4d .fbx .lwo .max .obj - bmw i3 2014 3d model, royalty free license available, instant download after purchase.
cg_studio
$99

BMW i3 20123d model
...tudio
.3ds .c4d .fbx .lwo .max .mb .obj - bmw i3 2012 3d model, royalty free license available, instant download after purchase.
cg_studio
$99

BMW i3 20143d model
...tudio
.3ds .c4d .fbx .lwo .max .mb .obj - bmw i3 2014 3d model, royalty free license available, instant download after purchase.
humster3d
$75

3D model of BMW i3 2014
...
buy a detailed 3d model of bmw i3 2014 in various file formats. all our 3d models were created maximally close to the original.
humster3d
$40

3D model of Kitchen Set I3
...uy a detailed 3d model of kitchen set i3 in various file formats. all our 3d models were created maximally close to the original.
3d_ocean
$30

Kitchen set i3
...ensils oven plates shelves sink table ware
kitchen set i3 include 3d models: cooker, oven, sink, cupboards, table, chair, plates.
3d_ocean
$89

BMW i3 2014
...y, in real units of measurement, qualitatively and maximally close to the original. model formats: - *.max (3ds max 2008 scanl...
cg_studio
$99

BMW i3 Concept 20113d model
...i3
.3ds .c4d .fbx .lwo .max .obj - bmw i3 concept 2011 3d model, royalty free license available, instant download after purchase.
Prusa
turbosquid
$2

Frame Filament Guide Clip-On for Prusa Mk3
...rame filament guide clip-on for prusa mk3 for download as stl on turbosquid: 3d models for games, architecture, videos. (1634730)
3d_export
free

prusa i3 mk3s laser mount for opt lasers
...to learn more about the blue laser technology that conceived the cutting and engraving laser heads from opt lasers, please visit:
turbosquid
free

Prusa small printer adapter holder
...er for download as ipt, skp, dwg, dxf, fbx, ige, obj, and stl on turbosquid: 3d models for games, architecture, videos. (1642936)
3d_export
$30

geisha by jonathan adler
...** i did a 3d printing test in the prusa software, you can find it among the attached images.<br>exchange:<br>.blend...
thingiverse
free

Prusa without Prusa (rc2) by madless
...prusa without prusa (rc2) by madless
thingiverse
just the main part of prusa rc2 faceshield, without writing.
enjoy :)
thingiverse
free

Prusa by acejbc
...prusa by acejbc
thingiverse
prusa knob info
m3 8mm screw
thingiverse
free

Prusa house
...prusa house
thingiverse
how prusa house could look like...
thingiverse
free

Prusa Mk2 "Fake Prusa" LCD cover by anraf1001
...r by anraf1001
thingiverse
version of prusa's lcd cover with "fake prusa" instead of "original prusa"
thingiverse
free

Prusa stabilizator by gutiueugen
...prusa stabilizator by gutiueugen
thingiverse
prusa stabilizator
thingiverse
free

Keychain Prusa by rbarbalho
...keychain prusa by rbarbalho
thingiverse
keychain with text prusa.
Extruder
3ddd
$1

Extruded Chair
...extruded chair
3ddd
extruded , tom dixon
inspired by tom dixon extruded chair
turbosquid
$15

Extruded Table
... extruded table for download as blend, dae, fbx, obj, and stl on turbosquid: 3d models for games, architecture, videos. (1634137)
turbosquid
$2

3D Printer Extruder
...d
royalty free 3d model 3d printer extruder for download as on turbosquid: 3d models for games, architecture, videos. (1537359)
turbosquid
$1

Zombie extruded text
...oyalty free 3d model zombie extruded text for download as obj on turbosquid: 3d models for games, architecture, videos. (1322198)
turbosquid
$4

Extruder conical screw
...el extruder conical screw for download as sldpr, ige, and stl on turbosquid: 3d models for games, architecture, videos. (1524433)
turbosquid
$50

3d PRINTER - Extruder
... available on turbo squid, the world's leading provider of digital 3d models for visualization, films, television, and games.
turbosquid
$15

Extruded Table 2
...xtruded table 2 for download as blend, dae, fbx, obj, and stl on turbosquid: 3d models for games, architecture, videos. (1621846)
turbosquid
$10

Maya Extrude Tool
... available on turbo squid, the world's leading provider of digital 3d models for visualization, films, television, and games.
3d_export
$5

world earth extrude map
...world earth extrude map
3dexport
3ddd
$1

Simply Elegant Extruded Tree Coffee Table Design
...ble by link studios. the silhouette of a tree is visible at one angle, extruded from the surface to create the support structure.