Thingiverse
Prusa i3 Dual Extruder Design by kenkelso
by Thingiverse
Last crawled date: 2 years, 12 months ago
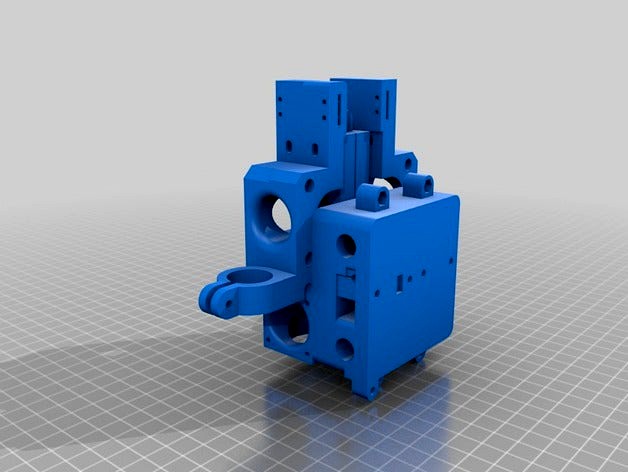
This is my take on a dual extruder setup for Prusa i3 machines.
It uses 2 E3D-V6 extruders, I use genuine ones (supporting British innovation) so you need to check sizes if clones are used.
It can be assembled as a side by side or a front and rear layout and includes optional 18mm Diameter capacitive Z-Probe mount and Filament Runout switch mount. It also has the option of either 3 or 4 linear bearings.
In both cases one of the extruders is adjustable.
Pros and Cons of different arrangements.
Front/Rear Extruders has the advantage of a more balanced design but has the disadvantage of reducing the Z axis to about 160mm and the Y axis to about 180.
Side by Side means its front heavy but allows the full X, Y, Z movement.
3 bearing probably has lower friction than the 4 bearing but may wear faster and possibly not be as accurate. I have tried the 3 bearing first and will report back on the performance later.
Depending on which arrangement you require you will need to mirror (flip) some of the extruder body parts. For instance for the side by side design with no Z-Probe or RunOut switch you need Two Extruder Body Basic and two Extruder Body Basic mirrored (flipped about Y if using Slic3r)
The Extruder body that is to be adjustable needs the Adjuster Lug glued into it (if printed in ABS then a dab of acetone is perfect) so that it locates in the X-Carriage Front, a 3mm cap head screw is screwed into the lug and locates into the carriage. The Extruder body is fixed to the carried by 3mm cap head screws in two slotted holes, tighten the screws a little then use an allen key to make the Z adjustment.
A fan can be mounted on the rear X-Carriage, if this is required then glue the Fan Lug in place. The fan mount and duct is the one supplied with the Prusa i3 Plus Original from Prusa Research as it's Open Source I have included the STL file for this as well. A suitable fan is: http://www.ebay.co.uk/itm/161834906059?_trksid=p2055119.m1438.l2649&ssPageName=STRK%3AMEBIDX%3AIT
The Capacitive probe I used is one of these:http://www.ebay.co.uk/itm/291369250165?_trksid=p2057872.m2749.l2649&ssPageName=STRK%3AMEBIDX%3AIT
If anyone needs to fit a 12mm diameter probe either make an adaptor or let me know and I will modify the part for you.
The Filament RunOut Sensor is a simple micro-switch with a lever and roller:http://www.ebay.co.uk/itm/281854711611?_trksid=p2057872.m2749.l2649&ssPageName=STRK%3AMEBIDX%3AIT
The Extruder fans should be assembled so as to both blow in the same direction to get a through flow of cooling air.
If going for the Front/Rear layout you have 3 Carriage options including a slightly narrower 3 bearing design.
Similar models
thingiverse
free
DIY 1s Charger / 1s Lader by zaphi
...strk%3amebidx%3ait
power suply:http://www.ebay.de/itm/221961044643?_trksid=p2057872.m2749.l2649&sspagename=strk%3amebidx%3ait
thingiverse
free

360w psu cover by kimmerkesdal
...0w psu - http://www.ebay.com/itm/262626173745?_trksid=p2057872.m2749.l2649&var=561523999305&sspagename=strk%3amebidx%3ait
thingiverse
free

logitech c270 with led prusa i3 by Ploegie
...me add on led bought on ebay..
http://www.ebay.nl/itm/181941929073?_trksid=p2057872.m2749.l2649&sspagename=strk%3amebidx%3ait
thingiverse
free

Kossel Cooling by SimonFrick
...o09_s01?ie=utf8&psc=1
fan:
http://www.ebay.de/itm/111317241608?_trksid=p2057872.m2749.l2649&sspagename=strk%3amebidx%3ait
thingiverse
free

RepRap Carriage Plate Adapter by Daaiisuukii
...rap-3d-printer-prusa-i3/112031552702?sspagename=strk%3amebidx%3ait&_trksid=p2057872.m2749.l2649
to fit on the ctc prusa i3.
thingiverse
free

Filter for 3d printer by pochetto
...plice-estremamente-silenzioso/dp/b002ktvftehttps://www.youtube.com/watch?v=cgh0vhmcvlohttps://www.youtube.com/watch?v=ie_0_-arzee
thingiverse
free

Electric Screwdriver by Kattstryparen
...ff-on-rocker-switch-momentary-rocker-switch-wl/232537776527?sspagename=strk%3amebidx%3ait&_trksid=p2057872.m2749.l2649 switch
thingiverse
free

Optical Filament Runout Sensor
...con-cavo-stampante-stampa-3d-printer-prusa-cnc-mendel/222448606842?sspagename=strk%3amebidx%3ait&_trksid=p2057872.m2749.l2649
thingiverse
free

SSR PS_ON COVER by thomasgobert
...mp;var=571595784259&sspagename=strk%3amebidx%3ait
thanks to 3dms : https://www.thingiverse.com/thing:2193481 for the upgrade.
thingiverse
free

powerbank by GottderDrachen
.../www.dx.com/de/p/universal-replacement-3-7v-4800mah-li-polymer-battery-for-7-10-tablet-pc-sliver-05-x-80-x-95-321496#.vgldrvkpnt4
Kenkelso
thingiverse
free

Vauxhall Astra Wiper Part by kenkelso
...vauxhall astra wiper part by kenkelso
thingiverse
this is the part that holds the wiper blade onto the arm
thingiverse
free

Avid Aircraft Fuel Tank LIght by kenkelso
...giverse
the level of the fuel in the avid tanks is hard to see through the fibre glass sight holes. these led lights help a lot.
thingiverse
free

VW Transporter T3 Headlamp adjusters by kenkelso
... square headlamp adjuster parts that disintegrate because they have become brittle. print in taulman nylon with a wide brim (8mm)
thingiverse
free

Alton Greenhouse ventilator clip by kenkelso
... this is a replacement part that is printed assembled. i have printed it in pet and also nylon, both of which seem to function ok
thingiverse
free

Avid Aircraft Door Pod by kenkelso
... outside and the retainer fits on the inside, blind rivet in place.
make sure the hole has smooth edges to avoid stress cracking.
thingiverse
free

Draper SWP210DWSS submersible pump impellers by kenkelso
...w if anyone tries them with a more exotic filament.
update 20/1/2016 new designs uploaded with deeper vanes, works even better!!!
thingiverse
free

RAMPS 1.4 enclosure for Prusa i3 single sheet frame by kenkelso
...8's to allow more space for wiring. it has 2 entry points at the top for cables from the extruder and the left stepper motor.
thingiverse
free

Prusa Research i3 Inductive/capacitive probe bracket by kenkelso
...nc (if you get an no one you will need to invert the pins on the z endstop.
the inductive probe part no is: lj12a3-4-z/bx npn nc.
thingiverse
free

Security Camera using Raspberry pi 2 B and RasbPi camera by kenkelso
...here are just 3 bits you will need from uavpilot1's design that you will need, see his posting for printing instructions etc.
thingiverse
free

Manual Z Probe (and some code to get a servo working) by kenkelso
...i used. btw, having used these mechanical probes, an inductive probe and a capacitive one i have settled on the capacitive probe.
I3
3d_export
$10

suv i3
...suv i3
3dexport
suv i3 2013 series
3d_ocean
$89

BMW i3 2012
...y, in real units of measurement, qualitatively and maximally close to the original. model formats: - *.max (3ds max 2008 scanl...
cg_studio
$99

BMW i3 20143d model
...
cgstudio
.3ds .c4d .fbx .lwo .max .obj - bmw i3 2014 3d model, royalty free license available, instant download after purchase.
cg_studio
$99

BMW i3 20123d model
...tudio
.3ds .c4d .fbx .lwo .max .mb .obj - bmw i3 2012 3d model, royalty free license available, instant download after purchase.
cg_studio
$99

BMW i3 20143d model
...tudio
.3ds .c4d .fbx .lwo .max .mb .obj - bmw i3 2014 3d model, royalty free license available, instant download after purchase.
humster3d
$75

3D model of BMW i3 2014
...
buy a detailed 3d model of bmw i3 2014 in various file formats. all our 3d models were created maximally close to the original.
humster3d
$40

3D model of Kitchen Set I3
...uy a detailed 3d model of kitchen set i3 in various file formats. all our 3d models were created maximally close to the original.
3d_ocean
$30

Kitchen set i3
...ensils oven plates shelves sink table ware
kitchen set i3 include 3d models: cooker, oven, sink, cupboards, table, chair, plates.
3d_ocean
$89

BMW i3 2014
...y, in real units of measurement, qualitatively and maximally close to the original. model formats: - *.max (3ds max 2008 scanl...
cg_studio
$99

BMW i3 Concept 20113d model
...i3
.3ds .c4d .fbx .lwo .max .obj - bmw i3 concept 2011 3d model, royalty free license available, instant download after purchase.
Dual
turbosquid
free

Dual Pistols
...ls
turbosquid
free 3d model dual pistols for download as fbx on turbosquid: 3d models for games, architecture, videos. (1320360)
turbosquid
$2

Dual Axe
...urbosquid
royalty free 3d model dual axe for download as fbx on turbosquid: 3d models for games, architecture, videos. (1332372)
turbosquid
$10

Dual Lesaths
... available on turbo squid, the world's leading provider of digital 3d models for visualization, films, television, and games.
3ddd
$1

плитка Dual Bianco (Испания)
...й плитки venis dual (испания). технические качества: устойчивость к стирания, отличная геометрия, отсутствие проблем при укладке.
turbosquid
$35

Dual Mesh Fonts
...ree 3d model dual mesh fonts for download as ma, obj, and fbx on turbosquid: 3d models for games, architecture, videos. (1352989)
turbosquid
$29

Dual Flask with Bungs
...del dual flask with bungs for download as obj, fbx, and blend on turbosquid: 3d models for games, architecture, videos. (1210512)
turbosquid
$19

Dual Socket Plug
...3d model dual socket plug for download as obj, fbx, and blend on turbosquid: 3d models for games, architecture, videos. (1303912)
turbosquid
$13

Dual Adjustable Pulley
... available on turbo squid, the world's leading provider of digital 3d models for visualization, films, television, and games.
turbosquid
$10

Amoi N809 Dual
... available on turbo squid, the world's leading provider of digital 3d models for visualization, films, television, and games.
turbosquid
$5

Dual Turret Tank
... available on turbo squid, the world's leading provider of digital 3d models for visualization, films, television, and games.
Prusa
turbosquid
$2

Frame Filament Guide Clip-On for Prusa Mk3
...rame filament guide clip-on for prusa mk3 for download as stl on turbosquid: 3d models for games, architecture, videos. (1634730)
3d_export
free

prusa i3 mk3s laser mount for opt lasers
...to learn more about the blue laser technology that conceived the cutting and engraving laser heads from opt lasers, please visit:
turbosquid
free

Prusa small printer adapter holder
...er for download as ipt, skp, dwg, dxf, fbx, ige, obj, and stl on turbosquid: 3d models for games, architecture, videos. (1642936)
3d_export
$30

geisha by jonathan adler
...** i did a 3d printing test in the prusa software, you can find it among the attached images.<br>exchange:<br>.blend...
thingiverse
free

Prusa without Prusa (rc2) by madless
...prusa without prusa (rc2) by madless
thingiverse
just the main part of prusa rc2 faceshield, without writing.
enjoy :)
thingiverse
free

Prusa by acejbc
...prusa by acejbc
thingiverse
prusa knob info
m3 8mm screw
thingiverse
free

Prusa house
...prusa house
thingiverse
how prusa house could look like...
thingiverse
free

Prusa Mk2 "Fake Prusa" LCD cover by anraf1001
...r by anraf1001
thingiverse
version of prusa's lcd cover with "fake prusa" instead of "original prusa"
thingiverse
free

Prusa stabilizator by gutiueugen
...prusa stabilizator by gutiueugen
thingiverse
prusa stabilizator
thingiverse
free

Keychain Prusa by rbarbalho
...keychain prusa by rbarbalho
thingiverse
keychain with text prusa.
Extruder
3ddd
$1

Extruded Chair
...extruded chair
3ddd
extruded , tom dixon
inspired by tom dixon extruded chair
turbosquid
$2

3D Printer Extruder
...d
royalty free 3d model 3d printer extruder for download as on turbosquid: 3d models for games, architecture, videos. (1537359)
turbosquid
$1

Zombie extruded text
...oyalty free 3d model zombie extruded text for download as obj on turbosquid: 3d models for games, architecture, videos. (1322198)
turbosquid
$4

Extruder conical screw
...el extruder conical screw for download as sldpr, ige, and stl on turbosquid: 3d models for games, architecture, videos. (1524433)
turbosquid
$50

3d PRINTER - Extruder
... available on turbo squid, the world's leading provider of digital 3d models for visualization, films, television, and games.
3d_export
$5

world earth extrude map
...world earth extrude map
3dexport
3ddd
$1

Simply Elegant Extruded Tree Coffee Table Design
...ble by link studios. the silhouette of a tree is visible at one angle, extruded from the surface to create the support structure.
3d_export
$13
extruded table
...ed to give you the highest possible quality for up to 4k renders. there is no post-production used on any of the renders you see.
3d_export
$13
extruded chair
...for high-quality render results. no extra plugins are required for this model. lights and cameras are not included in the scenes.
3d_export
$13
extruded table 2
...for high-quality render results. no extra plugins are required for this model. lights and cameras are not included in the scenes.
Design
3ddd
$1
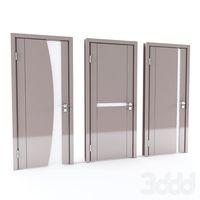
LINE DESIGN (Doors Design)
...line design (doors design)
3ddd
дверь
modern doors design - line design concept
3ddd
$1
VER DESIGN
...ver design
3ddd
ver design
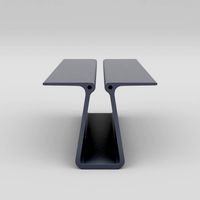
кресло ver design
3ddd
$1
VER DESIGN
...ver design
3ddd
ver design
диван ver design
3ddd
$1
Bagno design
...bagno design
3ddd
bagno design , унитаз
санитария bagno design
3ddd
free
VER DESIGN
...ver design
3ddd
ver design , стеллаж
полка ver design
3ddd
$1
VER DESIGN
...ver design , лежак , шезлонг
шезлонг ver design
3d_export
free

designer
..., trees and much more. the model has 3 types of parts: - 4 cells - 6 cells - 8 cells the *.max file contains 5 colored materials.
3d_export
$19

level design
...level design
3dexport
you can use this design (level design) in your own game.
3d_export
$7
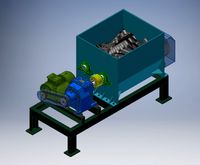
Crusher design
...crusher design
3dexport
crusher design
3d_export
$4
interior design
...interior design
3dexport
interior design