Thingiverse
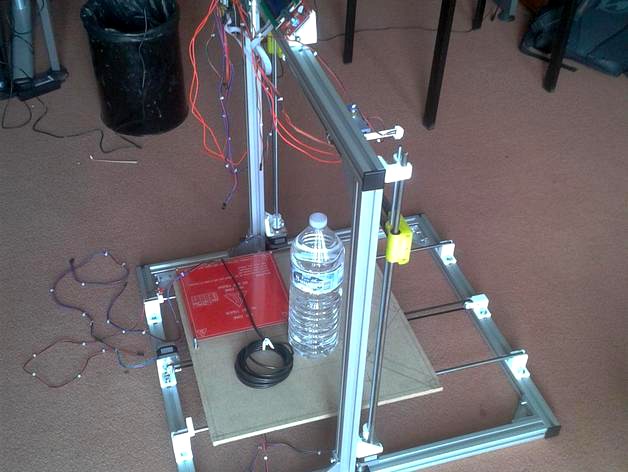
Prusa i3 Aluminium Rework by Nutz95
by Thingiverse
Last crawled date: 2 years, 12 months ago
#Description:
This printer is a rework from another Chinese guy that came up with this build that we found pretty simple and straight forward to make.
#Updates:
**July 8th 2015: UploadedY_Axis_LM8UU_Holder.rsdoc: can be opened with DesignSpark Mechanical
**July 2nd 2015: Uploaded YAxis_8mm_Rod_Holder.rsdoc: can be opened with DesignSpark Mechanical
**July 01st 2015**: This model has been upgraded into this thing:
http://www.thingiverse.com/thing:891409
It's also available on Kickstarter: https://www.kickstarter.com/projects/3dmodularsystems/scalar-m-xl-3d-modular-printers-imprimantes-3d-mod, enjoy! (the new plastic parts will be coming very soon).
You can also see some videos here:
https://www.youtube.com/watch?v=aifqco3Ef18
https://www.youtube.com/watch?v=AbEqcwTLVNc
**April 04th 2015**: add x_idler_v12_8mm.stl and x_motor_mount_v12_8mm.stl compatible for 8mm vertical rods
Also added Top_Rod_Holders_8mm.stl that are the top holders compatible with 8mm threaded rods
**April 01th 2015**: Add missing build_plate_8.stl containing belt holder for Y axis and also x carriage
**Feb 08th 2015**:Updated some comments
**Dec 02nd 2014**: Added some link about how to choose your pulley and update length of GT2 belt needed
**Nov 22nd 2014**: Add Video of the printer in action
**Nov 14th 2014**: Update BOM
**Nov 10th 2014**: Uploaded some new pictures
**Oct 26th 2014**: Added Aluminium Hot end V1.1 supports.
**aluminium_hotend_v1.1.stl** is the full plate updated
**aluminium_hotend_v1.1_box.stl** is the E3D hot end holder box alone
**aluminium_hotend_v1.1_support_for_e3d.stl** is the non box support for E3D hot end
**build_plate_4_v1.1** is to be used with M6X12mm screws. It seems that the previous version needed M6X10mm to properly fit the Aluminium profile with it's Tnut. You will neet M6x12 or M6X10 Hex nuts to use with this plate. Else you might have troubles to screw them inside their respective holes, or you will get stuck later on when mounting the stepper motors..
**Oct 16th 2014**: Updated provided coupler to 5mm-5mm coupler. the one uploaded before was for openbeam 1.4 (5mm-8mm).
**Sept 12th 2014**: I updated all parts containing belt tensioner because the tensioner was not long enough and y axis tensioner holder box didn't allow the belt to go inside when the tensioner was tightened at max position.
Also i removed the "ball bearing bumps holder" from the tensioner and replaced the bumps by special clamps made for 608zz ball bearings.
The clamps properly fit inside the bearing and you will have easy access inside the tensioner. Plus the bearing was shaking because it was not properly hold in place inside the tensioner. Those clamp solve that issue.
#Video:
https://www.youtube.com/watch?v=zVNrM8R4_1w
#Features:
* The aluminium extrusions makes the whole design very rigid.
* The aluminium extrusions are cheap :
About **50€** for 8'' printer and **60€** for 16'' printer)
* The extrusion frames are very easy to scale on any direction you want
#Requirements
##Hardware Requirements (quick BOM)
If you want to use all the same extrusion here is what you need
* You require 7 pieces of Aluminium extrusion (3030). All of the same size:
**7 X 45cm** for 8'' printer
**7 X 66 cm** for 16'' printer
* You also require a few meters of **8mm smooth rods**. Depending on the size of your printer you might adjust the length of the rods. for 16'' printer we used 6 8mm rod of 1Meter each.
**Note**: For Y Axis you might want to use 10 or 12mm smooth rods (the provided plastic parts however only support 8mm smooth rods. ) SBR-12 rail are also quite nice for this axis. the main point with them is that they cannot bend due to build plate weight.
For those you will require some different plastic part to keep the rails in place. I'll provide all those models in another version of this printer very soon.
* 1 Meters of 5mm threaded rod. (5mm will work only if they are straight and they don't bind. Other way prefer 1Meter of 8mm diameter threaded rod but the provided plastic parts needs to be adjusted however.).
* 54 x M6X12mm
* 54 x TNuts for above M6 screws
* 12 x LM8UU linear bearings
* 4 x 608ZZ ball bearings
* 4 x springs for heat bed support
* 1 x hobbed bolt M8 for wade extruder
* 4 x M8 Spacers
* 2 x M5 nuts
* about 10 x M3 screws
* 1-4 x MK2A/MK2B 8'' heat beds
* Either 20x20cm mirrors (from Ikea or any hardware store) or 20x20 cm glass to put over the heat bed for plastic adhesion.
* 50mm Kapton tape is also recommended to prepare Heat bed thermistor
* 360W power supply for 1 bed. (if you wonder how much power a 3D printer use please check this (https://nutz95.wordpress.com/wp-admin/post.php?post=5361)
* you will need **at least 220W** per heat bed if you wire them in parallel. You might require less if you wire them in series but you will heat them slower. 280-300W per bed can be nice if you take into account current peaks.
* 1 Static relay 24A DC (SSR25-DD) per heat bed, so if you choose 4 heat beds you'll need 4 of them. Also, as each bed will use about 200w each make sure you use the proper power supply or have multiple power supplies.
* 1 microswitch (we used small omron ones for Z probe)
* 2 standard end stop microswitch (for X and Y axis)
* 3 Meters of GT2 5mm belt (you might consider 3 to 4 meters for 16'' version)
* 2 GT2 16 teeth pulleys (you can also print them but buying aluminium ones is a good thing if you consider long term low maintenance)
For more information about Pulley size and how to choose one please see my post here: http://nutz95.wordpress.com/2014/12/02/reprap-how-to-choose-your-pulleys-for-your-3d-printer/
## Electronic Requirements:
In this part you can take any 3D printer electronics as it's a generic design with only 1 extruder.
For the 4 heat beds you might need an additional solid state relay in order to provide the power from a separate power supply.
For people starting in 3D printing, here is what we used:
* Cable kits for 3D printers electronic can be useful (you can get some for about 5€)
* Hot end (you can use any, we are using E3D-V6/Prometheus one and we also recently mounted a AluHotEndV7)
* depending if your hot end has bowden ptfe tube built in or not you might require to buy a 1m PTFE tube if you want a bowden style 3D printer.
* You can either buy a whole 3D printer Ramps 1.4 electronic kit but if you consider having good prices i suggest you buy every component separately (it's cheaper).
So you will need:
* 1X Ramps 1.4
* 1x arduino mega 2560 R3 (or similar)
* 5 x A4988 stepper stick
* 1 Rep rap Discount LCD (optional of course but very useful if you want to use your printer in stand alone mode).
* 1 thermistors (I suggest 3950-1% thermistor because they are easy to find and also supported by marlin firmware but you can take original EPCOS 100K thermistor if you can find any)
* some 1 or 2mm thermal shrinkable tube might be require to isolate your thermistor also.
* If your hot end has is not prepared for bowden and you want this style of printer, you will require 2x **push in fitting** connectors adjusted to your PTFE tube diameter. watch out for English pneumatic metrics here it's 1/4 BSPT male connector you will want for outer diameter)
* **Stepper motors**: we mounted 5* Nema 17 42BYGHW609 or 42BYGHW804 from wantai. on ebay you can find free shipping from either : china/us/Europe(Germany). They can sell you directly 5 or 10 units and the price is very nice.
They are 1.7A, 1.8*) 4000g.cm 40mm high. Quiet, small and cheap.
The best I found was 42BYGHW804: 1.2A, 4500g.cm 64oz-in 48mm high that always stay very cool and quiet. But i couldn't get any more from directly from Europe.
#Misc
## Reference Designs:
Original design: http://www.thingiverse.com/thing:322025
I used the following modified parts in order to deal with my different parts:
* PneufitAdaptor for JHead:
http://www.thingiverse.com/thing:324406/#files
* Auto Bed-Leveling Z-probe for Makerfarm Prusa i3 with E3Dv5 hotend
http://www.thingiverse.com/thing:222861
* Z-Probe Aluminium Prusa
http://www.thingiverse.com/thing:441146
* AUTO LEVELING Z-Probe for Makerfarm Prusa i3
http://www.thingiverse.com/thing:222861
* i3 Prusa X-End to strain the timing belt
http://www.thingiverse.com/thing:332071
* J-Adaptor To Pneufit 1/8"
http://www.thingiverse.com/thing:324407
* prusa i3 jhead holder 5mm sunken nut with servo mount ver-3
http://www.thingiverse.com/thing:363373
* Universal X Carriage
http://www.thingiverse.com/thing:97719
* Aluminium i3 Y Idler
http://www.thingiverse.com/thing:441151
* Parts from original Greg's extruder:
http://www.thingiverse.com/thing:65939
About the Aluminium Extrusion:
You can take any Aluminium Extrusion type you want.
The parts are designed however to be fixed on 30mm Aluminium extrusions bars.
The shape of the slot has no real importance.
On our side we bought in Europe the aluminium parts at
http://www.motedis.fr/shop/
You can find a German and English alternative.
The whole chassis on the picture was about 70-80€ including T-Nuts aluminium corners (L shaped supports) and plastic fits.
Screws:
The holes are made for M6 screws.
You might require 50xM6X12mm and about 25xM6x16mm screws.
##Optional Parts:
-Prusa_i3_x_pneufit_Adaptor =>Only needed if your hot end has no bowden connector built in
##Additional Notes :
* About Z probe Holder: make sure to select the one appropriate for your build. I provided a few but maybe they won't fit either your micro switch or the length will be wrong.
* About Hot end supports:
I put 3 different supports. 1 contains 2 supports for E3D like hot end (you will notice the top of the head that is supposed to be used for holding it in place is larger than standard Jhead hot ends)
Another 1 is for standard J-Heads.
* The model in the photos is with E3D hot end with bowden tube built in.
Of course, if you have any questions or require more photos feel free to ask!
Similar models
thingiverse
free

Rod mount 8mm by Row
...ow
thingiverse
8mm rod mount for 20x20mm aluminium extrusion.
spool holder stl files : http://www.thingiverse.com/thing:545954
thingiverse
free

2020 extrusion 8mm drill guide 5mm slot by Tirpitz93
... guide for 8mm drill, for 2020 aluminium extrusion, fits 5mm slot.
remixed/inspired by: https://www.thingiverse.com/thing:4255059
thingiverse
free

MP Select Mini bed brackets by ScotY
...inal design and it should work. if you have the new style, you will have to print these:http://www.thingiverse.com/thing:1916033
thingiverse
free

PnP Hot End for Pnp Extruder by eyigit
...ern from the 1000mmx30mmx2mm aluminum plate).
aluminium block (v6)
stainless steel mk8 heat break m6*26mm (with teflon tube)
bolt
thingiverse
free

Aluminium bed for Printrbot Plus (V2) by CrawlB4uBall
...e ambient heat varies 5-10 degrees c during the day which effects the bed quiet a lot. calibrate before every print is my advice.
thingiverse
free

Proto-Bot by Jonaser
...vement of rods inside of 3d printers, cnc's and laser cutters.
it requires:
600mm 5mm linear rod
12x 5mm x 7mm x 8mm bushings
thingiverse
free

Styx i3 (Updated) by Styx2015
...k you to all the above people for allowing me to make a custom printer.
18/04/2016
added missing z axis frame brace bolt on file.
thingiverse
free

Heavy Duty Mount for Anet by lange23
...ys used.
also check out my other e3d projects.https://www.thingiverse.com/thing:3033145https://www.thingiverse.com/thing:3017420
thingiverse
free

Spool Holder support by brianor01
...hing:2772607 ,and it works really well. no supports are required.
you can also reuse the m8 nuts that come with the printer too.
thingiverse
free

TRONXY X3 Bed Support by jopereira
...nforcement: https://www.thingiverse.com/thing:2501346
(belt tensioner (not my design): https://www.thingiverse.com/thing:2021999)
Nutz95
thingiverse
free

Remix of Nexus 7 - Ipad compatible Stand by Nutz95
...giverse.com/thing:199968.
i added the original design spark model so that you can use it to update the model based on your needs.
thingiverse
free

OB 1.4 60/50mm Fan Mount by Nutz95
...a.
a 60/50mm fan can be added to cool down the print.
the hotend holder in (green) is http://www.thingiverse.com/thing:211596
thingiverse
free

ShapeOko Chinese 1.5KW ER11 Spindle Mounts by Nutz95
... other partes are both separate parts for top and for bottom mount.
fully compatible with initial shapeoko z aluminium support.
thingiverse
free

3030 extrusion profile clips by Nutz95
...extrusion profile.
the other version with 5mm at the end of the names are for the versions of the clips that are only 5mm high.
thingiverse
free

OpenBeam 1.4 X Block for 6mm tube extended BedLeveling 3 by Nutz95
... also has a prolongated filament guide so that the filament don't get stuck between the ptfe tube's end and the jhead.top
thingiverse
free

28BYJ-48 Stepper Shaft - z-axis Coupler by Solarmax
...of the smartrap - z axis motor coupler by nutz95 i added blocks to one side because the shaft...
thingiverse
free

Scalar - 3D printer Gaz/Smoke detector Kit housing by 3DModularSystems
...(12v->5v) the modified firmware you can use is located here:https://github.com/nutz95marlin.git look the description on how to configure it at...
Rework
3d_export
$25
riva aquarama 1970
...visualization, as well as, if desired, it can be reworkd for 3d printing. in the near future, a model...
3d_export
$8
Mosaic 1 3D Model
...outdoor indoor vector ceramic glass mosaic decorative mosaic manually reworkd into a vector. the image is then modified in...
3d_export
$65

sci-fi scene for rendering restyling - tesla
...colors with the name, metal, light metal, dark metal, reworkd renders for preview and processed in photoshop using a...
3d_export
$22
a filter assembly and inspection line
...laser marking station (op40), one packaging station (op50), one rework and pump water detection station (op60), and two assembly...
3d_export
$19

muuto raw chair
...the muuto raw chair.<br>raw chair is a striking functional reworkng of a recognizable everyday object. a part of the...
3d_export
$12

desert rocks stock in blender
...in obj format (non-textured), together with the textures, for reworkng them in other programs.<br>notes: the scene include 12 simple...
3d_export
$10

arclinea principia
...the essence, with the basic principles of the kitchen, reworkd: new steel technology and natural wood cutting. the extraordinary...
thingiverse
free

Doughnut Rework by Johhnny
...doughnut rework by johhnny
thingiverse
i reworked tzani's mobius doughnut for dual extrusion.
thingiverse
free

Beanie the Transformer rework by Whirl55
...beanie the transformer rework by whirl55
thingiverse
found and reworked head pin
and all files
thingiverse
free
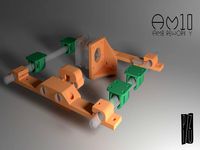
AM10 - am8 rework Y
...am10 - am8 rework y
thingiverse
totaly rework to turn your am8 into an am10 with only 2 pieces
Aluminium
3d_ocean
$3

Vray Aluminium
...vray aluminium
3docean
3d max aluminium material metal vray
vray aluminium material for 3dmax
design_connected
$13

Aluminium Chair
...aluminium chair
designconnected
sebastian scherer aluminium chair computer generated 3d model. designed by scherer, sebastian.
3ddd
$1
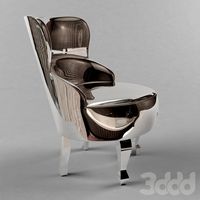
Baxter Sellerina Aluminium
... baxter , sellerina aluminium
итальянское кресло sellerina aluminium фабрики baxter
turbosquid
free
Aluminium Foil
...
turbosquid
free 3d model aluminium foil for download as dae on turbosquid: 3d models for games, architecture, videos. (1175978)
3ddd
$1
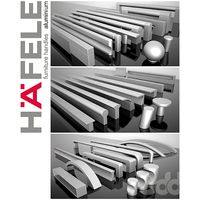
Hafele handles - Aluminium
...hafele handles - aluminium
3ddd
фурнитура
hafele handles - aluminium
turbosquid
$29
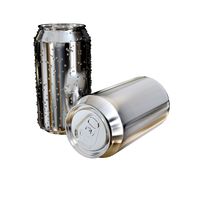
aluminium can
...quid
royalty free 3d model aluminium can for download as max on turbosquid: 3d models for games, architecture, videos. (1632245)
turbosquid
$4

Aluminium Chair
...id
free 3d model aluminium chair for download as max and fbx on turbosquid: 3d models for games, architecture, videos. (1318406)
turbosquid
free
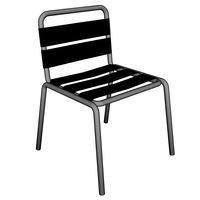
Aluminium Chair
...ee 3d model aluminium chair for download as max, skp, and 3ds on turbosquid: 3d models for games, architecture, videos. (1694764)
3d_ocean
$10

Aluminium Keyboard
...keyboard. ready to render with included scene and textures (c4d only). • fast renders • lights and cameras included • textures...
turbosquid
$9
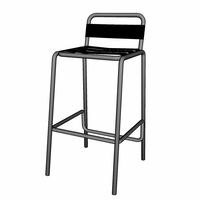
Aluminium Stool
...ee 3d model aluminium stool for download as max, skp, and 3ds on turbosquid: 3d models for games, architecture, videos. (1694695)
I3
3d_export
$10
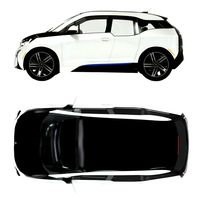
suv i3
...suv i3
3dexport
suv i3 2013 series
3d_ocean
$89

BMW i3 2012
...y, in real units of measurement, qualitatively and maximally close to the original. model formats: - *.max (3ds max 2008 scanl...
cg_studio
$99

BMW i3 20143d model
...
cgstudio
.3ds .c4d .fbx .lwo .max .obj - bmw i3 2014 3d model, royalty free license available, instant download after purchase.
cg_studio
$99

BMW i3 20123d model
...tudio
.3ds .c4d .fbx .lwo .max .mb .obj - bmw i3 2012 3d model, royalty free license available, instant download after purchase.
cg_studio
$99

BMW i3 20143d model
...tudio
.3ds .c4d .fbx .lwo .max .mb .obj - bmw i3 2014 3d model, royalty free license available, instant download after purchase.
humster3d
$75

3D model of BMW i3 2014
...
buy a detailed 3d model of bmw i3 2014 in various file formats. all our 3d models were created maximally close to the original.
humster3d
$40
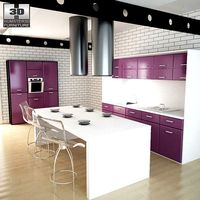
3D model of Kitchen Set I3
...uy a detailed 3d model of kitchen set i3 in various file formats. all our 3d models were created maximally close to the original.
3d_ocean
$30

Kitchen set i3
...ensils oven plates shelves sink table ware
kitchen set i3 include 3d models: cooker, oven, sink, cupboards, table, chair, plates.
3d_ocean
$89

BMW i3 2014
...y, in real units of measurement, qualitatively and maximally close to the original. model formats: - *.max (3ds max 2008 scanl...
cg_studio
$99

BMW i3 Concept 20113d model
...i3
.3ds .c4d .fbx .lwo .max .obj - bmw i3 concept 2011 3d model, royalty free license available, instant download after purchase.
Prusa
turbosquid
$2
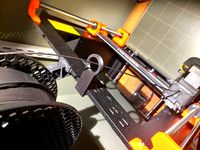
Frame Filament Guide Clip-On for Prusa Mk3
...rame filament guide clip-on for prusa mk3 for download as stl on turbosquid: 3d models for games, architecture, videos. (1634730)
3d_export
free
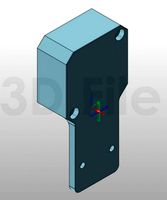
prusa i3 mk3s laser mount for opt lasers
...to learn more about the blue laser technology that conceived the cutting and engraving laser heads from opt lasers, please visit:
turbosquid
free
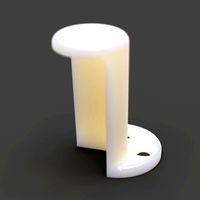
Prusa small printer adapter holder
...er for download as ipt, skp, dwg, dxf, fbx, ige, obj, and stl on turbosquid: 3d models for games, architecture, videos. (1642936)
3d_export
$30

geisha by jonathan adler
...** i did a 3d printing test in the prusa software, you can find it among the attached images.<br>exchange:<br>.blend...
thingiverse
free

Prusa without Prusa (rc2) by madless
...prusa without prusa (rc2) by madless
thingiverse
just the main part of prusa rc2 faceshield, without writing.
enjoy :)
thingiverse
free
Prusa by acejbc
...prusa by acejbc
thingiverse
prusa knob info
m3 8mm screw
thingiverse
free
Prusa house
...prusa house
thingiverse
how prusa house could look like...
thingiverse
free

Prusa Mk2 "Fake Prusa" LCD cover by anraf1001
...r by anraf1001
thingiverse
version of prusa's lcd cover with "fake prusa" instead of "original prusa"
thingiverse
free
Prusa stabilizator by gutiueugen
...prusa stabilizator by gutiueugen
thingiverse
prusa stabilizator
thingiverse
free
Keychain Prusa by rbarbalho
...keychain prusa by rbarbalho
thingiverse
keychain with text prusa.
