Thingiverse

Promega CoreXY Belt Tensioner by supinemonkey
by Thingiverse
Last crawled date: 3 years, 1 month ago
Check the remix here for an updated version by user TheBum:https://www.thingiverse.com/thing:3409417
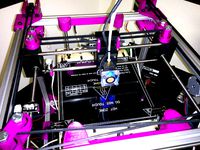
This is a really cool, granular way to tension the XY belt on the Promega giant printer, but could be implemented on other machines. Fusion code included, so mod away, makers!
It requires a bit of hardware but makes subtle tensioning a breeze. You will need:
1/4" or M6: 1 - nut, 1 - 1.5" long bolt (the tensioner bolt and nut)
2 - 1/2" or 12mm long M4 or 5 Screws (to attach the knob bracket to the Promega bracket)
4 - 12MM long hexagonal offset posts M3 thread
You can reuse the 4 - M3 Nema motor screws, 12mm or so long
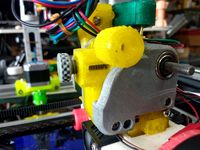
This mod solves a problem I was having where unscrewing the motor screws would sometimes loosen the round offset posts where they met the motor instead of on top. The hex posts are registered in the bracket so they stay put. Also, the knob tensioner is simply elegant.
No support needed.
Assembly:
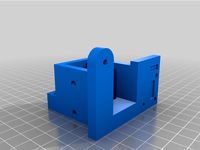
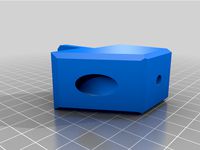
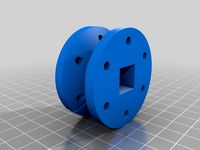
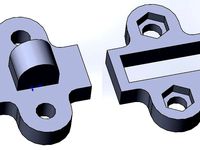
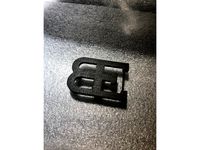
Screw the four hex offsets into your Nema. Press the motor bracket on flush with the bolt recess facing left as you look at the machine from the front. Mount with the 4 M3 Nema motor screws from on top.
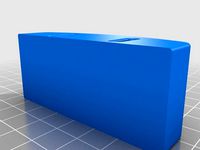
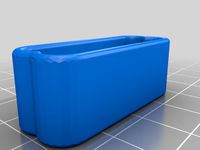
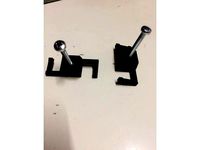
Make sure the knob fits snugly and turns smoothly in its slot. Insert the 1/4" or M6 nut to the nut slot.
Thread the tensioner bolt through the knob and nut.
Use the 2 M4 screws to secure the knob bracket to the Promega motor bracket.
To tension, simply loosen the four top screws as normal and hand tension with the knob. Tighten the top screws when the tension feels nice and snug.
This is a really cool, granular way to tension the XY belt on the Promega giant printer, but could be implemented on other machines. Fusion code included, so mod away, makers!
It requires a bit of hardware but makes subtle tensioning a breeze. You will need:
1/4" or M6: 1 - nut, 1 - 1.5" long bolt (the tensioner bolt and nut)
2 - 1/2" or 12mm long M4 or 5 Screws (to attach the knob bracket to the Promega bracket)
4 - 12MM long hexagonal offset posts M3 thread
You can reuse the 4 - M3 Nema motor screws, 12mm or so long
This mod solves a problem I was having where unscrewing the motor screws would sometimes loosen the round offset posts where they met the motor instead of on top. The hex posts are registered in the bracket so they stay put. Also, the knob tensioner is simply elegant.
No support needed.
Assembly:
Screw the four hex offsets into your Nema. Press the motor bracket on flush with the bolt recess facing left as you look at the machine from the front. Mount with the 4 M3 Nema motor screws from on top.
Make sure the knob fits snugly and turns smoothly in its slot. Insert the 1/4" or M6 nut to the nut slot.
Thread the tensioner bolt through the knob and nut.
Use the 2 M4 screws to secure the knob bracket to the Promega motor bracket.
To tension, simply loosen the four top screws as normal and hand tension with the knob. Tighten the top screws when the tension feels nice and snug.
Similar models
thingiverse
free

CR-10 Y Motor Stiffening Bracket by junaling
...ck alignment while tightening
6) tighten motor bolts to frame, check alignment
7) tighten bracket bolt to frame
8) tighten y belt
thingiverse
free

Nema 17 stepper motor Belt tensioner by Flytech81
...that mounts to a nema 17 stepper motor using m3 screws. for the tensing hardware i used two 8mm bearings with a 1/4-20 inch bolt.
thingiverse
free

motor mount for a delta by Orange_OSOM
... fidget spinner),
1) m4 washer
1) m4 7.5mm screw (for barring) ,
2) m4 9.5mm screw (for fastining to frame),
2) m4 square nuts,
thingiverse
free

Nema 17 motor mount bracket P3Steel by jusebago
...thingiverse
nema 17 motor mount bracket for bowden extruder p3steel
3x m3 nuts.
2x m3 12mm screws..
1x m3 15mm screw, or longer.
thingiverse
free

Anet A8 - X belt tensioner by Robchiks
...ex nut: 1 pieces
m3 or m5 screw 20mm length: 1 pieces
m4 hex nut: 1 pieces
m4 screw 35mm - 40mm length: 1 pieces
have fun with it
thingiverse
free

Belt tensioner by Helifreak1960
...: loosen 3 bolts on each side of brackets with slight snugness, turn 1/4-20 bolt to adjust belt tension, tighten bracket back up.
thingiverse
free

Nema 17 motor mount bracket by dintid
...r mount bracket
needed a bracket for my universal belted extruder
bom
5x m3 nuts.
4x m3 8mm screws..
1x m3 15mm screw, or longer.
thingiverse
free

ShapeOko Belt Tensioners by Kardacian
...long
reverse side of clamp 2 locking hex 5mm m3 nuts
here is the youtube showing these in action: https://youtu.be/o4jdh-kc9qa
thingiverse
free

Ring of Knob by tkc_exp
...ring of knob by tkc_exp
thingiverse
use for 6mm or 1/4" shaft
12mm m3 bolt and nut
thingiverse
free

T2.5 Belt tensioner by ceri
...f rod, 4 - 6 mm diameter.
note: you will need to drill 2 4mm holes 20mm apart,for the bolts.
tension and have betterprints !!
Promega
thingiverse
free

Promega Top skirt
...promega top skirt
thingiverse
skirt to limit heat loss when raising top of promega
thingiverse
free

Promega BLTouch Mount
...are setup and pin connections are described in the duet wiki: https://duet3d.dozuki.com/wiki/connecting_a_z_probe#section_bltouch
thingiverse
free

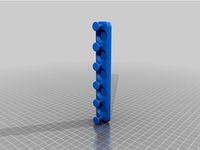
Promega CoreXY Motor Bracket by supinemonkey
...corexy motor bracket by supinemonkey
thingiverse
this is the fusion file for the promega motor bracket. make your own dang mods!
thingiverse
free

M3D Promega Quaden with BLTouch Mount
...ime.
uses the current xy bracket from the promega and bearings.
rev 2: extend the front to solve and interference of a bolt head.
thingiverse
free

ProMega Optical Endstop
...e.com/thing:3474153
there is a document describing how to install the optical endstop as well as how to configure it in the duet.
thingiverse
free

ProMega 1/4" Mirror Clip
...is a clip that can be used to hold a 1/4" mirror on the promega printbed.
print in 0.3mm laying on the side to give it flex.
thingiverse
free

M3D Promega Top Window Clip by eburgess4
...he top of my promega so i created this clip to keep the top window in place without screws. just print 4 and you are ready to go.
thingiverse
free

Promega cable case for Bondtech BMG V6 extruder
... m3d promega with the bmg v6 extruder upgrade:
https://www.thingiverse.com/thing:3611643https://www.thingiverse.com/thing:3624450
thingiverse
free

M3d Promega Compound Insert Mod
...compound insert mod
thingiverse
this is a mod i made to the compound head insert. it adds more of a ramp to the filament guides.
thingiverse
free

Backshield PROMEGA 3D Printer by Eazy75
...printer myself, so i'm not sure if it fits perfectly.
so please upload pictures, make comments if you were succesful or not!!
Supinemonkey
thingiverse
free

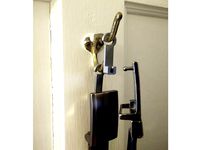
Drill Wall Mount by supinemonkey
...drill wall mount by supinemonkey
thingiverse
simple drill cozy. attaches anywhere with 2 2-3 inch drywall screws.
thingiverse
free
Promega CoreXY Motor Bracket by supinemonkey
...corexy motor bracket by supinemonkey
thingiverse
this is the fusion file for the promega motor bracket. make your own dang mods!
thingiverse
free

Robo3D Y End Stop Mod by supinemonkey
...robo3d y end stop mod by supinemonkey
thingiverse
this fit my bed a little better. plus i like things a bit curvy.
thingiverse
free

Connect Four in Miniature by supinemonkey
...pknhza
this is a very small but playable version of the popular table game. i designed it for a dvd menu for a popular tv show.
thingiverse
free

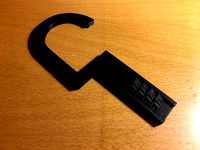
Hair Pick by supinemonkey
...aller version. it should be beefy enough to hold up to a bit of abuse. i also included a compatible hook for your cabinet. enjoy!
thingiverse
free

MST3K fridge magnet photo frame by supinemonkey
...verse
this is a fun way to be lampooned by proxy from joel and the bots. uses a standard refrigerator magnet and snaps together.
thingiverse
free

Simple wall hook by supinemonkey
...able for all sorts of purposes. i like to mount with scotch double-sided exterior tape or silicone, depending on the application.
thingiverse
free

MST3K profile to put wherever you want by supinemonkey
...o put wherever you want by supinemonkey
thingiverse
hikeeba! there's a vector file included for the more advanced tinkerers.
thingiverse
free

Photo Umbrella Hook by supinemonkey
...op, so i made this handy hanger. it uses a 1/4" inset nut. i made the loop large enough to fit over lightstand knobs. enjoy!
thingiverse
free

Captured Superpulley by supinemonkey
...em for future puppet rigging. use a pliers at the base to free them after printing. a bit of 3-in-1 oil helps them spin smoothly.
Corexy
thingiverse
free

CoreXY by Kaz_tech
...corexy by kaz_tech
thingiverse
this is the model of corexy platform. i separately put the parts on this place.
thingiverse
free

corexy plotter by tjwan
...corexy plotter by tjwan
thingiverse
parts for corexy mill inspired by http://der-frickler.net/technik/corexyportal
thingiverse
free
ScribbleJ CoreXY Beta by ScribbleJ
...j/corexy-v1https://github.com/scribblej/corexy-v1#corexy-beta
full gallery of development photos here: http://imgur.com/a/donun
thingiverse
free

CoreXY Emblem by emkajot
...by emkajot
thingiverse
an emblem for your corexy printer.
size: 100mm x 38mm x 2mm.
update: added a version with a proper mount.
thingiverse
free

SolidCore CoreXY Carriage by shanehooper
...olidcore 3d printer. this design could be used in other corexy 3d printers.
also see:https://3ddistributed.com/corexy-3d-printer/
thingiverse
free
CoreXY 3D Printer Model by ReginaFabricam
...bricam
thingiverse
this is an original design of a corexy printer.https://www.tinkercad.com/things/jggr9qk4s4p-3d-printer-corexy
thingiverse
free

coreXY Upper structure Left
...corexy upper structure left
thingiverse
my customized corexy 3d printer upper left parts
thingiverse
free
CoreXY by frankie
...ing machines, etc. the design is described in greater detail at http://www.corexy.com . a video is at http://vimeo.com/40914530 .
thingiverse
free

Endstop block for CoreXY carriage by svkeulen
...endstop block for corexy carriage by svkeulen
thingiverse
endstop for corexy carriage
thingiverse
free
X carriage for the CoreXY MGN12 by hackerbijay
...x carriage for the corexy mgn12 by hackerbijay
thingiverse
x carriage for the corexy frame
Tensioner
thingiverse
free

tensioner by Gincso0808
...tensioner by gincso0808
thingiverse
test tensioner
thingiverse
free
Tensioner
...tensioner
thingiverse
print in upright position. works great on any extrusion
thingiverse
free
tensioner by GMFerrari
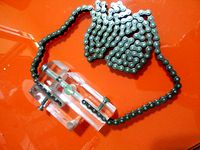
...the y-axis belt with a chain 6mm because the belt was now deformed by tension.
in the photos you can see how i made the tensioner
thingiverse
free
rope tensioner by Muffin256
...rope tensioner by muffin256
thingiverse
rope tensioner
thingiverse
free
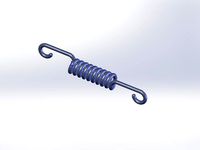
tension spring by mikehubka
...tension spring by mikehubka
thingiverse
tension spring
thingiverse
free
Belt tensioner. by IvanFjodorovich
...belt tensioner. by ivanfjodorovich
thingiverse
belt tensioner.
thingiverse
free

Clothesline Tensioner by hervstein
...clothesline tensioner by hervstein
thingiverse
tensioner for clothesline ropes.
thingiverse
free
Chain Tensioner by tromano32
...chain tensioner by tromano32
thingiverse
simple chain tensioner
thingiverse
free
Hercules Extruder Tensioning
...g.
3d printed tensioning screw ideally should be printed with 100% infill and
the tensioning plate can be printed with 30% infill
thingiverse
free
The delta tensioning by RuiJan1
...the delta tensioning by ruijan1
thingiverse
this is a delta prenter the arm tensioning
Belt
thingiverse
free
belt
...belt
thingiverse
belt sleeve for 35mm wide..
use tpu or tpu95
gcode ready
thingiverse
free

Belt hanger for mission belt by maburke
...belt hanger for mission belt by maburke
thingiverse
hanger for mission belt- hangs belt nicely on the closet rod
thingiverse
free
Belt Hanger (For Belts With a Stud) by SamuelSVD
...belt hanger.
this belt hanger works by placing the stud on the belt in the hole, then hang the hanger.
yep, it's that simple.
thingiverse
free
Belt hanger for Trakline belt by tomasf
...belt hanger for trakline belt by tomasf
thingiverse
a hanger for a single trakline belt.
thingiverse
free

Belt clip for 9 mm belt by papat400
...belt clip for 9 mm belt by papat400
thingiverse
remix the belt lock gt2 for a 9mm belt
thingiverse
free
Belt Rack
...belt rack
thingiverse
belt hanger
thingiverse
free
Belt Holder
...belt holder
thingiverse
a simple belt holder.
thingiverse
free

Hermes belt buckle for 31mm belt by Hubiro
...hermes belt buckle for 31mm belt by hubiro
thingiverse
hermes belt buckle for 31mm belt
perfect to order as metal print :-)
thingiverse
free
Bugatti belt buckle for 31mm belt by Hubiro
...t buckle for 31mm belt by hubiro
thingiverse
bugati belt buckle made for 31mm hermes belt.
perfect to order as a metal print :-)
thingiverse
free
Belt tensioner for GT2 belts by Endlesscnc
...oner little different.
after print you will need a:
m3 nut
m3 x10+ (screw length your choice)
is for the gt2 belt with 6mm width