Thingiverse

Printable Tripod Mount 2014 - after Starno by Processaurus
by Thingiverse
Last crawled date: 3 years ago
EDIT: 8/2016 Streamlined the design to eliminate the funny bottom piece. More on that below**
Note: This model requires inserting metal hardware mid print, to then get covered, which is a technique that requires either manually pausing the print it the correct moment, to insert the part, or modifying the G-Code being sent to the printer.
This is a remix of Starnos "Printable Tripod Mount" for smartphones. I loved the original concept, because it allows for different brands and cases. Anything shaped like a bar of soap.
After building and using the original, there were some issues this update addresses:
the original clamp fingers stuck out horizontally and the phone could easily slip out, away from the plastic. There is now an angled lip on each finger, to pull the phone in to mount when the nut is tightened down.
-the original used a 4" pan head screw (102mm to the sane world) sticking up through the clamp pieces. This could get loose and the head of the screw could spin around free when the hand nut gets tightened down. In this version it is changed to a bolt, so there is no way the head can spin in the bottom ("Camera Bracket") when the top gets tightened.
-the original used 10-24 sized screw. This uses 1/4", because they are easier to find at the hardware store, in the length needed. Also the smaller screw size seemed to bow/bend a little when mount got tightened down on a phone.
-the original relies on a press fit for the 1/4" nut the tripod screws into. A bump could make it fall out of the cavity, and let the phone/tripod mount fall off the tripod. This version uses a buried nut that cannot pop out, because it is encased in the plastic.
Other differences are cosmetic: An acorn cap for the top, and a knurled nut (also using a steel nut buried in the plastic) as a 3d printed alternative to the wingnut.
*BURIED NUTS. In order to encase a nut completely in a 3D printed plastic part, it is possible to pause the print at the right layer, and insert the metal nut into the cavity, and then print over the top to encase it forever. More in the instructions.
**UPDATE 8/2016 I Realized with the buried nut, that this design didn't need the original's Camera Bracket Piece, the 1/4" nut that the tripod screws into can just be inside the bottom of "Side 2". Less parts to print, smaller, better.
Similar models
thingiverse
free

Universal Phone Tripod Mount - normal thickness nut version by DorffMeister
... 5.6mm (when i measured the thickness of the nuts in my possession, i found them to be 5.5mm).
i've include a fusion360 file.
thingiverse
free

Sony AZ1 tripod adapter by Maks31
...cam on a tripod.
after printing 7 mm, pause the print, insert the 1/4" nut into the prepared hole, and then resume printing.
thingiverse
free

GoPro Camera Tripod Mount by rynil2000
...lowing to complete:
1 - m5 cap nut on the side for gopro screw
1 - 1/4-20 threaded heat insert in the bottom for the tripod screw
thingiverse
free

Tripod Mount for Phone by d3delta3d
...d.
comes with 2 tripod base mount styles, one designed to be tapped with a 1/4" tap and one to insert a 1/4" nut into.
thingiverse
free

GoPro tripod mount by roodee
...ill need a 1/4" screw nut for the bottom. the other screw and nut you can use from the equipment that comes with the camera.
thingiverse
free

Autel EVO 1/4-20 screw mount by Darkwing1800
... the print.
mount the adapter to the evo controller using the same mounting point and screw the original phone holder mount used.
thingiverse
free

Superbike handlebar mount for GIVI Smartphone Holder
...he print.
i modified g-code manually to pause the print at the right layer because cura pause function did not work well for me.
thingiverse
free

Tripod-Mountable Clamp by AD_Co
... i use the clamp to hold flashlights while i'm working on something, but i have also use it to hold a phone and a chalkboard.
thingiverse
free
Tripod Mount for 7 by toenolla
... need:
1 1/4" 20 hex head bolt, either 6" or 7" long depending on the size of your device
2 1/4" 20 hex nuts.
thingiverse
free

Tripod Phone Holder by Dymios
...self. it surprisingly works and i included its stl in this thing.
i printed this using pla, but any rigid material could be used.
Processaurus
thingiverse
free
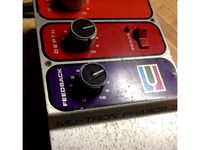
Mu-Tron Knob by Processaurus
...icro layers, or a .25mm nozzle, if you have the patience. printed with supports.
free for private or commercial use, have fun!
thingiverse
free
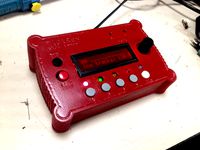
MidiRex Box by Processaurus
...idirex box design by ben milner 2016
midirex pcb , circuit, and software design by peter kvitek
more info at http://midisizer.com
thingiverse
free
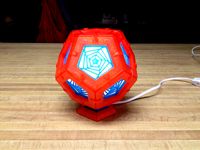
Dodecahedron Lamp - After AK Eric by Processaurus
...fely, get help from someone who does or take a class. you are responsible for the safety of anyone who uses something you build.
thingiverse
free

On Stage Stands KSA7500 (double keyboard stand )cross piece clamp by Processaurus
...etty specific!
print with support- i did mine on its side, so the support was just for the round peg that indexes in the housing.
thingiverse
free
Tripod Mount for 7 by toenolla
...large phones 3 7/8" to 5 3/4" wide. on processaurus#39; version, you have to pause your print and embed...
thingiverse
free

Hood for BCN3D Sigma, after Toobyy (.225" plexi) by Processaurus
... diagonal. i printed the flap once i had most of the enclosure together, as long parts tend to have more of a danger of warping.
Starno
thingiverse
free

Displayer by Starno
...usiness card displayer that will fit onto the makerbot build platform. could be used to prop up things of many shapes and sizes.
thingiverse
free

Business Card Displayer by Starno
...business card displayer by starno
thingiverse
a makerbot branded business card displayer.
thingiverse
free

Stephen Colbert Cufflinks by Starno
...stephen colbert cufflinks by starno
thingiverse
fasten your french cuffs in style with stephen colbert's face
thingiverse
free

Coin-op Bottle Opener by Starno
...coin-op bottle opener by starno
thingiverse
added 30 degree chamfers and small fillets to hoeken's design
thingiverse
free

Y Endstop Bracket by Starno
...packaged with gen4 electronics onto a cupcake cnc.
extra mounting holes are there just in case the friction grip is not adequate.
thingiverse
free

Collar Stays by Starno
...ore annoying to go out and spend money on? never again...
http://www.flickr.com/photos/nickstarno/5412347284/in/pool-makerbot/
thingiverse
free

Cable Catcher by Starno
...to fit a different sized cable, scale accordingly.
more pictures: http://www.flickr.com/photos/nickstarno/sets/72157624529783381/
thingiverse
free

Tie Hanger by Starno
...et rod. there is 1.2 cubic inches of volume, costing around $0.2x in material
please let me know if you experience any problems.
thingiverse
free

Print-O-Matic by Starno
...nt: http://www.thingiverse.com/thing:5310
the first sheet is for working with skeinforge, and the other has general calculations.
thingiverse
free

Valentine's Day Heart Box by Starno
...up after the print.
update
rev2 has a stronger connection with a better fit.http://www.flickr.com/photos/nickstarno/5446315732/
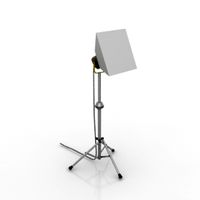
Tripod
archibase_planet
free
Tripod
...tripod
archibase planet
tripod staff state stand
tripod - 3d model for interior 3d visualization.
archibase_planet
free
Tripod
...tripod
archibase planet
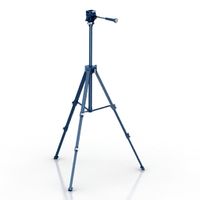
camera tripod
cam tripod 2 - 3d model (*.gsm+*.3ds) for interior 3d visualization.
archibase_planet
free
Tripod
...tripod
archibase planet
tripod support stand holder
tripod n191213 - 3d model (*.gsm+*.3ds+*.max) for interior 3d visualization.
design_connected
$13
Tripod
...tripod
designconnected
erickson æsthetics tripod computer generated 3d model. designed by erickson, ben.
design_connected
$13

Tripod
...tripod
designconnected
david weeks studio tripod computer generated 3d model. designed by weeks, david.
3d_ocean
$4

Tripod
...tripod
3docean
3d models coffee table furnishings furniture tripod
3d models,furnishings,furniture
archibase_planet
free
Tripod
...tripod
archibase planet
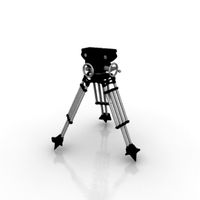
tv camera equipment
cam tripod - 3d model (*.gsm+*.3ds) for interior 3d visualization.
turbosquid
$4

Tripod
...urbosquid
royalty free 3d model tripod for download as blend on turbosquid: 3d models for games, architecture, videos. (1580064)
turbosquid
$5

Tripod
...uid
royalty free 3d model tripod for download as c4d and fbx on turbosquid: 3d models for games, architecture, videos. (1593078)
turbosquid
$35

Tripod
... available on turbo squid, the world's leading provider of digital 3d models for visualization, films, television, and games.
2014
3ddd
free

Лепнина 2014
...лепнина 2014
3ddd
лепнина
3ddd
$1

лого Сочи 2014
...лого сочи 2014
3ddd
лого сочи 2014
turbosquid
$70

2014-genesis
... available on turbo squid, the world's leading provider of digital 3d models for visualization, films, television, and games.
design_connected
$11

AC Collection 2014
...ac collection 2014
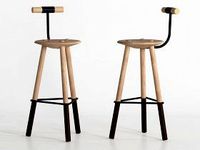
designconnected
maxalto ac collection 2014 chairs computer generated 3d model. designed by antonio citterio.
3ddd
$1

Desiree 2014 KEL IN
...l.com/eng/desiree/sofas-beds/armchairs/kel-in_d.php http://www.abitant.com/products/kreslo-desiree-2014-kel-in
3d_export
$20

ferrari f1 roadster 2014
...ferrari f1 roadster 2014
3dexport
ferrari f1 roadster 2014
turbosquid
$49

Toyota Camry 2014
...uid
royalty free 3d model toyota camry 2014 for download as on turbosquid: 3d models for games, architecture, videos. (1326111)
turbosquid
$69

Kia Sorrento 2014
...
royalty free 3d model kia sorrento 2014 for download as max on turbosquid: 3d models for games, architecture, videos. (1242424)
3ddd
$1

Rasch. Kids` Club 2014
...rasch. kids` club 2014
3ddd
rasch
производитель:rasch
коллекция:kids` club 2014
3ddd
$1

ps 2014
...14
3ddd
ikea , журнальный
http://www.ikea.com/ru/ru/catalog/products/60210806/
Printable
turbosquid
$5
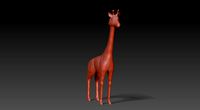
printable giraffe
...uid
royalty free 3d model printable giraffe for download as on turbosquid: 3d models for games, architecture, videos. (1504825)
turbosquid
$49

Longhorn Printable
...
royalty free 3d model longhorn printable for download as stl on turbosquid: 3d models for games, architecture, videos. (1712930)
3d_export
$2
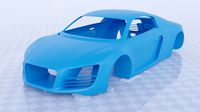
printable audi car
...printable audi car
3dexport
printable audi car
turbosquid
$40
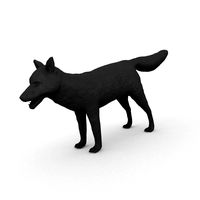
Fox printable
...lty free 3d model fox printable for download as blend and stl on turbosquid: 3d models for games, architecture, videos. (1507558)
turbosquid
$23

Printable Statue
...ty free 3d model printable statue for download as obj and stl on turbosquid: 3d models for games, architecture, videos. (1415137)
turbosquid
$3

Ear Printable
...yalty free 3d model ear printable for download as obj and stl on turbosquid: 3d models for games, architecture, videos. (1671689)
turbosquid
$1

heart printable
...y free 3d model heart printable for download as stl and sldpr on turbosquid: 3d models for games, architecture, videos. (1209566)
turbosquid
$1
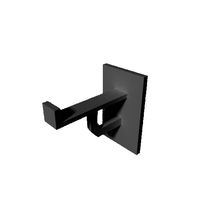
Printable Hook
...
royalty free 3d model 3d printable hook for download as stl on turbosquid: 3d models for games, architecture, videos. (1413683)
turbosquid
$30
Printable support
... model 3d printable support for download as max, 3ds, and stl on turbosquid: 3d models for games, architecture, videos. (1689342)
turbosquid
$24

Printable Dolphin
...el printable dolphin for download as , dae, fbx, obj, and stl on turbosquid: 3d models for games, architecture, videos. (1602353)
Mount
3d_export
free

mounting bracket
...mounting plate is the portion of a hinge that attaches to the wood. mounting plates can be used indoors, cabinetry and furniture.
turbosquid
$2

MOUNTING
... available on turbo squid, the world's leading provider of digital 3d models for visualization, films, television, and games.
turbosquid
free

Mounts
... available on turbo squid, the world's leading provider of digital 3d models for visualization, films, television, and games.
turbosquid
free

Mount Fuji
...fuji
turbosquid
free 3d model mount fuji for download as obj on turbosquid: 3d models for games, architecture, videos. (1579977)
3d_export
$5

Headphone mount LR
...headphone mount lr
3dexport
headphone mount l+r
turbosquid
$39

Mount rainier
...quid
royalty free 3d model mount rainier for download as fbx on turbosquid: 3d models for games, architecture, videos. (1492586)
turbosquid
$5

pipe mounting
...quid
royalty free 3d model pipe mounting for download as obj on turbosquid: 3d models for games, architecture, videos. (1293744)
turbosquid
$3

Mounting Tires
...uid
royalty free 3d model mounting tires for download as fbx on turbosquid: 3d models for games, architecture, videos. (1708511)
3d_export
$5

Magnetic GoPro Mount
...pro mount
3dexport
cool magnetic mount for gopro. allows you to mount the camera on flat metal surfaces and get exclusive shots.
turbosquid
$5

Stone Mount
...ty free 3d model stone mount for download as ma, obj, and fbx on turbosquid: 3d models for games, architecture, videos. (1370306)