Thingiverse

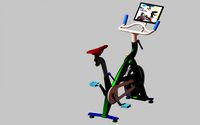
Pop Up Warning Sign - Bikes on Roof by reallifeonhold
by Thingiverse
Last crawled date: 3 years ago
Tired of forcefully taking your bike off of your car's roof rack by driving it into your garage door? This aims to put an end to decapitated bikes everywhere. Sign mounts to your car's hood with magnetic strips. When traveling at speed, air moving over the car folds the sign closed. At low speeds or when stopping, springs pop the sign open, offering up a reminder that your bikes are still on the roof.
Additional parts needed (with links):
(3) 7/8" long, 1/8" diameter dowel pins
(http://www.mcmaster.com/#90145a474/=10ru635)
(2) 90 degree torsion springs, .235" OD, .025" wire, left- or right-hand wound
(http://www.mcmaster.com/#9287k67/=10ru6kf)
(27") 1" wide, 1/8" thick, adhesive-backed, high-pull magnetic strip
(http://www.mcmaster.com/#5769k82/=10ru84r)
Model Notes:
I've included the parts with both tight tolerance dimensions as well low(er) tolerance dimensions for the dowel pin holes (I ended up needed to add a little slop to the holes to get the pins to fit nicely). Same goes for the offset of the letters. If you wanted to play it safe, you could start with the tight tolerance models and carefully open up the holes with a drill or shave down the edges of the letters, if needed. The top, base and letters are printed separately and then the letters are glued to the top panel using crazy glue or ABS slurry. For those with dual extruders or wishing to color the letters by hand, I've also included models with the letters already in place on the top panel.
Printing Notes:
I used ABS for my prints. .2mm layer height, 25-40% infill (to add some mass to the panels). Letters are printed face down as it will provide a better cosmetic surface.
Assembly notes:
As mentioned above, the letters are glued into place on the top panel. The magnetic strip is to be cut into 9" sections and installed 3-wide across the underside of the bottom panel. Use the dowel pins to secure the panels to each other; the springs get installed on the two outside hinges, run the dowel pin through the center of each.
Similar models
thingiverse
free

Corner bracket for hanging stuff by davepix
...n and same dropping one down the hole at the top for the spring. a safety pin was used to affix it to the dowel collar/retainer.
thingiverse
free

Yard Sign for dog owners by tlaverick
...se
please clean up after your dog sign.
ziptie holes for a 1/8" or 3/16" ziptie can me used with 3/8" dowel rod
thingiverse
free

Mini Compartment Fly Box by DryFly
...t so the flies don't get mixed up.
otherwise print the fly box top compartments.stl so your flies don't end up in a pile!
thingiverse
free

"The Office" Sign by Maxlarsen
... on your wall, or you can just prop it up on your desk, in your office ; ) hope you enjoy. (note: this is a dual extrusion print)
thingiverse
free

Giant Walking Machine by danowall
...odhttps://www.mcmaster.com/#89535k16
joint pins - 1/8" x 1 7/8" spring pinshttps://www.mcmaster.com/#90692a704/=19ziqrn
thingiverse
free

Fixed dashboard phone holder with spring clamp and sun shade by chingpao
...tween the holes in the "phone holder.stl" part and the wooden dowel
attach to car dashboard using adhesive or something
thingiverse
free

Magnetic curtain rod / towel rack by Busterific
...ued together. i scuffed up the metal backing for the magnets that i used with some sandpaper to make the super glue grip better.
thingiverse
free

3/8 dowel corner joint by xXHeli_MechXx
...hingiverse
this is a corner joint i drew for use with 3/8" wooden dowels. they have a nice tight fit when printed properly.
thingiverse
free

Mountain bike gear strap
...metimes come loose. two pins worked great.
note: the loop was designed with a a built in brim that you cut off once its printed.
thingiverse
free

PS5 Gift Box by anupchavda
...ing the groove increased the tolerance and causes no real issues in the finished product.
right panel: left as is and is original
Reallifeonhold
thingiverse
free

Rittal Rack Key by reallifeonhold
...r rack lock.
orientation appears to be off by 90deg. print with the flat on the bed and the business end of the key facing up.
thingiverse
free

Foot for Tanita Scale by reallifeonhold
...#39;s a replacement foot for a tanita body fat scale. it was based off the feet from the tbf-551 scale and may fit other models.
thingiverse
free

Settlers of Catan - Settlement by reallifeonhold
... i placed it on a pedestal that maintained the 14mm footprint used in dakanzla's designs and scaled up the rest of the model.
thingiverse
free

Marker Keeper by reallifeonhold
...o use, insert this little guy into the end of the marker and then run a string through the hole and tether it to your whiteboard.
thingiverse
free

Settlers of Catan - Bridge-style Roads by reallifeonhold
...o i made up my own with easier to print details. i also liked the bridges created by kakoritz so i designed these in that style.
thingiverse
free

Color changing biohazard coaster by reallifeonhold
...rward assembly, just print the two parts in the desired color(s) and glue together. i also sealed the coaster with xtc-3d epoxy.
thingiverse
free

Irrigation Hose and Drip Line Clips by reallifeonhold
...you may need to scale up or down slightly to get a solid fit depending on the tolerance of your printer and actual hose diameter.
thingiverse
free

Servo Adapter for Automated Blinds by reallifeonhold
... an arduino and the mysensors plug-in (mysensors.org).
note: per request, additional adapter uploaded based on 14mm bolt pattern.
thingiverse
free

Leveling Spacers for Sun Visor Mounted Radar Detector by reallifeonhold
...nts from 1/4" up to 3/4". for assembly, just snap the two parts together, sandwiching the detector clip in the middle.
thingiverse
free

Replacement Door Handle Mount for Kenmore Refrigerator by reallifeonhold
...the strength of the piece. the third (extra beefy) contains even more extra material.
for reference, i printed the parts in abs.
Pop
design_connected
$18

Pop
...pop
designconnected
kartell pop computer generated 3d model. designed by lissoni, piero.
design_connected
$16

Pop
...pop
designconnected
ligne roset pop chairs computer generated 3d model. designed by christian werner.
3ddd
$1

POP
...d
garsnas , pop
модульный диван. основные размеры: длина - 700, 1400, 2080; ширина - 700
3d_export
$5

pop screw
...pop screw
3dexport
pop screw
3ddd
$1

Pop floral frame
...pop floral frame
3ddd
pop
3 pop floral photo frame
3ddd
$1

Gala Pop Раковина
...gala pop раковина
3ddd
gala , pop
производитель: gala
коллекция: pop
design_connected
$16

Tokyo Pop
...tokyo pop
designconnected
driade tokyo pop computer generated 3d model. designed by yoshioka, tokujin.
3ddd
$1

mantra pop x4
...mantra pop x4
3ddd
mantra , pop
светильник потолочный на 4 рожка. mantra pop x4
design_connected
$18

Tokyo Pop
...tokyo pop
designconnected
driade tokyo pop lounge chairs computer generated 3d model. designed by tokujin yoshioka.
3d_export
free

pop it 3d
...pop it 3d
3dexport
that pop it(antistress toy) in 3d. that pack only suitable for blender. can be used as part of the interior.
Warning
turbosquid
$10

Warning Flammable
...model warning flammable for download as ma, max, fbx, and obj on turbosquid: 3d models for games, architecture, videos. (1628354)
turbosquid
$15

Warning Symbol
... available on turbo squid, the world's leading provider of digital 3d models for visualization, films, television, and games.
turbosquid
$10

Warning Barrier
... available on turbo squid, the world's leading provider of digital 3d models for visualization, films, television, and games.
3d_export
$5

warning triangle
...ady. with blender and photoshop .psd files for personal customization!<br>verts: 332<br>faces: 222<br>tris: 648
3d_export
$20

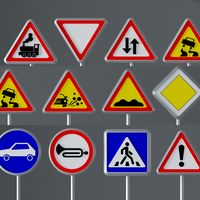
Warning Signs 3D Model
...warning signs 3d model
3dexport
sign warning traffic road roadway european
warning signs 3d model supermegamau 18750 3dexport
turbosquid
$29

5 Warning Light
...id
royalty free 3d model 5 warning light for download as c4d on turbosquid: 3d models for games, architecture, videos. (1538332)
turbosquid
free

Radiation Warning Sign
...alty free 3d model radiation warning sign for download as fbx on turbosquid: 3d models for games, architecture, videos. (1446692)
turbosquid
$20

Radar Warning Reciever
... available on turbo squid, the world's leading provider of digital 3d models for visualization, films, television, and games.
turbosquid
$19

Plastic Warning Drum
... available on turbo squid, the world's leading provider of digital 3d models for visualization, films, television, and games.
turbosquid
$15

signs-warning-001
... available on turbo squid, the world's leading provider of digital 3d models for visualization, films, television, and games.
Bikes
3d_ocean
$18
Bike
...bike
3docean
bicycles bike sports transport
3d model bike
3d_export
$5
bike
...bike
3dexport
bike
3d_export
$50
bike
...bike
3dexport
3d bike model
turbosquid
free
bike-bike-rack
... available on turbo squid, the world's leading provider of digital 3d models for visualization, films, television, and games.
archibase_planet
free

Bike
...bike
archibase planet
bike bicycle cycle
bike n161113 - 3d model (*.gsm+*.3ds+*.max) for exterior 3d visualization.
archibase_planet
free
Bike
...bike
archibase planet
bike bicycle cycle
bike and rack n220613 - 3d model (*.gsm+*.3ds+*.max) for exterior 3d visualization.
archibase_planet
free
Bike
...rchibase planet
bike bicycle cycle two-wheeled bicycle
bike n031213 - 3d model (*.gsm+*.3ds+*.max) for exterior 3d visualization.
archibase_planet
free
Bike
...rchibase planet
bike bicycle cycle two-wheeled bicycle
bike n180714 - 3d model (*.gsm+*.3ds+*.max) for exterior 3d visualization.
3d_ocean
$35
Batpod Bike
...cean
batman batman bike batpod bike bike motorcycle stylish bike
detailed model of a famous batpod bike used in the movie batman.
3d_export
$5
exercise bike
...exercise bike
3dexport
exercise bike, spin bike, bike, gym equipment, exerciser
Roof
3ddd
$1

Roof
...roof
3ddd
kare , roof
kare кресло roof.
archibase_planet
free
Roof
...roof
archibase planet
roof iron roof
fence roof - 2 - 3d model (*.gsm+*.3ds) for interior 3d visualization.
archibase_planet
free
Roof
...roof
archibase planet
roof iron roof
fence roof-3 - 3d model (*.gsm+*.3ds) for interior 3d visualization.
archibase_planet
free
Roof
...roof
archibase planet
roof iron roof
fence roof-5 - 3d model (*.gsm+*.3ds) for interior 3d visualization.
archibase_planet
free
Roof
...roof
archibase planet
roof iron roof
fence roof-6 - 3d model (*.gsm+*.3ds) for interior 3d visualization.
archibase_planet
free

Roof
...roof
archibase planet
roof iron roof
fence roof-1- 3d model (*.gsm+*.3ds) for interior 3d visualization.
3d_export
free

roof
...roof
3dexport
roof construct
archibase_planet
free
Roof
...roof
archibase planet
roof skylight
fence roof-7 - 3d model (*.gsm+*.3ds) for interior 3d visualization.
archibase_planet
free

Roof
...roof
archibase planet
roof skylight
fence roof-8 - 3d model (*.gsm+*.3ds) for interior 3d visualization.
archibase_planet
free

Roof
...roof
archibase planet
roof house-top
roof n070211 - 3d model (*.gsm+*.3ds) for exterior 3d visualization.
Sign
archibase_planet
free

Sign
...sign
archibase planet
signboard sign mask
restroom sign - 3d model for interior 3d visualization.
turbosquid
$1

Street Signs Stop Sign
...alty free 3d model street signs stop sign for download as fbx on turbosquid: 3d models for games, architecture, videos. (1672592)
turbosquid
free
Signs for the zodiac signs pack
...signs pack for download as 3ds, obj, wrl, fbx, stl, and sldpr on turbosquid: 3d models for games, architecture, videos. (1194807)
3d_ocean
$9
Road Signs
...road signs
3docean
outdoor road signs signpost waymark
road signs 3d models.
3d_export
$5

Biohazard sign
...biohazard sign
3dexport
biohazard sign
3ddd
$1
SUBWAY SIGN
...subway sign
3ddd
subway sign
3d_export
$5

road sign
...road sign
3dexport
road sign with the texture of a cyclist.
turbosquid
$45

Sign
... available on turbo squid, the world's leading provider of digital 3d models for visualization, films, television, and games.
turbosquid
$10

Sign
... available on turbo squid, the world's leading provider of digital 3d models for visualization, films, television, and games.
turbosquid
$5

sign
... available on turbo squid, the world's leading provider of digital 3d models for visualization, films, television, and games.