Thingiverse
PiPhi Raspberry Pi Hifi by oosthub
by Thingiverse
Last crawled date: 3 years, 1 month ago
Summary:
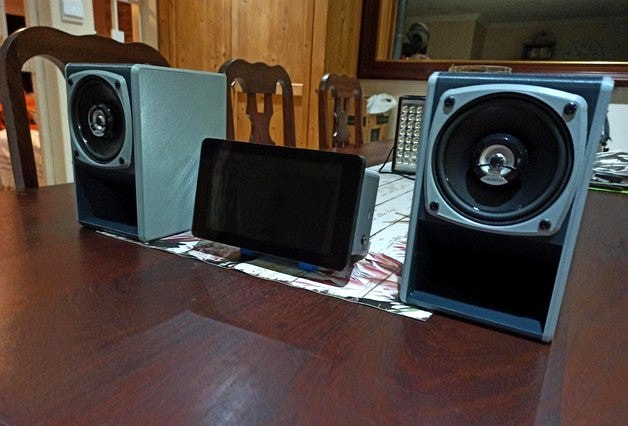
I got a 3d Printer 4 weeks ago and immediately set of with an ambitious project to create my own Hifi after seeing te speaker that guppyk2 created here: https://www.thingiverse.com/thing:4750820
I did not find a body design that I liked or served my purpose, so I set off designing my own. Many long nights toiling over all the new things like 3d software and even the printer and this is the result. It is not perfect, but I like it. Hope you do 2.
Disclosures:
Screen:
The screen cover I used is a Remix of Luc-e’s design ( https://www.thingiverse.com/thing:1585924 ) – Its not really a remix. It’s almost an exact copy. I just moved the holes a bit as I found they do not perfectly align with my screen and made the screen sit slightly off-center to the cover.
Speaker Enclosures:
The speaker enclosures I used in the pictures is an exact print of https://www.thingiverse.com/thing:4750820. I made no Changes or Mods on those.
Components Used in HiFi:
Raspberry Pi 3B as the main “brain” running Volumio (https://volumio.org/ )
Official Raspberry Pi 7” Screen
IQAudio DigiAmp+ Hat as DAC and Amp. (https://www.sparkfun.com/products/17737 )
Generic 12V 10A Power supply as the Amp is powered separately. The Amp also provide power to the PI via the GPIO’s
Speaker connectors, Wires, Power connector for PSU, and a Push button ON/OFF
Components Used in Speakers:
Hertz COAX DCX100.3 Speakers. (https://www.amazon.com/HERTZ%C2%AE-Stereo-Coaxial-Speakers-DCX100-3/dp/B008B5B1N6 )
Some Poly fill – I used it to thread it through the Tube of the speaker horn. To me it removed the hollow sound that I did not like. The speakers now do sound amazing to me… But I am no audiophile.
Speaker connectors on the back to connect it to the amp.
Printing:
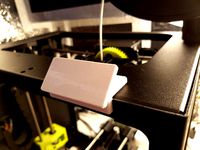
I used a Creality CR-10 V3 for all parts. The below settings is for the Hifi Parts… For speakers, please refer to that link. I printed everything in Graphite PLA and Slate Gray PLA. For the Logo and Feet, I used CRON flex filament.
Layer Height 0.2mm, Shell thickness 0.8mm, and Infill 20%
For the Main Body and the Back, Support is required (Set to everywhere). On the main body it is required for the bucket that houses the USB etc. for the PI. And on the Back it is for the little clips that holds it in place on the main body.
Hope you find the useful and if you print this, please share some pics.
I got a 3d Printer 4 weeks ago and immediately set of with an ambitious project to create my own Hifi after seeing te speaker that guppyk2 created here: https://www.thingiverse.com/thing:4750820
I did not find a body design that I liked or served my purpose, so I set off designing my own. Many long nights toiling over all the new things like 3d software and even the printer and this is the result. It is not perfect, but I like it. Hope you do 2.
Disclosures:
Screen:
The screen cover I used is a Remix of Luc-e’s design ( https://www.thingiverse.com/thing:1585924 ) – Its not really a remix. It’s almost an exact copy. I just moved the holes a bit as I found they do not perfectly align with my screen and made the screen sit slightly off-center to the cover.
Speaker Enclosures:
The speaker enclosures I used in the pictures is an exact print of https://www.thingiverse.com/thing:4750820. I made no Changes or Mods on those.
Components Used in HiFi:
Raspberry Pi 3B as the main “brain” running Volumio (https://volumio.org/ )
Official Raspberry Pi 7” Screen
IQAudio DigiAmp+ Hat as DAC and Amp. (https://www.sparkfun.com/products/17737 )
Generic 12V 10A Power supply as the Amp is powered separately. The Amp also provide power to the PI via the GPIO’s
Speaker connectors, Wires, Power connector for PSU, and a Push button ON/OFF
Components Used in Speakers:
Hertz COAX DCX100.3 Speakers. (https://www.amazon.com/HERTZ%C2%AE-Stereo-Coaxial-Speakers-DCX100-3/dp/B008B5B1N6 )
Some Poly fill – I used it to thread it through the Tube of the speaker horn. To me it removed the hollow sound that I did not like. The speakers now do sound amazing to me… But I am no audiophile.
Speaker connectors on the back to connect it to the amp.
Printing:
I used a Creality CR-10 V3 for all parts. The below settings is for the Hifi Parts… For speakers, please refer to that link. I printed everything in Graphite PLA and Slate Gray PLA. For the Logo and Feet, I used CRON flex filament.
Layer Height 0.2mm, Shell thickness 0.8mm, and Infill 20%
For the Main Body and the Back, Support is required (Set to everywhere). On the main body it is required for the bucket that houses the USB etc. for the PI. And on the Back it is for the little clips that holds it in place on the main body.
Hope you find the useful and if you print this, please share some pics.
Similar models
thingiverse
free

Raspberry Pi Camera support & USB way to Octodash by E_Raw
...usb (power) way for a raspberry pi 7" touchscreen & rpi 4b enclosure mount ( https://www.thingiverse.com/thing:4663952 )
thingiverse
free

Ender 5 Screen Case w/Raspberry Pi 2/3
...thingiverse.com/thing:3068580 and https://www.thingiverse.com/thing:3842373
there is an option to print the case top without fan.
thingiverse
free

Adjustable Raspberry Pi Camera mounting solution for Solidoodle 2 by krist10an
...o be able to mount the camera to the frame of my printer.
edit:
added a shorter 10mm link as well as the original 20mm version.
thingiverse
free

Raspberry Pi CAM 2 Mount Remix by Stingr
...op from the new enclosure at the bottom of the face plate which i think works quite well to keep the cable up and out of the way.
thingiverse
free

Raspberry Pi 7 inch touch screen v2 camera mount by nsquid78
...his bracket attaches to the swivel mount.
i also included the fusion 360 model and a step model if anyone wants to make changes.
thingiverse
free

Raspberry PI with Screen adapter for InMoov back by kwatters
...ed on https://www.thingiverse.com/thing:1384316 that will hold the ras pi with the 7" touchscreen in the back of the inmoov.
thingiverse
free

Raspberry Pi Official 7 inch screen mount for 2020 extrusions by jterranella
...my folgertech ft-5, but it will work with any similar 2020 style printer. designed to work with this touchscreen:...
thingiverse
free

Rear Raspberry Pi mount for Anet A8 by ugge75
...m/thing:2052064
&http://www.thingiverse.com/thing:47776
with this two design i'm able to put the pi on the back of lcd .
thingiverse
free
LulzBot Mini TFT Screen Mounting bracket by eirikso
...pberry pi: http://www.banggood.com/3_5-inch-320-x-480-tft-lcd-display-touch-board-for-raspberry-pi-2-model-b-rpi-b-p-1023432.html
thingiverse
free

7inch raspberry pi HDMI screen case with VESA mount fixed by Maganzi
...erry case.
rotate 90° face down the frame, and 120° the back to easily print.
original: https://www.thingiverse.com/thing:2323354
Hifi
turbosquid
$3

HiFi
... available on turbo squid, the world's leading provider of digital 3d models for visualization, films, television, and games.
turbosquid
$12

micro hifi concept
... available on turbo squid, the world's leading provider of digital 3d models for visualization, films, television, and games.
turbosquid
free

HIFI TV Board
... available on turbo squid, the world's leading provider of digital 3d models for visualization, films, television, and games.
3d_export
$9

radio hifi 2008 3D Model
... hifi 2008 3d model
3dexport
radio hifi music listen room dance hitec sono chaine
radio hifi 2008 3d model scorpiow 7692 3dexport
3d_export
$50

Speaker hifi 3D Model
...aker hifi 3d model
3dexport
speaker sound audio 3d model wood usher hi fi end home
speaker hifi 3d model cerebrate 89828 3dexport
turbosquid
$23

Corner cabinet for tv-hifi-video
... available on turbo squid, the world's leading provider of digital 3d models for visualization, films, television, and games.
turbosquid
$20
DVD or BluRay or Stereo (HIFI -Poser)
... available on turbo squid, the world's leading provider of digital 3d models for visualization, films, television, and games.
3d_export
$10

HiFi System Pack 1 3D Model
...stem pack 1 3d model
3dexport
3dsmax furniture architecture design vray electronic
hifi system pack 1 3d model hatt 3053 3dexport
turbosquid
$32

DVD or BlueRay Player - HIFI (LW version)
... available on turbo squid, the world's leading provider of digital 3d models for visualization, films, television, and games.
3d_ocean
$9

Target Audio TT2 HiFi Equipment Table
...t to house all kinds of electronics. - a subdivions surface model with clean topology - two tga textures at 4096×4096 for both...
Raspberry
3d_export
free

raspberry
...raspberry
3dexport
3d model of a raspberry. i tried to make it realistic.
turbosquid
$27

Raspberries
...y free 3d model raspberries for download as max, obj, and stl on turbosquid: 3d models for games, architecture, videos. (1354176)
turbosquid
$14

Raspberries
...y free 3d model raspberries for download as max, obj, and fbx on turbosquid: 3d models for games, architecture, videos. (1364663)
3d_export
$5

raspberry pi
...raspberry pi
3dexport
carcasa para la raspberry pi
turbosquid
$99

Raspberry
... available on turbo squid, the world's leading provider of digital 3d models for visualization, films, television, and games.
turbosquid
$10

raspberries
... available on turbo squid, the world's leading provider of digital 3d models for visualization, films, television, and games.
archive3d
free

Raspberries 3D Model
...raspberries 3d model archive3d raspberries raspberry raspberries n300911 - 3d model (*.3ds) for interior 3d...
3d_export
$5

raspberry fruit
...raspberry fruit
3dexport
3d_export
$5

raspberry
...y different sizes. their color ranges from light burgundy to pink. there are formats: obj, 3ds, blend, dae, fbx, mtl.<br>:)
evermotion
$12

raspberries 23 am130
...evermotion raspberries 23 am130 evermotion key 23 food fruit raspberry fruits am130 raspberries highly detailed 3d model of raspberries...
Pi
design_connected
$11

Pi
...pi
designconnected
ligne roset pi chairs computer generated 3d model. designed by thibault desombre.
3d_export
$5
raspberry pi
...raspberry pi
3dexport
carcasa para la raspberry pi
turbosquid
$18

pied
... available on turbo squid, the world's leading provider of digital 3d models for visualization, films, television, and games.
3ddd
$1

Emme pi light
...emme pi light
3ddd
emme pi light
люста emme pi light
3ddd
$1

Emme pi light
...emme pi light
3ddd
emme pi light
бра классическое emme pi light
3ddd
$1

Emme Pi Light
...emme pi light
3ddd
emme pi light
3ddd
$1

Emme Pi Light
...emme pi light
3ddd
emme pi light
design_connected
$16

Pi-Air
...pi-air
designconnected
living divani pi-air lounge chairs computer generated 3d model. designed by harry & camila.
3d_ocean
$15

Manneken Pis
...picting a naked little boy urinating into a fountain’s basin. (wikipedia) the model was sculpted in blender 2.70a rendered wit...
3ddd
$1

Emme pi light
...emme pi light
3ddd
emme pi light
люстра классическая фирма: emme pi light
артикул: 3595/5/cot/12/wh