Thingiverse

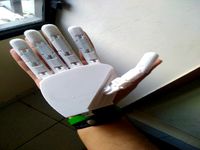
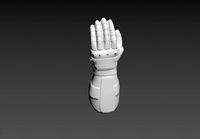
Phantom Pain Functional Prosthetic Hand by Armatus
by Thingiverse
Last crawled date: 3 years, 1 month ago
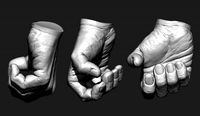
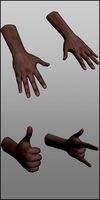
Several months ago I received a commission to create a functional prosthetic hand based off of the Phantom Pain hand used in Metal Gear Solid 5. This was for a client who was born without a left hand and grew tired of his standard claw style prosthetic, but didn't want to shell out thousands of dollars for a motorized medical grade prosthetic. The goal was to create something durable, functional and useful on a budget. This is what I came up with. My client has very little left of his wrist, meaning the standard active grip system on other 3D printed prosthetics wouldn't work for him, so I designed a passive grip system using retention springs. This allows the fingers to (more or less) auto-adjust to whatever object they are gripping, and only requires user input to actually open the grip, which is done by pulling the knob at the rear of the forearm section. All 5 fingers normally open and close at once, but there is also a detachable ring connected to the main knob which articulates just the index finger, which can be locked in place to allow greater usability in actions such as typing and pressing buttons.
I'm releasing these files for free because I want them to get into the hands of other people who actually need a prosthetic and can use them to better their lives. The total material cost for the final device is under $100. Here is a breakdown of the additional parts you will need:
Order these;
14x Low profile 4-40 Locknuts: https://www.mcmaster.com/#catalog/122/3213/=15s86hk
50x 4-40 7/8" screws: https://www.mcmaster.com/#catalog/122/3018/=15s87ym
20X 4-40 5/8" screws; https://www.mcmaster.com/#catalog/122/3018/=15s89ba
14x Torsion springs (option to use stronger springs here for increased grip strength, I used 0.353 OD 270 degree right hand torsion); https://www.mcmaster.com/#catalog/123/1293/=1ayad1u
10 feet of 1.2mm stainless steel braided cable; https://www.amazon.com/gp/product/B00GYTWM4I/ref=oh_aui_detailpage_o00_s00?ie=UTF8&psc=1
Normal hardware store stuff;
1x 6-32 Locknut
2x 6-32 40mm screws
2x 6-32 15mm screws
12x 13mm rubber grip pads
7 10mm rubber strip grip pads
Super Glue (for holding the pads in place)
Epoxy putty (For filling the connection between the cables to the pull knob)
Preferred type of foam for internal padding (high density open-cell foam recommended)
Assembly is pretty self explanatory, all parts press fit together (may require some sanding depending on the accuracy of your printer and slicer) and then are screwed into place with the appropriate size/length screw as listed above. The springs are slotted into the appropriate ends of each finger joint before they are put together. The steel wire must be knotted at one end, and then slid through the holes of the fingers to the back of the wrist starting at the finger tip. Please don't hesitate to ask any questions or ask for modifications :)
EDIT: All step files have been posted. Feel free to modify the files however you please, and be sure to post remixes for the community to benefit from!
Similar models
grabcad
free

Prosthetic Hand
...he user want to grip.
if you have the time and you are in mood ckeck out the presentation image for more information. thank you!
thingiverse
free

Helping Hand by 3dprntr_1
...de:
wrist circumduction capability
adaptive grip (can conform to oddly shaped objects)
natural (less mechanical) feel to the user
grabcad
free

Low-cost worm gear motor prosthetic hand
...nmore/mechanical_components/mechanical_fasteners/push_fastener
gloves- chinese silicone gloves available in the prosthetic market
grabcad
free

Cheap worm gear motor prosthetic hand
...nmore/mechanical_components/mechanical_fasteners/push_fastener
gloves- chinese silicone gloves available in the prosthetic market
grabcad
free

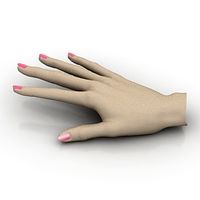
Scanned 3D Female Hand
...4cm
ring: 5.5cm
pinky: 4.75cm - 5cm
thumb: 6.25cm
width of fingers:
index: 2cm
middle: 1.9cm
ring: 1.8cm
pinky: 1.5cm
thumb: 2cm
3d_export
$15

Hand Grip 3D Model
...trong torsion gym workout fitness
hand grip 3d model download .c4d .max .obj .fbx .ma .lwo .3ds .3dm .stl firdz3d 102804 3dexport
thingiverse
free

Prosthetic Hand for designers to experience by MacGyvrBot
... at rochester institute of technology by e-nable volunteers and on other open-source designs shared within the e-nable community.
grabcad
free

Wrist Box
...wrist box
grabcad
wrist box mechanism for prosthetic hand
3d_export
$15

Hand Grip v2 3D Model
...ng torsion gym workout fitness
hand grip v2 3d model download .c4d .max .obj .fbx .ma .lwo .3ds .3dm .stl firdz3d 102816 3dexport
grabcad
free

Rotating Hand Prosthesis
...).
prints in 3 parts, designed in sw 2013, rendered using photoview 360.
igs file available for those with older sw versions.
Armatus
cg_studio
$49

Stegosaurus (Stegosaurus Armatus)3d model
....lwo .max .mb .obj - stegosaurus (stegosaurus armatus) 3d model, royalty free license available, instant download after purchase.
thingiverse
free

Prusa Mk3 Extruder BL-Touch mod by Armatus
...p cap (enlarged opening for 5mm nylon bowden guide) and i modeled a new rear support to help keep longer cables out of harms way.
thingiverse
free

FlashForge Creator Pro Improved Fan Shroud (2016 model) by Armatus
... to not heat up and warp during longer prints. this mounts directly into the existing cooling fan and uses the same screw holds.
thingiverse
free

Mercy's Caduceus Staff from Overwatch by Armatus
...e staff omits from the game. i intended to install some in mine but ran out of time before the convention i was making this for.
thingiverse
free

Susan 2.0, a Large Format Reprap i3 by Armatus
... however, anyone who has built a printer before could surely figure out the assembly steps just from the part files and pictures.
thingiverse
free

Prusa i3 Mk3+ Rebuild by Armatus
...he bed. the z motors have 365mm threaded shafts, giving me 330mm of total build height. takes the same gcode as a standard mk3.
thingiverse
free

Overwatch Mercy Concept Wings (Resliced v2 parts) by Armatus
...e, both pivots and wing keys and v2.1 main bodies. for the larger version, use all the original files plus the v2.1 main bodies.
thingiverse
free

Mercy's Caduceus Staff tip with improved range of motion by threonin
...by threonin thingiverse this replaces the staff tip from armatus design to allow for a bigger range of motion...
thingiverse
free

Printrbot Simple Metal Add-on System (Lower supports, LCD Housing, ATX Mount) by Armatus
...ot; sintra plastic through the central gaps, but it would be easy to make a printed part to replace this if that's requested.
Prosthetic
turbosquid
$49

Prosthetic Arm
...uid
royalty free 3d model prosthetic arm for download as max on turbosquid: 3d models for games, architecture, videos. (1556291)
turbosquid
$20

Prosthetic for small dogs 3D print model v2
...osthesis for small dogs 3d print model v2 for download as stl on turbosquid: 3d models for games, architecture, videos. (1290474)
3d_export
$10
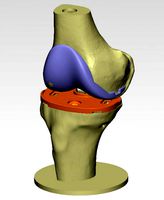
knee joint prosthesis with guides sample of individual prosthetics
...mm, 20 grams tibial component: ti6al4v material, 76×77×70 mm, 90 grams femoral component: cocrmo material, 70×52×62 mm, 290 grams
3d_export
$5
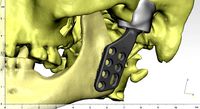
individual tmj prosthesis real operation
...left tmj. it consists of the following parts:: * prosthetic condylar process (ti6al4v); * joint cavity prosthesis (high molecular...
3d_export
$44
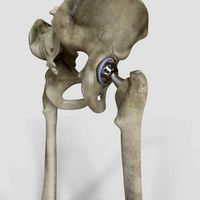
Hip Replacement
...damaged bone and cartilage is removed and replaced with prosthetic components. the damaged femoral head is removed and replaced...
3d_export
$10

itap implant osteointegration operation
...the implant. tested on more than 15 operations. itap prosthetic is an installation of "intraosseous transcutaneous amputation prosthesis". in...
thingiverse
free
Prosthetic arm
...prosthetic arm
thingiverse
prosthetics arm
3d printable
thingiverse
free

Prosthetic Arm
...prosthetic arm
thingiverse
a prosthetic arm purely for asthetic purposes. it was made for a client's wedding.
thingiverse
free

Dog Prosthetic by 3DESIGNER27
...animal allies. cheap alternative for dog prosthetic limb. scale in your slicer to fit the dog you are looking to apply prosthetic
thingiverse
free

XOR Prosthetic Hand by chandlersupple
...xor prosthetic hand by chandlersupple
thingiverse
prosthetic hand - two part
Phantom
design_connected
$13

Phantom
...phantom
designconnected
driade phantom computer generated 3d model. designed by emrys-roberts, peter.
design_connected
$11

Phantom
...phantom
designconnected
innovation randers phantom lounge chairs computer generated 3d model. designed by verner panton.
3ddd
$1

Phantom
...om
3ddd
пепельница
пепельница phantom. высоко полигональная фигура в форме грифона (стилизованная), материал v-ray золото внутри.
turbosquid
$9
Phantom
... available on turbo squid, the world's leading provider of digital 3d models for visualization, films, television, and games.
3ddd
$1

Pendant Lamp Phantom
...pendant lamp phantom
3ddd
kare
kare pendant lamp phantom
turbosquid
$30

phantom mountain
... available on turbo squid, the world's leading provider of digital 3d models for visualization, films, television, and games.
turbosquid
free
F4E-Phantom
... available on turbo squid, the world's leading provider of digital 3d models for visualization, films, television, and games.
3d_export
$25

RollsRoyce Phantom 3D Model
...rollsroyce phantom 3d model
3dexport
rolls-royce phantom rollsroycephantom
rollsroyce phantom 3d model lenar 19920 3dexport
3d_export
$5

phantom model drone
...phantom model drone
3dexport
3d modeling of phantom drone model. modeled in solidworks and saved in .stl and .sldprt formats
3d_export
$20

rollss roycee phantom 1963
...rollss roycee phantom 1963
3dexport
rollss roycee phantom 1963
Pain
3d_export
$5

Queen Of Pain
...queen of pain
3dexport
dota 2 character oueen of pain
turbosquid
$45

Lady of Pain
... available on turbo squid, the world's leading provider of digital 3d models for visualization, films, television, and games.
turbosquid
$1

Pain Killers
... available on turbo squid, the world's leading provider of digital 3d models for visualization, films, television, and games.
turbosquid
free

Demon of Pains
... available on turbo squid, the world's leading provider of digital 3d models for visualization, films, television, and games.
turbosquid
$10

Pain Au chocolat
...quid
royalty free 3d model pain au chocolat for download as on turbosquid: 3d models for games, architecture, videos. (1652051)
turbosquid
$5

Circle Pain Tat
...id
royalty free 3d model circle pain tat for download as obj on turbosquid: 3d models for games, architecture, videos. (1336291)
turbosquid
$1

Pain-Art-Cuadro
...id
royalty free 3d model pain-art-cuadro for download as c4d on turbosquid: 3d models for games, architecture, videos. (1196649)
turbosquid
$2

Pain au chocolat
... pain au chocolat for download as lwo, lxo, stl, obj, and fbx on turbosquid: 3d models for games, architecture, videos. (1644992)
turbosquid
$9

Cartoon Man In Pain
...an in pain for download as 3ds, obj, fbx, blend, dae, and stl on turbosquid: 3d models for games, architecture, videos. (1494288)
turbosquid
$25

Rayonnage Pain (Bread Racks)
... available on turbo squid, the world's leading provider of digital 3d models for visualization, films, television, and games.
Functional
turbosquid
$1

functional clock
...d
royalty free 3d model functional clock for download as fbx on turbosquid: 3d models for games, architecture, videos. (1378928)
turbosquid
$5

functional door
... model functional door for download as 3ds, obj, c4d, and stl on turbosquid: 3d models for games, architecture, videos. (1483785)
3d_export
$5
multi function box
...multi function box
3dexport
it is multi function box in iges format
3ddd
$1
Fitness Equipament - Functional
...fitness equipament - functional
3ddd
треножер
fitness equipament functional, modeled from real model.
turbosquid
$19

Four function formula
...
royalty free 3d model four function formula for download as on turbosquid: 3d models for games, architecture, videos. (1154985)
turbosquid
$1

functional work table
...yalty free 3d model functional work table for download as max on turbosquid: 3d models for games, architecture, videos. (1198733)
3d_export
free
Multi-functional anaquel
...multi-functional anaquel
3dexport
https://www.dock4all.com/
turbosquid
$12
Multi-Function Knife
... available on turbo squid, the world's leading provider of digital 3d models for visualization, films, television, and games.
turbosquid
$9

function x black coin
...yalty free 3d model function x black coin for download as max on turbosquid: 3d models for games, architecture, videos. (1457828)
turbosquid
$8

Multi-function cylinder mechanism
...lti-function cylinder mechanism for download as ige and sldpr on turbosquid: 3d models for games, architecture, videos. (1223739)
Hand
3d_export
$8
hand
...hand
3dexport
fantasy hand
3d_export
$5
hand
...hand
3dexport
male hand
3d_export
$5
hand
...hand
3dexport
realistic male hand
3d_export
$5

hand
...hand
3dexport
hand with nails and structure
archibase_planet
free
Hand
...hand
archibase planet
hand
hand n190111 - 3d model (*.gsm+*.3ds) for interior 3d visualization.
3ddd
$1

Hand
...hand
3ddd
hand
модель руки будды
3d_export
$5

hand
...hand
3dexport
it is my wrist of hand and this is on 3d sculpt
3d_export
$5
hand
...hand
3dexport
realistic male hand obj file
3d_export
$7
hand-006 rigged hand
...hand-006 rigged hand
3dexport
rigged right hand 3d model additional textures for pbr rendering included
3d_ocean
$6
Hand
...
this 3d models of the hands, made in 3ds max, has textures(.jpg), materials(.mat), rigged, the models in .max, fbx, obj format.