Thingiverse
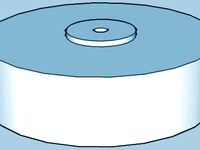
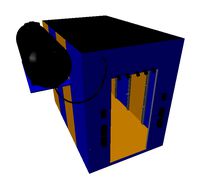
Pergo Robo3D/R1/+ PVC Heat Chamber or Ver 3 by Pergo
by Thingiverse
Last crawled date: 3 years ago
I love the summer because everything prints easy!
But in winter, everything is tough to print. I keep my house the same temp all year round but just a little draft is enough to make a print job a failure.
This is version 3 (See my things for the other 2 versions)
This design is my favorite because it is a game changer for a cheap heat chamber.
It goes on and off the printer very easy. (If you have the filament spool uploaded).
It stores flat against a wall. (unlike my earlier versions, they were a pain to store)
It's sturdier an you can lift it up out of the way if needed.
Simpler to print, build, and repair if needed.
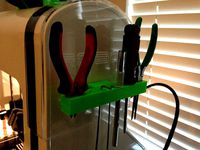
You can use any plastic that does not have holes in it. OR modify to use glass or whatever you dream up... The real heat of this is that it allows you to mount something to the sides of the printer.
Because my modded printer can print 372 mm on the Y axis,https://www.thingiverse.com/thing:2216671
my bed is longer, so my 1/2" PVC sides were 920 mm long. this design allows it to work on EVERY Robo3D printer regardless of your bed length! Just pull your glass bed to it's max in the forward and the back positions and measure. This will be the length for the side PVC pipes. I recommend that you place a tic mark at the middle. This tic is really handy when putting the plastic on. To measure out the plastic to cut, I placed the assembled frame on the floor. Place the plastic over it and use a letter sheet of paper as a guide to leave about 15" all around the outside of the frame. (See pictures). Next cut ONE slit down the middle where the top of the printer will poke out.
Cut 8 pieces of tape (I used black electrical so you could see it). I made 4 "saddles" that connect the plastic together where the slit was cut. NOTE: I have the gum sides of the tape sticking to each other. there is NO tape connecting to the printer. this allows you to take the hood off for storage.
Get it all positioned and then drill pilot holes with a drill in the indented locations on the elbows. put the plastic on and screw the screws into the drilled out holes. (I didn't cut holes so you could choose your choice of screw size.
Once all the screws are in, cut a slit on each side of front of the printer so you can flip the front plastic open to access the printer.
All is printed solid except the Elbows can be 6 shells/layers and a 12-15% in-fill.
I used PLA for all parts. Nothing ever gets that warm enough even when printing ABS to be an issue.
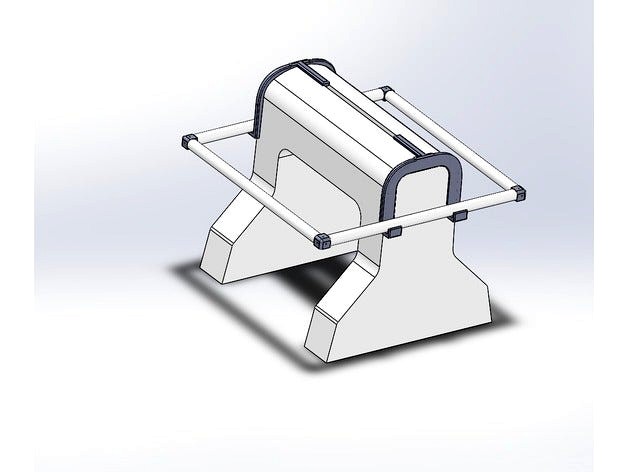
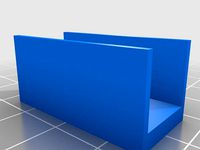
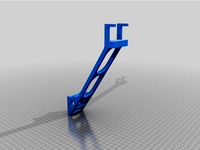
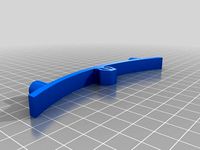
After printing the parts and screwing them together, we need to make the side supports bow downward a bit (see the pictures) this makes the tips fit into the top slot of the Robo3D much better. To do this, you want to heat your bed up to 90c and place the assembled side on the bed as pictured. in about a min, the PLA will heat up and allow you to bow or bed it. See how I'm pushing the "U" (or horse shoe looking item) in to the 8 mm bar in the picture. this making the U lift up and bow heated PLA.
There are no top slot covers because they are already present in my thing #2155476.
If you are not using my spool holder you can take one EndCovers.STL from 2155476 and resize it like 240 mm (a guess on length) and drill a hole in it to allow filament to pass through. or print 2 EndCovers.STL each like 115 mm ?
If you use my version 2 spool holder shown herehttps://www.thingiverse.com/thing:2155476
Print 2 each EndCovers.STL from 2155476 with the length resized to 48.5 mm and they will meet nicely with the Side Support.STL's printed for this heat chamber.
Enjoy. Let's see those Make pictures!!!
But in winter, everything is tough to print. I keep my house the same temp all year round but just a little draft is enough to make a print job a failure.
This is version 3 (See my things for the other 2 versions)
This design is my favorite because it is a game changer for a cheap heat chamber.
It goes on and off the printer very easy. (If you have the filament spool uploaded).
It stores flat against a wall. (unlike my earlier versions, they were a pain to store)
It's sturdier an you can lift it up out of the way if needed.
Simpler to print, build, and repair if needed.
You can use any plastic that does not have holes in it. OR modify to use glass or whatever you dream up... The real heat of this is that it allows you to mount something to the sides of the printer.
Because my modded printer can print 372 mm on the Y axis,https://www.thingiverse.com/thing:2216671
my bed is longer, so my 1/2" PVC sides were 920 mm long. this design allows it to work on EVERY Robo3D printer regardless of your bed length! Just pull your glass bed to it's max in the forward and the back positions and measure. This will be the length for the side PVC pipes. I recommend that you place a tic mark at the middle. This tic is really handy when putting the plastic on. To measure out the plastic to cut, I placed the assembled frame on the floor. Place the plastic over it and use a letter sheet of paper as a guide to leave about 15" all around the outside of the frame. (See pictures). Next cut ONE slit down the middle where the top of the printer will poke out.
Cut 8 pieces of tape (I used black electrical so you could see it). I made 4 "saddles" that connect the plastic together where the slit was cut. NOTE: I have the gum sides of the tape sticking to each other. there is NO tape connecting to the printer. this allows you to take the hood off for storage.
Get it all positioned and then drill pilot holes with a drill in the indented locations on the elbows. put the plastic on and screw the screws into the drilled out holes. (I didn't cut holes so you could choose your choice of screw size.
Once all the screws are in, cut a slit on each side of front of the printer so you can flip the front plastic open to access the printer.
All is printed solid except the Elbows can be 6 shells/layers and a 12-15% in-fill.
I used PLA for all parts. Nothing ever gets that warm enough even when printing ABS to be an issue.
After printing the parts and screwing them together, we need to make the side supports bow downward a bit (see the pictures) this makes the tips fit into the top slot of the Robo3D much better. To do this, you want to heat your bed up to 90c and place the assembled side on the bed as pictured. in about a min, the PLA will heat up and allow you to bow or bed it. See how I'm pushing the "U" (or horse shoe looking item) in to the 8 mm bar in the picture. this making the U lift up and bow heated PLA.
There are no top slot covers because they are already present in my thing #2155476.
If you are not using my spool holder you can take one EndCovers.STL from 2155476 and resize it like 240 mm (a guess on length) and drill a hole in it to allow filament to pass through. or print 2 EndCovers.STL each like 115 mm ?
If you use my version 2 spool holder shown herehttps://www.thingiverse.com/thing:2155476
Print 2 each EndCovers.STL from 2155476 with the length resized to 48.5 mm and they will meet nicely with the Side Support.STL's printed for this heat chamber.
Enjoy. Let's see those Make pictures!!!
Similar models
thingiverse
free

Pergo Heat Chamber for stock Robo3d by doctorjay
... bed. you would use these if you haven't done his y-axis mod.
as with the original, print them with supports at 100% infill.
thingiverse
free

Pergo's DCS-930L WiFi Cam/IP Cam Mounting Bracket for Robo3D by Pergo
... best as a slow print.
included the original source file. please when add your "things" include the source too!
enjoy..
thingiverse
free

Pergo Robo3D Heat Chamber Ver 2 by Pergo
...pplying the plastic, do the final cuts after you screw it on. in my pictures, the blue is version 2, and the orange is version 1.
thingiverse
free

MP Select Mini - Center Bed Leveler by asechrest
...l i've done here is cut 0.89 mm off of the length of the screw. credit goes to auralgasm for the original concept and design.
thingiverse
free

Glass plate mount Anet A6 by serki39
...rts in pla because i heated my plate only up to 55°c. if you heat your plate up to a higher temperatur, than maybe abs is better.
thingiverse
free

Pergo Robo3D Heat Chamber by Pergo
...e i had issues with the supports as they were kinda hard to remove.
comments, comments..i want to hear what you think about this.
thingiverse
free

Pergo Embroidery Rack by Pergo
...f you have a robo 3d you can do it too! just replace the belt, rods and print 2 of thesehttps://www.thingiverse.com/thing:2216671
thingiverse
free

Pergo Cable Chain Mount with screws to Stepper by Pergo
... abs sample colors i had..why don't samples come in a length that you can really make something with??? 23 grams is not much.
thingiverse
free

Pergo Generic Cel Phone Camera Holder for Robo3D 330mm Ends by Pergo
...pgrade"http://www.thingiverse.com/thing:1154745
this is a generic camera holder for this mod
needs to be printed 100% infill
thingiverse
free

Pergo Solder Holder for 1lb Roll by Pergo
...the size of your solder.
my solder was .84 mm, but a hole only 1 mm this small is still going to need to be drilled whne printed.
Pergo
thingiverse
free

Pergo Stylis by Pergo
...pergo stylis by pergo
thingiverse
nothing more than a pergo stylis
thingiverse
free
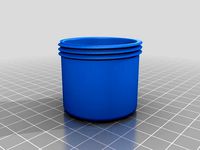
Pergo Med Jars by Pergo
...pergo med jars by pergo
thingiverse
these are great for travel. sealed containers for meds.
thingiverse
free
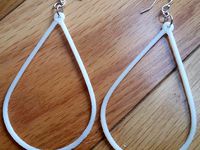
Pergo Plunge Earrings by Pergo
...pergo plunge earrings by pergo
thingiverse
just a simple earring design i made for the wife.
thingiverse
free

Pergo Snuggle Path Earring by Pergo
...pergo snuggle path earring by pergo
thingiverse
just another earing
thingiverse
free

Pergo B-Mine Earring by Pergo
...pergo b-mine earring by pergo
thingiverse
a little valentines day earring
thingiverse
free
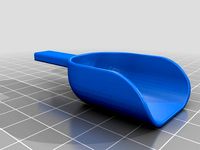
Pergo Mini Scoop by Pergo
..., you need a scoop for that.. well when you can, you make even the silliest of items. ta dah.. i present pergo's mini scooper
thingiverse
free
Pergo Flower Plunge Earring by Pergo
...pergo flower plunge earring by pergo
thingiverse
earring i call it the "flower plunge"
thingiverse
free
Pergo Night Light Shade by Pergo
...pergo night light shade by pergo
thingiverse
print with .4mm nozzle
no supports
no infill (tee hee)
thingiverse
free
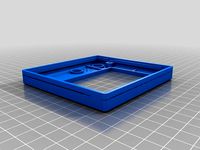
Pergo CoverTopNoTextSolderedDisplay by Pergo
... and can't be removed.
do not print the "base" piece this replaces the "top" and "base" pieces.
thingiverse
free

Pergo Cel Tilter by Pergo
...r by pergo
thingiverse
my pole holder was popular where the wife works, but they don't use the pole with it. so i made this.
Robo3D
turbosquid
$2
Robo3D Feet
... available on turbo squid, the world's leading provider of digital 3d models for visualization, films, television, and games.
thingiverse
free

Robo3d Filament Guide by sjreggel
...robo3d filament guide by sjreggel
thingiverse
robo3d filament guide, to be used with the default robo3d spool holder
thingiverse
free
Robo3D USB Support by GipsyEureka
...robo3d usb support by gipsyeureka
thingiverse
robo3d usb support.
thingiverse
free
Robo3D Camera Mount by robro
...robo3d camera mount by robro
thingiverse
mount for a logitech c270 webcamto a robo3d printer
thingiverse
free
Robo3D Tool Holder by huntergrayson
...robo3d tool holder by huntergrayson
thingiverse
an out of the way place for your tools on the robo3d printer
thingiverse
free
Robo3D Top Mount by ThorMJ
...o the robo3d.
added a version with longer posts so it clears the robo3d handle from the http://www.thingiverse.com/thing:234939
thingiverse
free

Screws' holder Robo3D by GalloEnricoDesign
...screws' holder robo3d by galloenricodesign
thingiverse
a easy support used as holder for screws' extruder
for robo3d.
thingiverse
free
ROBO3D Spool Cap by portdog77
...robo3d spool cap by portdog77
thingiverse
this is a cap i made for my robo3d to hold the filliment next to the machine.
thingiverse
free

ROBO3D OILER HOLDER by Prefab
...robo3d oiler holder by prefab
thingiverse
holds your robo3d oilers so you can always find them
thingiverse
free

robo3d feet simple version by Windpower
...robo3d feet simple version by windpower
thingiverse
robo3d feet remember to print 4.
R1
turbosquid
$10
R1
... available on turbo squid, the world's leading provider of digital 3d models for visualization, films, television, and games.
turbosquid
$10
R1
... available on turbo squid, the world's leading provider of digital 3d models for visualization, films, television, and games.
turbosquid
$15

chair r1
...urbosquid
royalty free 3d model chair r1 for download as max on turbosquid: 3d models for games, architecture, videos. (1282574)
3ddd
free
r1
...r1
3ddd
кольцо , ювелирное украшение
кольцо, сделано в свободное от работы время )
3d_ocean
$5

R1 rim
... tire tuner tuning tyre vehicle wheel
a r1 rim modeled to specs. for more car-related objects, please do visit my profile. enjoy!
turbosquid
$5
R1 Rocket
... available on turbo squid, the world's leading provider of digital 3d models for visualization, films, television, and games.
3d_export
$59

praga r1
...s for the minimum operational crew, the praga r1 offers the ultimate race-winning motorsport technology in an affordable package.
turbosquid
$80
R1 Astromech Droid
... free 3d model r1 astromech droid for download as obj and lxo on turbosquid: 3d models for games, architecture, videos. (1180592)
turbosquid
$49

Yamaha R1 2006
... available on turbo squid, the world's leading provider of digital 3d models for visualization, films, television, and games.
3d_export
$10

R1 Rim 3D Model
...wheel chrome spoke hub vehicle nut obj import addon tuner star tuning special tyre r1
r1 rim 3d model dragosburian 81316 3dexport
Chamber
turbosquid
$15
Chamber
...rbosquid
royalty free 3d model chamber for download as blend on turbosquid: 3d models for games, architecture, videos. (1240986)
3d_export
$6

Chamber
...chamber
3dexport
squish dumpling avatars of the valorant agents.
turbosquid
free

Underground chamber
... available on turbo squid, the world's leading provider of digital 3d models for visualization, films, television, and games.
turbosquid
free
Vacuum chamber
... available on turbo squid, the world's leading provider of digital 3d models for visualization, films, television, and games.
turbosquid
$10
disinfection chamber
...on chamber for download as blend, 3ds, dae, fbx, obj, and stl on turbosquid: 3d models for games, architecture, videos. (1671962)
3d_export
$25
Hypersleep Chamber
..., the users are usually clad in either sleepwear or underwear to prevent clothes and/or armor to become frozen to the users body.
turbosquid
$2

Xenomorph Incubation Chamber
...y free 3d model xenomorph incubation chamber for download as on turbosquid: 3d models for games, architecture, videos. (1705895)
3d_export
$7

chambers bar stools
...chambers bar stools
3dexport
name:
turbosquid
$59

Chamber Pendant Light
...yalty free 3d model chamber pendant light for download as max on turbosquid: 3d models for games, architecture, videos. (1291559)
turbosquid
free

Chamber Night Table
...model chamber night table for download as fbx, blend, and upk on turbosquid: 3d models for games, architecture, videos. (1268286)
Ver
3ddd
$1
VER DESIGN
...ver design
3ddd
ver design
кресло ver design
3ddd
$1
VER DESIGN
...ver design
3ddd
ver design
диван ver design
3ddd
free
VER DESIGN
...ver design
3ddd
ver design , стеллаж
полка ver design
3ddd
$1
VER DESIGN
...ver design , лежак , шезлонг
шезлонг ver design
3ddd
$1

Ver Design стол
...ver design стол
3ddd
ver design
...
3ddd
$1

Ver Design / NOTTURNA
...ver design / notturna
3ddd
ver design
http://www.verdesign.it
3d_export
$6

Old book ver 2
...old book ver 2
3dexport
old book ver. 2 pbr unwrap
3d_export
$6

Old book ver 3
...old book ver 3
3dexport
old book ver. 3 pbr unwrap
3d_export
$6

Old book ver 5
...old book ver 5
3dexport
old book ver. 5 pbr unwrap
turbosquid
free

plant ver 02
...2
turbosquid
free 3d model plant ver 0.2 for download as fbx on turbosquid: 3d models for games, architecture, videos. (1491580)
Pvc
turbosquid
$39
pvc window
...bosquid
royalty free 3d model pvc window for download as max on turbosquid: 3d models for games, architecture, videos. (1205578)
turbosquid
$19

window PVC
...bosquid
royalty free 3d model window pvc for download as 3ds on turbosquid: 3d models for games, architecture, videos. (1204830)
turbosquid
$15
PVC Band
...turbosquid
royalty free 3d model pvc band for download as ma on turbosquid: 3d models for games, architecture, videos. (1287079)
turbosquid
$3
Pvc taping
...bosquid
royalty free 3d model pvc taping for download as max on turbosquid: 3d models for games, architecture, videos. (1161550)
turbosquid
$1

PVC Fittings
... available on turbo squid, the world's leading provider of digital 3d models for visualization, films, television, and games.
turbosquid
$1

PVC elbow
... available on turbo squid, the world's leading provider of digital 3d models for visualization, films, television, and games.
turbosquid
$29

Pvc cabinet
... pvc cabinet for download as blend, dae, fbx, obj, stl, and x on turbosquid: 3d models for games, architecture, videos. (1669537)
turbosquid
$10

PVC PIPE FITTING
...d
royalty free 3d model pvc pipe fitting for download as skp on turbosquid: 3d models for games, architecture, videos. (1164250)
turbosquid
$17
Glass PVC Table
...ee 3d model glass pvc table for download as max, obj, and fbx on turbosquid: 3d models for games, architecture, videos. (1267063)
turbosquid
$8

Pedant light PVC
...model pedant light pvc for download as 3ds, max, obj, and fbx on turbosquid: 3d models for games, architecture, videos. (1246571)
Heat
3d_export
$5
heat
...heat
3dexport
heat tool
3ddd
$1
electric heating
...electric heating
3ddd
обогреватель
electric heating
3d_export
$6
The heating module
...any questions also you can email to me. designed with solidworks 2017, render with keyshot **************************************
turbosquid
$2
Heating Radiator
...
royalty free 3d model heating radiator for download as blend on turbosquid: 3d models for games, architecture, videos. (1561908)
3d_export
$35
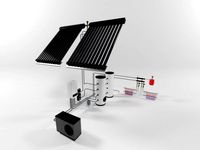
heating instalation with heat pump and solar system
...el , please contact me. before buying a model, you can try to download one of my free models and testing. thank you for watching.
turbosquid
$29
Heating Mantle
... available on turbo squid, the world's leading provider of digital 3d models for visualization, films, television, and games.
turbosquid
$25
Heating Radiator
... available on turbo squid, the world's leading provider of digital 3d models for visualization, films, television, and games.
turbosquid
$20
AT_airship_control_stand_(heated)
... available on turbo squid, the world's leading provider of digital 3d models for visualization, films, television, and games.
turbosquid
$20
AT_airship_(heated)
... available on turbo squid, the world's leading provider of digital 3d models for visualization, films, television, and games.
turbosquid
$10

Heating radiator
... available on turbo squid, the world's leading provider of digital 3d models for visualization, films, television, and games.
3
turbosquid
$10

Mountain Bike 3 -3 of 3
...model mountain bike 3 (#3 of 3) for download as fbx and blend on turbosquid: 3d models for games, architecture, videos. (1438752)
turbosquid
$3

Genesis 3 Clothing 3
... available on turbo squid, the world's leading provider of digital 3d models for visualization, films, television, and games.
3d_export
$5

hinge 3
...hinge 3
3dexport
hinge 3
3ddd
$1

Розетка 3
...розетка 3
3ddd
розетка
розетка 3
turbosquid
$50

is-3
... available on turbo squid, the world's leading provider of digital 3d models for visualization, films, television, and games.
turbosquid
$10

Mountain Bike 3 -2 of 3
...model mountain bike 3 (#2 of 3) for download as fbx and blend on turbosquid: 3d models for games, architecture, videos. (1438750)
turbosquid
$10

Mountain Bike 1 -3 of 3
...model mountain bike 1 (#3 of 3) for download as fbx and blend on turbosquid: 3d models for games, architecture, videos. (1438743)
3d_export
$5

3 CATS
...3 cats
3dexport
3 cats pen holder
3ddd
free
3 Буфета
...3 буфета
3ddd
буфет , кантри
3 буфета
turbosquid
$12

Calligraphic Digit 3 Number 3
...hic digit 3 number 3 for download as max, obj, fbx, and blend on turbosquid: 3d models for games, architecture, videos. (1389329)