Thingiverse

Pergo ROBO3D R1+ Marlin 1.1 bug fix (with manual bed leveling) by Pergo
by Thingiverse
Last crawled date: 3 years ago
THIS IS THE GREATEST UPGRADE I EVER DONE TO MY ROBO3D R1+ !!!
This firmware flashed to your Robo3D R1+ will
Remove the Auto bed leveling and replace it with a manual bed leveling which I have found to be SOOOO much better. Especially if you have modded your baby for a longer bed.
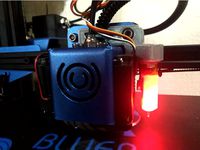
Remove the bell/buzzer (my wife is a shift worker)
Initially lower to speed of which the travel moves/ Jerk happens. ALL of these are changeable in the GUI of your graphical controller.
First off thank you VERY much to the hard working people contributing to the Marlin Firmware project at http://marlinfw.org/ for without their beautiful contributions, we might not be enjoying our 3D printers as much!
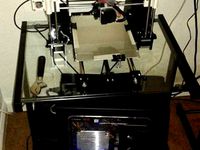
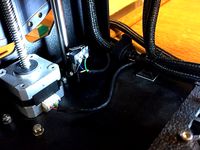
Next, remember that I have modded my beloved Robo 3D R1+ printer to death. All the mods are available by looking at my designs here on Thingiverse. The only one that matters to you with this firmware is that I have the changed the bed size in Configuration.h
Change the values to your max Y Length and X Width of your bed.
Starting at line 847
// The size of the print bed
define X_BED_SIZE 214
define Y_BED_SIZE 372
^-- a pound sign is here but Editor here uses this a special code.
The Mod for my bed...https://www.thingiverse.com/thing:2216671
Be sure to update your PID values in the Control section of the GUI
The firmware has my values which are for an E3D v6 hotend and a 600 watt 110 volt bed heater! All configurations using the same hardware will have different PID values due to drafts, ambient temp, etc..GREAT 3D printing starts with good configs. If these values are wrong you will see wide temp changes on the hot end /bed.
https://reprap.org/wiki/PID_Tuning
If you have the software installed that came with the ROBO 3D, you can use the "terminal" window to view the detected values while using the URL above.
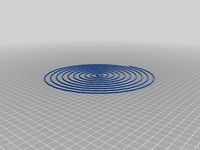
How to print using the manual leveling:
Note: Z Offsets in newer firmware versions are not set in the gcode anymore. These commands are ignored. Bug fix 1.0 had it settable in the controller. Really nice feature once you got it. 1.1 uses pure leveling.
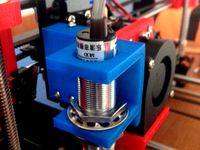
** Put something on the middle coordinate of the bed that represents your "Z-offset". I have a hacksaw blade with two pieces of black electrical tape that adds the height that I needed. Add more tape for a higher Z Offset, less for lower.
Select bed leveling function on the controller and the hotend will move to the middle and "home" This is the BASE reference from which ALL other points will be +/- from.
Hotend will now move to the 9 points asking each for a +/- while you are sliding a doubled over piece of paper under the nozzle to get the "right" height. This is where learning your printer is gonna help you get better prints. For my situation I found that best is where the paper first moves "freely".
After the 9 points, select the "Save" feature one menu up.
You are now done with leveling and will not have to do it again unless you knock/move/disturb your printer and/or it's bed.
Update your "Start gcode" with this.
G21 ;Mount SD Card
G90 ;Set to absolute positioning
M82 ;Set extruder to absolute mode
G28 ;Auto Home and center
G1 Z1.7 F200 ;move the head up to the proper start point for filament run
G92 E0 Z0;Now we have new 0,0,0
update the "G1 Z1.7 F200" command to set your Z-Offset
Make the "1.7"
a higher number to raise the nozzle up. ex. "Z1.75"
a lower number or - to bring the nozzle closer to the glass. ex. "Z-.01"
Sit back and watch how you get REPEATABLE and BETTER prints than you ever did before!!!!
Update:
Comment out line 1460 like this "//#define REVERSE_MENU_DIRECTION"
reverses our encoder (knob) so that it increments values when turned clockwise.
This firmware flashed to your Robo3D R1+ will
Remove the Auto bed leveling and replace it with a manual bed leveling which I have found to be SOOOO much better. Especially if you have modded your baby for a longer bed.
Remove the bell/buzzer (my wife is a shift worker)
Initially lower to speed of which the travel moves/ Jerk happens. ALL of these are changeable in the GUI of your graphical controller.
First off thank you VERY much to the hard working people contributing to the Marlin Firmware project at http://marlinfw.org/ for without their beautiful contributions, we might not be enjoying our 3D printers as much!
Next, remember that I have modded my beloved Robo 3D R1+ printer to death. All the mods are available by looking at my designs here on Thingiverse. The only one that matters to you with this firmware is that I have the changed the bed size in Configuration.h
Change the values to your max Y Length and X Width of your bed.
Starting at line 847
// The size of the print bed
define X_BED_SIZE 214
define Y_BED_SIZE 372
^-- a pound sign is here but Editor here uses this a special code.
The Mod for my bed...https://www.thingiverse.com/thing:2216671
Be sure to update your PID values in the Control section of the GUI
The firmware has my values which are for an E3D v6 hotend and a 600 watt 110 volt bed heater! All configurations using the same hardware will have different PID values due to drafts, ambient temp, etc..GREAT 3D printing starts with good configs. If these values are wrong you will see wide temp changes on the hot end /bed.
https://reprap.org/wiki/PID_Tuning
If you have the software installed that came with the ROBO 3D, you can use the "terminal" window to view the detected values while using the URL above.
How to print using the manual leveling:
Note: Z Offsets in newer firmware versions are not set in the gcode anymore. These commands are ignored. Bug fix 1.0 had it settable in the controller. Really nice feature once you got it. 1.1 uses pure leveling.
** Put something on the middle coordinate of the bed that represents your "Z-offset". I have a hacksaw blade with two pieces of black electrical tape that adds the height that I needed. Add more tape for a higher Z Offset, less for lower.
Select bed leveling function on the controller and the hotend will move to the middle and "home" This is the BASE reference from which ALL other points will be +/- from.
Hotend will now move to the 9 points asking each for a +/- while you are sliding a doubled over piece of paper under the nozzle to get the "right" height. This is where learning your printer is gonna help you get better prints. For my situation I found that best is where the paper first moves "freely".
After the 9 points, select the "Save" feature one menu up.
You are now done with leveling and will not have to do it again unless you knock/move/disturb your printer and/or it's bed.
Update your "Start gcode" with this.
G21 ;Mount SD Card
G90 ;Set to absolute positioning
M82 ;Set extruder to absolute mode
G28 ;Auto Home and center
G1 Z1.7 F200 ;move the head up to the proper start point for filament run
G92 E0 Z0;Now we have new 0,0,0
update the "G1 Z1.7 F200" command to set your Z-Offset
Make the "1.7"
a higher number to raise the nozzle up. ex. "Z1.75"
a lower number or - to bring the nozzle closer to the glass. ex. "Z-.01"
Sit back and watch how you get REPEATABLE and BETTER prints than you ever did before!!!!
Update:
Comment out line 1460 like this "//#define REVERSE_MENU_DIRECTION"
reverses our encoder (knob) so that it increments values when turned clockwise.
Similar models
thingiverse
free

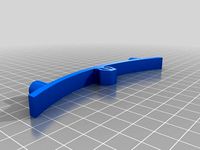
Pergo Generic Cel Phone Camera Holder for Robo3D 330mm Ends by Pergo
...pgrade"http://www.thingiverse.com/thing:1154745
this is a generic camera holder for this mod
needs to be printed 100% infill
thingiverse
free
Marlin Firmware 1.1.8 Anycubic Kossel Plus - G33 "auto_calibrate" Updated by TsunamiSoul
...invert_e1_dir false
define invert_e2_dir false
define invert_e3_dir false
define invert_e4_dir false
pd: sorry for my bad english
thingiverse
free
TwoTrees Bluer 3dTouch suport by kakarotojmsc
...multiplicator_z 5"
"#define babystep_zprobe_offset "
https://www.paypal.com/donate?hosted_button_id=zqtmyur24g2ke
thingiverse
free
HIC Prusa i3 Custom Firmware/ bed level/ metal to metal zmin by ojeda397
...nt of "#define enable_auto_bed_leveling"
video:https://www.youtube.com/watch?v=rs_nvmx6wzm&feature=youtube_gdata
thingiverse
free
Tronxy P802e Inductive/Capacitive Sensor Mount by srbaude86
... least half of whats written here before i installed my probe - would have saved my me 2 days of yelling at my printer. good luck
thingiverse
free
MakerGear M2 moving Z Endstop to the Bottom and OctoPrint by arnoldpro
...latform
-diff shows your z changes.
the difference between old and diff gives the new offset.
attention: 2.78 minus -0.05 = 2.83!
thingiverse
free
Pergo Robo3D (and R1, Plus) Z Housing Lift by Pergo
...nt to allow.
example i set mine to _define z_max_pos 221
then flash your printer with the new value.
show me those make pictures!
thingiverse
free
3D/BL touch mount for Anet A6 by ithinuel
...ly 3 grid points on a linear bed levelling.
i am printing on a borosilicate glass bed, i don't know if more point are needed.
thingiverse
free
CR-10 / Ender Hotend stock fan shroud with ezabl mount by keithrea89
...there can be some inconsistencies. for example i print with a layer height of 0.08 mm but i set my first layer height to 0.2 mm.
thingiverse
free

Pergo Heat Chamber for stock Robo3d by doctorjay
... bed. you would use these if you haven't done his y-axis mod.
as with the original, print them with supports at 100% infill.
Pergo
thingiverse
free

Pergo Stylis by Pergo
...pergo stylis by pergo
thingiverse
nothing more than a pergo stylis
thingiverse
free

Pergo Med Jars by Pergo
...pergo med jars by pergo
thingiverse
these are great for travel. sealed containers for meds.
thingiverse
free
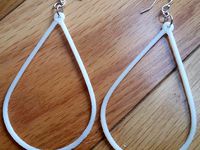
Pergo Plunge Earrings by Pergo
...pergo plunge earrings by pergo
thingiverse
just a simple earring design i made for the wife.
thingiverse
free
Pergo Snuggle Path Earring by Pergo
...pergo snuggle path earring by pergo
thingiverse
just another earing
thingiverse
free

Pergo B-Mine Earring by Pergo
...pergo b-mine earring by pergo
thingiverse
a little valentines day earring
thingiverse
free
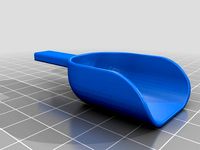
Pergo Mini Scoop by Pergo
..., you need a scoop for that.. well when you can, you make even the silliest of items. ta dah.. i present pergo's mini scooper
thingiverse
free
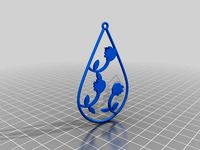
Pergo Flower Plunge Earring by Pergo
...pergo flower plunge earring by pergo
thingiverse
earring i call it the "flower plunge"
thingiverse
free

Pergo Night Light Shade by Pergo
...pergo night light shade by pergo
thingiverse
print with .4mm nozzle
no supports
no infill (tee hee)
thingiverse
free
Pergo CoverTopNoTextSolderedDisplay by Pergo
... and can't be removed.
do not print the "base" piece this replaces the "top" and "base" pieces.
thingiverse
free

Pergo Cel Tilter by Pergo
...r by pergo
thingiverse
my pole holder was popular where the wife works, but they don't use the pole with it. so i made this.
Robo3D
turbosquid
$2

Robo3D Feet
... available on turbo squid, the world's leading provider of digital 3d models for visualization, films, television, and games.
thingiverse
free

Robo3d Filament Guide by sjreggel
...robo3d filament guide by sjreggel
thingiverse
robo3d filament guide, to be used with the default robo3d spool holder
thingiverse
free
Robo3D USB Support by GipsyEureka
...robo3d usb support by gipsyeureka
thingiverse
robo3d usb support.
thingiverse
free
Robo3D Camera Mount by robro
...robo3d camera mount by robro
thingiverse
mount for a logitech c270 webcamto a robo3d printer
thingiverse
free
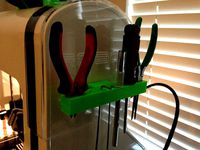
Robo3D Tool Holder by huntergrayson
...robo3d tool holder by huntergrayson
thingiverse
an out of the way place for your tools on the robo3d printer
thingiverse
free
Robo3D Top Mount by ThorMJ
...o the robo3d.
added a version with longer posts so it clears the robo3d handle from the http://www.thingiverse.com/thing:234939
thingiverse
free

Screws' holder Robo3D by GalloEnricoDesign
...screws' holder robo3d by galloenricodesign
thingiverse
a easy support used as holder for screws' extruder
for robo3d.
thingiverse
free
ROBO3D Spool Cap by portdog77
...robo3d spool cap by portdog77
thingiverse
this is a cap i made for my robo3d to hold the filliment next to the machine.
thingiverse
free

ROBO3D OILER HOLDER by Prefab
...robo3d oiler holder by prefab
thingiverse
holds your robo3d oilers so you can always find them
thingiverse
free

robo3d feet simple version by Windpower
...robo3d feet simple version by windpower
thingiverse
robo3d feet remember to print 4.
Marlin
3d_export
$35

Marlin
...s : zbrush 3ds max ztool obj fbx dae 3ds stl properties : 8*14*6 production time : 15 hours 52 gram models are drawn with zbrush.
3ddd
$1

Faro Marlin pendant
...mpara colgante blancohttp://www.faro.es/es/productos/marlin-lampara-colgante-blanco/
polyrate: 14107
в архиве fbx+obj
3ddd
$1

Faro Marlin bra
...
marlin black wall lamphttp://www.faro.es/en/productos/marlin-lampara-aplique-negro/
polyrate: 15491
в архиве fbx+obj
turbosquid
$19

Blue marlin
...e 3d model blue marlin for download as max, obj, fbx, and dae on turbosquid: 3d models for games, architecture, videos. (1341037)
3d_export
$60

Marlin Blue 3D Model
...marlin blue 3d model
3dexport
fish sea 3ds marlin mental ray textured animals
marlin blue 3d model ojoalperro 57644 3dexport
3ddd
free

Brass Marlin
... винтаж , марлин
статуэтка марлина из латуни. винтаж.
3d_export
$60

martin p5m marlin
...d states navy performing naval patrols. it also served with the united states coast guard and the french navy. 285 were produced.
humster3d
$15

AMC Marlin 1965 Blueprint
...65 blueprint 3d model in the format you need. all our 3d models was created on real car base and maximally close to the original.
humster3d
$75

3D model of AMC Marlin 1965
...y a detailed 3d model of amc marlin 1965 in various file formats. all our 3d models were created maximally close to the original.
turbosquid
$20

Cartoon fish - Xiphias gladius - marlin
...phias gladius - marlin for download as max, 3ds, fbx, and obj on turbosquid: 3d models for games, architecture, videos. (1673408)
R1
turbosquid
$10
R1
... available on turbo squid, the world's leading provider of digital 3d models for visualization, films, television, and games.
turbosquid
$10

R1
... available on turbo squid, the world's leading provider of digital 3d models for visualization, films, television, and games.
turbosquid
$15

chair r1
...urbosquid
royalty free 3d model chair r1 for download as max on turbosquid: 3d models for games, architecture, videos. (1282574)
3ddd
free
r1
...r1
3ddd
кольцо , ювелирное украшение
кольцо, сделано в свободное от работы время )
3d_ocean
$5

R1 rim
... tire tuner tuning tyre vehicle wheel
a r1 rim modeled to specs. for more car-related objects, please do visit my profile. enjoy!
turbosquid
$5

R1 Rocket
... available on turbo squid, the world's leading provider of digital 3d models for visualization, films, television, and games.
3d_export
$59

praga r1
...s for the minimum operational crew, the praga r1 offers the ultimate race-winning motorsport technology in an affordable package.
turbosquid
$80
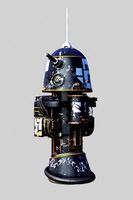
R1 Astromech Droid
... free 3d model r1 astromech droid for download as obj and lxo on turbosquid: 3d models for games, architecture, videos. (1180592)
turbosquid
$49

Yamaha R1 2006
... available on turbo squid, the world's leading provider of digital 3d models for visualization, films, television, and games.
turbosquid
free
GHAANON R1.blend
... available on turbo squid, the world's leading provider of digital 3d models for visualization, films, television, and games.
Bug
turbosquid
$24

bugs / kyi bugs / insect
...royalty free 3d model bugs/kyi bugs/insect for download as ma on turbosquid: 3d models for games, architecture, videos. (1318597)
design_connected
$18

Bug
...bug
designconnected
poliform bug armchairs computer generated 3d model. designed by paola navone.
3ddd
$1

Poliform Bug
...poliform bug
3ddd
poliform , bug
кресло bug
производитель poliform s.p.a.
turbosquid
$3

Bug
...bug
turbosquid
royalty free 3d model bug for download as fbx on turbosquid: 3d models for games, architecture, videos. (1174243)
3ddd
$1
Poliform Bug
...poliform bug
3ddd
poliform , bug
enjoy!
turbosquid
$29

bugs
...lty free 3d model bugs for download as 3ds, obj, c4d, and fbx on turbosquid: 3d models for games, architecture, videos. (1443206)
turbosquid
$3

BUG
...alty free 3d model bug for download as max, 3ds, fbx, and stl on turbosquid: 3d models for games, architecture, videos. (1676677)
3d_ocean
$5

Beetle Bug
...beetle bug
3docean
beetle bug insect
a simple model of a beetle bug. - preview images rendered with mental ray -
turbosquid
$79

Bug
... available on turbo squid, the world's leading provider of digital 3d models for visualization, films, television, and games.
turbosquid
$60
THE BUG
... available on turbo squid, the world's leading provider of digital 3d models for visualization, films, television, and games.
Manual
turbosquid
$10
manual plow
...e 3d model manual plow for download as max, max, obj, and fbx on turbosquid: 3d models for games, architecture, videos. (1565106)
turbosquid
$40

Candelabrum manuale
... available on turbo squid, the world's leading provider of digital 3d models for visualization, films, television, and games.
turbosquid
$10
manual jack
...anual jack for download as blend, 3ds, dae, fbx, obj, and stl on turbosquid: 3d models for games, architecture, videos. (1674034)
3ddd
$1

manual pull station
...manual pull station
3ddd
safety first
safety first release unit manual pull station
to be used with commercial exhaust hood
3d_export
$20

Manual Drill 3D Model
...nd-cranked cranked mechanical gear wood hole industrial tool workshop woodwork tools
manual drill 3d model firdz3d 84144 3dexport
turbosquid
$1

Manual Coffee Grinder
... 3d model manual coffee grinder for download as blend and fbx on turbosquid: 3d models for games, architecture, videos. (1654673)
turbosquid
$5

Manual Body Massager
...odel manual body massager for download as 3ds, blend, and dae on turbosquid: 3d models for games, architecture, videos. (1358457)
3d_export
$20

manual coffee grinder
...grinder. the 3d model was created on real base. comes with a uv-map and high resolution baked textures. maya 2019. arnold render
3d_export
$29
Manual watches 3D Model
...manual watches 3d model
3dexport
watch accessory
manual watches 3d model reno 89186 3dexport
turbosquid
$15

Manual Hand Drill
... available on turbo squid, the world's leading provider of digital 3d models for visualization, films, television, and games.
Leveling
design_connected
$11

Levels
...levels
designconnected
one nordic levels computer generated 3d model. designed by form us with love.
design_connected
$7

Level
...level
designconnected
zanotta level shelves and storage computer generated 3d model. designed by arik levy.
turbosquid
$29
level
...ty free 3d model level for download as 3ds, obj, c4d, and fbx on turbosquid: 3d models for games, architecture, videos. (1272856)
turbosquid
$1
level
... available on turbo squid, the world's leading provider of digital 3d models for visualization, films, television, and games.
3d_export
$5

Mario level
...mario level
3dexport
mario level low quality for fun videos
3ddd
$1

LEVELS OF DISCOVERY
...етская мебель "levels of discovery". rab10003 princess mini rocker
кресло-качалка (мини) "принцесса навсегда"
3d_export
$19

level design
...level design
3dexport
you can use this design (level design) in your own game.
turbosquid
$60
Desert level
...squid
royalty free 3d model desert level for download as fbx on turbosquid: 3d models for games, architecture, videos. (1208131)
turbosquid
$15
Transit Level
...quid
royalty free 3d model transit level for download as max on turbosquid: 3d models for games, architecture, videos. (1158112)
turbosquid
$14

Districts Level
...id
royalty free 3d model districts level for download as max on turbosquid: 3d models for games, architecture, videos. (1408410)
Fix
3ddd
$1

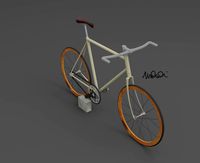
Fixed Gear Велосипед
... fixed , bicycle
классический шоссейный велосипед, переделанный под fixed gear.
design_connected
$16

Idée fixe
...idée fixe
designconnected
jacco maris idée fixe computer generated 3d model. designed by maris , jacco.
3d_export
$5
fixing scale knob
...fixing scale knob
3dexport
fixing scale knob
turbosquid
$10

Mini Fix
...bosquid
royalty free 3d model mini fix for download as sldas on turbosquid: 3d models for games, architecture, videos. (1581558)
turbosquid
$49
fixed bike
... available on turbo squid, the world's leading provider of digital 3d models for visualization, films, television, and games.
turbosquid
$39

Fixed Bicycle
... available on turbo squid, the world's leading provider of digital 3d models for visualization, films, television, and games.
3ddd
$1
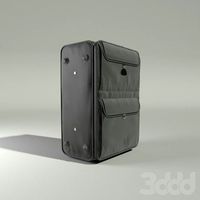
Bag Fixed
...bag fixed
3ddd
чемодан
a bag model by me
3ddd
$1
Кресло BEAU FIXE
...fixe
3ddd
beau fixe , ligne roset
кресло beau fixe:
w 80 cm d 106 cm h 97 cm sh 43,5 cm
turbosquid
free

Crowbar "Fixed"
... available on turbo squid, the world's leading provider of digital 3d models for visualization, films, television, and games.
3ddd
$1
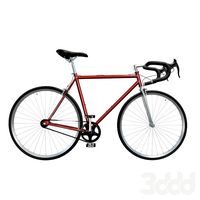
Fixed gear
...fixed gear
3ddd
велосипед
шоссейный велосипед с фиксированной передачей
Bed
3ddd
$1

bed
...bed
3ddd
bed , постельное белье
bed
3ddd
$1

bed
...bed
3ddd
bed , постельное белье
bed
3ddd
$1

bed
...bed
3ddd
bed , постельное белье
bed
3ddd
$1

bed
...bed
3ddd
bed , постельное белье
bed
3ddd
$1

bed
...bed
3ddd
bed , постельное белье
bed
3ddd
$1

bed
...bed
3ddd
bed , постельное белье
bed
3ddd
free

bed
...bed
3ddd
bed , постельное белье
bed
3ddd
free

bed
...bed
3ddd
bed , постельное белье
bed
3ddd
$1

Bed
...bed
3ddd
bed , постельное белье , постель
bed
3d_export
$7

bed adairs bed
...rs bed
3dexport
bed adairs bed in modern style. if you want a smoother surface, please turn on turbosmooth in the modifier list.
1
turbosquid
$69

armchairs(1)(1)
... available on turbo squid, the world's leading provider of digital 3d models for visualization, films, television, and games.
turbosquid
$15

ring 1+1
... available on turbo squid, the world's leading provider of digital 3d models for visualization, films, television, and games.
turbosquid
$10

chair(1)(1)
... available on turbo squid, the world's leading provider of digital 3d models for visualization, films, television, and games.
turbosquid
$8

Chair(1)(1)
... available on turbo squid, the world's leading provider of digital 3d models for visualization, films, television, and games.
turbosquid
$2

RING 1(1)
... available on turbo squid, the world's leading provider of digital 3d models for visualization, films, television, and games.
turbosquid
$1

house 1(1)
... available on turbo squid, the world's leading provider of digital 3d models for visualization, films, television, and games.
turbosquid
$1

Table 1(1)
... available on turbo squid, the world's leading provider of digital 3d models for visualization, films, television, and games.
turbosquid
$59

Formula 1(1)
...lty free 3d model formula 1 for download as max, fbx, and obj on turbosquid: 3d models for games, architecture, videos. (1567088)
design_connected
$11

No 1
...no 1
designconnected
sibast no 1 computer generated 3d model. designed by sibast, helge.
turbosquid
$2

desert house(1)(1)
...3d model desert house(1)(1) for download as 3ds, max, and obj on turbosquid: 3d models for games, architecture, videos. (1055095)