Thingiverse

Pergo Robo3D Heat Chamber by Pergo
by Thingiverse
Last crawled date: 3 years ago
Update Feb 10, 2017
I remixed a version 2 see it here http://www.thingiverse.com/thing:2100690
Read the info here before looking at the new version I reference the ideas here.
Update Nov 15, 16
Thanks goes to doctorjay for remixing the project so that it fits the stock versions of the Robo3D. Here's the link http://www.thingiverse.com/thing:1892658
Update: 03 Feb 16
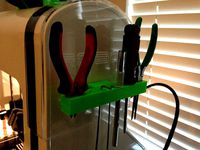
All up and running, turned out better than I expected! Fit is great and plastic stays in place extremely well. Note that I screwed the back side closed so the back does not open. I had those magnets left over from my 330mm bed upgrade and I dual purpose them for weights to hold the front plastic down, and it clings to the the two screws in the midway position for a "held open" state while working with the hot end. The pic with my finger in it is the "held open" shot. Start printing, it's now a proven project!!! Note: on drilling any plastic retaining holes, drill slow to avoid heat and you get the best holes. Extruded plastic balls up when it is heated, drills well when cool. When cutting the new threads, turn in....turn out,, repeat going farther each time. It avoids plastic cracking, splitting. recommended color is grey as it will mesh well with the color of the plastic. I used orange so that final pictures will be easy to see. Yes I will be dremel cutting off the screws later.
Update: 29 Jan 16
This worked well for me. But so good that the PLA pieces I used for my cable chain slightly melted and I had a mess created by a few uncoupled connectors. Glad I only had 10 PLA pieces and the rest were ABS. I'm reprinting chain links... argh. But hey the ABS piece I was printing at the time was WARP-Free!! and looking fantastic. I've removed "this is a work in progress" as I'm happy with the results thus far. It's time for the remixes or requests for change if you have ideas.
Update:
Printing with a .8mm nozzle rather than a .4mm does make the support removal a pain. Other wise a printing speed of 27 worked well. Printing faster causes rounding of the corners and makes fit bad.
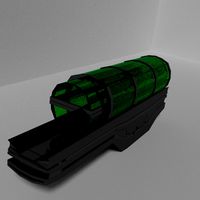
I loved Mike's Acrylic enclosure but I wanted my extended bed more. That left me with no options for a heated chamber until now. With $6.76 in extruded plastic, Some clear plastic sheeting, you too can have the heated chamber you want even if you used my http://www.thingiverse.com/thing:1154745 "True 330mm Y rails upgrade". I'm using a 6mil clear plastic that I bought 100' of from Lowes (chain of US hardware stores) to put my hot tub in my basement.
People with stock beds:
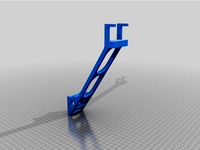
If you have the standard stock bed (what's stopping you from upgrading????) you can still use this, you just need to shrink the length of the Extenders to shorten. I was making sure this works with stock the entire design time. If some one wants to help, I just need the full distance the fence should be to support the fully extended bed.
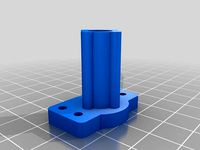
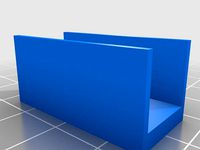
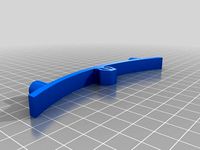
Instead of printing the 2 supports, you can cut a piece of wood (or dowel) and counter drill a pilot hole a tad smaller than 3mm to connect the sides together.
You MUST print solid (100% infill) to get the stability needed AND USE SUPPORTS for all prints except the Supports.
Printing with a .8mm nozzle I had issues with the supports as they were kinda hard to remove.
Comments, Comments..I want to hear what you think about this.
I remixed a version 2 see it here http://www.thingiverse.com/thing:2100690
Read the info here before looking at the new version I reference the ideas here.
Update Nov 15, 16
Thanks goes to doctorjay for remixing the project so that it fits the stock versions of the Robo3D. Here's the link http://www.thingiverse.com/thing:1892658
Update: 03 Feb 16
All up and running, turned out better than I expected! Fit is great and plastic stays in place extremely well. Note that I screwed the back side closed so the back does not open. I had those magnets left over from my 330mm bed upgrade and I dual purpose them for weights to hold the front plastic down, and it clings to the the two screws in the midway position for a "held open" state while working with the hot end. The pic with my finger in it is the "held open" shot. Start printing, it's now a proven project!!! Note: on drilling any plastic retaining holes, drill slow to avoid heat and you get the best holes. Extruded plastic balls up when it is heated, drills well when cool. When cutting the new threads, turn in....turn out,, repeat going farther each time. It avoids plastic cracking, splitting. recommended color is grey as it will mesh well with the color of the plastic. I used orange so that final pictures will be easy to see. Yes I will be dremel cutting off the screws later.
Update: 29 Jan 16
This worked well for me. But so good that the PLA pieces I used for my cable chain slightly melted and I had a mess created by a few uncoupled connectors. Glad I only had 10 PLA pieces and the rest were ABS. I'm reprinting chain links... argh. But hey the ABS piece I was printing at the time was WARP-Free!! and looking fantastic. I've removed "this is a work in progress" as I'm happy with the results thus far. It's time for the remixes or requests for change if you have ideas.
Update:
Printing with a .8mm nozzle rather than a .4mm does make the support removal a pain. Other wise a printing speed of 27 worked well. Printing faster causes rounding of the corners and makes fit bad.
I loved Mike's Acrylic enclosure but I wanted my extended bed more. That left me with no options for a heated chamber until now. With $6.76 in extruded plastic, Some clear plastic sheeting, you too can have the heated chamber you want even if you used my http://www.thingiverse.com/thing:1154745 "True 330mm Y rails upgrade". I'm using a 6mil clear plastic that I bought 100' of from Lowes (chain of US hardware stores) to put my hot tub in my basement.
People with stock beds:
If you have the standard stock bed (what's stopping you from upgrading????) you can still use this, you just need to shrink the length of the Extenders to shorten. I was making sure this works with stock the entire design time. If some one wants to help, I just need the full distance the fence should be to support the fully extended bed.
Instead of printing the 2 supports, you can cut a piece of wood (or dowel) and counter drill a pilot hole a tad smaller than 3mm to connect the sides together.
You MUST print solid (100% infill) to get the stability needed AND USE SUPPORTS for all prints except the Supports.
Printing with a .8mm nozzle I had issues with the supports as they were kinda hard to remove.
Comments, Comments..I want to hear what you think about this.
Similar models
thingiverse
free

Pergo Heat Chamber for stock Robo3d by doctorjay
... bed. you would use these if you haven't done his y-axis mod.
as with the original, print them with supports at 100% infill.
thingiverse
free

Pergo Generic Cel Phone Camera Holder for Robo3D 330mm Ends by Pergo
...pgrade"http://www.thingiverse.com/thing:1154745
this is a generic camera holder for this mod
needs to be printed 100% infill
thingiverse
free

Pergo's ROBO3D Bed Extension - Flat Bottom for 10 1/16" Glass Bed by Keshyden
...om the original (about 10 1/16" wide). this change fits cleanly.
fairly specific to my setup, but may be helpful to someone.
thingiverse
free

Pergo Heat Chamber for stock Robo3d V2 by 2_Brothers_Designs
... doctorjay's file and noticed in the slicer they wanted to split each part. these are just repaired parts to make them solid.
thingiverse
free

Pergo's DCS-930L WiFi Cam/IP Cam Mounting Bracket for Robo3D by Pergo
... best as a slow print.
included the original source file. please when add your "things" include the source too!
enjoy..
thingiverse
free

Robo3D Y-axis smooth rod upgrade for stock bed REMIX by tonycstech
...! also !!!
bedmount y motor on the left.stl is for those who want to relocate the y motor to the left. read instructions on that.
thingiverse
free

Pergo Full Graphics Controller High Lift Single Mount by Pergo
...ood and bad welcomed :)
i was asked about my bed, it's my 330mm upgrade located here.http://www.thingiverse.com/thing:1154745
thingiverse
free

Pergo Bed Stiffeners by Pergo
... block sits. if you upgraded to a 300 mm length bed heater, you had better use abs or nylon which has a higher glass temperature.
thingiverse
free
Robo3D Z Stabiliser by galaxius
...y stock stabilisers. please comment and add photos if you use these.
printed in pla with 4 perimeters. i think my infill was 95%.
thingiverse
free

Pergo Robo3D Heat Chamber Ver 2 by Pergo
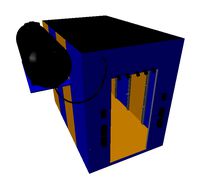
...pplying the plastic, do the final cuts after you screw it on. in my pictures, the blue is version 2, and the orange is version 1.
Pergo
thingiverse
free

Pergo Stylis by Pergo
...pergo stylis by pergo
thingiverse
nothing more than a pergo stylis
thingiverse
free
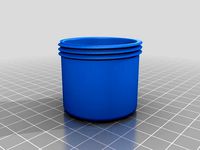
Pergo Med Jars by Pergo
...pergo med jars by pergo
thingiverse
these are great for travel. sealed containers for meds.
thingiverse
free
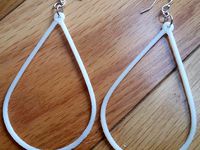
Pergo Plunge Earrings by Pergo
...pergo plunge earrings by pergo
thingiverse
just a simple earring design i made for the wife.
thingiverse
free

Pergo Snuggle Path Earring by Pergo
...pergo snuggle path earring by pergo
thingiverse
just another earing
thingiverse
free

Pergo B-Mine Earring by Pergo
...pergo b-mine earring by pergo
thingiverse
a little valentines day earring
thingiverse
free
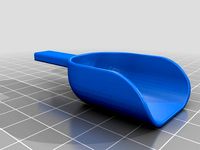
Pergo Mini Scoop by Pergo
..., you need a scoop for that.. well when you can, you make even the silliest of items. ta dah.. i present pergo's mini scooper
thingiverse
free
Pergo Flower Plunge Earring by Pergo
...pergo flower plunge earring by pergo
thingiverse
earring i call it the "flower plunge"
thingiverse
free

Pergo Night Light Shade by Pergo
...pergo night light shade by pergo
thingiverse
print with .4mm nozzle
no supports
no infill (tee hee)
thingiverse
free
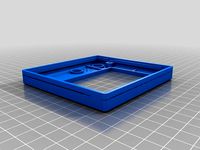
Pergo CoverTopNoTextSolderedDisplay by Pergo
... and can't be removed.
do not print the "base" piece this replaces the "top" and "base" pieces.
thingiverse
free

Pergo Cel Tilter by Pergo
...r by pergo
thingiverse
my pole holder was popular where the wife works, but they don't use the pole with it. so i made this.
Robo3D
turbosquid
$2

Robo3D Feet
... available on turbo squid, the world's leading provider of digital 3d models for visualization, films, television, and games.
thingiverse
free

Robo3d Filament Guide by sjreggel
...robo3d filament guide by sjreggel
thingiverse
robo3d filament guide, to be used with the default robo3d spool holder
thingiverse
free
Robo3D USB Support by GipsyEureka
...robo3d usb support by gipsyeureka
thingiverse
robo3d usb support.
thingiverse
free
Robo3D Camera Mount by robro
...robo3d camera mount by robro
thingiverse
mount for a logitech c270 webcamto a robo3d printer
thingiverse
free
Robo3D Tool Holder by huntergrayson
...robo3d tool holder by huntergrayson
thingiverse
an out of the way place for your tools on the robo3d printer
thingiverse
free
Robo3D Top Mount by ThorMJ
...o the robo3d.
added a version with longer posts so it clears the robo3d handle from the http://www.thingiverse.com/thing:234939
thingiverse
free

Screws' holder Robo3D by GalloEnricoDesign
...screws' holder robo3d by galloenricodesign
thingiverse
a easy support used as holder for screws' extruder
for robo3d.
thingiverse
free
ROBO3D Spool Cap by portdog77
...robo3d spool cap by portdog77
thingiverse
this is a cap i made for my robo3d to hold the filliment next to the machine.
thingiverse
free

ROBO3D OILER HOLDER by Prefab
...robo3d oiler holder by prefab
thingiverse
holds your robo3d oilers so you can always find them
thingiverse
free

robo3d feet simple version by Windpower
...robo3d feet simple version by windpower
thingiverse
robo3d feet remember to print 4.
Chamber
turbosquid
$15
Chamber
...rbosquid
royalty free 3d model chamber for download as blend on turbosquid: 3d models for games, architecture, videos. (1240986)
3d_export
$6

Chamber
...chamber
3dexport
squish dumpling avatars of the valorant agents.
turbosquid
$53

Alveolus Chamber
... available on turbo squid, the world's leading provider of digital 3d models for visualization, films, television, and games.
turbosquid
free

Underground chamber
... available on turbo squid, the world's leading provider of digital 3d models for visualization, films, television, and games.
turbosquid
free
Vacuum chamber
... available on turbo squid, the world's leading provider of digital 3d models for visualization, films, television, and games.
turbosquid
$10
disinfection chamber
...on chamber for download as blend, 3ds, dae, fbx, obj, and stl on turbosquid: 3d models for games, architecture, videos. (1671962)
3d_export
$25
Hypersleep Chamber
..., the users are usually clad in either sleepwear or underwear to prevent clothes and/or armor to become frozen to the users body.
turbosquid
$2

Xenomorph Incubation Chamber
...y free 3d model xenomorph incubation chamber for download as on turbosquid: 3d models for games, architecture, videos. (1705895)
3d_export
$7

chambers bar stools
...chambers bar stools
3dexport
name:
turbosquid
$59

Chamber Pendant Light
...yalty free 3d model chamber pendant light for download as max on turbosquid: 3d models for games, architecture, videos. (1291559)
Heat
3d_export
$5
heat
...heat
3dexport
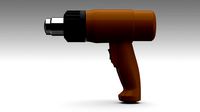
heat tool
3ddd
$1
electric heating
...electric heating
3ddd
обогреватель
electric heating
3d_export
$6
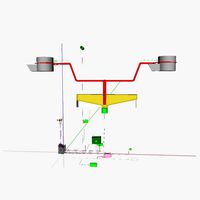
The heating module
...any questions also you can email to me. designed with solidworks 2017, render with keyshot **************************************
turbosquid
free
Heating Rod
...rod
turbosquid
free 3d model heating rod for download as obj on turbosquid: 3d models for games, architecture, videos. (1482690)
turbosquid
$2
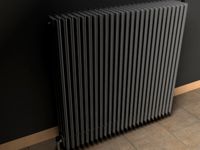
Heating Radiator
...
royalty free 3d model heating radiator for download as blend on turbosquid: 3d models for games, architecture, videos. (1561908)
3d_export
$35
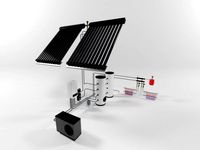
heating instalation with heat pump and solar system
...el , please contact me. before buying a model, you can try to download one of my free models and testing. thank you for watching.
turbosquid
$29
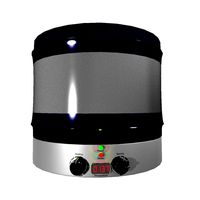
Heating Mantle
... available on turbo squid, the world's leading provider of digital 3d models for visualization, films, television, and games.
turbosquid
$25
Heating Radiator
... available on turbo squid, the world's leading provider of digital 3d models for visualization, films, television, and games.
turbosquid
$20
AT_airship_control_stand_(heated)
... available on turbo squid, the world's leading provider of digital 3d models for visualization, films, television, and games.
turbosquid
$20
AT_airship_(heated)
... available on turbo squid, the world's leading provider of digital 3d models for visualization, films, television, and games.