Thingiverse
Pergo Bed Stiffeners by Pergo
by Thingiverse
Last crawled date: 3 years ago
This may work on printers other than a Robo3D/R1/R1 Plus
The 8mm rod(s) are 24 mm shorter than your glass length.
** Warning remember your working with glass! be sensible in the amount of correction you try to make. If you apply TOO much shim you could break the glass. I some cases the glass is between $30-$50.00
When I created my 330mm Y Rails upgrade for the Robo 3Dhttp://www.thingiverse.com/thing:1154745
I learned that my bed glass was .02 mm lower at a certain point that at other points.
When your auto leveling a larger printable space it's expected that you will find larger variations that when using a smaller area. I personally have my auto level routine in the firmware reaching out to points at 5 mm and 305 mm when it auto levels the Y area (this is a firmware config change).
Ok now for the fix.
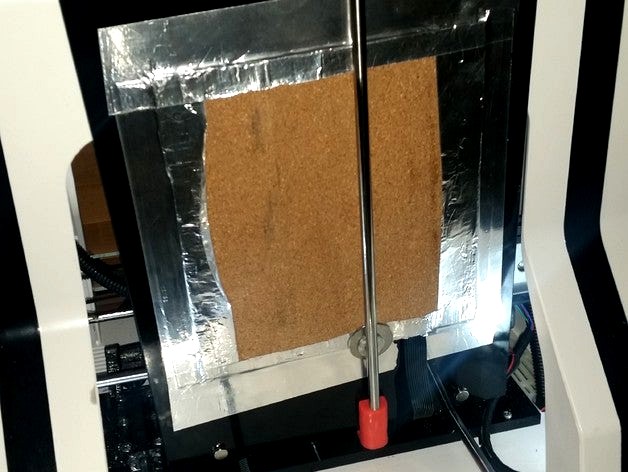
If you did the 330mm Y rail upgrade, you will have the old standard length rails. I created the (printed in red in the pictures) rod holders to use these standard length left over rods for this design.
Print 2 of the blocks and place one of the left over 8mm rods in the holes and slide the slots onto the glass. This gives you a support bar which you can lift your glass in a location that has a low spot. I used some washers I had laying around to accomplish this shim action.
If you don't get the right lift to get you a perfectly level bead area, print 2 more blocks and use the 2nd 8mm bar you have.
I personally printed mine is PLA because the heated area does not extend into the area where the block sits. IF you upgraded to a 300 mm length bed heater, you had better use ABS or nylon which has a higher glass temperature.
The 8mm rod(s) are 24 mm shorter than your glass length.
** Warning remember your working with glass! be sensible in the amount of correction you try to make. If you apply TOO much shim you could break the glass. I some cases the glass is between $30-$50.00
When I created my 330mm Y Rails upgrade for the Robo 3Dhttp://www.thingiverse.com/thing:1154745
I learned that my bed glass was .02 mm lower at a certain point that at other points.
When your auto leveling a larger printable space it's expected that you will find larger variations that when using a smaller area. I personally have my auto level routine in the firmware reaching out to points at 5 mm and 305 mm when it auto levels the Y area (this is a firmware config change).
Ok now for the fix.
If you did the 330mm Y rail upgrade, you will have the old standard length rails. I created the (printed in red in the pictures) rod holders to use these standard length left over rods for this design.
Print 2 of the blocks and place one of the left over 8mm rods in the holes and slide the slots onto the glass. This gives you a support bar which you can lift your glass in a location that has a low spot. I used some washers I had laying around to accomplish this shim action.
If you don't get the right lift to get you a perfectly level bead area, print 2 more blocks and use the 2nd 8mm bar you have.
I personally printed mine is PLA because the heated area does not extend into the area where the block sits. IF you upgraded to a 300 mm length bed heater, you had better use ABS or nylon which has a higher glass temperature.
Similar models
thingiverse
free

Pergo Generic Cel Phone Camera Holder for Robo3D 330mm Ends by Pergo
...pgrade"http://www.thingiverse.com/thing:1154745
this is a generic camera holder for this mod
needs to be printed 100% infill
thingiverse
free

Pergo Robo3D R1 (and plus) true 330mm Y rails upgrade by Pergo
...will be printing with nozzle jammed against the bed.
here's a possibility for a heated bedhttp://www.amazon.com/dp/b011u7ayx4
thingiverse
free

Prusa i3 trapezoid thread Z-axis mod by pansono
... nut and the leveling screw.
i completely got rid of my z-wobbling problem this way.
keep in mind to adobt your printer firmware.
thingiverse
free

Ender 3 Bed Leveling Gcode (3 point y carriage upgrade)
...s scary enough as it is.
https://gulfcoast-robotics.com/products/modular-y-carriage-plate-upgrade-creality-ender-3-point-leveling
thingiverse
free

Printrbot Simple X upgrade. by iamjonlawrence
... on the ends of the rods and not bind the bed leveling screws.
design inspired by ahaer http://www.thingiverse.com/thing:215294
thingiverse
free

Robo3D Y-axis smooth rod upgrade for stock bed REMIX by tonycstech
...! also !!!
bedmount y motor on the left.stl is for those who want to relocate the y motor to the left. read instructions on that.
thingiverse
free

Pergo VER 2 Robo3D R1 (and plus) true 370 mm Y rails upgrade by Pergo
... too good but that's a 370 mm print. my heat only extends to the 355 mm mark. but i can stretch it to 360 with short objects.
thingiverse
free

Bed Levelling Doohickey by pcsentinel
...king at an 8mm threaded rod, so i designed this clip that you just put on the top of you z axis and you can see the rod turning.
thingiverse
free

Shim for Glass bed Qidi Tech with 10mm rods, customizable thickness by Robert256
...kness can be adjusted by just stretching the model in the z-direction, so you can use it with any glass plate thickness you want.
thingiverse
free

Mk3/S Bear Y linear rail upgrade
...-axis-upgrade-kit-for-prusa-mk3
i hope you'll enjoy it and if you like it, don't hesitate to throw a tip to support me :d
Pergo
thingiverse
free

Pergo Stylis by Pergo
...pergo stylis by pergo
thingiverse
nothing more than a pergo stylis
thingiverse
free

Pergo Med Jars by Pergo
...pergo med jars by pergo
thingiverse
these are great for travel. sealed containers for meds.
thingiverse
free
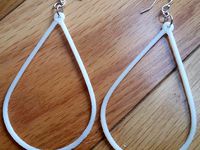
Pergo Plunge Earrings by Pergo
...pergo plunge earrings by pergo
thingiverse
just a simple earring design i made for the wife.
thingiverse
free

Pergo Snuggle Path Earring by Pergo
...pergo snuggle path earring by pergo
thingiverse
just another earing
thingiverse
free

Pergo B-Mine Earring by Pergo
...pergo b-mine earring by pergo
thingiverse
a little valentines day earring
thingiverse
free
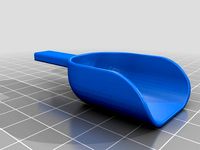
Pergo Mini Scoop by Pergo
..., you need a scoop for that.. well when you can, you make even the silliest of items. ta dah.. i present pergo's mini scooper
thingiverse
free

Pergo Flower Plunge Earring by Pergo
...pergo flower plunge earring by pergo
thingiverse
earring i call it the "flower plunge"
thingiverse
free

Pergo Night Light Shade by Pergo
...pergo night light shade by pergo
thingiverse
print with .4mm nozzle
no supports
no infill (tee hee)
thingiverse
free
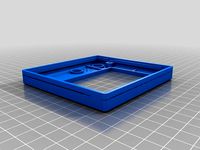
Pergo CoverTopNoTextSolderedDisplay by Pergo
... and can't be removed.
do not print the "base" piece this replaces the "top" and "base" pieces.
thingiverse
free

Pergo Cel Tilter by Pergo
...r by pergo
thingiverse
my pole holder was popular where the wife works, but they don't use the pole with it. so i made this.
Stiffeners
turbosquid
$1

Stiffener Bracket
...
royalty free 3d model stiffener bracket for download as ige on turbosquid: 3d models for games, architecture, videos. (1170606)
3d_export
$5

visera para pantalla protectora covid19
..., office elastics ...<br>the use of the visor for commercial purposes is not allowed. for the sale of the visor contact us.
thingiverse
free

E-revo Stiffener by Roomik
...e-revo stiffener by roomik
thingiverse
simple stiffener rear part for e-revo 1/10
thingiverse
free

BZ3lexan front posts stiffener
...bz3lexan front posts stiffener
thingiverse
hello,this is a front body post stiffener for lexan mounts on atomic bz3.
3dfindit
free

DOOR STIFFENER PROFILE
...door stiffener profile
3dfind.it
catalog: a lex products
thingiverse
free

Frame stiffener by Ved0o
...ese to stiffen my tevo tarantula frame.
it fits aluminium tube with inside diameter of 5mm and the hole is made for the 4mm bolt.
thingiverse
free

Stiffened fan bracket Mendel90 by Bazooka_Gum
...stiffened fan bracket mendel90 by bazooka_gum
thingiverse
stiffened fan bracket mendel90
thingiverse
free

corner stiffening by motsch
...and this reputation is certainly not unfounded. these corner stiffeners help immensely and also look...
thingiverse
free

Parrot Swing Wing Stiffener by ilikeryebread
...parrot swing wing stiffener by ilikeryebread
thingiverse
custom wing stiffener for parrot swing
wip
thingiverse
free

Collar Stiffener by FitzZZ
...l or cleaner next door) misplace all the time...
freecad file included for customization.
this one is approx. 70x10x1 mm in size.
Bed
3ddd
$1

bed
...bed
3ddd
bed , постельное белье
bed
3ddd
$1

bed
...bed
3ddd
bed , постельное белье
bed
3ddd
$1

bed
...bed
3ddd
bed , постельное белье
bed
3ddd
$1

bed
...bed
3ddd
bed , постельное белье
bed
3ddd
$1

bed
...bed
3ddd
bed , постельное белье
bed
3ddd
$1

bed
...bed
3ddd
bed , постельное белье
bed
3ddd
free

bed
...bed
3ddd
bed , постельное белье
bed
3ddd
free

bed
...bed
3ddd
bed , постельное белье
bed
3ddd
$1

Bed
...bed
3ddd
bed , постельное белье , постель
bed
3d_export
$7

bed adairs bed
...rs bed
3dexport
bed adairs bed in modern style. if you want a smoother surface, please turn on turbosmooth in the modifier list.