Thingiverse

PE3D Ghettoblaster, Boombox, Bluetoothspeaker, Radio, Musik, DIY by peed6687
by Thingiverse
Last crawled date: 3 years, 1 month ago
Since I want to give my nephew something very special for Christmas, I thought he could use a "mini ghetto blaster".
Because there was nothing similar to Thinkiverse, I sat down and pieced myself together.
Meanwhile I have several versions of it here. You can just puzzling those who like you better.
Version 1 is with built-in battery pack 12V li-ion
Version 2 is for AA batteries.
Current status of the project is: waiting for ordered parts
Parts list for the PE3D mini ghettoblaster.
for printing:
Maincase 5-15% Infill / 0.2mm Layer - OK
Front 15% infill / 0.1 - 0.15mm layer + Support 5% - OK
Backcover 5% - 15% Infill / 0.2mm Layer OK
Backcover for Batterie Version 20% /0.2mm + Support 10% - OK
Grid 1-3 100% Infill / 0.1mm Layer + Support 15% - OK
Grid v2 100% Infill / 0.1mm Layer - OK
Handle.stl 50% infill / 0.2mm layer - OK
Handle Beltholder 100% Infill 0.1mm Layer - OK
VolKnob.stl 80-100% infill / 0.2mm layer - OK
Speaker broadband 2x 50mm 10W 4ohmhttps://goo.gl/PRKcwU
orhttps://goo.gl/PYiFfh
On / Off switch 10pcshttps://goo.gl/htsDiu
Battery + power supply or Batteryholderhttps://goo.gl/PhahMVhttps://goo.gl/UDsV4C
or u can use 3x 18650 Li-ion Batteries because the ready set in the Link are cheaper.
Amplifier 2x10W PAM8610 Stereo Class Dhttps://goo.gl/sdbuZX
Antenna 25.4cm 5 sectionshttps://goo.gl/kbzG8J
Led version 3mm 10pcshttps://goo.gl/Thpe7u
Led 3mm 100pcshttps://goo.gl/mv6Sn1
DC plug installation 5.5-2.1mm 5pcshttps://goo.gl/PXB7NU
MP3 / Bluetooth / USB Playerhttps://goo.gl/6EQAGG
orhttps://goo.gl/ZzjhQZ
additional is required:
-ca. 20cm 2x0,5mm cable for the speakers
acoustic wadding or similar to insulating the housing
Screws metric 8x M3x10-25mm + nuts and washers (for mounting the speakers)
-Screws Metric 5x M5x10-25mm for the lid
-Screws for plastic joint countersunk 2x approx 3x10 (for the player) holes must be pre-drilled!
Plastic Adhesive (Uhu Allplast)
Soldering iron and solder
Shrink tubing or insulation tape
The project is still under development.
Pressure and assembly, only on receipt of the parts.
Then come real photos.
Have fun while rebuilding and listening to music
If you want to give me a donation for this work, I would be very happy about it.
Changelog:
09-11-17 Frontplate new designed for better Print.
10-11-17 Frontplate testprint was ok, but not perfekt, Corner adapted to improve haptics.
10-11-17 Handle v3 Testprint was ok, but the part needs more infill. 15% to are to less -> 40%. Results much better.
12-11-17 Maincase Update, Holes für a Screw to Fix the Handle
13-11-17 Maincase Update, Bassreflextubes for little bit better Bassperformance
13-11-17 Added Maincase Battery version and matching rear panel and lid added.
14-11-17 Update Handle v 3, take holes for Screws, Update Maincase v2. Best Results are by 50% Infill
15-11-17 Grid v3 added
15-11-17 Cover for the Batteryversion addet Place for Switch Chargin or not, to make charging off if u use normal Batteries or Akkus & Update the Batterycover.
Similar models
thingiverse
free

Skimmer para piscina redonda by pedrobecerra
.................yes
-tornillo y tuerca.......:.0.1mm...100%...........4....................4..................4.................no
thingiverse
free

TRex Shower Head: Different Densities for Nozzle and Skull by BasmentShop
...etier host and octoprint.
i documented my slicing at the s3d forum:http://www.forum.simplify3d.com/viewtopic.php?f=8&t=2071
cg_trader
$3

Crocodile | 3D
...: 15% / outline overlap : 30~40%
additions raft : ok / brim : no / support : no reptile animal lizard nature creature crocodile
thingiverse
free

Lego DUPLO train small car, wagon by markosaurus
...pacer to be printed separately, it should keep the distance from car base.
update 1.7.2017 all parts redesigned, nipples adjusted
thingiverse
free

Wild Turkey Stencil by swerf
...wild turkey stencil by swerf
thingiverse
0.12 - 0.2mm layer ht should be ok
i used 100% infill
works great with spray paint
cg_trader
$3

Deer foldable | 3D
... outline overlap : 30%
additions raft : ok / brim : no / support : no deer christmas animal mammal nature games toys games toys
thingiverse
free

Elephant iPhone holder with speaker trunk by SubsonicHobby
... modified this elephant iphone holder from an existing design to enable amp speaker.
i printed with 15% infill and 0.2mm layer.
thingiverse
free

Child Figurine by ozgasl
...child figurine by ozgasl
thingiverse
3d scanned. 0.2mm layer was ok but if you have time, you can try 0.1mm
thingiverse
free

Simple Metal Handle with lead screw hole and filament guide by Rippledabs
... by rippledabs
thingiverse
make it strong. i used 5 perimeters, 5 bottom, 6 top layers. 30% infill using grid (not rectilinear).
thingiverse
free

18650 Battery Holder by nguyenngoctranvu
...u
thingiverse
bed heat: 80oc
heat: 230oc
infill: 100%
layer height: 0.2mm
layer width: 0.4mm
wall thickness: 0.8mm
speed: 30mm/s
Bluetoothspeaker
grabcad
free

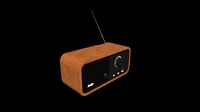
High end bluetooth speaker
...high end bluetooth speaker grabcad a bluetoothspeaker with a high end appearance. a practice for styling...
cg_trader
$2

Speaker
...speaker cg trader 3d asset realtime speaker bluetoothspeaker , available formats obj, fbx, stl, blend, ready for...
cg_trader
free

Bluetooth Speaker
...through inbox. thank you!! blender cycles blendercycles speaker bluetooth bluetoothspeaker portablespeaker electronics audio audio device audio device audio device...
3dwarehouse
free

Desk sound
...#hifi #bluetooth #headphones #audiophile #bluetoothspeaker #technology #subwoofer #wirelessspeaker #soundsystem #bluetoothspeaker #wireless #amplifier #portablespeaker #speakerbluetooth #peugeot #inspiration #basshead #speakerwireless #dj...
3dwarehouse
free

sound system
...#hifi #bluetooth #headphones #audiophile #bluetoothspeaker #technology #subwoofer #wirelessspeaker #soundsystem #bluetoothspeaker #wireless #amplifier #portablespeaker #speakerbluetooth #peugeot #inspiration #basshead #speakerwireless #dj...
3dwarehouse
free

#sound #system #room #accentwall #soundwall #soundsystemwall #stereo
...#hifi #bluetooth #headphones #audiophile #bluetoothspeaker #technology #subwoofer #wirelessspeaker #soundsystem #bluetoothspeaker #wireless #amplifier #portablespeaker #speakerbluetooth #peugeot #inspiration #basshead #speakerwireless #dj...
Ghettoblaster
3d_ocean
$15

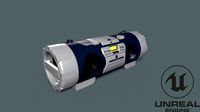
Ghetto Blaster
...ghetto blaster 3docean audio boombox cassette ghettoblaster music radio stereo fully modeled ghetto blaster including uvw...
unity_asset_store
$5

Ghettoblaster
...our workflow with the ghettoblaster asset from vis games. find this & other electronics options on the unity asset store.
thingiverse
free

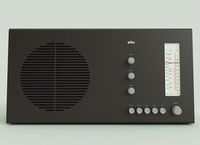
80s Retro Stereo Ghettoblaster
... retro stereo ghettoblaster
thingiverse
print settings in my profile!
ghettoblaster, scaled to 1/35 (when dropped into chitubox)
thingiverse
free

Ghettoblaster Boombox by zombiesrus
...alibu barbie, or boombox enthusiast.
this thing was made with tinkercad. edit it online https://tinkercad.com/things/3e9fezpmudk
thingiverse
free

JVC Ghettoblaster / Boomblaster RV-NB RV-B Replacement Knob by Nitec0re
...toblaster / boomblaster rv-nb rv-b replacement knob by nitec0re
thingiverse
replacement knob for the jvc rv-(n)b gehettoblaster
thingiverse
free

Lasonic Ghettoblaster Volume Knob by TeamTeamUSA
...hose lasonic trc-931 d-stem volume/balance knobs are scarce as æ’^@#!
today epay/epray is over, it's time to print this $h!t!
thingiverse
free

Sony Boombox by bre
...i used 123d catch to scan my 1983 sony ghettoblaster the scan is a bit rough, but i'm still...
thingiverse
free

Lab Power Supply Remix by diedburn
...up! mini, and i didn't want to boot the ghettoblaster following the original guide you should be able to...
cg_trader
$2

Ghettoblaster
...tape. an unity5 package is included. ghettoblaster radio tapedeck tape retro audio device vintage electronics audio vintage radio
Peed6687
thingiverse
free

MKS Gen 1.4 Case by peed6687
...mks gen 1.4 case by peed6687
thingiverse
the idea with the fan holder was so appealing to me that i created my version of it.
thingiverse
free

80mm Fan Skull Fan Cover by peed6687
...80mm fan skull fan cover by peed6687
thingiverse
the 40mm was to smal, so i remix this to a 80mm version. :-)
thingiverse
free

Das Blummentöpfchen by peed6687
... for this design i use 6mm bamboo with a length of 30cm. chopsticks from the china snack bar, but should also fit.
holes are 7mm.
thingiverse
free

Buchstaben Schablonen / letter Template / Lackieren / Paint by peed6687
...ate / lackieren / paint by peed6687
thingiverse
schablonen zum lackieren von buchstaben & zahlen.
sowie ein stormtrooper :-)
thingiverse
free

Schablone AT-AT Lackieren Airbrush Grafiiti by peed6687
...h ein wenig dicker gemacht als die anderen, damit diese aufgrund der details nicht direkt nach der ersten nutzung kaputt ist. :-)
thingiverse
free

Anet A8 Extern Box Lid by peed6687
...t a8. one with place for 3.5 inch touchscreen for octoprint and the other one with the chemical formula of pla , abs and pet :-)
thingiverse
free

Stormtrooper Helmed Mic Tips by peed6687
...ment or resin, instant glue and a bit of insect screen made of aluminum or stainless steel.
if you like it, like and support. :-)
thingiverse
free

EL84 Tube Valve - Case / Storage / Transport by peed6687
...t box for el84 electronics tubes.
a rubber band is required to close it.
have fun printing! likes me, supports me and drinks gin.
thingiverse
free

Filament Holder for IKEA Stuva by peed6687
... threaded rod ca.123mm two m8 nuts and two ball bearings type 608zz. and of course two 20mm wood screws.
have fun reprinting. :-)
thingiverse
free

Anet A8 Extern Case Remix for 2x Mosfets & Raspberry Pi Zero by peed6687
...ets & raspberry pi zero by peed6687
thingiverse
here is a better version of the box.
place for 2 mosfets + raspberry pi zero
Musik
3ddd
free

Консоль MUSIK
...ь
консоль music выполнена в классическом стиле
характеристики
размеры: 100х38х78 cм
материал: массив дерева
цвет: слоновая кость
3d_ocean
$15

Maestro headphones
...maestro headphones 3docean 3ds c4d headphones maestro maxon musik obj copy of real brend...
3d_ocean
$12

Wings headphones
...wings headphones 3docean 3ds c4d headphones maxon musik obj wings copy of real brend...
3d_export
$5

Violin crystal 3D Model
...violin crystal 3d model 3dexport violin musik crystal violin crystal 3d model freeollo 14329...
3d_sky
$8

Console MUSIK
...le musik
3dsky
console
console music in classical style specifications dimensions: 100h38h78 cm material: solid wood color: ivory
thingiverse
free

Trichterschwein / musik aus dem trichter oinkoink by Syzguru11
...wein / musik aus dem trichter oinkoink by syzguru11
thingiverse
trichterschwein / musik aus dem trichter oinkoink
aka lochcamper
thingiverse
free

Roto Dachfenster Rollo Halter by theorie-musik-de
...uch recht schief aus, der gerade war nichts, aber evtl. passt er ja bei jemand anderem, deswegen findet ihr hier beide varianten.
thingiverse
free

frame crv by licon22rus
...frame crv by licon22rus thingiverse frame crv musik ...
thingiverse
free

Photoframe with Music - Bilderrahmen mit Musik by Dichtikus
...tch must be bridged so that it switches ground.
further details in a few days on my webiste:http://praxis-doktor-dichtmann.de/
thingiverse
free

BellaStalin
...bellastalin thingiverse solange die musik spielt, muss man...
Boombox
3d_ocean
$18

Boombox
...boombox
3docean
audio boombox music stereo
boombox made in 3dsmax and rendered in vray
3d_export
free

boombox
...boombox
3dexport
boombox music center
3d_export
$5

boombox
...boombox
3dexport
turbosquid
free

BoomBox
... available on turbo squid, the world's leading provider of digital 3d models for visualization, films, television, and games.
3ddd
free

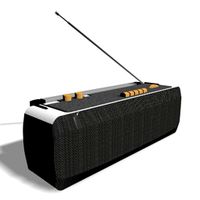
TDK 3 Speaker Boombox
... boombox , магнитола
tdk life on record, 3-speaker boombox audio system
turbosquid
$19

Compact Boombox
...boombox for download as max, ipt, max, 3ds, fbx, obj, and stl on turbosquid: 3d models for games, architecture, videos. (1665184)
turbosquid
$15

Boombox Low-Poly
...id
royalty free 3d model boombox low-poly for download as ma on turbosquid: 3d models for games, architecture, videos. (1607076)
turbosquid
$3

Black guy with boombox
... available on turbo squid, the world's leading provider of digital 3d models for visualization, films, television, and games.
3d_export
$15
JVC Boombox
...s.<br>pbr textures: 4k res base color, roughness, metalness, normal and ao.<br>there is a video display with a timer.
3d_export
$10

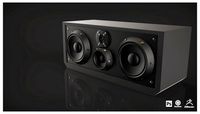
Compact Boombox
...are provided. chipboard and mdf can be used as wood. the bass speaker used is 100 watt, the right and left speakers are 15 watts.
Radio
archibase_planet
free
Radio
...radio
archibase planet
radio
radio - 3d model for interior 3d visualization.
archibase_planet
free
Radio
...radio
archibase planet
radio
radio - 3d model for interior 3d visualization.
3d_export
$10
radio
...radio
3dexport
radio 3d, ojb
archibase_planet
free
Radio
...radio
archibase planet
radio set wireless receiver wireless set
radio 2 - 3d model (*.gsm+*.3ds) for interior 3d visualization.
archibase_planet
free
Radio
...radio
archibase planet
radio set wireless receiver wireless set
radio 7 - 3d model (*.gsm+*.3ds) for interior 3d visualization.
archibase_planet
free
Radio
...radio
archibase planet
radio set wireless receiver wireless set
radio 10 - 3d model (*.gsm+*.3ds) for interior 3d visualization.
3d_ocean
$9
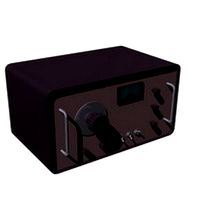
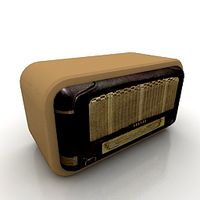
Vintage Radio
...vintage radio
3docean
old radio radio set vintage
this is a vintage radio modeled to help in interior design arrangements.
3d_ocean
$8
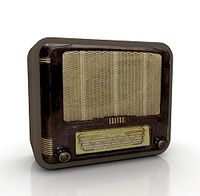
Radio Branu
...radio branu
3docean
detail radio vintage
vintage radio with detail
3d_export
$5
radio
...radio
3dexport
turbosquid
$25

Radio
...o
turbosquid
royalty free 3d model radio for download as max on turbosquid: 3d models for games, architecture, videos. (1203794)
Diy
3d_export
free
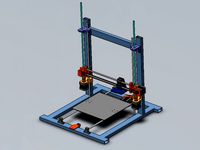
DIY 3D Printer
...diy 3d printer
3dexport
diy 3d printer model
turbosquid
$10

Diy tiered
...l diy tiered for download as max, max, max, max, fbx, and obj on turbosquid: 3d models for games, architecture, videos. (1603709)
turbosquid
$3
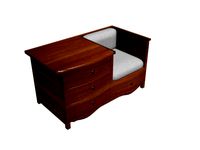
Diy Desk to Bench
...odel diy desk to bench for download as 3ds, max, obj, and fbx on turbosquid: 3d models for games, architecture, videos. (1506589)
turbosquid
$2

DIY Moon Light
...model diy moon light for download as obj, fbx, blend, and dae on turbosquid: 3d models for games, architecture, videos. (1501170)
3d_export
$8
DIY CNC Router 3D Model
...diy cnc router 3d model
3dexport
cnc; router; diy; homemade
diy cnc router 3d model maikeru86 58463 3dexport
turbosquid
$5
Diy Kitchen Cabinets
...itchen cabinets for download as 3ds, obj, fbx, blend, and dae on turbosquid: 3d models for games, architecture, videos. (1197373)
3d_export
free

Download free Diying Plant 3D Model
...download free diying plant 3d model
3dexport
diying plant blender
diying plant 3d model visitorsama 98607 3dexport
3ddd
$1
DIY coffee table + decor
... рамка для фото
кофейный столик diy 400х350х600(h) мм. моделился по фото. внимание: материалы - corona.
turbosquid
$3
Diy Wire Lamp Shade
...free 3d model diy wire lamp shade for download as 3ds and fbx on turbosquid: 3d models for games, architecture, videos. (1347605)
cg_studio
$12
DIY MONGOLIAN LAMB STOOLS3d model
... hair soft pile white
.max - diy mongolian lamb stools 3d model, royalty free license available, instant download after purchase.