Thingiverse

PBP-0 by Group-C
by Thingiverse
Last crawled date: 3 years ago
/!\ WARNINGS FOR STUPID/LITIGIOUS PEOPLE: Gun intended for recreational purposes. Do not use in public. Use adequate protection where needed; gun fires hard plastic pieces. I am not liable for any damages resulting from improper use of this toy gun. /!\
Mechanism inspired by YouTuber CozShot. Please don't sue.
Here is the PBP-0 (Pull Back Pistol) Adieu, a compact, decent-looking Lego gun that actually shoots "bullets"! Sure, the range isn't the best, the mag is unreliable, and there's the occasional jam, but I have to start somewhere, and I'm actually pretty proud of the end result.
While this might be considered a failure by professional Lego gun standards, it is just an experiment.
STATS
Fire mode: Repeating
Action: Pullback
Capacity: 4 rounds (any more may harm the bullets' ability to stay in the magazine)
Range:
Ammo: Bullet (2M axle in 2M axle connector), bullet (2M pin in pin connector)
FEATURES
Sprung magazine
Magazine can be inserted and removed without taking one's hand off of the grip
Detachable stock
Ammo storage in stock
Detachable silencer
Connection points on top for accessories
Lower inaccuracy from holding the gun sideways
TIPS
The magazine can be difficult to load; make sure each round is secured before resuming loading.
Since the silencer is just for decoration, it does nothing to hide the fact that the PBP-0's report is comparable to a nail gun's.
Mag insertion instructions:1) Prime bolt.2) Hook mag retention hooks into gaps in mag (or use tab to pull back hooks).3) Pull on hooks, allowing the mag to be inserted completely.
Rubber band springing instructions:Picture 2: Thread the band through the hole of the 90° cross block.Pictures 3 and 4: Hook either end of the band onto the pin connector (followed by the other), but make sure the way in which this step is executed is symmetrical (identical for both sides).Picture 5: For the magazine, insert the follower (with an extra-long rubber band hooked around its ball) into the magazine before it is completed. With the follower secured in the completed magazine, hook the other end of the band around the ball at the bottom. In the picture, the band has been moved out of the way for clarity's sake, but make sure it is centred for optimal performance.
Similar models
3dwarehouse
free

bullets
...d of bullets and a mag #ammo #ammunition #bullet #bullets #gun #guns #mag #magazine #pistol #shell #shells #shotgun #war #weapons
thingiverse
free

MRBG (Modular Rubber Band Gun) by Group-C
...d prop magazine (see "mrbg" .lxf file)
spring-assisted mag ejection (for speedy ejection, tip gun back and release pin)
thingiverse
free

12 Shot Rubber Band Gun Extender/Silencer
...o modifications needed. just unbolt the original hook and put this silencer/extender in place.
it can be printed without support.
3dwarehouse
free

50cal. Mag& ammo
...50cal. mag& ammo
3dwarehouse
a banana clip with two empty shells #ammo #bullet #bullets #clip #clips #magazine #mags
thingiverse
free

Dyglass by NolanSandidge
...hrough the holes, attach a rubber band to the end of the pencil, hook the rubber band into dyggo's tail, pull back, and fire.
thingiverse
free

LP-19 (Light Pistol, 2019) by Group-C
... be loaded when the cam lays flush with the top of the gun and the slide moves forward.
see the video above for more information.
thingiverse
free

Lego Shortstop/COP .357 by Group-C
...kages is intended to pull the hooks together to avert jamming. if jams still occur, use a smaller or more doubled-up rubber band.
3dwarehouse
free

Pistol with two Magazines and one silencer
...gs and a silencer. #bad #contacttom2006 #cool #fun #gun #handgun #mag #magazines #one #pistol #pistols #silencer #sketch #two #up
thingiverse
free

Rubber Tie Hook by easai
.../end that hold the other end of the rubber band.
i made the rubber-tie-hook 'flat' so that it would be easier to print.
thingiverse
free

Lego Technic, Axle and Pin Connector Hub with 2 Axles 27940 by velascoborja
... 27940 by velascoborja
thingiverse
technic, axle and pin connector hub with 2 axles. used for bmw r1200gs lego broken side stand
Pbp
3d_export
$20

realistic luxury easel
...realistic luxury easel 3dexport high quality easel using pbp material.<br>the asset uses unique handcrafted textures. texture quality 2k,...
3dfindit
free

PBP
...pbp
3dfind.it
catalog: a&t
thingiverse
free

Pinebook Pro Laptop Stand.
...0.3mm layer heights. print the following parts. 2 x pbp stand brace.stl 2 x pbp stant upright.stl if you...
thingiverse
free

Team RUSH Compact Electrical Design - Tower Of Power by jmmarke
...side. the bases mount to the holes in the pbp we used small nails for the hinge axles between...
thingiverse
free

PrintrBot Play SKR Mini Board Adapter (USB exposure) by bucketmouse
...some reason. the original mount requires cutting into the pbp to expose the usb port while leaving the microsd...
3dbaza
$4

Decorative pineapple - Game Ready model - VR, AR, low-poly (133010)
...this is a 3d model of a pineapple with pbp materials for use in any genre of games.<br>in the...
3dbaza
$6

Just a 3D cactus - Game Ready model - VR, AR, low-poly (132597)
...this is a 3d model of a cactus with pbp materials for use in any genre of games.<br>in the...
thingiverse
free

Gillo Weight Plate by caleb1783
...2 pla side plates. so my setup is now pbp drilled with small bit first to get the body...
cg_trader
$28

Cise PBP - Vegan Leather Mini Bag Yellow
...cise pbp - vegan leather mini bag yellow
cg trader
model created with 3ds max and textured in 4k
Group
3ddd
$1

Marchi Group
...
marchi group , холодильник
холодильник marchi group, моделился из каталого marchi group
3ddd
$1

IDEA GROUP
...idea group
3ddd
idea group
idea group, mistral comp
3ddd
$1

Marchi Group
...marchi group
3ddd
marchi group
кухня
фабрика marchi group
модель islamorada
3ddd
$1

Florida Group
... круглый
стол круглый
производитель florida group
арт. firenze 583330
размеры: 110*110*75
3ddd
free

idea group
...idea group
3ddd
idea
idea group laccato grigio viola lucido msp04
design_connected
$27

Fergana group
...fergana group
designconnected
moroso fergana group computer generated 3d model. designed by urquiola, patricia.
3ddd
$1

Beby group
...beby group
3ddd
beby group
модель без текстур
большой вес - 2,4 млн поликов
3ddd
free

Elsa Groupe
...дства elsa groupe. может использоваться как подсвечник в интерьерах, так и в экстерьерах, как садовый фонарь. текстуры в раздаче.
turbosquid
$50

Group cars
...bosquid
royalty free 3d model group cars for download as max on turbosquid: 3d models for games, architecture, videos. (1214997)
turbosquid
$24
entry group
...osquid
royalty free 3d model entry group for download as iam on turbosquid: 3d models for games, architecture, videos. (1236931)
0
turbosquid
$12

Calligraphic Digit 0 Number 0
...hic digit 0 number 0 for download as max, obj, fbx, and blend on turbosquid: 3d models for games, architecture, videos. (1389318)
3d_export
$6

set-0
...set-0
3dexport
turbosquid
$6

hedge 0
...yalty free 3d model hedge 0 for download as max, obj, and fbx on turbosquid: 3d models for games, architecture, videos. (1450353)
turbosquid
$5

Nuber 0
...oyalty free 3d model nuber 0 for download as ma, obj, and fbx on turbosquid: 3d models for games, architecture, videos. (1564674)
turbosquid
$22

0.jpg
... available on turbo squid, the world's leading provider of digital 3d models for visualization, films, television, and games.
turbosquid
free

Steam Locomotive Fowler 4F 0-6-0
... available on turbo squid, the world's leading provider of digital 3d models for visualization, films, television, and games.
turbosquid
$10

Liquid Number 0
... model liquid number 0 for download as c4d, 3ds, fbx, and obj on turbosquid: 3d models for games, architecture, videos. (1689919)
turbosquid
$45

Dragon360_perspShape_tmp.0.jpg
... available on turbo squid, the world's leading provider of digital 3d models for visualization, films, television, and games.
turbosquid
$8

Rocks Debris 0
... available on turbo squid, the world's leading provider of digital 3d models for visualization, films, television, and games.
3d_export
$18

wood-guardrail-fence 0
...wood-guardrail-fence 0
3dexport
wood-guardrail-fence 0<br>3ds max 2015
C
3ddd
$1
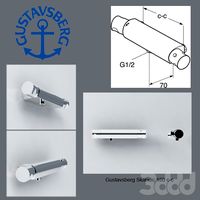
Gustavsberg Skandic 160 c-c
...gustavsberg skandic 160 c-c
3ddd
gustavsberg , смеситель
3dmax 2009
3ddd
$1

Кресло Victoria C
...кресло victoria c
3ddd
victoria c , стул
victoria c
design_connected
$25

Mobius C
...mobius c
designconnected
zenith mobius c computer generated 3d model. designed by schamburg, marc.
3ddd
$1

Molteni & C
...molteni & c
3ddd
molteni&c
molteni & c
turbosquid
$10
Raids house C&C Tiberian sun
... raids house c&c tiberian sun for download as max and fbx on turbosquid: 3d models for games, architecture, videos. (1188376)
turbosquid
$10
Civilian Asylum C&C Tiberian sun
...ilian asylum c&c tiberian sun for download as max and fbx on turbosquid: 3d models for games, architecture, videos. (1188365)
3ddd
$1

Molteni & C
...molteni & c
3ddd
molteni&c
стул molteni & c
3ddd
free

kamina&c
...kamina&c
3ddd
kamina-c , табурет барашек
sheep chair by kamina-c
design_connected
$29

Extrasoft C
...extrasoft c
designconnected
living divani extrasoft c computer generated 3d model. designed by lissoni, piero.
design_connected
$4

Mono C
...mono c
designconnected
scp mono c tables computer generated 3d model. designed by konstantin grcic.