Thingiverse

Over complicated humidity protection spool holder/roller by DrakoTrogdor
by Thingiverse
Last crawled date: 3 years, 1 month ago
This is my over complicated / over engineered solution to prevent humidity from ruining my filament while it prints in my garage. The spool sits on the rollers inside the container and feeds out a tube on the bottom. The roller assembly has an adjustment knob on the outside to adjust the width of the rollers in order to accommodate different spool widths. The slider/carriage width is adjusted using a 1/4" carriage bolt with two 1/4" nuts in the carriage in order to align it as well as control spacing. At the end of the adjustment carriage bolt I have a custom made lock nut which I tapped afterwards to make a tight fit. This prevents the adjustment knob from moving in and out. The side opposite from the adjustment knob is flat so that it will be flush with the container lid. The entire roller assembly can either sit directly on the base stand or, using the Slider-Carriage Bracket Spacer and four 1/4" carriage bolts, it can be raised up as is shown in the photo. I used m3 and m4 bolts and nuts for the rest of the assembly (I will update the full list of sizes later, including the length of the carriage bolts).
Issues with putting this together:
The hex shaped holes for the nuts are not necessarily the best fit. I sometimes would have to wedge a small flat head screw driver in to hold the nuts steady while I tightened the bolts.
The two m3 bolts in that hold the roller assembly to the carriage had to be cut to a custom length in order to prevent them from interfering with the slider assembly, while at the same time being long enough to bite into the nuts. The length was between 11 and 12 mm.
The adjustment knob plug is extremely tight. I had to sand down the locking ridge in order to get it to fit. But now it's never moving.
The alignment nuts in the carriage can lock while threading the carriage bolt through. In order to fix this, thread the bolt through one and either pull or push while threading through the second until the bolt travels without resistance.
The spindle lock nuts are a delicate and tight fit, a tiny bit of sanding might be required to get them to fit together. I also used a bit of superglue to lock them to the threads of the carriage bolt, this was delicate work. I test fitted them together, used the tap, separated them and put one on each side of the carriage bracket. Started threading the carriage bolt through then just before the last turn, I put a drop of crazy glue on each side.
The Container is the cheapest container I could find that would fit my filament. I bought it from Dollarama (a Canadian dollar store chain). It is held in place with the slider and slider bracket as well as the two carriage bolts on the carriage side of the stand. In all I drilled 8 holes in the container, 4 for the bolts on the slider bracket, 1 for the carriage bolt that adjusts the width of the slider/carriage, 2 for the carriage bolts that go from the slider in to the base stand and 1 for the brass pressuring fitting. I tried to keep all holes at the minimum size required for them to fit, the adjustment carriage bolt hole required a bit of sanding so that the adjustment knob would turn freely.
The connector at the bottom of the container is a brass pressure fit for 1/4 PVC tubing. I made a simple two piece washer with the correct angle to hold it level in my container.
In the end I am very happy with this project. I placed a humidity sensor inside with a couple of packets of silica gel. The inside of the container is currently at 19% (the minimum for the sensor), while the rest of my garage is currently at 82% humidity.
If you have any questions please feel free to ask. If my instructions are unclear, also feel free to ask.
This build was complicated on purpose as I was super bored last week and just kept adding and adding all while trying not to revamp any of the previous parts because I was also being lazy (bored and lazy go together).
Similar models
thingiverse
free

Y Belt Tensioner .tight_y by Aynareth
...her for the stock wheel carriage.
09/12.2017
this is the initial release, if you run into any problems don´t hesitate to comment.
thingiverse
free

Hat Stretcher by razzard
... press fit and fits very solidly for me. i had to tap the pieces together with a rubber mallet to get everything to fit together.
thingiverse
free

Ender 3 Adjustable Z Endstop Cryo by cryogen
...ing part of the bolt use the lock washed and nut to secure the bolt in the knob.
i use petg for long-term use of the item.
enjoy.
thingiverse
free

Filament Roller Stand by X50arm
...g it around and breaking the axle shafts. today i replaced them with 8mmx200mm threaded rod. hopefully, i won’t break them now.
thingiverse
free

Dremel 4000 Adjustable Stand Holder by bkeeber2011
...39;re done, slowly remove the two nuts from the screw. as they come off, they'll re-align the screw threads at the cut-point.
grabcad
free

Filament Bearing Roller
...t base 1
bolt base 2 (carriage bolt insert)
20mm washer
5mm washer
wingnut (epoxy 5/16 nut inside)
see image for assembly order.
thingiverse
free

Neje 30w Z Axis by xHubbyx
...bolts and nuts
9- 6-32 bolt for the estop tab and laser holder
tube of super glue glue the adjust nut to the back of adjust mount
thingiverse
free

Rostock Max Large Spool holder by HJ3D
...d m8x160mm
1 washer m8
2 self-locking nuts/nylocs, or 4 normal nuts
1 piece of min 100mm long 1.75mm filament
the 2 printed files
grabcad
free

Autodoors roller / slider with BOM
...tapped slider, bolts and washers. folder with both assemblies for catia and solidworks. belt brackets available, check my models.
thingiverse
free

4mm Adjustment Knob and Nut Lock Plate by andrewadsit
...z-axis. when i switch from printing on 3m tape back to glass only, its an easy switch because i know where the knob needs to be.
Drakotrogdor
thingiverse
free

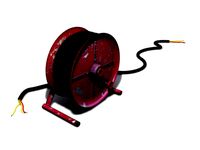
Wire Spool Holder by DrakoTrogdor
...olders the fit between the clips is snug, but not too tight, they will hold together well but can be slid apart again afterwards.
thingiverse
free

Resistor Storage Drawers (E24 series) by DrakoTrogdor
...mixing.
update 3:
[2018-07-05] michaeljbell noticed a mistake in the text for the 1.1 ohm drawer. fixed it and updated the file.
thingiverse
free

Tablet Stand / Tripod (works with Samsung Tab A 8.0 2017) by DrakoTrogdor
...ovetail area such as what was done by lynce9956. they used two eye screws and a rubber band to create tension to hold it closed.
Humidity
3d_export
$15

Humidifier 3D Model
...humidifier 3d model 3dexport humidifier moisture mist humidity room home cool ion evaporative wick vaporizer steam ultrasonic...
3d_export
$5

sculpture
...e, or heat. this is confirmed by statues preserved, for example, from the time of the renaissance or classicism. fire resistance.
3d_ocean
$15

Air Conditioner
...conditioner air conditioning climatic comfort con electrical electronics home humidity propeller temperature thermal detailed air conditioner “hitachi ac inverter”...
3ddd
free

TAVERN BAR
...automatic humidification system and live control of the relative humidity degree on display for cigars maintenance completely covered with...
3d_export
$49

drawing of 3x2x15m full fiber trolley resistance furnace
...power supply. ambient temperature: 5 ~ 50 ℃, relative humidity < 80%. there is no conductive dust, explosive gas...
3d_export
$5

wisteria
...2 next. textures and maps are made in jipeg format. the dimensions of the tree are 3 meters in height and 2.2 meters in diameter.
3d_export
$7

sansevieria in the pot lechusa cararo
...special requirements either on watering and the level of humidity or on lighting. lechuza cararo is a self-irrigated floor...
3d_export
$50

childrens plane mask one drag two external ear belt machine 2d3dbomelectrical applianceplc
...the ambient temperature is required to be normal temperature.<br>2. humidity requirement is 40%-80%. there is no condensation and a...
3d_export
$5

New Plant High detail Rhapis Excelsa
...and later to america where its low light and humidity requirements make it a common feature in malls and...
3d_export
$5

New Plant High detail Rhapis Excelsa Small
...and later to america where its low light and humidity requirements make it a common feature in malls and...
Complicated
3d_export
$69

Patek Philippe Grand Complications mens watch 3D Model
...land accessory patek philippe complications gentelmen
patek philippe grand complications mens watch 3d model squir 87451 3dexport
cg_studio
$69

Patek Philippe Grand Complications mens watch3d model
...j .max - patek philippe grand complications mens watch 3d model, royalty free license available, instant download after purchase.
3d_export
$149

Breguet Grande Complication Marie Antoinette 1160
...note: this 3d model like all my other models cannot be used as nft, as is or modified thank you for reading thank you for reading
3d_export
$149

Breguet Grande Complication Marie Antoinette 1160
...odel available as a separate product please note: this 3d model like all my other models cannot be used as nft, as is or modified
3d_export
free

object0452spider
...walker, with a skeleton for animation.the model is not complicated has no textures and materials. it can be used...
3d_ocean
$5

Maze
...maze 3docean art beautiful complex complicated labyrint lowpoly maze thanks for purchasing this model! the...
3d_ocean
$9

Chair design - Arreda
...arreda 3docean 1 leg architecture arreda arredaclick best chair complicated concept crazy design dining elegant fast food fun glossy...
3d_export
$5

space satellite realistic model
...can be converted to the standard there is nothing complicated in this there...
3d_export
$179

Knee Joint Anatomy 3D Model
...human knee joint anatomy thigh tibia femure patella largest complicated body people artery leg character ligament animate 3d model...
cg_studio
$179

Knee Joint Anatomy3d model
...human knee joint anatomy thigh tibia femure patella largest complicated body people artery leg character ligament animate .lwo .fbx...
Roller
turbosquid
$26
Roller A
...urbosquid
royalty free 3d model roller a for download as fbx on turbosquid: 3d models for games, architecture, videos. (1350603)
turbosquid
$3
Roller
...oyalty free 3d model roller for download as 3ds, max, and obj on turbosquid: 3d models for games, architecture, videos. (1460818)
3ddd
$1
edilkamin roller
...edilkamin roller
3ddd
камин
edilkamin roller 360
3ddd
$1
Roller Blinds
...roller blinds
3ddd
рулонная
roller blinds black out finish
turbosquid
$50

Roller
... roller for download as max, max, c4d, max, max, fbx, and obj on turbosquid: 3d models for games, architecture, videos. (1700762)
3d_export
$10
rollers
...lers
3dexport
this is low-poly model of rollers.<br>model:<br>- low-poly<br>- textured<br>- uv unwrapped
3d_export
$28
Roller 3D Model
...roller 3d model
3dexport
roller construction boss evil
roller 3d model adagio15740837 50561 3dexport
3d_export
$6
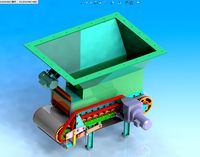
hopper roller conveyor
...hopper roller conveyor
3dexport
hopper roller conveyor
3d_export
$12

roller skates
...roller skates
3dexport
3d_ocean
$19
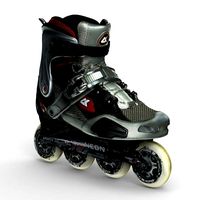
roller skate
...can scanned skates skating sport
3d scan of roller skate. the model has been retopologized and made fully compatible with zbrush.
Spool
3ddd
$1

spool c53301
...spool c53301
3ddd
spool
spool c53301 650х350х145
turbosquid
$3

Cable Spool
...royalty free 3d model cable spool for download as max and fbx on turbosquid: 3d models for games, architecture, videos. (1457009)
turbosquid
free

Pallets and Spool
... available on turbo squid, the world's leading provider of digital 3d models for visualization, films, television, and games.
turbosquid
$10

Spool of String
...ol of string pink for download as c4d, 3ds, fbx, obj, and stl on turbosquid: 3d models for games, architecture, videos. (1647892)
3ddd
$1

Подвесные светильники Spool
...ye/podvesnoy_svetilnik_spool_d320/ http://www.cosmorelax.ru/catalog/podvesnyye/podvesnoy_svetilnik_spool_d420/
3ddd
free

Spool 001 sofa
...spool 001 sofa
3ddd
roda
roda
collection spool
design rodolfo dordoni
dimensions:
lenght 90 cm
depth 94 cm
height 79 cm
turbosquid
$15

Roda Spool Sofa
...ee 3d model roda spool sofa for download as max, obj, and fbx on turbosquid: 3d models for games, architecture, videos. (1502650)
turbosquid
$95
wire spools 3ds
... available on turbo squid, the world's leading provider of digital 3d models for visualization, films, television, and games.
turbosquid
$20
spool of TV wire
... available on turbo squid, the world's leading provider of digital 3d models for visualization, films, television, and games.
turbosquid
$3

Simple and Fast Spool Holder
...ree 3d model simple and fast spool holder for download as stl on turbosquid: 3d models for games, architecture, videos. (1548546)
Protection
archibase_planet
free

Protection
...protection
archibase planet
protection
protection - 3d model (*.gsm+*.3ds) for interior 3d visualization.
3d_export
$10

Protective shelter
...protective shelter
3dexport
military protective cover for laser and soldier
3d_export
free

protective helmet
...protective helmet
3dexport
this is a helmet to protect the standard human head. in the archive there are textures.
3d_export
$5

Protected Diamonds
...protected diamonds
3dexport
two textured diamonds protected by a fictitious-style pedestal and a glass
turbosquid
$28

Mask helmet protection scifi futuristic protection
... scifi futuristic protection for download as ma, obj, and fbx on turbosquid: 3d models for games, architecture, videos. (1551702)
archive3d
free

Protection 3D Model
...d model
archive3d
protection
protection - 3d model (*.gsm+*.3ds) for interior 3d visualization.
3d_export
$5

protected pressure gauge
...protected pressure gauge
3dexport
protected pressure gauge
turbosquid
$150

protection character
... model protection character for download as max, obj, and fbx on turbosquid: 3d models for games, architecture, videos. (1366331)
3d_export
$5

mask medical protection
...mask medical protection
3dexport
medical protection equipment 3d model
3d_export
$6

face protect mask
...
a face protect mask is a personal protective equipment to from potentially infectious materials. file formats: sldprt, step, stl
Holder
archibase_planet
free

Holder
...holder
archibase planet
holder toilet paper holder
holder paper n070712 - 3d model (*.gsm+*.3ds) for interior 3d visualization.
archibase_planet
free

Holder
...e planet
holder rack toilet paper holder
holder toilet roll n240715 - 3d model (*.gsm+*.3ds+*.max) for interior 3d visualization.
archibase_planet
free

Holder
...holder
archibase planet
pen holder support prop
pen holder - 3d model for interior 3d visualization.
archibase_planet
free

Holder
...holder
archibase planet
pole post holder
сhurch cross pole holder - 3d model for interior 3d visualization.
archibase_planet
free

Holder
...holder
archibase planet
holder bathroom ware
shower holder - 3d model (*.gsm+*.3ds) for interior 3d visualization.
archibase_planet
free

Holder
...oilet paper holder
holder paper devon&devon; time black n241113 - 3d model (*.gsm+*.3ds+*.max) for interior 3d visualization.
archibase_planet
free

Holder
...holder
archibase planet
holder hanger hanger for towel
holder 7 - 3d model (*.gsm+*.3ds) for interior 3d visualization.
archibase_planet
free

Holder
...holder
archibase planet
holder hanger hanger for towel
holder 3 - 3d model (*.gsm+*.3ds) for interior 3d visualization.
archibase_planet
free

Holder
...holder
archibase planet
holder towel rack towel-horse
holder - 3d model (*.gsm+*.3ds) for interior 3d visualization.
archibase_planet
free

Holder
...lder
archibase planet
holder hanger hanger for towel
holder towel n250912 - 3d model (*.gsm+*.3ds) for interior 3d visualization.