Thingiverse

Original Series Phaser by Corma
by Thingiverse
Last crawled date: 3 years ago
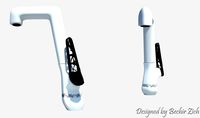
I wanted to build a Star Trek phaser model that could fit nicely on a 485 printer. This print is hollow, and is made with customization in mind. It also has a removable Hand Phaser Type I.
The following parts are print in place and will accommodate accessory electronics:
trigger_12 (for a momentary switch),
switch_13 (for a rotary switch or potentiometer),
phasertopparta_6 (two dials, a pushbutton, an LED + whatever you need to hold it in place)
mainbody_3 (for a potentiometer, ‘switch_13’, ‘trigger_12’)
They were modeled with the parts I had lying around in mind, so you might need to make adjustments for your own parts.
You will also need a couple of ballpoint pen springs(~.1” *.5”) to assemble the following parts:
phasertopparta_6
phasertoppinion_10
pinioncover_11
I’ve included a diagram of how they fit together. This allows Hand Phaser Type I to be separated from Hand Phaser Type II.
Finally, there’s a square hole right above the muzzle. The prop needs a small tinted glass/plastic insert to go there.
I’ve included ‘resinpart_9’ for the muzzle insert(clear blue in the big picture) I’d recommend using it to make a mold and cast the part in clear resin. Or you can just print with clear 3D printing filament. Either way works.
Please note that Hand Phaser Type II has many print in place parts, most notably in mainbody_3. I’ve included ‘buttoncover_4’ to cover this part. You can see it in the first diagram in gold. It’s literally a button. The tolerance should be pretty high, but your mileage may vary.
Please leave feedback if you try it out for yourself, and I will continue to improve the models!
Update 1: The pinion cover was actually not properly made. So it has been remade.
Update 2: The pinion dovetailing was a cute idea that 3d printers hated. It should be stable enough with just the little pin that goes into the pinion cover. Pinion cover was not very structurally stable. Now it's more stable. The pins to mesh it with the phaser top are now bigger and hopefully stronger. The phaser top part A has had some work done to get greater clearance in the print in place button. Should be able to actually slide a pushbutton into place. Also the muzzle has been repaired after some weird glitch.
Update 3: Added some more files. A grate with bigger features because I realized my printer at least couldn't print the very tiny grate originally supplied. Made some dummy parts for the main body knob and the two knobs on the phaser part. These parts are definitely a work in progress but I cannot really find a good detailed photo yet so I made them based on what I could see.
Similar models
3dwarehouse
free

Star Trek TOS Type 2 Hand Phaser
...l series of star trek. i made this model from diagrams scanned in by hand. (non-textured). #hand_phaser #sifi #star_trek #tos #tv
thingiverse
free

Print In Place 608 Bearing by Darthvaper
...t print problems
(untested) print in place 608 bearing for fidget spinners.
print with support and whatever infill works for you.
thingiverse
free

Pushbutton by jeremy2nis
...pushbutton by jeremy2nis
thingiverse
pushbutton 12x12mm
update : 29/02/16
i have added a green cover on the pushbutton.
thingiverse
free

Stabilizer by Matze_
...t and add the 3 parts as shown on the image. i fixed the base axis with some glue as well to make sure that everything is stable.
thingiverse
free

Star Lord Gun for 120mm printers by Snoopy3195
...s
attach knob a part 1 to part 2 and attach the knob to 9
attach a knob b to both 1 and 5
attach trigger to part 4 if you want it
thingiverse
free

Kossel Linear Drive Belt Lower Cover by peaberry
...eed the extruder stepper cable into the channel on one of the towers. the sketchup file is also updated and includes both models.
thingiverse
free

Nusantara COVID-19 Face Shield Visor with Flip Cover and full head by aledrus
...on you could use if you want to print two at once.
this is a print-in-place design, so a well calibrated printer is recommended.
thingiverse
free

Creality CR-10 Z Shaft Cover V.1 by Double_Alfa
... printer shaft diameter for example ranges from 8.4 to 7.8 mm from bottom to top.
if you still have an issue, please let me know.
thingiverse
free

star trek type 2 phaser MMU
...ated.
i printed upside down. might not be the best way to get a nice print. i'll try another later....need more grey filament
thingiverse
free

Cyclops goggles for costume by cerberus333
...eed support (exterior should be adequate)
infill of 10% should be sufficent.
sizing might be needed, i had to make my best quess.
Corma
thingiverse
free

Sierpinski Carpet Castle by Corma
...rpinski carpet using these molds. the second iteration is probably the most practical but i included molds up to four iterations.
thingiverse
free

Complement of Original Series Phaser of Corma. by J_VEGA
...a. by j_vega
thingiverse
this is a collaboration to the original series phaser of corma.http://www.thingiverse.com/thing:1133310
thingiverse
free

Harlech Castle by Corma
...d door tool are included in the files.
https://upload.wikimedia.org/wikipedia/commons/a/ab/harlech_castle_-_cadw_photograph.jpg
thingiverse
free

Gipsy Danger action figure by Corma
...ake my own. note i haaaaave not really test printed it yet. from what i can tell from shapeways it should print fine but i dunno.
thingiverse
free

Rascorder by Corma
...y sensor(unknown part number)
blank cd(for making the spectrometer)
mirror(also for spectrometer)
2-56 screw and nut(roughly 2mm)
thingiverse
free

Memory Gun by Corma
...oor
-1/8" rod for some of the pivots
-.05" rod for the trigger that will connect the spring to the body
-a small spring
thingiverse
free

Victorian O-Scale House by Corma
...w how legal this was so if anyone knows i would love to hear about it.
p.p.s. i can also be commissioned to do this sort of work.
thingiverse
free

Modular Marble Machine for 8mm Ball Bearings by Corma
...
i hope you enjoy and please give me feed back if you make this or make more parts for it, i am highly curious as to the results.
thingiverse
free

Kafka DLP printer (360$ Resin Printer) by Corma
...ernative of direct control with the pi through an a4988 stepper driver and attaching that direct to the rpi. it should work fine.
Phaser
turbosquid
$4

Phaser
...ser
turbosquid
royalty free 3d model phaser for download as on turbosquid: 3d models for games, architecture, videos. (1510622)
turbosquid
$30

Phaser Pistol
...quid
royalty free 3d model phaser pistol for download as c4d on turbosquid: 3d models for games, architecture, videos. (1250679)
turbosquid
$50

Assault Phaser
... available on turbo squid, the world's leading provider of digital 3d models for visualization, films, television, and games.
turbosquid
$2

Lego Phaser
... available on turbo squid, the world's leading provider of digital 3d models for visualization, films, television, and games.
turbosquid
$2

electric gun hand phaser
... free 3d model electric gun hand phaser for download as blend on turbosquid: 3d models for games, architecture, videos. (1690718)
turbosquid
$3

Boss Phaser PH-1r
...model boss phaser ph-1r for download as blend, blend, and obj on turbosquid: 3d models for games, architecture, videos. (1705958)
turbosquid
$32

Type 2 2271 Phaser Gun
...phaser gun for download as max, blend, max, fbx, obj, and 3ds on turbosquid: 3d models for games, architecture, videos. (1551450)
turbosquid
$34

Star Trek Enterprise Naussian Phaser Cosplay prop replica
...r cosplay prop replica for download as max, dwg, fbx, and obj on turbosquid: 3d models for games, architecture, videos. (1626920)
turbosquid
$25

Star Trek The Next Generation Ferengi Phaser Cosplay prop
...gi phaser cosplay prop for download as max, dwg, fbx, and obj on turbosquid: 3d models for games, architecture, videos. (1601378)
turbosquid
$35

Star Trek Marco Enterprises Hero Klingon Hand Phaser disruptor
... hand phaser disruptor for download as max, dwg, fbx, and obj on turbosquid: 3d models for games, architecture, videos. (1610220)
Series
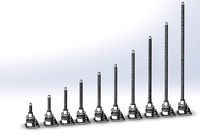
design_connected
$13
T-Series
...t-series
designconnected
bolia t-series computer generated 3d model. designed by burgess, james.
3ddd
$1
SYSTEMPOOL Serie Curve
..., serie curve , раковина
systempool serie curve
3ddd
free
Table Series 1
... series 1 , обеденный
table series 1 for dining room.
3ddd
free
KOLARZ Serie Explosion
... serie explosion , австрия
kolarz serie explosion 0109.118.5.kot. врай. текстуры.
3d_export
$8
jwm series elevator
...jwm series elevator
3dexport
jwm series elevator
3ddd
$1

Cappellini Serie 331
...cappellini serie 331
3ddd
cappellini
cappellini serie 331
3ddd
free
R3310 POS Series
...r3310 pos series
3ddd
терминал
r3310 pos series
turbosquid
$19

A series of curtains
...oyalty free 3d model a series of curtains for download as max on turbosquid: 3d models for games, architecture, videos. (1440593)
turbosquid
$15

Ribbed Series
...free 3d model ribbed series for download as max, obj, and fbx on turbosquid: 3d models for games, architecture, videos. (1311360)
turbosquid
$12

Dune series
...y free 3d model dune series for download as max, obj, and fbx on turbosquid: 3d models for games, architecture, videos. (1294893)
Original
3d_export
free
original table
...original table
3dexport
this is an original table with on one side a metallic square and on the other side a wood cylinder
design_connected
$16
Original beanbag
...designconnected
photo-realistic 3d models of the fatboy original beanbag for 3d architectural and interior design presentations.
turbosquid
$15

Original Gun
...squid
royalty free 3d model original gun for download as obj on turbosquid: 3d models for games, architecture, videos. (1483511)
turbosquid
$10
original faucet
...ree 3d model original faucet for download as ma, obj, and fbx on turbosquid: 3d models for games, architecture, videos. (1243295)
turbosquid
$30
original-armchairs
... available on turbo squid, the world's leading provider of digital 3d models for visualization, films, television, and games.
turbosquid
$29

Baileys Original
... available on turbo squid, the world's leading provider of digital 3d models for visualization, films, television, and games.
turbosquid
$20

Original Chair
... available on turbo squid, the world's leading provider of digital 3d models for visualization, films, television, and games.
turbosquid
$20

original-armchair
... available on turbo squid, the world's leading provider of digital 3d models for visualization, films, television, and games.
turbosquid
$12
Original Chair_039
... available on turbo squid, the world's leading provider of digital 3d models for visualization, films, television, and games.
turbosquid
$10

Sofia Original
... available on turbo squid, the world's leading provider of digital 3d models for visualization, films, television, and games.