Thingiverse

Original Lightsaber by kat8090
by Thingiverse
Last crawled date: 3 years ago
This lightsaber was designed to be a fully functional saber, albeit slightly weak (as it is made of plastic and not metal). The completed model is fully functional in the sense that, once completed, a blade and electronics may be added if you so desire. This was designed and printed over the course of about two months, with many setbacks and trial runs to test the fit of the parts and solve problems related to fitting electronics and the blade.
All of the pieces have a flat side on which to print. Rotate to that side. For the inner cylinders (IC), change the settings to that the x or y-value is 28.5mm. Make sure as well that you print the cylinders standing up, with the slant being printed before the flat side (this prevents overhang).
There are many components to this lightsaber. Here, I will list the components and their function/positioning:
Inner cylinders (IC), which are used to house the electronics and provide a base to position the rest of the parts and to increase strength. There are two (to accommodate the MakerBot Replicator print bed size), and each is slightly longer than the total completed length of the lightsaber. This is to accommodate for any problems when bonding the cylinders together. I took off about an inch from the upper cylinder when I was finishing it. The inner cylinders are equipped with ledges for the positioning of an LED emitter (mine is an UltraSabers emitter, but a SaberForge emitter or another kind should work as well, as long as the outer diameter is one inch), and a battery holder. The battery holder size that the lower inner cylinder is designed to fit is a dual AAA battery holder. The flat side of the ledge should be used to hold the battery holder and emitter in place, and the slanted side for strength. If you are installing a switch (I used a SaberForge switch with no internal light), you will have to cut or melt a hole in the inner cylinder for the switch. Make sure to assemble the switch and electronics before combining the sections.
Piece 1 is the "blade emitter." This piece is the top piece. When finishing the lightsaber, you might want to drill a hole for a blade retention screw on the side opposite the tall side to help hold the blade in place when you swing it around.
Pieces 2, 3, 4, and 5 are all decorative/grip pieces. They are arranged in that order from top to bottom after piece 1.
Pieces 6 and 7 are the main body and grip of the saber, and there is space to place a switch. The switch ring and switch cover are used to set the switch into the body of the lightsaber for a closer fit. Place the switch ring around the switch base (I could simply screw on the ring to the switch), and plastic weld the switch ring to the main body and then add the switch cover to the top of the main body.
The end cap is used as an access area for the batteries and as as the pommel of the saber.
Similar models
thingiverse
free

Functional light saber by Juleaume
...s. it might not work with other, but feel free to send me the dimensions of your components, i'll do my best to make it work.
thingiverse
free

custom lightsaber
...-blade
inside diameter: 35mm
outside average: 45mm
male and female connections 7.5mm long/deep
connections outside diameter: 38mm
thingiverse
free

Proffieboard SaberForge Chassis by gusswho38
...its high bass speaker, saberforge charger, 18650 battery, and proffieboard.
length: 4.42inches (including the screws and speaker)
thingiverse
free

Jedi Lightsaber for Electronics by BTSculptor
...iles have been separated into basic color, but you may want to separate them further, depending on your printing style. have fun!
cg_trader
$12

Venom Sith Lightsaber 3D Model | 3D
...r). if you print part by part dont worry pieces are going to fit each other and stick each other without any collision. have fun!
thingiverse
free

Luke Skywalker's Lightsaber (Episode VI)
... go here: switch for lightsaber electronics
for the batteries go here: a23 batteries
for the battery snaps go here: battery snaps
thingiverse
free

Revan's Lightsabers by CaseStudyno8
...g the tor saber to stack all of the necessary pieces and then slide the emitter guards through all of the pieces. happy printing!
thingiverse
free

Leia Lightsaber Emitter for CaseStudyno8's saber. by TibuTangboo
...d replace the parts that were hard to print and inaccurate.
here is the original model: https://www.thingiverse.com/thing:4193911
thingiverse
free

Ahsoka Tano Rebels Large Lightsaber - 4-Piece Version by BPStoyle
...aber and cut it in half to fit better. the large saber (not including a d-ring) would now print out in 4 parts with flat bottoms.
thingiverse
free

Temple Guard Lightsaber by CaseStudyno8
... upper emitter inner with support generated in cura. be sure to print two red buttons, two black buttons and two emitter inserts.
Kat8090
thingiverse
free

Glass Turbine by kat8090
...glass turbine by kat8090
thingiverse
a vase inspired by gas turbines.
thingiverse
free

BB-8 by kat8090
...bb-8 by kat8090
thingiverse
bb-8 created on [3dtin] from star wars, the force awakens
thingiverse
free

Starship Design by kat8090
...starship design by kat8090
thingiverse
a starship design i made into a 3d object for a friend. made in 123d.
thingiverse
free

Simple Handle by kat8090
... by kat8090
thingiverse
a simple handle i designed to test the different aspects of the program i used to create it,123d design.
thingiverse
free

Southside HS Keychain 2 by kat8090
...southside hs keychain 2 by kat8090
thingiverse
an improved keychain for southside hs, made in 123d and tinkercad.
thingiverse
free

Twi'lek Bust by kat8090
...male twi'lek. made from autodesk sculpt+ base male bust, modified.
bust stand by https://www.thingiverse.com/crimsonindustry.
thingiverse
free

Southside HS Keychain 1 by kat8090
...southside hs keychain 1 by kat8090
thingiverse
a promotional keychain design for southside high school, designed in 123d design
thingiverse
free

Batarang by kat8090
...uot; batarang. however, this one is thicker and may not print just how you might want it, as a warning. i intend to test it soon.
thingiverse
free

Death Star Ornament (Simple) by kat8090
...ad)
there are two versions - one has a hanging ring that is sunk deeper into the main ornament, in case the other is too brittle.
Lightsaber
3d_export
free

lightsaber
...lightsaber
3dexport
the best lightsabers in the galaxy:)
3d_export
$6

lightsaber
...lightsaber
3dexport
lightsaber belonging to an unknown jedi of the old republic.
3d_export
$5

Lightsabers
...lightsabers
3dexport
rusty and clean lightsabers like in star wars
3d_export
$5

lightsaber
...lightsaber
3dexport
i fan star wars and i do my lightsaber
3d_ocean
$4

Simple Lightsaber
...simple lightsaber
3docean
jedi lightsaber starwars
lightsaber model that is ready to be rigged and animated.
turbosquid
$4

Lightsaber
...squid
royalty free 3d model lightsaber for download as blend on turbosquid: 3d models for games, architecture, videos. (1691034)
3d_export
free

lightsaber 3d
...lightsaber 3d
3dexport
the best lightsabers in the galaxy:)
3d_ocean
$10

Lightsaber
...er multi format multiformat skywalker star wars
made a high poly lightsaber from the star wars franchise. this is my own version.
turbosquid
$15

lightsaber
...
royalty free 3d model lightsaber for download as max and obj on turbosquid: 3d models for games, architecture, videos. (1165564)
3d_export
$5

lightsaber
...lightsaber
3dexport
Original
3d_export
free
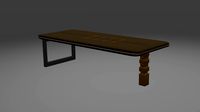
original table
...original table
3dexport
this is an original table with on one side a metallic square and on the other side a wood cylinder
design_connected
$16
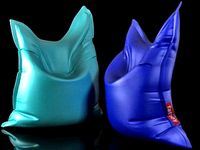
Original beanbag
...designconnected
photo-realistic 3d models of the fatboy original beanbag for 3d architectural and interior design presentations.
turbosquid
$15

Original Gun
...squid
royalty free 3d model original gun for download as obj on turbosquid: 3d models for games, architecture, videos. (1483511)
turbosquid
$10
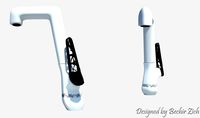
original faucet
...ree 3d model original faucet for download as ma, obj, and fbx on turbosquid: 3d models for games, architecture, videos. (1243295)
turbosquid
$30
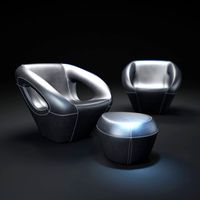
original-armchairs
... available on turbo squid, the world's leading provider of digital 3d models for visualization, films, television, and games.
turbosquid
$29

Baileys Original
... available on turbo squid, the world's leading provider of digital 3d models for visualization, films, television, and games.
turbosquid
$20

Original Chair
... available on turbo squid, the world's leading provider of digital 3d models for visualization, films, television, and games.
turbosquid
$20

original-armchair
... available on turbo squid, the world's leading provider of digital 3d models for visualization, films, television, and games.
turbosquid
$12
Original Chair_039
... available on turbo squid, the world's leading provider of digital 3d models for visualization, films, television, and games.
turbosquid
$10

Sofia Original
... available on turbo squid, the world's leading provider of digital 3d models for visualization, films, television, and games.