GrabCAD

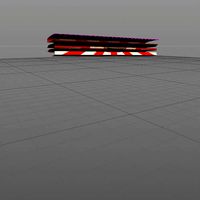
Open Sesame Challenge Preliminary Design proposal (Concept_vers1)1
by GrabCAD
Last crawled date: 1 year, 11 months ago
The design intent here was to focus on keeping a consistent and similar design with some of the other winning entries chosen in previous Blackboard challenges. It’s important to build a brand by having some design similarities among the product families. Since this is another card reader device, I’ve used Blackboards handheld reader (designed by David Franklin, from here on GrabCad,
https://grabcad.com/library/bb-transact-1) as inspiration for this design. I tried to incorporate some of the design and style cues of his design while adding my own flare and innovation. If you were to look at the two products side by side, you would know that they belong the same product family or company. Just like you can tell that a Logitech product is made by Logitech even though they might be completely different things with different functions.
I only realized that the antenna was going to be sandwiched with the main board after this design was finished. So in this case, I have designed it with the antenna as a separate board to the left. I have made a revised vers that I will add later that will have the revised, more accurate architecture with the sandwiched board. The designs and files I am offering are NOT JUST PRETTY surface models, all of my designs and model files are basically ready to mold, I design them as accurately as I can. There might be a need to change a few screw holes around, move a few ribs here and there, add a fillet or two, to meet your needs but otherwise they are designed with drafts and molding in mind.
When designing this, I reflected on the design considerations and tried to address all of them. Obviously it’s a beautiful design, but I also have considered its DURABILITY, RESISTANCE TO VANDALISM, ENVIRONMENT. I will explain further below, AND I also invite you to review the slides for better visual reference.
DURABILITY
I used .07” main wall thickness on the bottom half and .065” on the cover. These are descent thicknesses and a good balance between cost and durability. The weather protection guard is to be molded of durable rubber, it’s flexible and durable, it won’t crack or break.
VANDAL RESISTANT
The concept here is to use a custom aluminum backing plate as your foundation plate, this can be adapted any surface and it is screwed in place with special tamper proof screws(size m5or m6). Prior to this plate being installed, from behind, screws are inserted through the plate and bottom half of the case and then are threaded into the coverplate, thus closing and tightening the whole unit. The coverplate is designed with a lip so it fits over the bottom half to provide a weather proof seal. Because these screws for the case can only be accessed when the aluminum plate is off, there’s no way to get into the card reader unit without taking the aluminum plate off (which has the special tamper proof screws)
ENVIRONMENT
As noted above, the design intent was to keep a consistant aesthetic with some of the other family of card reader products but I also wanted to keep the lines and forms fairly conservative and straight considering it’s intended use as a door card reader. It’s an environment that see’s more conservative and more “industrial” design aesthetics. Not really the place for Apple Mac design styling. So although the design does have cues from David’s Franklin’s hand card reader, it’s overall more conservative and industrial in nature, straighter lines, simpler overall form etc.
**some notes on the features
I included a mag stripe reader in addition to the touch reader. All my designs are designed with simplicity of manufacturing in mind. There are literally a million ways we could about designing a case but budget will affect what can be done. There is no glass, no touch LED panels, no overmolding. In this particular design I only used two plastic halves which can be made with a simple two part pull mold for each part. This reduces the cost of the tooling greatly. Yet I tried not to sacrifice in terms of design aesthetics. I also tried to keep most of the parts for the CB off the shelf so the keyboard module is a fairly standard design, some slight alterations might need to be made depending on which model is chosen but overall shouldn’t be difficult to find vs. designing a complete custom keypad system. The LED’s and lenses can be bought off the shelf, or worst case the lense covers can be molded very inexpensively.
OVERALL DIMENSIONS:
5.3”L X 3.2”W X .85”h
There are two backplates, one short one for interior installation and one longer one for use with the rubber shroud for exterior installation.
As mentioned, I will be added another similar design to this that will be slightly different in dimensions(thinner) and tamperproof function so stay tuned.
I've uploaded .step and .iges files. I can make the native files available upon request. I've saved the files in .stl format but understand that I did not design them for FDM printing, they will most likely need to be tweaked for FDM printing, they will need to be run through a mesh editor, resized etc. I really didn't focus on making them 3D printable. The .step files should be good to go for injection molding.
Similar models
grabcad
free

Open Sesame Challenge Preliminary Design proposal (Concept 2)
...design-proposal-concept1_vers2-1
https://grabcad.com/library/open-sesame-challenge-preliminary-design-proposal-concept_vers1-1-1
grabcad
free

Card Reader 3
...card reader 3
grabcad
blackboard card reader design
grabcad
free

Card Reader 2
...card reader 2
grabcad
blackboard card reader
grabcad
free

Blackboard Reader Device Challenge
...esigned so it can be printed in 3d as well as injection molded.
technical drawings & renderings will be uploaded when needed.
grabcad
free

Blackboard Multi-Function Reader (BBmulti2)
... module
- a mini thermal printer
ps. i will add the credits later for the other components i recycled from the grabcad library.
thingiverse
free

3D-Freunde V2 Mosfet Holder for Anycubic i3 Mega SD Card Reader by Bearded_Engineer
...ll the necessary cables
test it!
(can be done with the printer laying on its side, just preheat for pla, don't move the axes)
grabcad
free

Card Reader 1
...card reader 1
grabcad
blackboard
grabcad
free

Triangular Blackboard reader
...h attractive and good look.
it contains :
1.number pad
2.contact less reader
3.magnetic card reader
can be easily manufactured.
grabcad
free

Blackboard Door Reader design
...e dimension is 130 mm x 80 mm x 23 mm. i have make 2 base. one is mounted with wall, and other for main bone of the construction.
grabcad
free

Blackboard:
...t the user.
powered by iec 320 c13 cord (the plugin at the back of the screen)
2 usb, ethernet (also at the back of the screen)
Vers1
cg_trader
$48

0014 Promise Ring - vers1 | 3D
...0014 promise ring - vers1 | 3d
cg trader
0014 promise ring - vers1
3dwarehouse
free

Christina 100mm legs vers1
...christina 100mm legs vers1
3dwarehouse
christina 100mm legs vers1
3dwarehouse
free

Jon Surf Rack Vers1
...board. 1 36' rack for misc items(..ie wetsuit hanger.) or optional wood board shelving can be placed across 2 rods. 4/16/2010
3dwarehouse
free

tango tent
...tango tent 3dwarehouse vers1 ...
Sesame
turbosquid
$25

sesame pogaca
... available on turbo squid, the world's leading provider of digital 3d models for visualization, films, television, and games.
3d_export
$20

Sesame Balls 3D Model
...sesame balls 3d model
3dexport
sesame balls chinese food shao mai dim sum meal
sesame balls 3d model jeremytsao 38322 3dexport
turbosquid
$15

Bread 17 sesame
...lty free 3d model bread 17 sesame for download as lwo and obj on turbosquid: 3d models for games, architecture, videos. (1349626)
turbosquid
$15

Bread With Sesame 091
... bread with sesame 091 for download as max, fbx, obj, and stl on turbosquid: 3d models for games, architecture, videos. (1561700)
turbosquid
$14

Sesame Kaiser Bun
... available on turbo squid, the world's leading provider of digital 3d models for visualization, films, television, and games.
turbosquid
$10

Sesame Kaiser Bread Roll
...del sesame kaiser bread roll for download as ma, max, and obj on turbosquid: 3d models for games, architecture, videos. (1218281)
turbosquid
$18

Sliced Bun with Sesame Seeds
... available on turbo squid, the world's leading provider of digital 3d models for visualization, films, television, and games.
3d_ocean
$18

Bitten bagel with sesame seeds
...aced on white square plate. available formats: • max scanline • max vray • max mentalray • cinema 4d • cinema 4d vray • fbx • obj
3d_ocean
$18

Pastry with meat
...fbx food meat mental ray obj pastry photorealistic scanned sesame vray scanned 3d model of two meat pastries with...
3d_ocean
$18

Bitten pastry with meat
...fbx food meat mental ray obj pastry photorealistic scanned sesame vray scanned 3d model of two meat pastries –...
Preliminary
3d_export
$15

Air purifier Bork
...on each side there is a reliable system of preliminary and combined...
thingiverse
free

Preliminary test by andres_900
...preliminary test by andres_900
thingiverse
this is a test from solidworks to .stl- it's not very important.
thingiverse
free

plumber's tape cover (preliminary) by freNRG
...plumber's tape cover (preliminary) by frenrg
thingiverse
work in progress, not uploadding ??
thingiverse
free

LED Lighthouse Project - Preliminary by gwpoulos
...n clearance (http://www.radioshack.com/product/index.jsp?productid=22128516). the electronics are controlled by an arduino micro.
thingiverse
free

Preliminary design for replacement momo force hub by ock10
...cement hub.
fillets and chamfers have not been added yet.
longer m3x45mm screws replace the m3x20mm screws that hold the gear on.
thingiverse
free

Descent 2 : Preliminary Integration Groundbot
...
thingiverse
slow speed and weak weapons systems make this robot a nuisance, but when you are low on shields, a deadly nuisance.
thingiverse
free

Preliminary drawing of iphone6+ mount for truck by MordecaiWolf
...t for truck by mordecaiwolf
thingiverse
i modified a mount for a cup holder to fit into a bezel format under a vent for a truck.
thingiverse
free

My Pocket PI PC, V2.0, Preliminary by phiatt
... cable, incorporate a slide switch to disconnect the pi from the dc-dc converter, and move some holes around, that's about it
thingiverse
free

LekPoleBracket by cfastie
...lekpolebracket by cfastie thingiverse this is a preliminary mockup, not for...
thingiverse
free

Pressure Probe Mount by mateoneutron
...pressure probe mount by mateoneutron thingiverse preliminary ...
Proposal
turbosquid
$100

Proposed Residential Development
...3d model proposed residential development for download as rvt on turbosquid: 3d models for games, architecture, videos. (1309182)
3d_export
$36

Flower Bouquet Propose Marry flowers and plants
...high res textures. textures res is from 512 to 2k. render: the file includes light and rendering settings,you can render directly
3ddd
$1

кровать Volpi Doge
...doge 3ddd doge , volpi , капитоне кровать volpi proposal 38 doge (без...
3d_export
$7

compass
...created with blender 2.92 but rendering with cycles i propose here the 2.92 version, but obj, fbx, bled, jpg and stl version too.
3d_export
$5

banana in a plate 3d
...a modifier to bananas subdivisions if you have a proposal for new models, write. enjoy using the...
3d_export
$10

drawing compass
...4d and physical render. solidworks model assembly is disponible i propose here the c4d version, but obj, fbx and stl version too.
3d_ocean
$4

Solitaire Ring
...jewellery ring this solitaire ring is made for marriage proposal you can use this lovely ring in your very...
3ddd
$1
Antonio Citterio Maxalto Imprimatur armchair
...etations. the first, more casual solution displays a seat split into two portions and a backrest with cushions of different sizes
3d_export
$25

Nyc block
...;br>fly-through animations...<br>broken into blocks. with render settings. the proposed concept of one of the buildings.
3d_export
$5

firs head sculpting
...cool so i upload here maybe somebody like it. actually i improvised the form completely and didn't have any propose. enjoy it
Challenge
turbosquid
$120
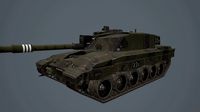
Challenger 2 and challenger 2 TES
...e 3d model challenger 2 and challenger 2 tes for download as on turbosquid: 3d models for games, architecture, videos. (1430319)
3d_export
$59
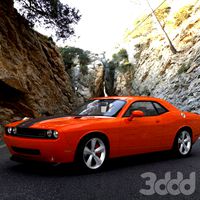
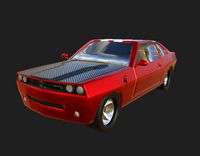
dodge challenger srt8
...dodge challenger srt8
3dexport
dodge challenger srt8
3d_export
$20
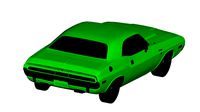
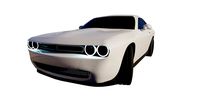
dodge challenger 1970
...dodge challenger 1970
3dexport
dodge challenger 1970
3d_export
$15
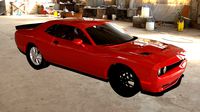
Dodge Challenger Hellcat
...dodge challenger hellcat
3dexport
dodge challenger hellcat
turbosquid
$80
challenger-2
...rbosquid
royalty free 3d model challenger-2 for download as on turbosquid: 3d models for games, architecture, videos. (1498848)
3d_export
$5

dodge challenger car
...dodge challenger car
3dexport
3d model dodge challenger!
turbosquid
$99
Dodge Challenger
...
royalty free 3d model dodge challenger for download as blend on turbosquid: 3d models for games, architecture, videos. (1489358)
turbosquid
$49

Dodge Challenger
...
royalty free 3d model dodge challenger for download as blend on turbosquid: 3d models for games, architecture, videos. (1698375)
turbosquid
$10
dodge challenger
...
royalty free 3d model dodge challenger for download as blend on turbosquid: 3d models for games, architecture, videos. (1405948)
3d_export
free

dodge challenger srt8
...dodge challenger srt8
3dexport
dodge challenger srt8 free model
Concept
3d_export
$5

concept house
...concept house
3dexport
concept house blend.
turbosquid
$20

concept
... available on turbo squid, the world's leading provider of digital 3d models for visualization, films, television, and games.
turbosquid
free

Concept
... available on turbo squid, the world's leading provider of digital 3d models for visualization, films, television, and games.
turbosquid
free

Concept
... available on turbo squid, the world's leading provider of digital 3d models for visualization, films, television, and games.
turbosquid
free

concept
... available on turbo squid, the world's leading provider of digital 3d models for visualization, films, television, and games.
3ddd
$1

Bo concept
...bo concept
3ddd
boconcept , декоративный набор
bo concept
3d_ocean
$45

Dreamcar concept
...cept cars from the past.before i became 3d modeler i sketched a lot futuristic cars.when i want it to look more realistic,i st...
3d_ocean
$49

Buggy Concept
... poly massive outdoor robust vehicle
just a model of are own buggy concept vehicle. maybe you can make a beautiful renders of it!
3d_export
free

concept s ii
...concept s ii
3dexport
concept car
3d_export
free

concept s iii
...concept s iii
3dexport
concept car
Open
3d_export
free
Opener
...r
3dexport
3d model of can opener. its my first work, if u can please show me my mistakes. this 3d model was created in autocad.
3d_export
free
Cap opener
...cap opener
3dexport
handy cap opener, more files/formats here:
3ddd
$1
Кресло, Open Oreon.
...кресло, open oreon.
3ddd
open , oreon
кресло, open oreon.
3d_ocean
$4
Open Book
...r interior max mental model open ray reading shelf text vray
open hardcover book with unique texture map on front and back cover.
turbosquid
$6
Opening Flag
...squid
royalty free 3d model opening flag for download as c4d on turbosquid: 3d models for games, architecture, videos. (1593555)
turbosquid
$10

Open book
...
royalty free 3d model open book for download as skp and obj on turbosquid: 3d models for games, architecture, videos. (1690781)
turbosquid
$2
bottle opener
...lty free 3d model bottle opener for download as blend and obj on turbosquid: 3d models for games, architecture, videos. (1621201)
turbosquid
$24
Bottle Opener
...free 3d model bottle opener for download as max, obj, and fbx on turbosquid: 3d models for games, architecture, videos. (1300948)
turbosquid
$20
Open Box
...yalty free 3d model open box for download as ma, obj, and fbx on turbosquid: 3d models for games, architecture, videos. (1481218)
turbosquid
$10

Wine Opener
...ty free 3d model wine opener for download as ma, obj, and fbx on turbosquid: 3d models for games, architecture, videos. (1240730)
1
turbosquid
$69

armchairs(1)(1)
... available on turbo squid, the world's leading provider of digital 3d models for visualization, films, television, and games.
turbosquid
$15

ring 1+1
... available on turbo squid, the world's leading provider of digital 3d models for visualization, films, television, and games.
turbosquid
$10

chair(1)(1)
... available on turbo squid, the world's leading provider of digital 3d models for visualization, films, television, and games.
turbosquid
$8

Chair(1)(1)
... available on turbo squid, the world's leading provider of digital 3d models for visualization, films, television, and games.
turbosquid
$2

RING 1(1)
... available on turbo squid, the world's leading provider of digital 3d models for visualization, films, television, and games.
turbosquid
$1

house 1(1)
... available on turbo squid, the world's leading provider of digital 3d models for visualization, films, television, and games.
turbosquid
$1

Table 1(1)
... available on turbo squid, the world's leading provider of digital 3d models for visualization, films, television, and games.
turbosquid
$59

Formula 1(1)
...lty free 3d model formula 1 for download as max, fbx, and obj on turbosquid: 3d models for games, architecture, videos. (1567088)
design_connected
$11

No 1
...no 1
designconnected
sibast no 1 computer generated 3d model. designed by sibast, helge.
turbosquid
$2

desert house(1)(1)
...3d model desert house(1)(1) for download as 3ds, max, and obj on turbosquid: 3d models for games, architecture, videos. (1055095)
Design
3ddd
$1
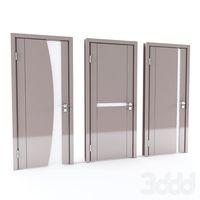
LINE DESIGN (Doors Design)
...line design (doors design)
3ddd
дверь
modern doors design - line design concept
turbosquid
$5

designer
...alty free 3d model designer for download as max, obj, and fbx on turbosquid: 3d models for games, architecture, videos. (1422665)
3ddd
$1
VER DESIGN
...ver design
3ddd
ver design
кресло ver design
3ddd
$1
VER DESIGN
...ver design
3ddd
ver design
диван ver design
3ddd
$1
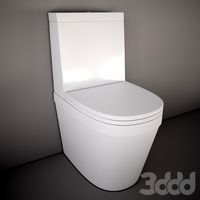
Bagno design
...bagno design
3ddd
bagno design , унитаз
санитария bagno design
3ddd
free
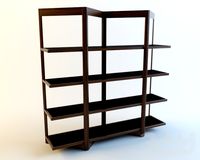
VER DESIGN
...ver design
3ddd
ver design , стеллаж
полка ver design
3ddd
$1
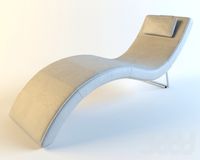
VER DESIGN
...ver design , лежак , шезлонг
шезлонг ver design
3d_export
free

designer
..., trees and much more. the model has 3 types of parts: - 4 cells - 6 cells - 8 cells the *.max file contains 5 colored materials.
3d_export
$19

level design
...level design
3dexport
you can use this design (level design) in your own game.
3d_export
$7
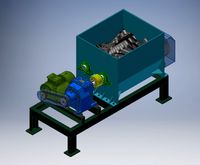
Crusher design
...crusher design
3dexport
crusher design