Thingiverse
OneUp Expansion Project by ashoe
by Thingiverse
Last crawled date: 4 years, 4 months ago
Bought my oneup this year and already wanting to expand it. Instead of going the easy route and buying the oneup to twoup upgrade from QUBD I decided to print and enlarge the print surface on my own. I am starting this to keep track of my progress and upload the parts and pieces used to complete my project.
The purpose of this project it to expand the print bed and strengthen the overall printer working in the confines of the stock print bed to produce the parts needed and using as many of the stock parts as can be done to do so. After the bed has been expanded I will most likely reprint some pieces since I will then be able to produce larger pieces.
So far:
Created:
build platform base expansion design begun. Plan to cut wood piece and add 150mm(+) using four printed pieces and metal to span the distance. Considering reusing the linear action rods that will be replaced to connect the cut pieces as seen in first draft design.
Purchased:
6 feet linear action rods to be cut into 4 pieces to use for X-axis and Y-axis expansion
New length of belt to be cut and fit and new gears for X and Y motors.
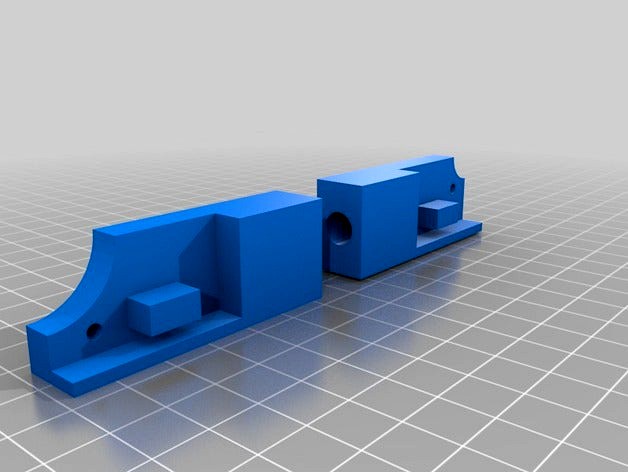
Update 3/31/15 - Changed the model, moved holes for screws that will pass through printed piece and wood for a little extra support. Also, increased the scallop cut out of the rectangle that is there to allow for the Y-axis rods. After printing I noticed it was not cut enough to clear where the rods protrude past the wood "U" shaped piece on the stock printer. Think these are a go for the first prototype, at least can get it going to print some replacements once I expand the whole thing or put it back together as is with some metal straps if all fails! Next, quick design of the parts to expand the Y-carriage itself. These are simple and again use the stock rods to expand the width after cutting the stock wood in two. The holes for screws will probably require some rethinking to keep the part simple but allow for nut and bolt to be used to add strength to the connection between the printed part and the stock wood. May end up using screws here or even filling the hole with epoxy to join the two but that seems a little too permanent to me, probably go for captive nut and bolt if I redo the model.
4/1/2015 - Redid the carriage expansion pieces last night. Don't know why I had the bar underneath on the first go which caused the issue with the nut and bolt I wanted to use for support. I flipped the whole thing to the side now so the bar will sit outside the carriage. This will also maybe give me a good surface to mount an endstop which I have not started thinking about but came to mind while drawing this last night. Part has been updated. Going to work on the "handle" part now but that may end up just being a new cut piece of wood or plastic as expanding this like I am doing for the rest of the body is a bit overkill. I can easily cut and drill two holes in something and use it as a replacement handle. Once I get all this printed and am happy with it I will begin making a template and cutting the printer in two. I'll take photos and post those when I do.
4/2/15 - Yeah, screwed up that carriage extension piece. Way to thick for how much "meat" there will be on each side once I halve the carriage. Re-done now so should allow for both screw holes to be used plus extended where the rod will go to give that some more support. This sits on the outside of the carriage wood piece so there is plenty of room for it to extend as it does.
The purpose of this project it to expand the print bed and strengthen the overall printer working in the confines of the stock print bed to produce the parts needed and using as many of the stock parts as can be done to do so. After the bed has been expanded I will most likely reprint some pieces since I will then be able to produce larger pieces.
So far:
Created:
build platform base expansion design begun. Plan to cut wood piece and add 150mm(+) using four printed pieces and metal to span the distance. Considering reusing the linear action rods that will be replaced to connect the cut pieces as seen in first draft design.
Purchased:
6 feet linear action rods to be cut into 4 pieces to use for X-axis and Y-axis expansion
New length of belt to be cut and fit and new gears for X and Y motors.
Update 3/31/15 - Changed the model, moved holes for screws that will pass through printed piece and wood for a little extra support. Also, increased the scallop cut out of the rectangle that is there to allow for the Y-axis rods. After printing I noticed it was not cut enough to clear where the rods protrude past the wood "U" shaped piece on the stock printer. Think these are a go for the first prototype, at least can get it going to print some replacements once I expand the whole thing or put it back together as is with some metal straps if all fails! Next, quick design of the parts to expand the Y-carriage itself. These are simple and again use the stock rods to expand the width after cutting the stock wood in two. The holes for screws will probably require some rethinking to keep the part simple but allow for nut and bolt to be used to add strength to the connection between the printed part and the stock wood. May end up using screws here or even filling the hole with epoxy to join the two but that seems a little too permanent to me, probably go for captive nut and bolt if I redo the model.
4/1/2015 - Redid the carriage expansion pieces last night. Don't know why I had the bar underneath on the first go which caused the issue with the nut and bolt I wanted to use for support. I flipped the whole thing to the side now so the bar will sit outside the carriage. This will also maybe give me a good surface to mount an endstop which I have not started thinking about but came to mind while drawing this last night. Part has been updated. Going to work on the "handle" part now but that may end up just being a new cut piece of wood or plastic as expanding this like I am doing for the rest of the body is a bit overkill. I can easily cut and drill two holes in something and use it as a replacement handle. Once I get all this printed and am happy with it I will begin making a template and cutting the printer in two. I'll take photos and post those when I do.
4/2/15 - Yeah, screwed up that carriage extension piece. Way to thick for how much "meat" there will be on each side once I halve the carriage. Re-done now so should allow for both screw holes to be used plus extended where the rod will go to give that some more support. This sits on the outside of the carriage wood piece so there is plenty of room for it to extend as it does.