Thingiverse

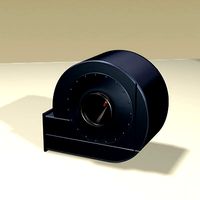
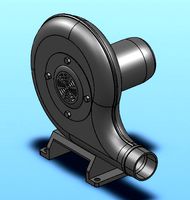
Nozzle Viewing Shroud and Blower Fan Mount for Wanhao Duplicator i3 by Pigworthy
by Thingiverse
Last crawled date: 3 years ago
UPDATE: 10-25-2016: Wanhao i3 PLUS design is here http://www.thingiverse.com/thing:1850770
UPDATE: 10-06-2016: This will not work for the Wanhao i3 PLUS. Should have one designed and proven for that printer next week.
UPDATE: 10-08-2015
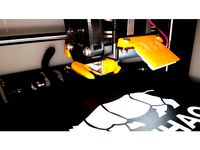
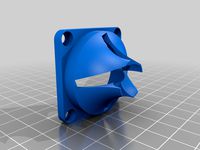
Newest Fan Shroud (ver8) and Fan Guard (ver2) is loaded. This mounts very rigid to the machine. It was designed to use #4 x 3/8" screws to mount to the machine and #6 x 1" long screws to mount the Blower Fan and Grill to the mount and together.
I used 1.010 (101%) scale when I printed. Just print 4 of one of the nozzles also and your all set.
UPDATE: 10-05-2015
Thanks to everyone and their interest. One of the issues I have dealt with, with the current design, is the shroud letting loose / tilting off of the Fan housing sometimes. I've updated the design so the shroud includes a new mount to the machine. This installs much easier and makes a very solid shroud (2nd photo of new shroud). I've got a couple of alignment issues to work out yet but I hope to have it on the site in the next couple of days. It does use the same Air nozzles and Fan Grille.
ORIGINAL:
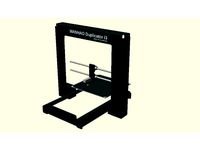
I'm a newbie to 3d printing and just purchased the Wanhao Duplicator i3 recently. I wanted better cooling so I had a better cooler installed on it. This works very well, but I had one major issue with it and all other shrouds, I could not see the nozzle anymore. I couldn't easily watch those first layers go down to see if everything looked good.
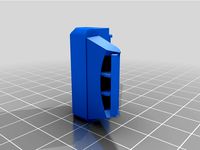
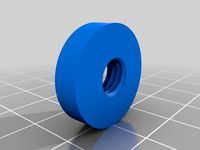
So I designed this to use a low profile shroud ring with 4 additional air nozzles you glue onto it. There are alignment ribs on the air nozzles, and multiple air nozzle designs, #01 is the best in my opinion. You do have to do some fitting of the air nozzles to the shroud before gluing.
For mounting the bracket to the machine use 2 #4 x 1/2" screws. This is to make sure the angled screw mount will still go through the mount bracket on the machine. The mount holes in the bracket are sized for the screw also.
I did add pads to the shroud and found this to be the better file to print ABS in. That round end really likes to curl up, not much holding it down with all the air openings. I just used supports in the main neck area, which you can remove easily.
I used this fan.http://www.amazon.com/gp/product/B00MJU6JR2?psc=1&redirect=true&ref_=oh_aui_detailpage_o02_s00
UPDATE: 10-06-2016: This will not work for the Wanhao i3 PLUS. Should have one designed and proven for that printer next week.
UPDATE: 10-08-2015
Newest Fan Shroud (ver8) and Fan Guard (ver2) is loaded. This mounts very rigid to the machine. It was designed to use #4 x 3/8" screws to mount to the machine and #6 x 1" long screws to mount the Blower Fan and Grill to the mount and together.
I used 1.010 (101%) scale when I printed. Just print 4 of one of the nozzles also and your all set.
UPDATE: 10-05-2015
Thanks to everyone and their interest. One of the issues I have dealt with, with the current design, is the shroud letting loose / tilting off of the Fan housing sometimes. I've updated the design so the shroud includes a new mount to the machine. This installs much easier and makes a very solid shroud (2nd photo of new shroud). I've got a couple of alignment issues to work out yet but I hope to have it on the site in the next couple of days. It does use the same Air nozzles and Fan Grille.
ORIGINAL:
I'm a newbie to 3d printing and just purchased the Wanhao Duplicator i3 recently. I wanted better cooling so I had a better cooler installed on it. This works very well, but I had one major issue with it and all other shrouds, I could not see the nozzle anymore. I couldn't easily watch those first layers go down to see if everything looked good.
So I designed this to use a low profile shroud ring with 4 additional air nozzles you glue onto it. There are alignment ribs on the air nozzles, and multiple air nozzle designs, #01 is the best in my opinion. You do have to do some fitting of the air nozzles to the shroud before gluing.
For mounting the bracket to the machine use 2 #4 x 1/2" screws. This is to make sure the angled screw mount will still go through the mount bracket on the machine. The mount holes in the bracket are sized for the screw also.
I did add pads to the shroud and found this to be the better file to print ABS in. That round end really likes to curl up, not much holding it down with all the air openings. I just used supports in the main neck area, which you can remove easily.
I used this fan.http://www.amazon.com/gp/product/B00MJU6JR2?psc=1&redirect=true&ref_=oh_aui_detailpage_o02_s00
Similar models
thingiverse
free

Nozzle Viewing Shroud and Blower Fan Mount for Wanhao Duplicator i3 plus by Pigworthy
...zles and glue them in and your all set.
it is designed to work with a blower fan 50mmx15mm. make sure to get the correct voltage.
thingiverse
free

50mm Wanhao Duplicator i3 v2.1 Rear fan - updated with blower adapters by rdsail
...and petg at .2 resolution with no issues.
i added 2 blower adapters for a 50mm x15mm. one is for single and the other is double.
thingiverse
free

Nozzle Viewing Shroud and Blower Fan Mount for Wanhao Duplicator i3 plus by _shape_shift_
... just print 4 of the shroud nozzles and a fan guard (optional) from his original thing -https://www.thingiverse.com/thing:1850770
thingiverse
free

Wanhao Duplicator i3 Mini Fan Grill - Updated
...and it's clones. the domed design reduces air flow noise. i also include unbranded options. will need to print with supports.
thingiverse
free

Wanhao Duplicator 6 blower shroud by gimp
...ight. no loss of any movement area. no drop in extruder temp after initial turn on. designed to press fit into blower fan nozzle.
thingiverse
free

BLTouch Mount for Wanhao i3 by rhattie
...crews onto the fan mount, and can be used in conjunction with a front-mounted fan shroud, as long as your screws are long enough.
thingiverse
free

Wanhao Duplicator i3 fan mount spacers by tahustvedt
...f fans which are mounted to the original mounting bracket on the wanhao duplicator i3 printer.
the spacers are 3mm and 1mm tall.
thingiverse
free

Maker Select / Wanhao / Cocoon Fan Mount by UNCCEngineer
...fit). mounts on the stock fan shroud and is similar to the fan design used on prusa i3 mk2...
thingiverse
free

Wanhao Duplicator i3 40mm Fan Adapter by Outcold09
...hao duplicator i3 40mm fan adapter by outcold09
thingiverse
40mm fan adapter for the extruder nozzle of an wanhao duplicator i3.
thingiverse
free

Wanhao Duplicator 6 Simple Fan Shroud (3 supports)
...erse
modification of existing fan shroud design, adds an additional, 3rd screw support for the wanhao duplicator 6 screw layout.
Pigworthy
thingiverse
free

Star Realms Card Box by Pigworthy
...ed into place, but are not needed. they are just for looks.
designed to be printed with a .4mm nozzle and a .2mm layer thickness.
thingiverse
free

Battlelore 2nd Edition Gaming Insert by Pigworthy
...ccess. it's made to fit into (with a little modification) the foam core tray system that many gamers have made for this game.
thingiverse
free

Accuset A200BN Brad Nailer No-Mar Tip by Pigworthy
...ok for a local 3d print service and send them a link to this model. if you can not find a local print service use an online one.
thingiverse
free

Shaker Lid Top Canning Jar Regular Mouth by Pigworthy
...e use it for a homemade scrub and a homemade seasoning.
multiple opening sizes from 2mm - 6mm
scrub top has holes just over 2.5mm
thingiverse
free

XBOX Battery Organizer / Holder AA by Pigworthy
...ded tape together.
update: updated 2 piece design. use the rev 4 files. they interlock much more easily without much filing work.
thingiverse
free

Dead Men Tell No Tales (Board Game Insert & Storage) Remix by Pigworthy
...2) (3) or (5). this is how many you should print if you want the whole set.
all skulls are inlaid or inserted and must be glued.
thingiverse
free

XBOX 360 Thumbstick Controller Extension by Pigworthy
...ou print and use one of these on your controllers and like it, please come back and give it a like and show the made here also.
thingiverse
free

Noozle Viewing Fan Shroud for wider Fan by abrandl
...files form pigworthy's thing (http://www.thingiverse.com/thing:1850770) as well... thanks to pigworthy for the great work and for providing me his...
thingiverse
free
Nozzle Viewing Shroud and Blower Fan Mount for Wanhao Duplicator i3 plus by _shape_shift_
...fan shroud with a 5mm neck extension- done by pigworthy it fits my i3p with a flexion extruder upgrade,...
thingiverse
free

XBOX ONE Thumbstick Controller Extension by Pigworthy
...ou print and use one of these on your controllers and like it, please come back and give it a like and show the made here also.
Wanhao
thingiverse
free

Wanhao Logo Plate / Wanhao Logo Schild by JMDesigns
...wanhao logo plate / wanhao logo schild by jmdesigns
thingiverse
wanhao logo plate / wanhao logo schild
thingiverse
free
Wanhao logo by nebtio
...wanhao logo by nebtio
thingiverse
wanhao logo
thingiverse
free
Wanhao keychain by Rein3003
...wanhao keychain by rein3003
thingiverse
a keychain with the logo of wanhao
thingiverse
free
Wanhao Di3 v2 Light / Wanhao Di3 v2 Beleuchtung by JMDesigns
...wanhao di3 v2 light / wanhao di3 v2 beleuchtung by jmdesigns
thingiverse
wanhao di3 v2 light / wanhao di3 v2 beleuchtung
thingiverse
free

TUSH For Wanhao by wtmi1992
...tush for wanhao by wtmi1992
thingiverse
the ultimate spool holder, modified for the top of the wanhao control box. fits snug.
thingiverse
free
fanduct wanhao d12 by theopoilmek
...fanduct wanhao d12 by theopoilmek
thingiverse
fanduct pour wanhao d12
thingiverse
free
Wanhao i3 Marlin by johan21
...wanhao i3 marlin by johan21
thingiverse
marlin for wanhao i3 rampsboard 1.4.
thingiverse
free

Wanhao Duplicator i3 by imagineering4
...wanhao duplicator i3 by imagineering4
thingiverse
these are the stl files for the improvements to the wanhao duplicator i3, v2
thingiverse
free

Wanhao D6 filament guard
...wanhao d6 filament guard
thingiverse
this is a filament guard for wanhao d6 machine to avoid the filament unrolling
thingiverse
free
Wanhao Duplicator i3 Model by Hilde3D
...wanhao duplicator i3 model by hilde3d
thingiverse
wanhao duplicator i3 model
Shroud
3d_export
$500

Centrifugal pump volute casing with impeller
...casing with impeller 3dexport volute casing with impeller and shroud ...
3d_export
$35

The Holy Face base relief 3D Model
...the holy face base relief 3d model 3dexport shroud turin veronica veronica's veil gospel ikon jesus holy face...
3d_export
$20

present car cloth presentation transport transportation shape concepts show celebration cover showro
...transportation shape concepts show celebration cover showroom covered revealin shroudd cover covering tarp draped fabric cloth showroom reveal revealing...
3d_export
$5

Lockheed F-117 Nighthawk lowpoly stealth bomber
...initial operating capability status in 1983. the aircraft was shroudd in secrecy until it was revealed to the public...
3d_export
$49

kriss vector gen 2 sub-d
...rear flip sight.<br>- vector ejection port.<br>- vector crb square shroud / 16"" sliencer.<br>- ds150 stock.<br>- .ma (maya 2020 ascii)<br>-...
3d_export
$10

vichy dining table
...in oak, sycamore and walnut marquetry.<br>even if the restaurant shroud the vichy in a long table cloth, two slender...
3d_export
$500

us navy pcu sterett ddg-104 arleigh burke class destroyer flight iia max
...the position has been shifted.<br>q. where are the exhaust shroud for the stacks?<br>a. since ddg-89, the exhaust system was...
thingiverse
free

shroud by samshay317
...shroud by samshay317
thingiverse
shroud
thingiverse
free

Fan Shroud
...fan shroud
thingiverse
this is a fan shroud for a 140mm fan
thingiverse
free
40mm fan shroud
...40mm fan shroud
thingiverse
40mm fan shroud
Duplicator
turbosquid
$10

duplicate
...
turbosquid
royalty free 3d model duplicate for download as on turbosquid: 3d models for games, architecture, videos. (1566034)
turbosquid
$20

Wonderful duplicate kids room
...ul duplicate kids room for download as skp, 3ds, fbx, and obj on turbosquid: 3d models for games, architecture, videos. (1609462)
archive3d
free

Copier 3D Model
...hine duplicating machine
copier n160808 - 3d model (*.gsm+*.3ds) for interior 3d visualization.
3d_export
$30

connect four set
...ate objects that can be disassembled. includes one red and one black checker which can be duplicated to the standard 42 checkers.
3ddd
$1
Черепица
...del
- put it in your scene and duplicate
- level of detail can be edited
- open with 3ds max 2010-2013 or import in your program.
3d_export
$27

Dividing Cell / Ovule 3D Model
...al microbe blob ovum fiction science ovule duplication divide dividing
dividing cell / ovule 3d model duchampmodels 9691 3dexport
3d_ocean
$16

Folding Chair
...tubing. designed to be good low poly at a distance and mesh smooth pretty well and light weight for duplicating a lot. package...
3d_export
$8
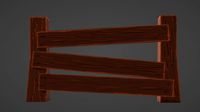
wooden fence
... one post separate so the fence can be duplicated and extended. created in blender 3.0 file format fbx with texture painted maps.
3d_export
$8
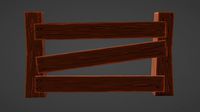
wooden fence
... one post separate so the fence can be duplicated and extended. created in blender 3.0 file format fbx with texture painted maps.
3d_ocean
$2

DNA Strands Of 5 Types
... strands that can be multiplied and can be made long chains by duplicating them and can be easily applied materials and textures.
Blower
3d_export
$5
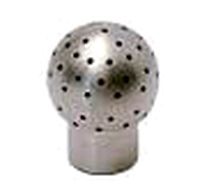
ball blower
...ball blower
3dexport
ball blower
3d_export
$10

engine blower assambly
...engine blower assambly
3dexport
engine blower assambly
3d_export
$5

air pipe blower
...air pipe blower
3dexport
air pipe blower
3d_export
$5

air hand blower
...air hand blower
3dexport
air hand blower
3d_export
$5
Blower Boom 3D Model
...blower boom 3d model
3dexport
boom blower
blower boom 3d model bkl1989 63079 3dexport
turbosquid
$44
blower-dxf
... available on turbo squid, the world's leading provider of digital 3d models for visualization, films, television, and games.
turbosquid
$39

Old Blower
...l old blower for download as ma, max, gltf, fbx, obj, and stl on turbosquid: 3d models for games, architecture, videos. (1638848)
3d_export
$7
zy series centrifugal blower
...zy series centrifugal blower
3dexport
zy series centrifugal blower
3d_export
$5
root blower compressor
...oot blower compressor
3dexport
you will get both .stl and .sldprt format of root blower compressor from here at very cheap rate.
turbosquid
$5
V8 engine with blower
... available on turbo squid, the world's leading provider of digital 3d models for visualization, films, television, and games.
I3
3d_export
$10

suv i3
...suv i3
3dexport
suv i3 2013 series
3d_ocean
$89

BMW i3 2012
...y, in real units of measurement, qualitatively and maximally close to the original. model formats: - *.max (3ds max 2008 scanl...
cg_studio
$99

BMW i3 20143d model
...
cgstudio
.3ds .c4d .fbx .lwo .max .obj - bmw i3 2014 3d model, royalty free license available, instant download after purchase.
cg_studio
$99

BMW i3 20123d model
...tudio
.3ds .c4d .fbx .lwo .max .mb .obj - bmw i3 2012 3d model, royalty free license available, instant download after purchase.
cg_studio
$99

BMW i3 20143d model
...tudio
.3ds .c4d .fbx .lwo .max .mb .obj - bmw i3 2014 3d model, royalty free license available, instant download after purchase.
humster3d
$75

3D model of BMW i3 2014
...
buy a detailed 3d model of bmw i3 2014 in various file formats. all our 3d models were created maximally close to the original.
humster3d
$40

3D model of Kitchen Set I3
...uy a detailed 3d model of kitchen set i3 in various file formats. all our 3d models were created maximally close to the original.
3d_ocean
$30

Kitchen set i3
...ensils oven plates shelves sink table ware
kitchen set i3 include 3d models: cooker, oven, sink, cupboards, table, chair, plates.
3d_ocean
$89

BMW i3 2014
...y, in real units of measurement, qualitatively and maximally close to the original. model formats: - *.max (3ds max 2008 scanl...
cg_studio
$99

BMW i3 Concept 20113d model
...i3
.3ds .c4d .fbx .lwo .max .obj - bmw i3 concept 2011 3d model, royalty free license available, instant download after purchase.
Nozzle
3d_export
$5

nozzle
...nozzle
3dexport
3d_export
$49

fuel nozzles
...fuel nozzles
3dexport
fuel nozzles 3d model. include max, obj, fbx files.
archive3d
free

Nozzle 3D Model
...archive3d
nozzle hair-drier ware
nozzle - 3d model (*.gsm+*.3ds) for interior 3d visualization.
turbosquid
$25

Pirouette Nozzle
... available on turbo squid, the world's leading provider of digital 3d models for visualization, films, television, and games.
turbosquid
$10

Fuel Nozzle
...model fuel nozzle for download as c4d, fbx, obj, 3ds, and stl on turbosquid: 3d models for games, architecture, videos. (1672732)
turbosquid
$8

Aeration Nozzles
... available on turbo squid, the world's leading provider of digital 3d models for visualization, films, television, and games.
3d_export
$10

laval airjet nozzle
...laval airjet nozzle
3dexport
a simple modified laval nozzle (airjet shooter) for sorting purposes.
3d_export
$36

Gas nozzle 3D Model
... 3d model
3dexport
gas pump nozzle dispenser filling station petrol fuel spout tank gun
gas nozzle 3d model tartino 1945 3dexport
turbosquid
$10

Diecast Jet nozzle
... free 3d model diecast jet nozzle for download as obj and stl on turbosquid: 3d models for games, architecture, videos. (1425990)
turbosquid
$39
Rocket nozzle, supressor.
... available on turbo squid, the world's leading provider of digital 3d models for visualization, films, television, and games.
Fan
3d_export
$5

fan
...fan
3dexport
fan 3d model, table fan, fan, electric fan, ventilator
archibase_planet
free

Fan
...fan
archibase planet
fan large fan
fan out n260707 - 3d model for interior 3d visualization.
archibase_planet
free

Fan
...fan
archibase planet
fan ceiling fan ventilator
fan stealth n300615 - 3d model (*.gsm+*.3ds) for interior 3d visualization.
3d_export
$15

fan
...fan
3dexport
is an ancient fan
3ddd
$1

Fan-C-Fan by marco gallegos
...n-c-fan by marco gallegos
3ddd
вентилятор , marco gallegos
fan-c-fan by marco gallegos
3d_export
$10

fan
...fan
3dexport
a detailed fan designed for home or space blowing is now available for only 19.99!
turbosquid
$1

Fan
...fan
turbosquid
free 3d model fan for download as on turbosquid: 3d models for games, architecture, videos. (1427865)
turbosquid
$14

Fan
...fan
turbosquid
royalty free 3d model fan for download as on turbosquid: 3d models for games, architecture, videos. (1415642)
3ddd
$1

Светильник Fan
...светильник fan
3ddd
fan , italamp
светильник fan, производитель italamp
turbosquid
$25

Fan
...fan
turbosquid
royalty free 3d model fan for download as c4d on turbosquid: 3d models for games, architecture, videos. (1483246)
Viewing
turbosquid
$9

View VIEW black coin
...oyalty free 3d model view view black coin for download as max on turbosquid: 3d models for games, architecture, videos. (1634125)
turbosquid
$9

View VIEW gold coin
...royalty free 3d model view view gold coin for download as max on turbosquid: 3d models for games, architecture, videos. (1634120)
turbosquid
$2

View
...del view for download as c4d, ma, 3ds, dae, fbx, obj, and stl on turbosquid: 3d models for games, architecture, videos. (1601008)
3d_ocean
$16

room view
...room view
3docean
balcony chair floor red room scene view
simple view of a room to outside
turbosquid
$15

Sea View
...w
turbosquid
royalty free 3d model sea view for download as on turbosquid: 3d models for games, architecture, videos. (1250643)
turbosquid
$15

View tower
...rbosquid
royalty free 3d model view tower for download as ma on turbosquid: 3d models for games, architecture, videos. (1189700)
turbosquid
$2

street view
...quid
royalty free 3d model street view for download as blend on turbosquid: 3d models for games, architecture, videos. (1231592)
3ddd
$1

Бра Global Views
...бра global views
3ddd
global views
бра global views, моделил по фото, текстуры не требуются.
3d_export
$8

Road Way View
...road way view is a bundle in which there are two poles and there is straight road going. its is basically giving a roadside view.
turbosquid
$6

Jacuzzi View
... available on turbo squid, the world's leading provider of digital 3d models for visualization, films, television, and games.
Mount
3d_export
free

mounting bracket
...mounting plate is the portion of a hinge that attaches to the wood. mounting plates can be used indoors, cabinetry and furniture.
turbosquid
$2

MOUNTING
... available on turbo squid, the world's leading provider of digital 3d models for visualization, films, television, and games.
turbosquid
free

Mounts
... available on turbo squid, the world's leading provider of digital 3d models for visualization, films, television, and games.
turbosquid
free

Mount Fuji
...fuji
turbosquid
free 3d model mount fuji for download as obj on turbosquid: 3d models for games, architecture, videos. (1579977)
3d_export
$5

Headphone mount LR
...headphone mount lr
3dexport
headphone mount l+r
turbosquid
$39

Mount rainier
...quid
royalty free 3d model mount rainier for download as fbx on turbosquid: 3d models for games, architecture, videos. (1492586)
turbosquid
$5

pipe mounting
...quid
royalty free 3d model pipe mounting for download as obj on turbosquid: 3d models for games, architecture, videos. (1293744)
turbosquid
$3

Mounting Tires
...uid
royalty free 3d model mounting tires for download as fbx on turbosquid: 3d models for games, architecture, videos. (1708511)
3d_export
$5

Magnetic GoPro Mount
...pro mount
3dexport
cool magnetic mount for gopro. allows you to mount the camera on flat metal surfaces and get exclusive shots.
turbosquid
$5

Stone Mount
...ty free 3d model stone mount for download as ma, obj, and fbx on turbosquid: 3d models for games, architecture, videos. (1370306)