Thingiverse

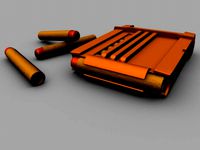
NERF BALL CATAPULT by fernanoob
by Thingiverse
Last crawled date: 4 years, 1 month ago
The difference to the Remix is a Stronger, reinforced arm with an angled head. The original arm tends to snap after multiple use due to continual impact at the impact points just above the rubber band notch. I'm removed the square notch altogether and placed a small triangular notch instead.
The head where ammo is placed is now angled to allow the shot to have an angled projectory vs the straight shot that the old arm produced. This way the Kinetic force that is passed from the Catapult arm into the ball projects the ball upward at an angle. Thus making for a better experience. (Previously, I had to angle the Catapult or prop it up on some books to make it shoot properly. ENJOY!
PIECES TO PRINT INCLUDE: (Print at a minimum of 20% for Strength)
(1)BRACE LEFT
(1) BRACE RIGHT
(3) CROSSBARS
(1) ANGLED LAUNCH ARM
(1) PENNION SHAFT
(1) PENNION BASE
(1) PENNION FLAG
ASSEMBLY:
Place Launch Arm in Brace Holes prior to placing Crossbars at front and back. (Be sure the Launch arm is positioned up above the Rear Crossbar prior to gluing. Otherwise you'll need to remove rear crossbar)
Next, place Top Crossbar in place while Launch arm is resting on Rear Crossbar.
Next, Assemble the Flag to the Pennion and base. (Self Explanatory)
Next, Secure rubber bands onto the assembled Catapult via the notches on the front and back of Launch Arm.
ENJOY!
Either NERF or Aftermarket Nerf balls can be purchased for less than $10 at Walmart or off Amazon.
Similar models
thingiverse
free

Catapult Arm for iPad Stand by Arnic
... put the support pins in the nearest notches, so the support is vertical. insert the notched end of the arm into the rubber band.
thingiverse
free

Ping Pong Catapult
... launch arm allow adjusting the tension of the rubber band. the pegs on the inside of the frame allow adjusting the launch angle.
thingiverse
free

Catapult (Launches pennies) by TyeffaIsABallah
...ches at approximately 35 to 40 degree angle. with the rubber bands shown in the picture it launches about 30'.printed in pla.
thingiverse
free

Nerf Catapult by Pybrotechnic
...he plunger and releasing.
note: it is not a full nerf gun since it does not have a trigger and cannot store darts only fire them.
thingiverse
free

Mini Desk Catapult by ace_303
...also provides the power that shoots the catapult. shoots about 15 ft with a decent rubber band, max launch length is about 20 ft.
thingiverse
free

Penny Catapult by DaisyOParnell
...penny catapult by daisyoparnell
thingiverse
this is a penny catapult. use rubber bands to make it launch.
thingiverse
free

Catapult by ebrown14
...e
this catapult is propelled by rubber bands. very simple to assemble. fires both ping pong balls and marshmallows. super fun!!!
grabcad
free

Catapult Design
...l the parts must inside the 3-d volume. the ball is launched using rubber bands, which are attached to the arm and also the base.
thingiverse
free

Rubber Band Catapult by LJefson
...rubber band catapult by ljefson
thingiverse
a catapult assembly designed to shoot pennies. all it needs are a few rubber bands!
thingiverse
free

Nerf Dreadbolt Bow Spacer by BuffdaddyNerf
...ension is more than enough to keep the bow arms in place during use.
this is version 1. feel free to improve upon it if you like!

Catapult
3d_export
$5

medieval catapult
...medieval catapult
3dexport
this is a catapult
turbosquid
$30

Catapult
...turbosquid
royalty free 3d model catapult for download as ma on turbosquid: 3d models for games, architecture, videos. (1266660)
turbosquid
$11

Catapult
...urbosquid
royalty free 3d model catapult for download as max on turbosquid: 3d models for games, architecture, videos. (1491788)
turbosquid
free

catapult
...urbosquid
royalty free 3d model catapult for download as c4d on turbosquid: 3d models for games, architecture, videos. (1381505)
turbosquid
$10

Catapult
...d
royalty free 3d model catapult for download as max and obj on turbosquid: 3d models for games, architecture, videos. (1409408)
turbosquid
$85

Catapult
...alty free 3d model catapult for download as 3ds, fbx, and obj on turbosquid: 3d models for games, architecture, videos. (1610894)
turbosquid
$5

Catapult
...alty free 3d model catapult for download as 3ds, max, and fbx on turbosquid: 3d models for games, architecture, videos. (1309806)
turbosquid
$40

Catapult
...free 3d model catapult for download as 3ds, obj, 3dm, and skp on turbosquid: 3d models for games, architecture, videos. (1270846)
turbosquid
$15

Catapult
...free 3d model catapult for download as fbx, obj, dae, and stl on turbosquid: 3d models for games, architecture, videos. (1608939)
turbosquid
$55

Catapult
...3d model catapult for download as 3ds, obj, fbx, 3dm, and skp on turbosquid: 3d models for games, architecture, videos. (1338352)
Nerf
turbosquid
$30

Nerf Soaker
...osquid
royalty free 3d model nerf soaker for download as obj on turbosquid: 3d models for games, architecture, videos. (1255038)
turbosquid
$9

Nerf Gun
...urbosquid
royalty free 3d model nerf gun for download as c4d on turbosquid: 3d models for games, architecture, videos. (1200860)
turbosquid
$1

Nerf Doubledown
... model nerf doubledown for download as jpg, 3ds, max, and fbx on turbosquid: 3d models for games, architecture, videos. (1477201)
turbosquid
$50
Nerf Clip
... available on turbo squid, the world's leading provider of digital 3d models for visualization, films, television, and games.
turbosquid
free

Nerf Dart
... available on turbo squid, the world's leading provider of digital 3d models for visualization, films, television, and games.
turbosquid
$10

Nerf Picatinny Rail
... available on turbo squid, the world's leading provider of digital 3d models for visualization, films, television, and games.
turbosquid
$2

Nerf Gun Low Poly
...royalty free 3d model nerf gun low poly for download as blend on turbosquid: 3d models for games, architecture, videos. (1632641)
3d_export
$19
nerf n-strike elite rough cut - 3d scan
...nerf n-strike elite rough cut - 3d scan
3dexport
free3d
$15
Nerf Darts
...nerf darts
free3d
nerf darts for any nerf gun!
thingiverse
free
Pistola a dardi NERF (Nerf Gun) by ruggeromarzocca
...pistola a dardi nerf (nerf gun) by ruggeromarzocca
thingiverse
nerf gun, pistola nerf...
Ball
turbosquid
$5
Ball on a Ball
...uid
royalty free 3d model ball on a ball for download as obj on turbosquid: 3d models for games, architecture, videos. (1484719)
archibase_planet
free
Ball
...ball
archibase planet
ball golf ball
ball - 3d model (*.gsm+*.3ds) for 3d visualization.
3d_export
$5
ball
...ball
3dexport
ball
archibase_planet
free

Ball
...ball
archibase planet
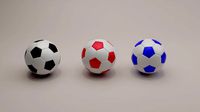
ball football soccer ball
ball n100714 - 3d model (*.gsm+*.3ds+*.max) for exterior 3d visualization.
3d_export
$5
ball
...ball
3dexport
soccer ball
archibase_planet
free
Ball
...ball
archibase planet
ball football
ball n100914 - 3d model (*.gsm+*.3ds+*.max) for 3d visualization.
3d_ocean
$5
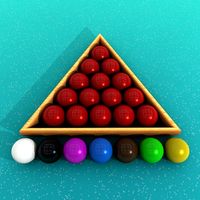
Snooker Balls
... set balls snooker snooker balls white ball yellow ball
set snooker balls format include : .c4d .3ds .obj build in cinema 4d r13
3d_export
free

ball
...ball
3dexport
this is 3d model ball's
3d_ocean
$2
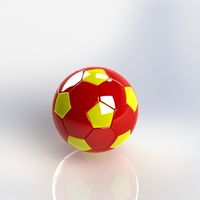
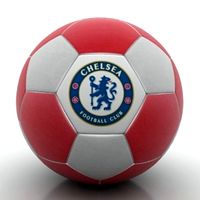
Soccer Ball
...soccer ball
3docean
ball red and yellow ball red ball soccer ball
a gorgeous red and yellow seamless soccer ball
3d_ocean
$5
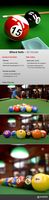
Billard Balls
...low poly billiard balls. numbering from 1 to 15 plus the cue ball. each of the balls excluding the cue ball has a 4k texture map.