Thingiverse
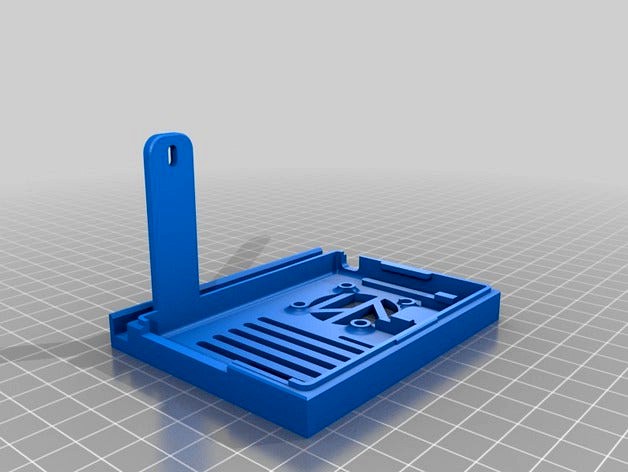
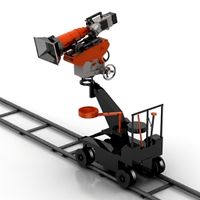
NERDVille OctoPrint - FULLY Adjustable Camera + Light Rig by NERDVille
by Thingiverse
Last crawled date: 3 years ago
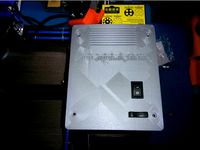
AT LAST, some quiet time enabled me to implement my own version of OctoPi for my Prusa i3 MK2
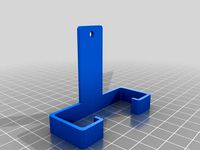
Unfortunately, this was specifically designed with my Prusa MK2 in mind but if you can redesign the Camera Stand v2 somewhere on your 3D printer, then I believe this can work just as well, just bear in mind that you will need to purchase the correct length camera ribbon. For Prusa this was a 1250 - 1500mm ribbon.
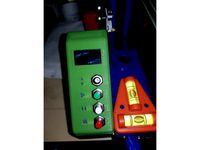
Refer to my photos so you can plan the cable length for this.
I would advise slightly longer cable for the power out to the Raspberry Pi and LED (optional).
For Terminal Connectors I used these DuPont connectors from Amazon. Very useful for creating small compact connections
http://amzn.eu/bsyazFa
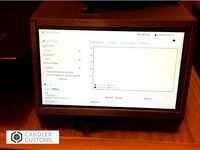
NOW, follow my YouTube episode below to see how this was designed, 3D printed and installation instructions as well as being entertained along the way.
https://youtu.be/e6c507Jmmu4
Feel free to leave me a tip as I spent a good week designing and prototyping this before releasing it for general public use.
UPDATE 01:
Just from experience, I've had to make changes to the PiCam setting to get the PiCAM to grab 1080p footage at 30fps but found the cam was totally out of focus. So just print this focusing ring out and superglue it to the front lense, being extremely careful not to get SuperGlue on the lens. Works a treat.https://www.thingiverse.com/thing:211641/#files
To get a better image on your PiCAM too go to the Config.txt file and enter the following line anywhere:
&# Raspberry Pi Camera V1/V2, 1080P, partial field of view (16:9 aspect) at 30fps
&# Notes: Using 16:9 aspect crops your field of view so you will see less
camera_raspi_options="-x 1920 -y 1080 -fps 30 -quality 95"
and then goto the OctoPrint interface and from the timelapse menu, change the Bitrate from 5000k to 12600k, this way you'll notice a much-improved image. This setting will give a more cropped image as its 16:9 ratio.
For a more Full View use these settings:
&# Raspberry Pi Camera V2, half resolution, video mode, full field of view (4:3 aspect) at 10fps
&# Notes: Good compromise between resolution and framerate, recommended for V2
camera_raspi_options="-x 1640 -y 1232 -fps 10 -quality 95"
Then you can crop it in your video editor to a 16:9 ratio.
UPDATE 02:
Viewer requested a 40mm fan version so that a more silent fan can be used. I have created a 40mm Top lid and also included a toggle switch hole so that the fan can be switched on/off manually when not printing.
Hope it works and PLEASE SHARE this post.
Unfortunately, this was specifically designed with my Prusa MK2 in mind but if you can redesign the Camera Stand v2 somewhere on your 3D printer, then I believe this can work just as well, just bear in mind that you will need to purchase the correct length camera ribbon. For Prusa this was a 1250 - 1500mm ribbon.
Refer to my photos so you can plan the cable length for this.
I would advise slightly longer cable for the power out to the Raspberry Pi and LED (optional).
For Terminal Connectors I used these DuPont connectors from Amazon. Very useful for creating small compact connections
http://amzn.eu/bsyazFa
NOW, follow my YouTube episode below to see how this was designed, 3D printed and installation instructions as well as being entertained along the way.
https://youtu.be/e6c507Jmmu4
Feel free to leave me a tip as I spent a good week designing and prototyping this before releasing it for general public use.
UPDATE 01:
Just from experience, I've had to make changes to the PiCam setting to get the PiCAM to grab 1080p footage at 30fps but found the cam was totally out of focus. So just print this focusing ring out and superglue it to the front lense, being extremely careful not to get SuperGlue on the lens. Works a treat.https://www.thingiverse.com/thing:211641/#files
To get a better image on your PiCAM too go to the Config.txt file and enter the following line anywhere:
&# Raspberry Pi Camera V1/V2, 1080P, partial field of view (16:9 aspect) at 30fps
&# Notes: Using 16:9 aspect crops your field of view so you will see less
camera_raspi_options="-x 1920 -y 1080 -fps 30 -quality 95"
and then goto the OctoPrint interface and from the timelapse menu, change the Bitrate from 5000k to 12600k, this way you'll notice a much-improved image. This setting will give a more cropped image as its 16:9 ratio.
For a more Full View use these settings:
&# Raspberry Pi Camera V2, half resolution, video mode, full field of view (4:3 aspect) at 10fps
&# Notes: Good compromise between resolution and framerate, recommended for V2
camera_raspi_options="-x 1640 -y 1232 -fps 10 -quality 95"
Then you can crop it in your video editor to a 16:9 ratio.
UPDATE 02:
Viewer requested a 40mm fan version so that a more silent fan can be used. I have created a 40mm Top lid and also included a toggle switch hole so that the fan can be switched on/off manually when not printing.
Hope it works and PLEASE SHARE this post.
Similar models
thingiverse
free

Geeetech Adaptor for NERDVille OctoPrint FULLY Adjustable Camera + Light Rig by darrenjrobinson
...rig to the front of a geeetech i3 pro c.
waiting on a longer raspberry pi camera cable so i can mount the raspberry pi elsewhere.
thingiverse
free

Camera Cover for Raspberry Pi Camera V2.1 / NERDVille OctoPrint by poloniusDergath
...changed the mesh in blender for it to fit. also strengthened the top claw of the cover to prevent it from breaking when mounting.
thingiverse
free

Adjustable/Rotating Mount for Raspberry Pi Camera V2 by theodroid
...is rotating on 2 axis so you can orient the camera!
if you printed it, please click on "i made one" and upload a photo!
thingiverse
free

15cm long arm version - Raspberry Pi Camera Stand by atleberg by yazz
...berry camera v2 for my prusa i3 mk2 with raspberry pi 2 powered by octoprint. need at least 15cm to record the printing process.
thingiverse
free

Raspberry pi Camera Holder for Anycubic Prusa i3 by mrpom
...erse
a simple thing which i made for my octoprint system. this is a simple holder for the rasperry pi camera. hope you enjoy it.
thingiverse
free

Raspberry Pi camera mount Modified for v2 camera by hipystix
...ated the back and front cover to work with the v2 pi camera. printed on prusa mk2 i3 using pla "normal" print profile.
thingiverse
free

Raspberry Pi Zero W Magnetized Holder by kietcallies
...t bed for the raspberry pi camera module. you can view a time lapse captured from the new design at https://youtu.be/vrfoawfdbxq.
thingiverse
free

Raspberry Pi Camera Mount by TimOdell
...e build plate of my prusa i3 printer. i wanted to mount the camera to the build plate for image stability when using octoprint.
thingiverse
free

Sleeve Case for Raspberry Pi With Fan Slot by AfroPrints3D
...l work with raspberry 3 either
if you slicing with cura three support would be useful
you can print case and cap at the same time
thingiverse
free

PiCam V2.1 Holder for reprap printer by rainerunsinn
...emember. if somebody recognises his/her picam module in my code please comment, i will set the "remixed from" properly!
Nerdville
thingiverse
free

18650 NERDVille Benchmark Accuracy gauge by NERDVille
...king for skewing, tapering and fused deposition as layer height increases.
check out my youtube channel for more info @ nerdville
thingiverse
free

PRUSA i3 Mk2 MOSFET Upgrade - NERDVille Guide by NERDVille
...re is a link of one in the uk:
https://ebay.us/g6mmcl
love to hear your thoughts and feel free to subscribe to my youtube channel
thingiverse
free
Geeetech Adaptor for NERDVille OctoPrint FULLY Adjustable Camera + Light Rig by darrenjrobinson
...rig to the front of a geeetech i3 pro c.
waiting on a longer raspberry pi camera cable so i can mount the raspberry pi elsewhere.
thingiverse
free
Camera Cover for Raspberry Pi Camera V2.1 / NERDVille OctoPrint by poloniusDergath
...changed the mesh in blender for it to fit. also strengthened the top claw of the cover to prevent it from breaking when mounting.
thingiverse
free

Prusa i3 MK2/s Cable management Guide by NERDVille
... and installedhttps://youtu.be/chljnkiekw8
feel free to leave me a tip, helps the channel (and pay for the marketing department!)
thingiverse
free

CTC Dial Gauge Stand Holder by NERDVille
...nets-5mm-dia-x-3mm-thick-grade-n50-small-strong-round-magnet-/371176559801?var=&hash=item566bd8d4b9:m:mbnsuc2nt3s_w8o8nkvwcfa
thingiverse
free

Tevo Tarantula - Nerdville cable management guide for 2040 aluminium extrusions by teikjoon
...ect for the top of my tevo tarantula)
i printed this at 25% infill, you can increase/decrease this to make it more/less flexible.
thingiverse
free

Prusa i3 MK2 PINDA height calibration tool by NERDVille
... basic tools that you'll find the most useful in your arsenal of 3d printer tool box.
see me at:
https://youtu.be/dbagzjomtxc
thingiverse
free

BangGood Visuo XS809HW Battery MOD 18650 by NERDVille
...leave a tip so that it helps my youtube channel! nerdville and please share your work, love to see it.
thanks for watching/making
Octoprint
thingiverse
free

Octoprint Case + Relais by bennylu
...octoprint case + relais by bennylu
thingiverse
octoprint case+ doppel relais
thingiverse
free
Octoprint Control-Panel by sanisam
...von: https://plugins.octoprint.org/plugins/display_panel/?utm_medium=announcements&utm_source=octoprint&utm_content=1.5.2
thingiverse
free
Octoprint Controller by CandlerCustoms
...control. it's super handy.
check out my post about it here: http://www.candlercustoms.com/3d-printed-octoprint-controller/
thingiverse
free

Octoprint Raspberry Pi Logo by ProtomakerSprint
...octoprint raspberry pi logo by protomakersprint
thingiverse
octoprint raspberry pi logo
thingiverse
free

Octoprint plugin - DisplayLayerProgress
...o the plug inhttps://github.com/ollisgit/octoprint-displaylayerprogresshttps://github.com/ollisgit/octoprint-displaylayerprogress
thingiverse
free

OctoPrint Wifi Display by Nori0aw
...it on character lcd screen (20x4).
boards:
esp8266
lcd screen (20x4)
source code: https://github.com/nori0aw/octoprintwifidisplay
thingiverse
free

Octoprint Logo Molle by oiitsame
...octoprint logo molle by oiitsame
thingiverse
thingiverse
free
OctoPrint Statue by KingRahl
...ng octoprint free and available for anyone to use.
a special thanks to janina himmen (@zwergimbikini on twitter) for the design.
thingiverse
free
Case Octoprint (for Raspberry, DC/DC converter and Relay) In file list "Octoprint" is correct! by Genna1986
...ot; is correct! by genna1986
thingiverse
case for raspberry, relay board and dc/dc converter... all you need to use octoprint...
thingiverse
free
Octoprint Ultimaker holder by klenk
...my simple design for attaching my octoprint server to my ultimaker.
raspberry case used: http://www.thingiverse.com/thing:1015706
Rig
3d_export
$25

rigged chimpanzee
...rigged chimpanzee
3dexport
rigged chimpanzee
3d_export
$25

rigged wolf
...rigged wolf
3dexport
rigged wolf
3d_export
$25

rigged cicada
...rigged cicada
3dexport
rigged cicada
3d_export
$20

triceratops rigged
...triceratops rigged
3dexport
triceratops rigged
3d_export
$20

rigged horse
...rigged horse
3dexport
rigged horse
3d_export
$15

rigged cheetah
...rigged cheetah
3dexport
rigged cheetah
3d_ocean
$16

Rigged Mannequinn
...es .this rig contains two textures.however it is not uv mapped. the parts and the rig controls are named with proper naming co...
3d_ocean
$35

Rigged Bicycle
...rigged bicycle
3docean
bicycle cycle rigged bicycle slim tire
rigged bicycle ready for animation..
turbosquid
$40

knight-rigged RIGGED
...ree 3d model knight-skeleton for download as ma, fbx, and obj on turbosquid: 3d models for games, architecture, videos. (1576606)
turbosquid
$2

rig
... available on turbo squid, the world's leading provider of digital 3d models for visualization, films, television, and games.
Fully
turbosquid
$50
Drone fully rigged
...
royalty free 3d model drone fully rigged for download as max on turbosquid: 3d models for games, architecture, videos. (1282280)
turbosquid
$12

FULLY PARAMETRIC CHAIR
...alty free 3d model fully parametric chair for download as rvt on turbosquid: 3d models for games, architecture, videos. (1280209)
turbosquid
$10

firetruck-fully-rigged
...yalty free 3d model firetruck-fully-rigged for download as ma on turbosquid: 3d models for games, architecture, videos. (1653811)
turbosquid
$6

Fully rigged character
...ty free 3d model fully rigged character for download as blend on turbosquid: 3d models for games, architecture, videos. (1486076)
turbosquid
$3
Fully Rigged shark
...ee 3d model fully rigged 3d shark model for download as blend on turbosquid: 3d models for games, architecture, videos. (1517695)
turbosquid
$75
Fully Customizable Hospital
... available on turbo squid, the world's leading provider of digital 3d models for visualization, films, television, and games.
turbosquid
free

Fully Rigged Link
... available on turbo squid, the world's leading provider of digital 3d models for visualization, films, television, and games.
design_connected
$16
Troy W Fully Covered
...troy w fully covered
designconnected
magis troy w fully covered computer generated 3d model. designed by wanders, marcel.
cg_studio
$99

Pepe fully rigged3d model
...ully rigged3d model
cgstudio
.max - pepe fully rigged 3d model, royalty free license available, instant download after purchase.
3d_export
$60

Ankylosaur 8K - fully animated
...ankylosaur 8k - fully animated
3dexport
Adjustable
3d_ocean
$7
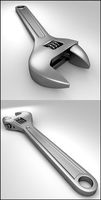
Adjustable Wrench
...adjustable wrench
3docean
adjustable wrench highly detailed wrench
highly detailed adjustable wrench.
3ddd
$1
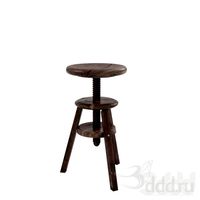
Adjustable Stool
...adjustable stool
3ddd
табурет
wooden adjustable stool.
3d_ocean
$20

Adjustable Gym Bench
...st adjustable bench black equipement gym gymnastic indoor silver sport workout
3d model of black and silver adjustable gym bench.
3d_ocean
$20
Adjustable Gym Bench
...st adjustable bench black equipement gym gymnastic indoor silver sport workout
3d model of black and silver adjustable gym bench.
3d_ocean
$16

Adjustable Weight Bench
...arbell bench black equipement gym gymnastic indoor sport weight workout
3d model of black adjustable weight bench with a barbell.
turbosquid
$5

Adjustable wrench
...
royalty free 3d model adjustable wrench for download as fbx on turbosquid: 3d models for games, architecture, videos. (1313414)
3d_export
$5

adjustable tension lock
...adjustable tension lock
3dexport
adjustable tension lock
turbosquid
$1
Adjustable Wrench
...free 3d model adjustable wrench for download as obj and blend on turbosquid: 3d models for games, architecture, videos. (1446736)
turbosquid
$1

Adjustable Wrench
...y free 3d model adjustable wrench for download as c4d and fbx on turbosquid: 3d models for games, architecture, videos. (1379022)
3d_export
$5

Adjustable key
...adjustable key
3dexport
Camera
archibase_planet
free
Camera
...base planet
camera surveillance camera video camera
camera surveillance n090211 - 3d model (*.3ds) for interior 3d visualization.
archibase_planet
free
Camera
...hibase planet
camera security camera video camera
camera security n210515 - 3d model (*.gsm+*.3ds) for exterior 3d visualization.
archibase_planet
free
Camera
...se planet
camera web camera webcam
camera butterfly usb pc camera n090713 - 3d model (*.gsm+*.3ds) for interior 3d visualization.
archibase_planet
free
Camera
...mera
archibase planet
surveillance camera video camera camcorder
camera n011211 - 3d model (*.3ds) for exterior 3d visualization.
archibase_planet
free
Camera
...camera
archibase planet
camera digital camera
camera canon digital n041211 - 3d model (*.3ds) for interior 3d visualization.
archibase_planet
free
Camera
...camera
archibase planet
camera film camera phototechnique
camera n100214 - 3d model (*.gsm+*.3ds) for interior 3d visualization.
archibase_planet
free

Camera
...amera
archibase planet
camera video camera camcorder
camera video n070315 - 3d model (*.gsm+*.3ds) for interior 3d visualization.
archibase_planet
free
Camera
...rchibase planet
camera video camera camcorder
camera studio n101213 - 3d model (*.gsm+*.3ds+*.max) for interior 3d visualization.
archibase_planet
free
Camera
...ibase planet
digital camera camera phototechnique
camera canon ixus 400 n310311 - 3d model (*.3ds) for interior 3d visualization.
archibase_planet
free
Camera
...ase planet
photocamera video camera camera
camera sony t300 black n291010 - 3d model (*.gsm+*.3ds) for interior 3d visualization.
Light
archibase_planet
free

Light
...light
archibase planet
lamp lighting light
light - s2 - 3d model for interior 3d visualization.
archibase_planet
free

Light
...light
archibase planet
light luminaire lighting
light l0465 - 3d model (*.gsm+*.3ds) for interior 3d visualization.
3d_export
$5

lighting
...lighting
3dexport
lighting
3d_export
$5

lighting
...lighting
3dexport
lighting in livingroom
turbosquid
$3

Lighting Tree with Lights
...d model lighting tree with lights for download as max and 3ds on turbosquid: 3d models for games, architecture, videos. (1585507)
archibase_planet
free

Light
...light
archibase planet
luster lighting solution
light - s - 3d model for interior 3d visualization.
archibase_planet
free

Light
...light
archibase planet
luster lamp lighting
light 1 - 3d model for interior 3d visualization.
archibase_planet
free

Lights
...lights
archibase planet
surgical lights surgical lamp
surgical lights (floor) - 3d model for interior 3d visualization.
archibase_planet
free

Light
...light
archibase planet
lighting luminaire candlelight
light l0463 - 3d model (*.gsm+*.3ds) for interior 3d visualization.
3d_export
$18

street light-lighting-light-xia bing
...
3dexport
street light-lighting-light-xia bing<br>max 2015 v-ray 3 max 2015<br>textures<br>all files in zip...