Thingiverse
Neopixel Mini Cube
by Thingiverse
Last crawled date: 5 years, 9 months ago
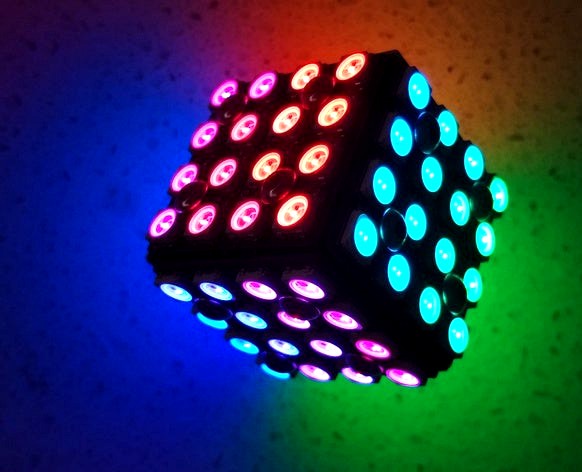
This mini cube is made up of six 4x4 WS2812B panels giving a total of 96 individually addressable RGB LEDs. Buried inside the cube is a ATTiny85 microcontroller powered by a 120mAh Lithium Ion battery. It also contains a mercury switch and a couple of transistors to turn the cube on. The cube switches itself off after displaying a series of animations.
Video
https://youtu.be/mVqQSdfhl90
Assembly
3D print the holder for the panels with supports and a raft. After you clean off the support and raft, drill out the holes with a 2.5mm drill and create a thread with a 3mm tap. Next you need to wire up the six WS2812B panels. Start with the four side panels. I used 0.5mm tinned copper wire. Each time you complete a panel, test it on the former and re-adjust the wires if necessary to get a good fit without straining the connections and also having the screw holes lined up. Connect fine insulated wire (I used wire-wrap wire) to the VCC, DIN, GND on the first side panel and VCC, DOUT, GND on the last side panel. Screw on the sides using M3 x 6 or M3 x 8 screws. Next connect the bottom VCC, DIN, GND to the VCC, DOUT, GND wires of the last side panel and screw it in-place. (See Sketch, it contains a wiring diagram showing how all the panels are ordered and how they need to be connected). For the top panel, connect the VCC, DOUT, GND to the VCC, DIN, GND wires of the first side panel. Add wires to VCC, DIN, GND of the top panel. These will ultimately be connected to the custom PCB.
Eagle files have been included so that you can get the board manufactured or make it yourself. Mine was made using the Toner method. I have left small holes so that I could attach wires and connect the board to my Digispark Development System (https://www.thingiverse.com/thing:3975240). This allowed me to develop the software. In theory you shouldn't need to do this as you can just program the ATTiny85 and solder it to the board.
(Note: The picture of the V2 PCB shown above was my development board. The 1K5 resistor you see tacked on the board has been incorporated on the V3 board.)
The Sketch is included. To program the ATTiny85, I used my AVR programmer (https://www.thingiverse.com/thing:3882262) to burn a Digispark bootloader onto the chip and then programmed it using my Digispark development system.
Parts
6 x WS2812B 4x4 16-Bit Full Color 5050 RGB LED Lamp Panel Light
1 x ATTiny85 SMD
1 x 120mAh Lithium Ion battery
3 x 1M 0805 resistors
1 x 100K 0805 resistor
1 x 330R 0805 resistor
1 x 1K5 0805 resistor
2 x 0.1uF 0805 capacitors
1 x 100uf 10V 3528 Tantalum capacitor
1 x AO3401 P-Channel MOSFET SOT-23
1 x 2N3904 NPN Transistor SOT-23
1 x 0805 Red LED
1 x JST-PH-2-THM-RA socket
1 x 5mm mercury switch